[2024 Updated] How to Delete Temporary Files on Windows 11/10/8/7?
Looking to free up space on your Windows PC? Deleting temporary files is a good choice. Temporary files take up a lot of space on the hard drive if not cleaned regularly. There are many ways to delete temp files. Read on to find how.
- Part 1: Things You Need to Know Before Deleting Temporary Files
- Part 2: How to Delete Temporary Files in Windows 11/10/8/7?
- 1. Delete Temp Files Using CMD
- 2. Manually Remove Temporary Files from Settings
- 3. Automatically Delete Temporary Files Using Storage Sense
- 4. Clear Temporary Files in Windows 11/10 Using Disk Cleanup
- 5. Delete Temporary Files in Windows File Explorer
- Bonus: What If You Permanently Deleted Some Important Files?
Part 1: Things You Need to Know Before Deleting Temporary Files
Temporary files are also referred to as Temp files. As a Windows user, you might have found a temp file on your computer before. Do you know what it is? Can you delete the temporary file? You'll find the answers in this section.
1.1 What Are Temporary Files?
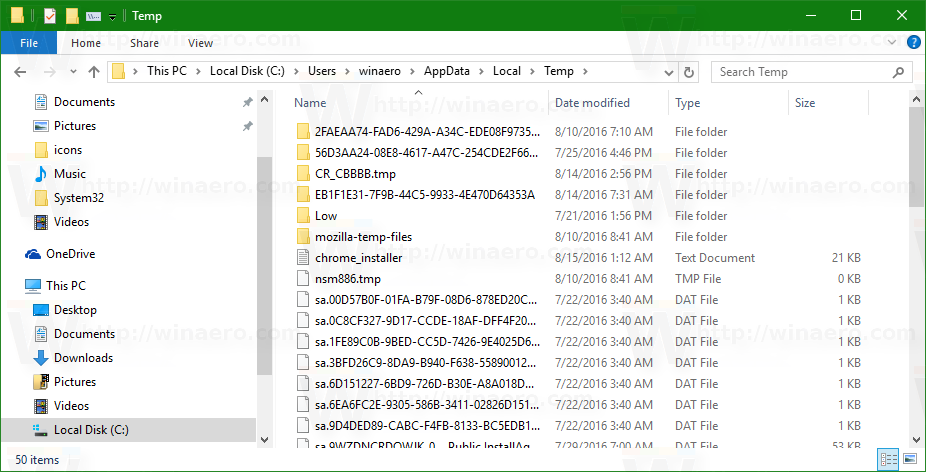
Temporary files are created by Windows operating system or programs running on your computer. Based on different Windows operating systems or programs, the temporary files have different names or extensions.
For instance, some Windows programs or web browsers always generate temporary files with a .tmp file extension. And some programs like Microsoft Excel may create a temp file with its original file extension, but you'll see a tilde and a dollar sign in the name (for example, ~$example.xlsx).
There are a number of circumstances in which these files are created:
- When you undo edits that you have made in applications like Excel or Word.
- When the physical RAM is insufficient and applications need more memory.
- When you print a document or file.
- When the program suddenly crashed.
- When you browse the internet and your web browser caches web pages and stores your browsing history.
1.2 Why Should You Delete Temporary Files in Windows 10/11/8/7?
By default, temporary files are stored on the hard drive partition on which Windows is installed. In most cases, they get automatically deleted when they are no longer needed.
However, there could be a circumstance where the temporary files won't be deleted automatically. This can happen if the program crashed or the developer of the program didn't add the code to allow automatic deletion. When no longer needed, these files just sit on your hard drive taking up a lot of space. There are a number of reasons why you should delete those temporary files:
- Speed of access. When you delete temporary files related to a certain application, the speed of access to that application significantly increases.
- Temporary files take up a lot of storage space. Cleaning those files not only frees up space but also increases hard disk speed/performance.
- Some temporary files contain valuable information. Deleting them is recommended to protect your privacy.
1.3 Is It Safe to Delete Temporary Files?
Yes.
As the name suggests, the temporary files only contain information that is temporarily in use. If you have closed the program and the temp file still exist, you can delete it and your original file won't be affected.
Part 2: How to Delete Temporary Files in Windows 11/10/8/7?
There are several methods that can be used to delete temporary files in Windows 11/10/8/7. Now, let's dive right in.
1. Delete Temp Files on Windows 11/10 Using CMD
One of the quickest ways to delete temp files on Windows 10/11 is using a specific command in the Command Prompt: del /q/f/s %TEMP%\*
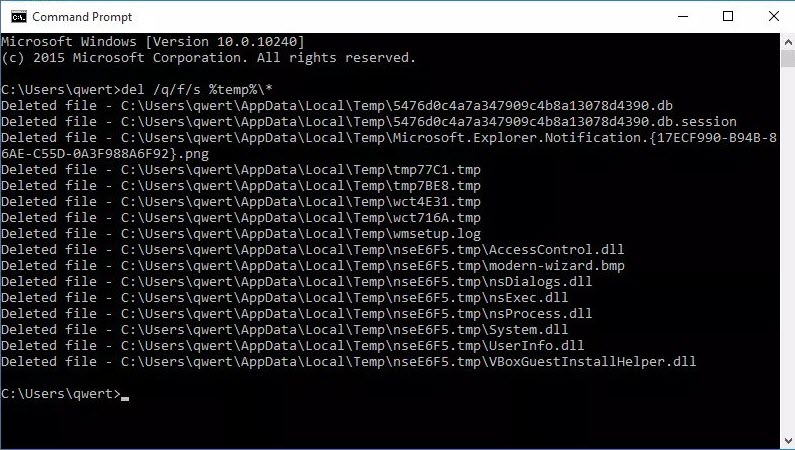
You can store that command in a .BAT file so that you don't have to input it every time you need to delete temporary files. Follow these instructions:
- 1. Launch Notepad and create a new .txt file and input this command: del /q/f/s %TEMP%\*
- 2. Save this .txt document and change its extension from .txt to .BAT.
- 3. Now you simply need to double-click on the .BAT file and the temporary files will be deleted via Command Prompt.
The temporary files which are deleted by using command prompt won't be moved into Recycle Bin. In other words, those temp files can't be recovered. Therefore, please be careful if you want to delete any files by using CMD. If unluckily you have permanently deleted some important files through CMD, you can recover them by using a data recovery tool.
2. Manually Remove Temporary Files from Settings on Windows 11/10
On Windows 11/10, it is possible to delete temporary files manually or automatically via Settings. Follow these instructions to manually delete temporary files on Windows 11/10 via Settings:
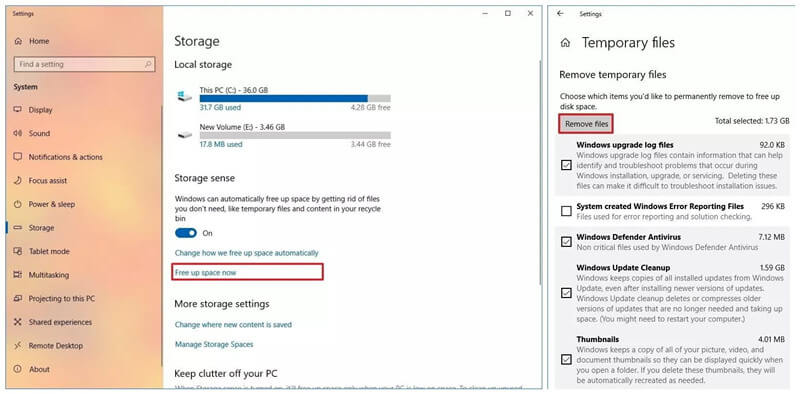
- 1. Launch Settings and navigate to System > Storage.
- 2. Now find and click on the "Free up space now" option.
- 3. On the next screen, choose the files that you wish to delete e.g. Windows upgrade log files, temporary files, thumbnails, recycle bin, Delivery Optimization Files, etc. After selecting the desired files, click the "Remove files" button to delete those files.
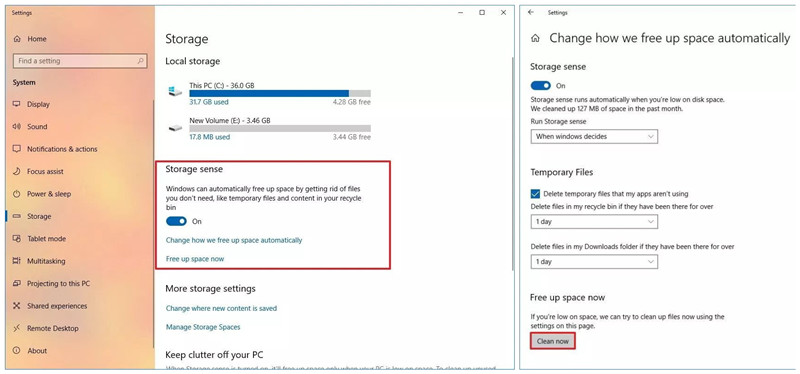
3. Automatically Delete Temporary Files Using Storage Sense
Storage sense is a great feature of Windows 11/10 /8/7 that allows you to automatically free up space by deleting temporary files. Follow these instructions to automatically delete temporary files via Storage sense:
- 1. Launch Settings on your computer.
- 2. Navigate to System > Storage.
- 3. Now find and turn on the Storage sense option. Windows 11/10 will now automatically delete temporary files. If you want to schedule automatic cleanup, then use the "Change how we free up space automatically" option.
4. Clear Temporary Files in Windows 11/10 Using Disk Cleanup
Another method to delete temp files on Windows is to use the Disk Cleanup utility. It has been specifically designed to free up disk space when required. Follow these instructions to delete temporary files via Disk Cleanup:
- 1. Open File Explorer by double-clicking on This PC.
- 2. Now right-click on the drive on which the Windows is installed and select Properties > Disk Cleanup.
- 3. Next, click the Cleanup system files button and then choose the items that you want to delete. After that, click OK > Delete Files to start the cleanup process.
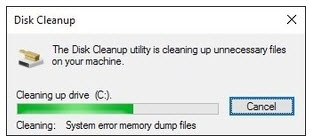
You can also type "Disk Cleanup" in the search box. Choose a drive you want to clean up and click OK. It will also help you delete temporary files.
Some users may be wondering whether it is safe to do a disk cleanup. The answer is positive. The Disk Cleanup utility will only delete the temporary files, caches, and log files created by your operating systems. It won't delete your personal documents or programs.
5. Delete Temporary Files in Windows File Explorer
There is another way to delete temporary files manually. The deleted files will be sent to Recycle Bin, so you can recover them if needed. Here is how to do that:
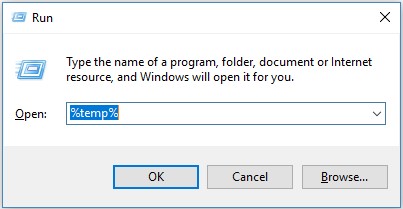
- 1. Press the Windows button and R key simultaneously.
- 2. Type %temp% in the Run dialog and click OK.
- 3. It will open a folder where the temporary files are stored. You can selectively delete the temporary files, or press Ctrl+A to delete all temp files.
Bonus: What If You Permanently Deleted Some Important Files?
If you have accidentally deleted some important files forever and now want to recover them, we'd like to recommend a professional data recovery program, namely AnyRecover. As one of the best options for you, this software makes data recovery easy, fast, and simple as A-B-C. It is uniquely designed to sort out any recovery issue and comes with really smart algorithms that recovers unlimited data fast with a high recovery rate.
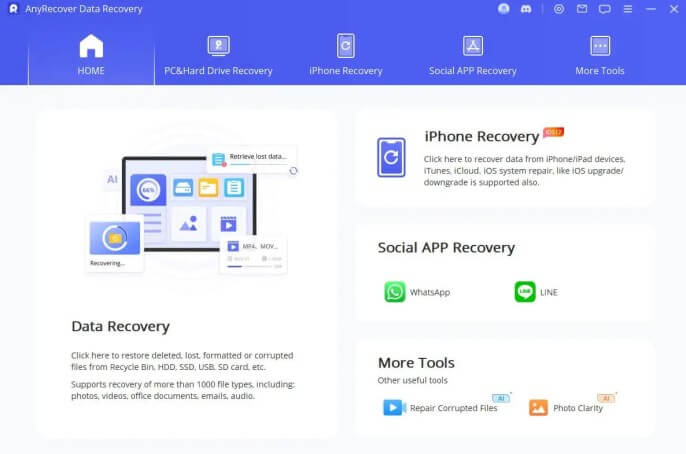
Now, it's time to share some main features of AnyRecover with you.
It adopts deep scan and all-round scan simultaneously, which shorten the scanning time and ensure a high recovery rate up to 98%.
It supports more than 1000 file types, including documents, photos, videos, audios and etc.
You can recover data from any storage media or PC such as Digital Cameras, Hard drives, XD/CF/SD cards, Video player, USB Flash Drive, SSD, and much more.
It can also recover your data in any data loss scenario: accidental deletion, trash emptied, partition lost, system crash and so on.
The tool is easy to use. With 3 simple steps, the deleted data can be recovered.
It offers a free trial that enables user to perform a deep scan, preview and recover.
It's recommended not to write data to your computer once you find that you have accidentally deleted some important data. Otherwise, the deleted data will be easily overwritten and cannot be recovered. AnyRecover is free to scan the data, so you can download the program to check whether it can find your deleted data.
How to Recover Permanently Deleted Temporary Files:
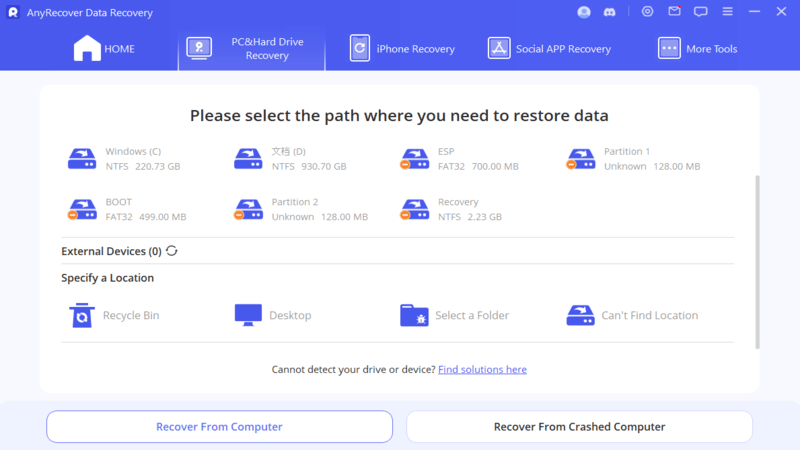
Step 1: Choose the location where you lost your data.
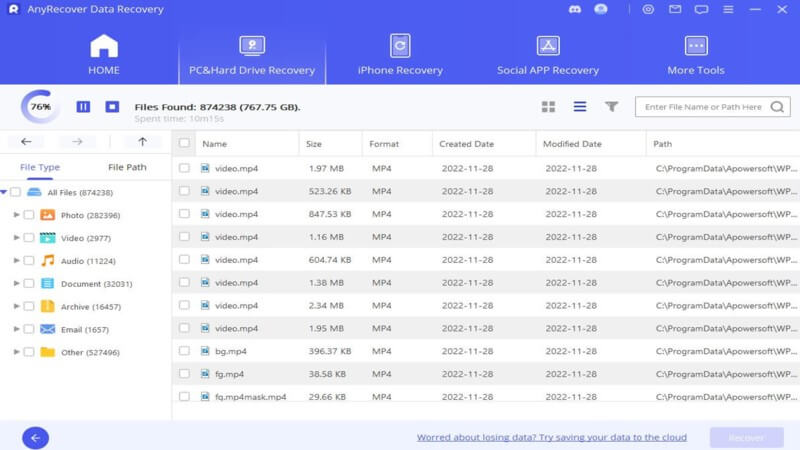
Step 2: The program will start the quick and deep scan.
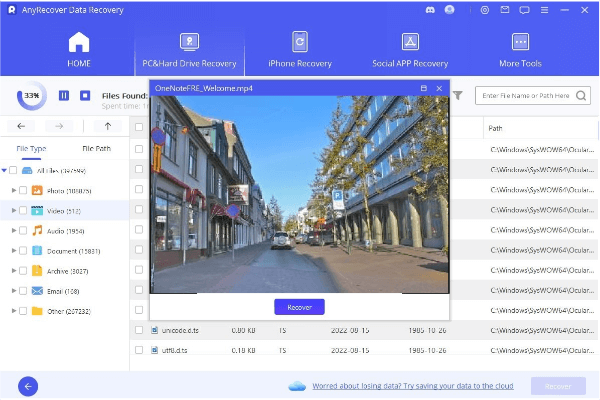
Step 3: After the scanning is completed, you can click the temp files you want to recover and select "Recover".
Conclusion
Deleting temporary files is a good choice to free up space on your Windows PC. Simply try the above methods to delete them. If you permanently deleted some important files, you can try to use AnyRecover to recover them. It will provide you with a quick, easy while highly effective recovery solution.
Start a deep scan for free right now!
AnyRecover
10% Discount Coupon Code: RECOVER9
Related Articles:
- How to Recover Deleted Files and Photos from Recycle Bin After Empty?
- How to Permanently Delete Files on Windows Without Recovery
- Top 6 Ways to Recover Deleted Restore Points on Windows 7/10/11
- [2024 Updated] Fix "Windows 10 Show Hidden Files Not Working"
- [Solved] How to Undelete Profile that I Mistakenly Deleted?
Time Limited Offer
for All Products
Not valid with other discount *

 Hard Drive Recovery
 Deleted Files Recovery
