Does CHKDSK Delete Files? Get the Best Trick to Recover Them
There have been lots of arguments amongst most PC users in recent times about whether CHKDSK can actually delete files or not. While some are of the opinion that their files have been deleted in the past, others are yet to agree. There are lots of facts you need to know about this command before deciding to use it.
This post will be revealing some of such facts. There is no doubt that about reading the details below, you will have an answer to a question such as ‘‘Does CHKDSK Delete Files?’’. Just ensure to read the content from start to finish.
Part 1: Does CHKDSK Delete Files?
CHKDSK is a command that checks the functionalities of your system’s disk. Its aim is to look up for sectors within your disk that are bad. However, after running this command, there are files that may be deleted. One of the major reasons for this is when such files have been infected by virus or malware. Also, when the file name in the directory is invalid, it will be deleted by CHKDSK command.
How Does CHKDSK Work?
CHKDSK works in a simple way which is to look out for bad sectors within the disk in your system. The aim is to ensure that issues within your disk are fixed. There are 5 stages that it undergoes before getting completed. These are checking and verifying files, checking volume indexes, checking each volume's security description, data verification and free space verification. It should be noted that the steps are basically 3 since the last 2 are optional.
What Data Would be Deleted While Running CHKDSK?
Despite the usefulness of CHKDSK command, you are at risk of losing important data. This can happen when the drive isn’t locked while the process is being carried out. You can lose important data files in your system. These could be documents that have been saved, project files and libraries. These files have been installed in your system by default or those you must have decided to create for one reason or the other.
Remember These before You Run CHKDSK
There are some things you need to always remember before deciding to make use of it. These could be:
Logical disk errors inside the file system is what CHKDSK checks and repairs.
Network drives aren't checked by CHKDSK.
Sectors that are discovered to be bad will be indicated. This will enable Windows to understand sectors where data should be stored in.
If you don't understand parameters in terms of how they work, avoid using them with CHKDSK.
Before deciding to run CHKDSK utility, ensure that every folder, program and file has been closed.
Part 2: How to Recover Data Deleted by CHKDSK Command?
Just as explained above, CHKDSK command is great to help ensure that bad sectors within your system disk are identified and repaired in order to function effectively. However, the problem is that you are at risk of losing important data files once this command is run. There is no need bothering though as AnyRecover can help you get back such files.
AnyRecover is one of the most effective tools when it comes to recovering files from any source. It is really powerful and has earned the trust of users in recent times by helping them get back their lost files. This couldn’t have been possible without its advanced features some of which are:
AnyRecover Key features include:
- AnyRecover is designed to recover over 1000 different file formats of photos, videos, documents and emails, etc.
- Data can be recovered from any data loss scenarios: deleted by CHKDSK command, formatted disk, lost partition, virus attack, etc.
- You could also preview your data before recovering it.
- This software is developed to recover all the data in its original form without overwriting it.
- It is 100% safe and easy to use.
- Supports Windows 11/10/8/7/XP and MacOS.
How to Recover Files Deleted by CHKDSK Command with AnyRecover
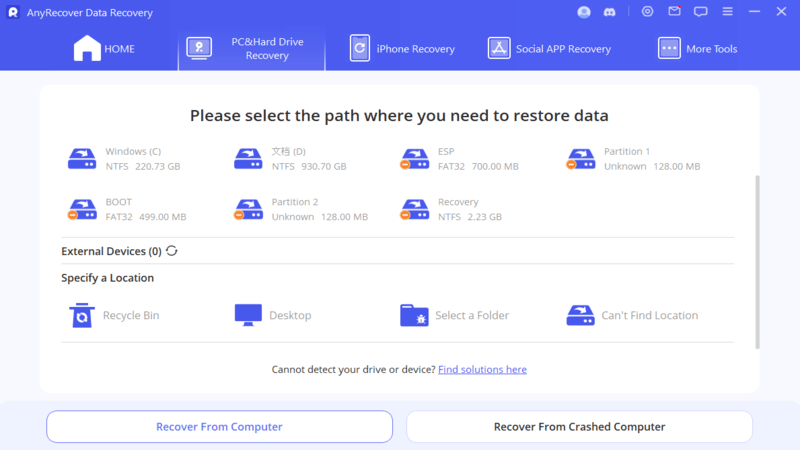
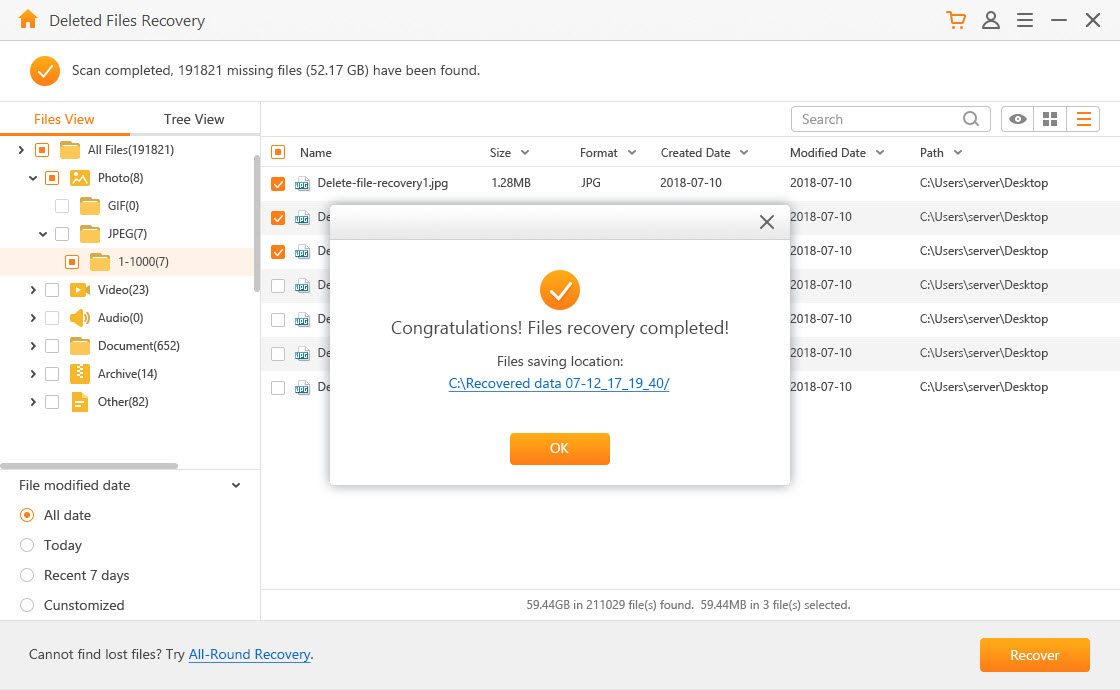
Step 1. Download the application (AnyRecover) and get it launched. After that, choose the option which says Deleted Files Recovery.
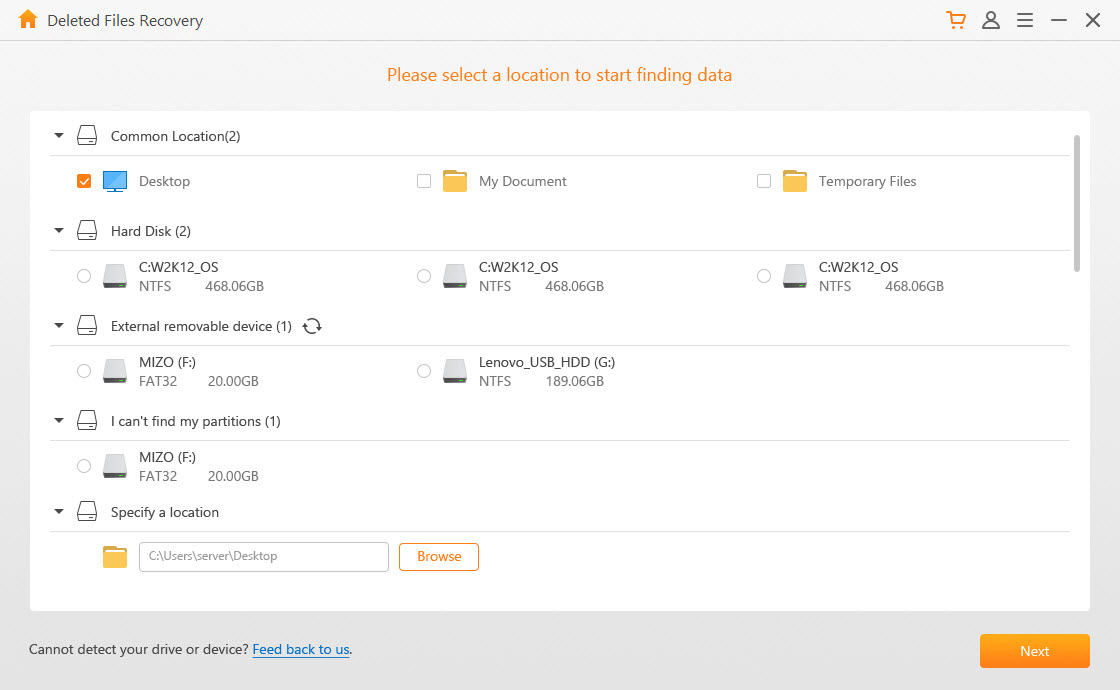
Step 2. Select the location that you want such file recovered from. It could be an external device or hard disk. Next should be clicked on after choosing the location.
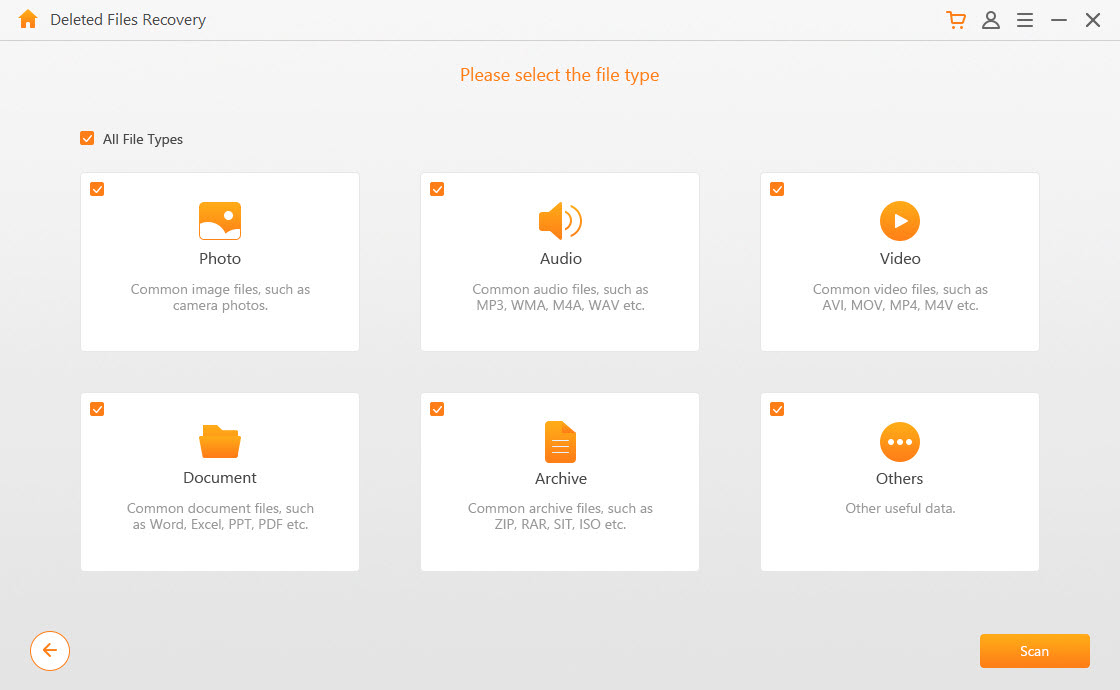
Step 3. Choose the type of file that you want this application to recover. After that click on Scan.
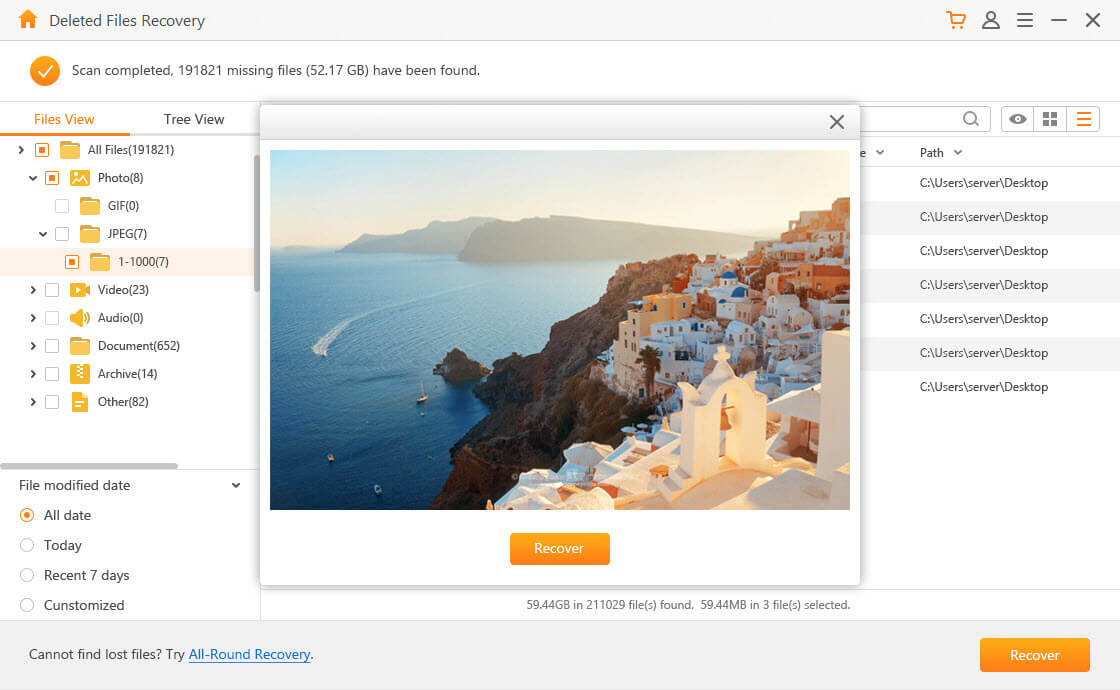
Step 4. AnyRecover will start scanning your system or external device in order to find the lost files. After the scan is complete, files will be shown. All you need to do is preview them one after the other before clicking on Recover.
Bonus: How to Run CHKDSK Command in Windows?
If you are using Windows 7, CHKDSK command can be run by following the steps below:
Run CHKDSK from Windows Explorer (Windows 7)
Step 1. Windows Explorer should be entered.
Step 2. The drive to be checked should be right clicked on.
Step 3. Click on properties.
Step 4. Shift over to tools.
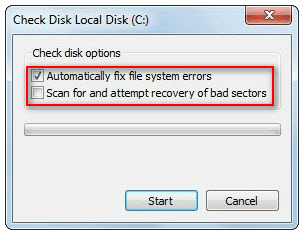
Step 5. Get Check Now clicked on.
Step 6. Choose between "Scan for and attempt recovery" and "automatically fix file system errors".
Run CHKDSK in Command Line
Step 1. Get Start clicked on.
Step 2. Command Prompt should be typed in the search programs as well as files box.
Step 3. From the result, locate the program.
Step 4. Get it right clicked on and select Run as Administrator.
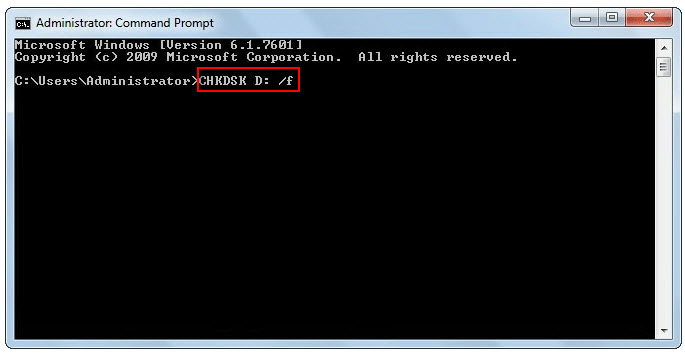
Step 5. Get CHKDSK *: /f typed in (Please replace "*" with your drive letter).
Step 6. Enter key should be pressed on your keyboard.
Conclusion
Although CHKDSK is very important to ensure your system is fully functional, caution will have to be exercised when planning to use its command since your data files can be lost. It can also be seen that the use of iMyFone AnyRecover can help get back lost data in any scenario.
Time Limited Offer
for All Products
Not valid with other discount *

 Hard Drive Recovery
 Deleted Files Recovery
