Top 5 Ways to Recover Deleted Notes on Mac [100% Work]
"Hi AnyRecover, my notes disappeared from Mac after the update. Can you help me find them back? Any help would be greatly appreciated!"
One of the things that can easily get Mac users worried about is missing or deleted notes. This could be as a result of upgrading your mac OS, accidentally deleting notes or whatever might be the cause. Notes can be really precious and of great value. This would ordinarily make any user want to recover the notes without undue stress. This article would go into step-by-step explanation on how to recover deleted notes on mac after update or in other cases.
Part 1: Where Does Mac Store Notes?
Notes is a default app on Mac, which can be used to save various types of information including reminders and to-do lists. You may also use it for other purposes, then you might wonder where are notes stored on Mac. Well, actually there are 2 ways of storing Mac notes. On the one hand, they are stored on the local hard drive by default. You could head to Finder and enter "~/Library/Containers/com.apple.Notes/Data/Library/Notes/" to see your notes. On the other hand, if you have synced your notes with iCloud, then they are also stored on the iCloud storage and you can go to the official website to visit them.
Part 2: How to Recover Deleted/Lost Notes on Mac?
Method 1: Recover Deleted Notes on Mac From Recently Deleted Folder
Deleted notes can also be restored to your Mac directly from Recently Deleted Folder. Thus, if you follow this procedure immediately after you observe the missing notes or delete them, you should still be able to get them back. Here's how:
Step 1: Open your Notes app on your Mac, click on Recently Deleted.
Step 2: Here you'll find your deleted notes, then drag the deleted notes from Recently Deleted folder to another folder in the sidebar.
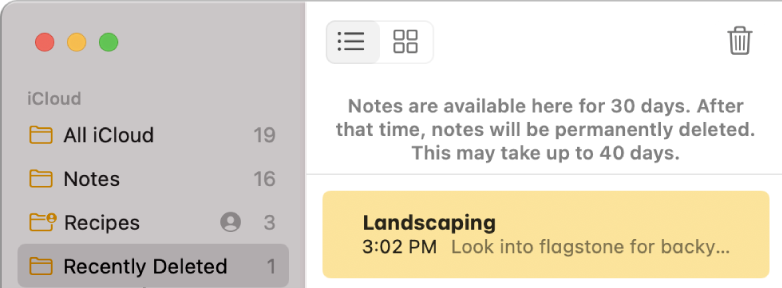
You can't find your deleted notes on the recently deleted folder 30 days after you delete them, as the program only keeps stuff for 30 days after the deletion. Besides, folders won't be in the recently deleted folder in Notes app if you use Gmail/Yahoo account.
Method 2: Recover Your Deleted Notes from Trash on Mac
Another method to restore your missing notes is recovering from Trash on MacBook, even if the notes were subsequently emptied amongst other files from the trash. The Quick action tool enables Mac users to recover files from being permanently lost.
Step 1: Press "Command-Z" or click Edit from the menu of the app and select Undo from the dropdown options.
Step 2: If this does not work, you can got the trash bin and restore your notes by clicking the Put Back button or dragging the files onto your desktop.
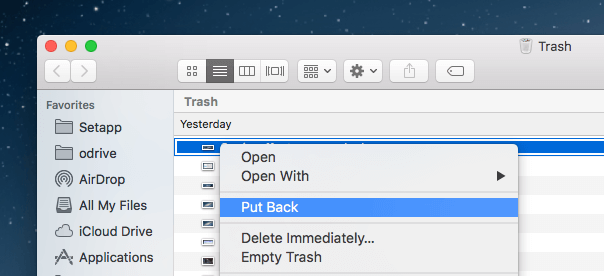
If the files have been emptied from your trash, you may recover your notes using the Time Machine or the AnyRecover software.
Method 3: Recover Deleted Notes on Mac from the Time Machine Backup
The Time Machine was created with the Apple OS X operating system as a backup software application which creates a backup for all your files in an external hard drive. All backed up files with Time Machine can be restored including your lost notes (assuming they were regularly backed up).
Step 1: Click on Finder > System References > Time Machine.
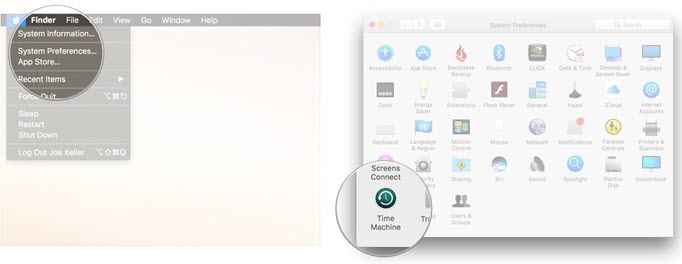
Step 2: Check the box next to Show Time Machine in menu bar. Then select the option Enter Time Machine from the Time Machine menu.
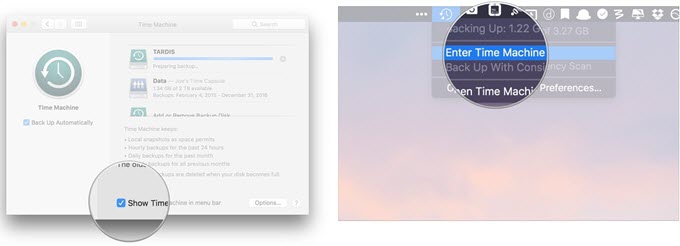
Step 3: Locate a version of the Notes storage folder that just precedes your deletion using the timeline on the edge of the screen.
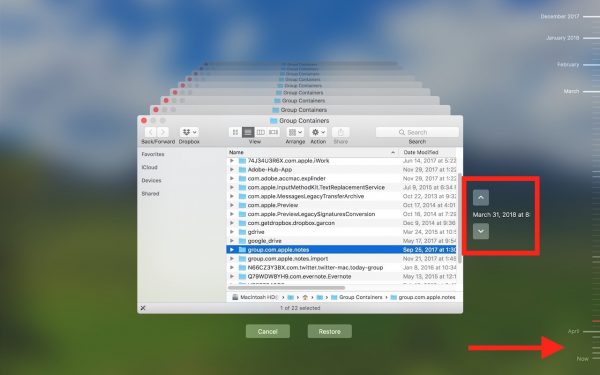
Step 4: Click Restore to restore the selected notes. Your missing notes should reappear once you launch the Notes app.
You can restore deleted notes from time machine backup only if you regularly back up your files via time machine before deletion.
Method 4: Recover Deleted Notes on Mac with iCloud
Just as said above, if you have synced the notes with iCloud, then you could recover your deleted notes to Mac directly. The operating steps are rather simple.
Step 1: Head to "System Preferences", choose iCloud and uncheck Notes.
Step 2: Sign in iCloud with your Apple ID and password.
Step 3: Open Notes and select ones you want to recover, then click Recover to recover them to your Mac.
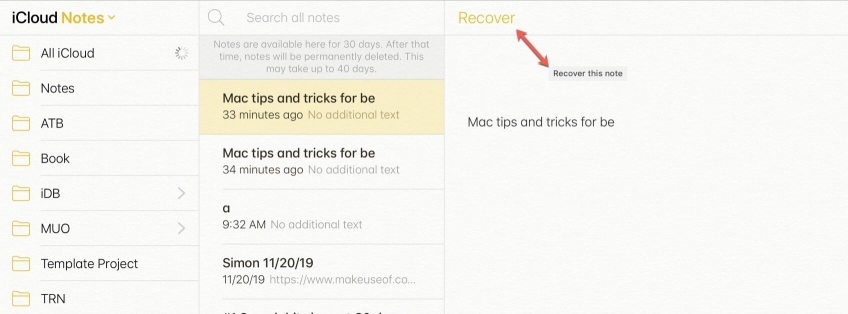
This way is workable only if you synchronize your notes to various Apple devices.
Part 3: Bonus Tip to Recover Deleted/Lost Notes Files/Folders on Mac With AnyRecover
Actually, almost all data recovery tools are unable to recover deleted/disappeared notes on Mac directly. But if you previously stored notes in a file folder, then there is possibility of recovering them with data recovery software. And after the above methods failed, you could have a try. Here AnyRecover for Mac is recommended.
It is a professional data recovery tool equipped with sophisticated algorithm and powerful functions to recover deleted files, formatted data or any form of lost data (malware or virus attack and power outage) from various devices. Please see its main mighty features below.
![]()
2,061,704 Downloads
Features of AnyRecover
-
Recover notes folders lost from different scenarios like recycle bin emptied, formatting, system crash and mistaken deletion.
-
With safety ensured, you are offered a free trial to perform a deep scan, preview and recover.
-
Have a ease-to-understand interface and simple-to-use steps while recovering folders in Notes on your Mac.
-
Compatible with many Mac systems such as Mac OS 13-10.1, etc.
How to Undo Deleted Notes Files on Mac With AnyRecover?
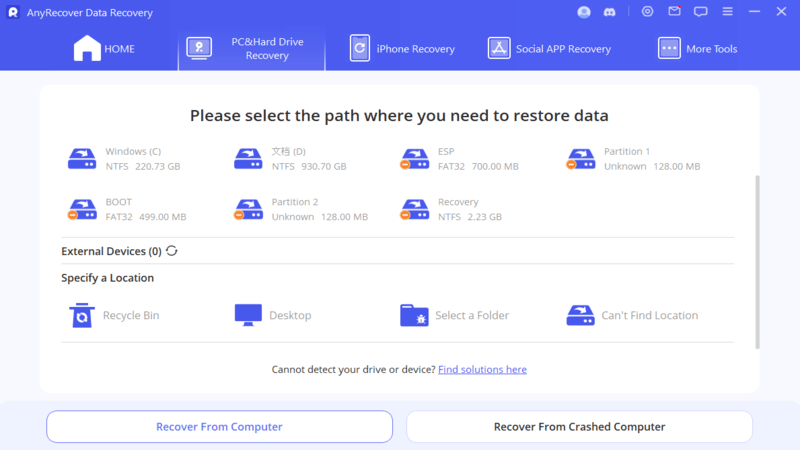
Step 1 Select a Location. Get AnyRecover program on your Mac and open it. Then it will display several recovery locations for you. You can choose the suitable option according to your need. After that, click Start button.
Step 2 Scan the Selected Location. AnyRecover will begin scanning on the selected disk. It may require some time depending on the size and quantity of files on the disk. You can also pause or stop the scanning process once you found the files you want.
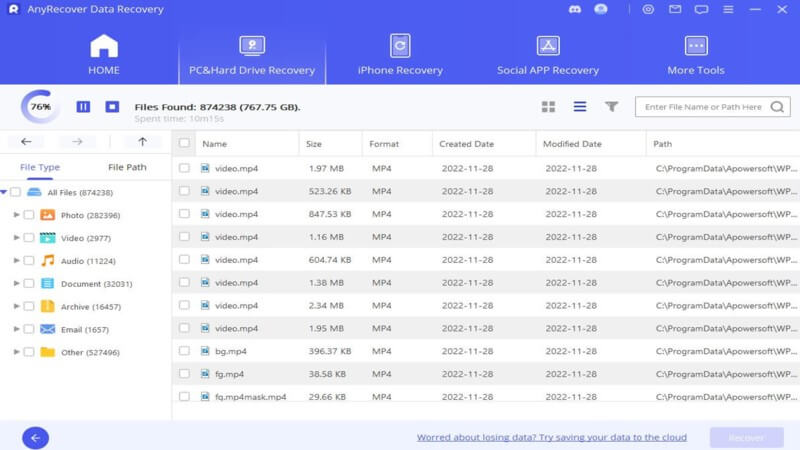
Step 3 Preview and Recover. After scanning, you can now preview the notes and select the files you want to recover, then click on Recover button.
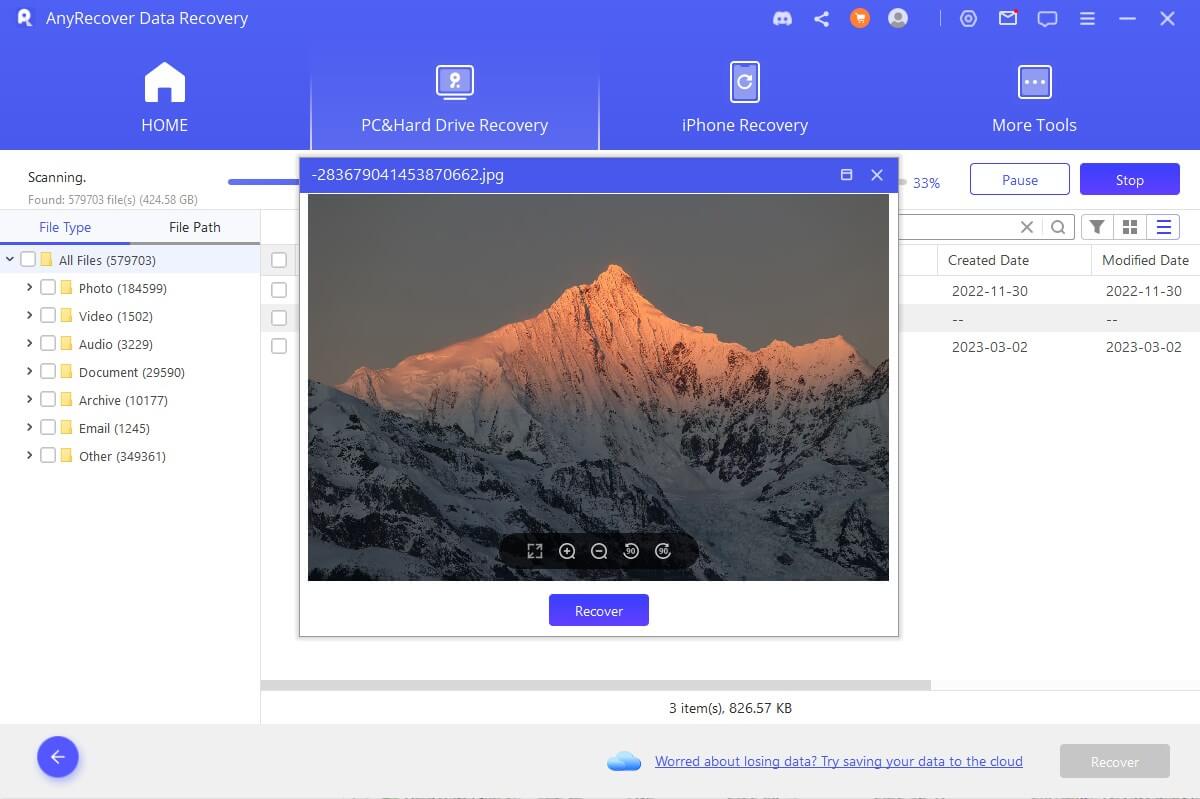
To avoid overwriting your lost files, stop using your computer immediately after the notes disappeared from mac.
Something You Might Want to Know About AnyRecover
1. Can AnyRecover restore deleted notes without any backup?
After the notes were deleted, they are just hidden and we can't see it. However, AnyRecover can discover and retrieve them no matter you have backed up them or not.
2. If I emptied Trash on Mac, can I get deleted notes back?
Even if you emptied the trash on your Mac, these deleted or emptied notes still exist on your Mac. With an advanced deep scan algorithm, AnyRecover can go deep into the data structure to retrieve them back.
3. Can I recover notes deleted a long time ago?
AnyRecover can recover any lost notes only if the allocated memory space of these notes were not overwritten by new data. Please kindly notice that the data recovery depends on the availability of allocated memory space on the notes but not the date of their deletion.
Part 4: Frequently Asked Questions About Notes on Mac
1. What Causes Notes on Mac Disappear?
Understanding the location of your notes stored on Mac is good, but they may sometimes disappear or be lost. In terms if this issue, what could be the reasons behind it? We list several possible causes below.
-
Mistaken deletion. Usually, the most common reason for your Mac notes disappearance is the accidental deletion by yourself or by other persons.
-
MacOS update problems. Any interruption moves like shutting down during updating MacOS to the latest version will cause notes loss. Besides, you are unable to access your notes if you aren't sync them to the latest system version.
-
Malware or virus attack. Virus and ransomware will pose danger to the Note app on Mac, thus causing the inaccessibility of your notes.
-
Software and hardware glitches. If the hard drive on Mac gets corrupted or damaged, then your notes folders might become missing.
-
Note app crashing. Have you experienced the app crashing? Occasional Note app crashing will make your notes disappear little by little.
-
Other reasons. Have you synced your notes to multiple devices and you deleted them from a device? In this case, they will be removed from your Mac.
2. What Happens to Deleted Notes on Mac?
Once you have deleted your notes stored on Mac, then they will be removed to the Recently Deleted folder. You could check and restore them in 30 days. After that, they will be removed forever. But you are still allowed to recover deleted notes files on Mac after 30 days with data recovery software as long as the older space is not overwritten by new notes.
3. How to Back up Notes on Mac?
To back up notes on Mac, you could do it manually. Simply open Notes, choose View > Show Folders, then create a new folder named Notes Backup and drag the notes into the folder.
In addition, you could also automatically back up your notes on Mac by activating Time Machine or enabling iCloud synchronization.
4. How to Save Notes on Mac?
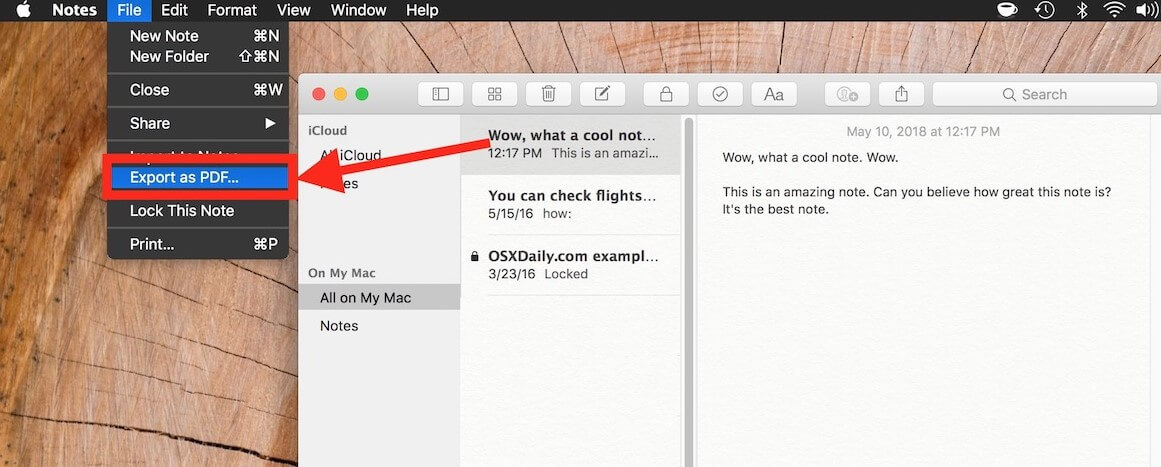
To save notes on Mac, you could save them as PDF files. In this way, you could better read them and recover them with data recovery software once they are accidentally deleted. Here are steps about saving notes on Mac as PDF files.
Step 1: Launch Notes app and choose the notes you want to save as PDF files.
Step 2: Click "File" option and "Export as PDF".
Step 3: Name the PDF file and hit "Save" to the location you would like.
Conclusion
If you discovered that your notes disappeared from MacBook Air/MacBook Pro after update or you deleted them intentionally or accidentally, do not be scared, it is not a fatal blow to your precious collection. This article goes into detail and simplifies the procedure how to recover deleted notes on mac. AnyRecover Data Recovery Software is the recommended tool for perfect results because of its high recovery rate and a free trial version exists for new users.
Time Limited Offer
for All Products
Not valid with other discount *

 Hard Drive Recovery
 Deleted Files Recovery
