How to Recover Overwritten Files on Windows/Mac? [Solved]
Have you committed the forgivable mistake of overwriting files on your Mac PC? Well you are not alone, and thankfully there are several ways to rrecover overwritten files with a smile.
1 Can I Recover Overwritten Files from Mac?
Of course, you must be worried about this, but rest easy now. Mac systems are designed in a way that overwritten files (which technically are deleted) can be recovered with suitable software. When a file is deleted, it is only removed from the virtual memory space and its index is deleted too. But it is very much possible to recover these files as they have not been fully removed from the system, instead they are stored on an allocated memory space. Macs have a built-in recovery utility that can be exploited with the right steps. Let me guide you through.
2 How Overwritten Files Can Occur?
Sometimes, when prompted to save a new document on your Mac, you might click “yes” in response to the prompt to save and replace files with the same names. As a result of this, your original files are lost on the Mac.
It is possible that you rename a file and it has a conflicting name with another file. When this happens, your file can be lost if you do not change the name.
3 Best Way to Recover Overwritten Files on Windows/Mac with AnyRecover?
AnyRecover is a powerful software designed to help users recover any type of file they have lost on their Mac. AnyRecover is a file recovery software that makes use of a combination of deep-scanning and recovery techniques to find deleted or lost files and retrieve them in a short time. With AnyRecover, you can quite easily, efficiently and quickly recover your overwritten files even if they have been deleted permanently. AnyRecover supports and offers a seamless, easy service across different versions of Mac. AnyRecover comes with a free 30-day trial period during which you can recover three files and convince yourself before paying for a full version. (Windows 11 supported)

1,000,000 + Downloads
Recovery of lost files easily and quickly, no tech required.
Supports over 1000 file formats, like music, documents, photos, etc.
Supports all types of storage devices including internal hard disks and external medias.
Deep-scanning technology enables AnyRecover to be your primary choice to recover lost data.
Check out the simple steps to recover overwritten files:
Step 1. Mode Select: After launching, you will see several options like “Deleted Files Recovery”, “Recycle Bin Recovery”, “Formatted Disk Recovery”, “Lost Partition Recovery”, “External Device Recovery”, and “All-Round Recovery” on the main interface. Select the "Deleted File Recovery" button to enter recovery mode.
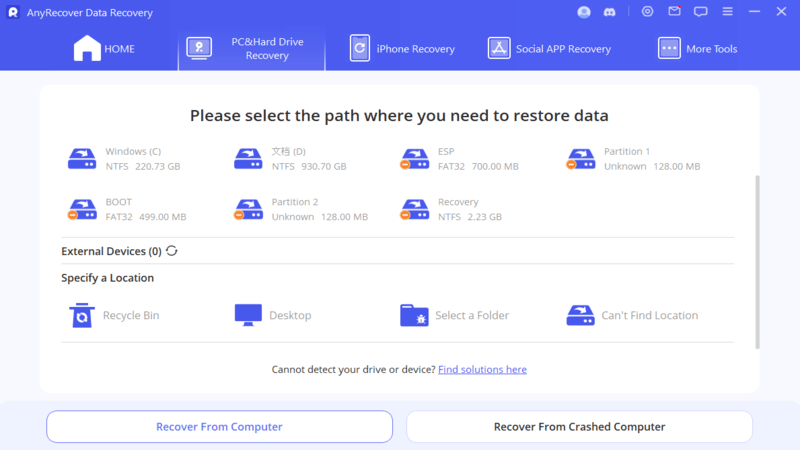
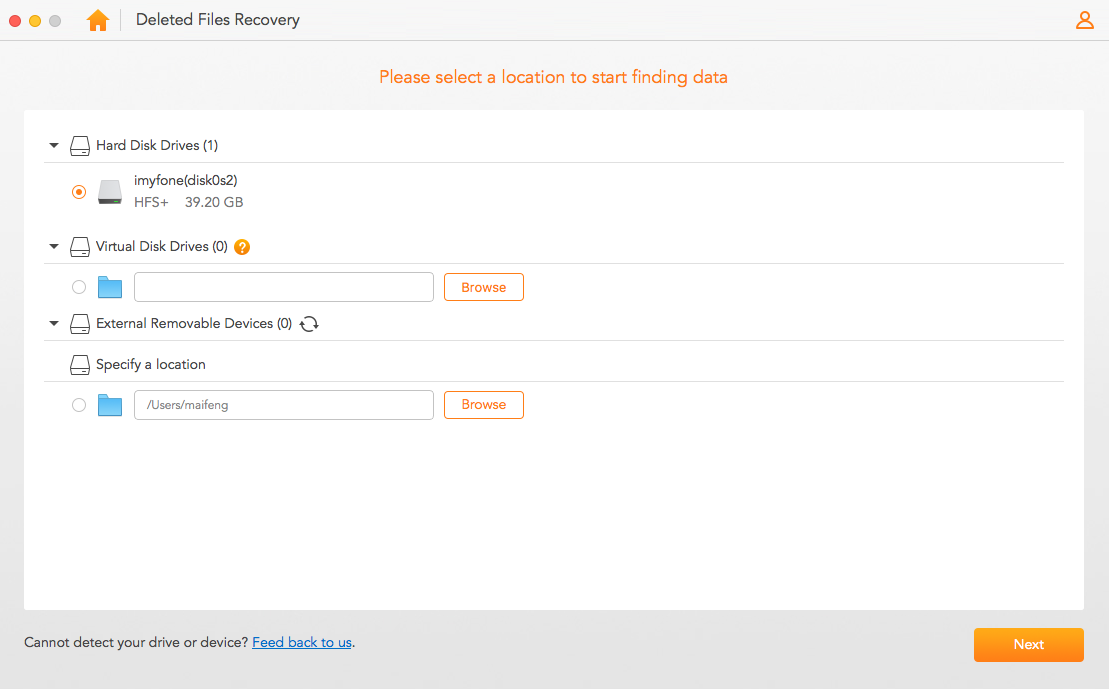
Step 2. Select Location: Next, you must select the location or path where your file was stored before you lost it. You can directly select any location where you had your lost files or you can click "Browse" and navigate the system to locate the specific folder you want. After you might have located the path, you can click "Next".
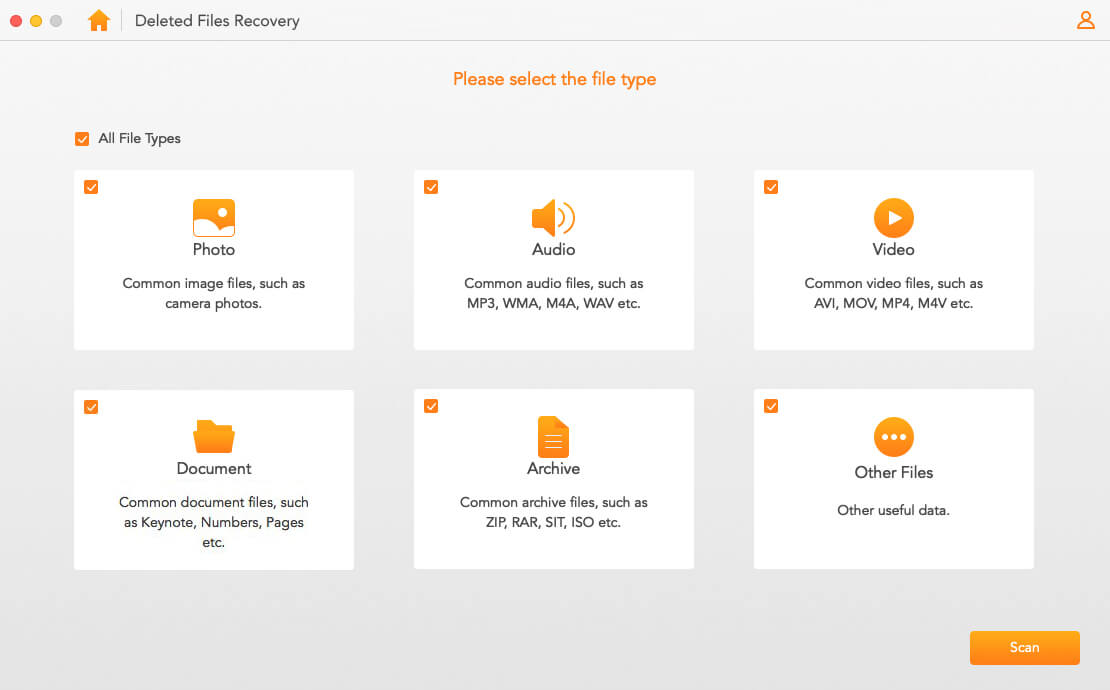
Step 3. Select File Type: Now, you have to select the type of file you want to recover from the recovery list. Select Video, Audio, Photo, Document, or Archive. You can also select others to specify the file type. Once you are done, simply click "Scan" to start the recovery process.
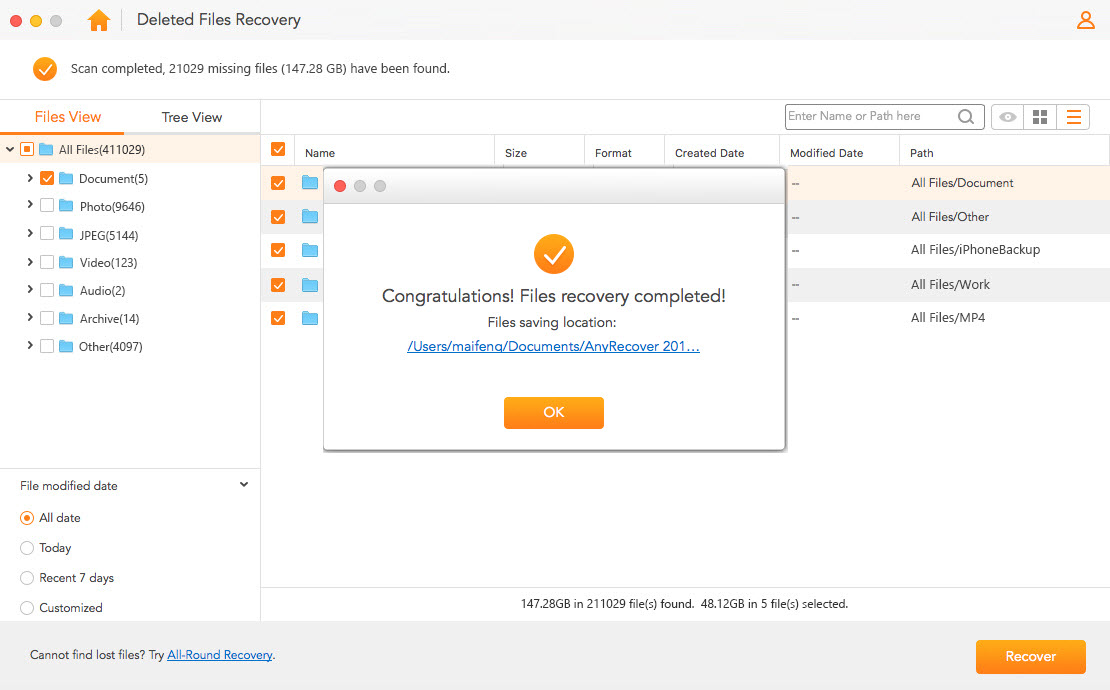
Step 4. Scan the Location: AnyRecover will instantly carry out a quick scan based on the mode selected, the location and type. After the scan, the results of all deleted files within that path will be displayed for further actions.
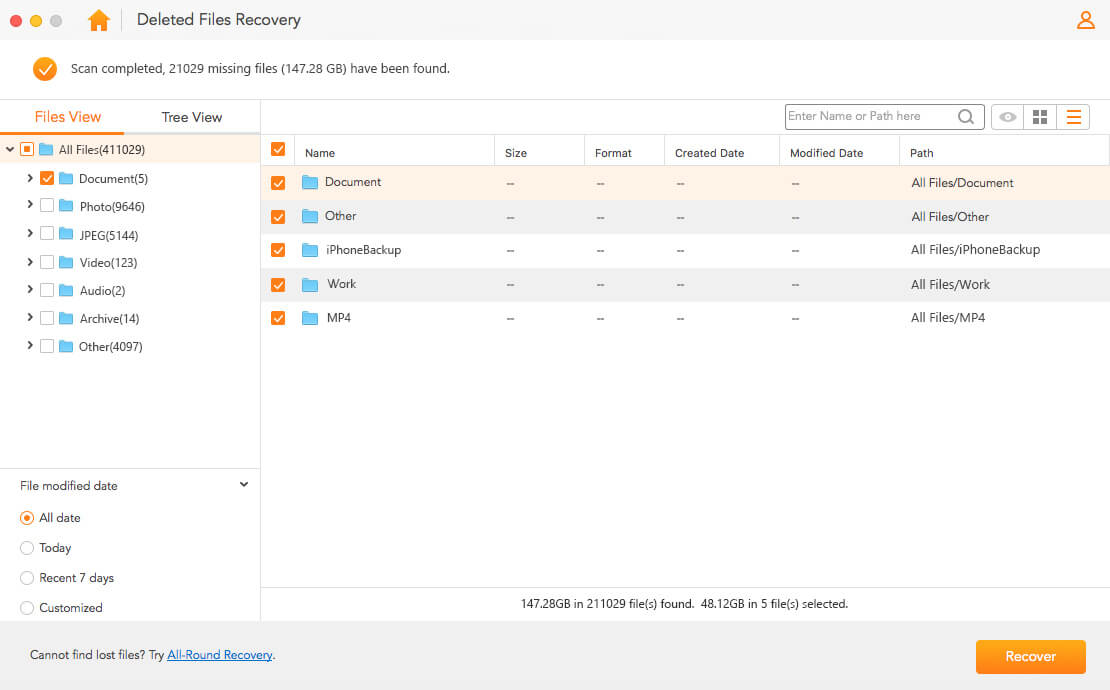
Step 5. Preview and Restore: Once you see the deleted files list, you can then preview and restore them. AnyRecover gives you the option of selecting the files you want restored, if you do not want to restore all of them.
4 How to Recover Overwritten Files on Mac with Time Machine?
Macs come with a built-in feature called Time Machine that can help you recover your data easily. Time machine is a simple to use utility that regularly backs up the selected data on your machine. Here is a simple guide to using Time Machine.
Step 1: Launch the Time Machine
First, you have to switch on this feature on your Mac (if it was off before). You can find do this from the Menu bar.
Now you have to start the Time Machine. To do this, you can either click on the “Time Machine” option in the Dock, or go to the Time Machine Menu on the top bar of your Mac and click “Enter Time Machine”. Wait for it to launch and perform the next step.
Step 2: Locating specific files
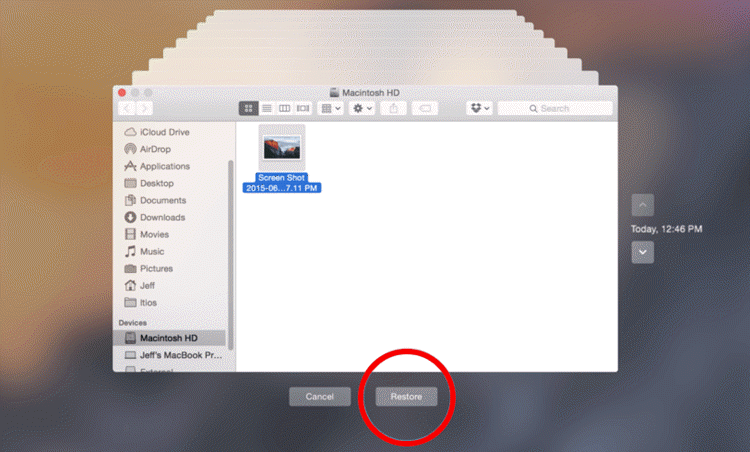
You have to now select the files/folders you want to recover. You can also search for any particular file you think was overwritten and which you want to recover. Once you have selected them, click on “Restore” and watch your files come back in no time.
Time Limited Offer
for All Products
Not valid with other discount *

 Hard Drive Recovery
 Deleted Files Recovery
