Quick Fix: External Hard Drive Read Only on Mac
“A friend of mine sold his external hard drive to me last week but one. I can access and view all the files on the hard drive. The issue is that I cannot write anything into the hard drive. I can’t even delete the files present on the drive. My friend owns a Windows PC. I am using his hard drive on my Mac. Is there a way to fix this problem? Thank you, guys.” – Jimmy, discussions.apple.com
An external hard drive will only be 100% useful to its owner if reading and writing into the hard drive are possible. If you are currently dealing with this external hard drive read only error on Mac, this article is for you. We will be showing you how to get rid of the error.
1Why is Your External Hard Drive Read-Only on Mac?
The external hard drive read only error has 3 major causes. We have outlined the causes below:
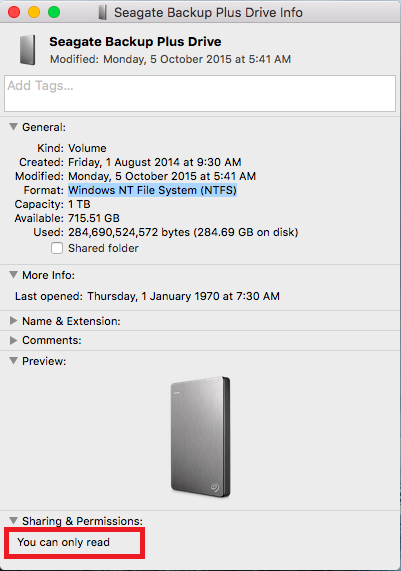
NTFS File System
You can determine whether the NTFS file system is the reason you cannot write into your hard drive by right-clicking the hard drive and then choosing Get Info. The NTFS file system is compatible with Windows PC but incompatible with Mac computers. While the Mac can allow you to read the files in the NTFS file system, it won’t allow you to write into the drive.
Permission Settings Aren’t Ignored
If the hard drive had been used on a different Mac computer, OS X could have set up access permission for the folders and files available on the hard drive. These settings could be preventing full access to the hard drive.
Formatting Errors
If formatting errors do exist in your hard drive, there is a chance that this is the reason you are experiencing the Mac external hard drive read only issue
2 Fix External Hard Drive Read-Only Without Losing Data
Step 1: Recover Data on the Hard Drive
If the hard drive has important files, you will need to recover these files before proceeding to fix the external hard drive read only Mac problem. This will ensure that you do not lose the data during the fixing process.
Recovering data from a read only hard drive on Mac is extremely easy. All you will need is a third-party tool called iMyFone AnyRecover. AnyRecover supports more than 1000 file types. This means that it is capable of recovering all the file types on the hard drive. The tool is not just easy to use. It also does its job quickly. You won’t need tech knowledge to recover your files.

1,000,000 + Downloads
You can use it to recover over 1000 file formats, including photos, videos, documents, etc.
AnyRecover supports numerous data loss situations, including damaged hard drive, formatted drive or device, OS crash, virus attack, accidental deletion, emptied recycle bin, etc.
AnyRecover works with all types of storage media, besides hard drives, flash drives, external drives, memory cards and more are supported as well.
You can use the trial version for free before you decide to purchase the full version.
To recover data from your external hard drive before fixing the external hard drive read only issue, you will just need to follow the steps below:
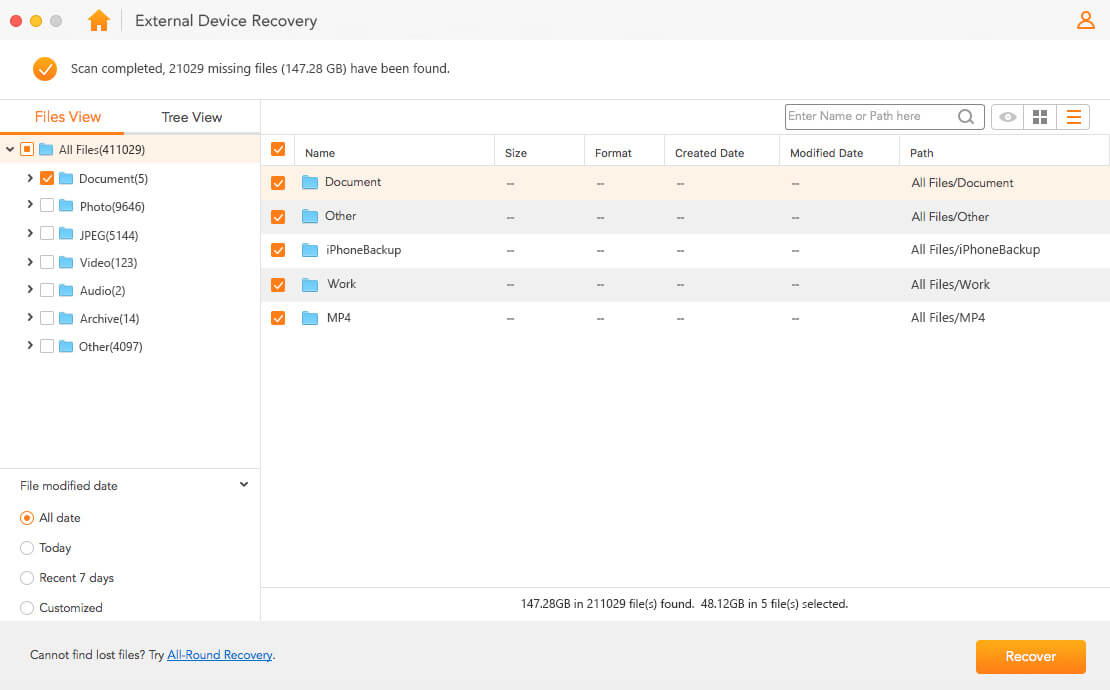
Step 1: After opening AnyRecover, tap External Device Recovery.
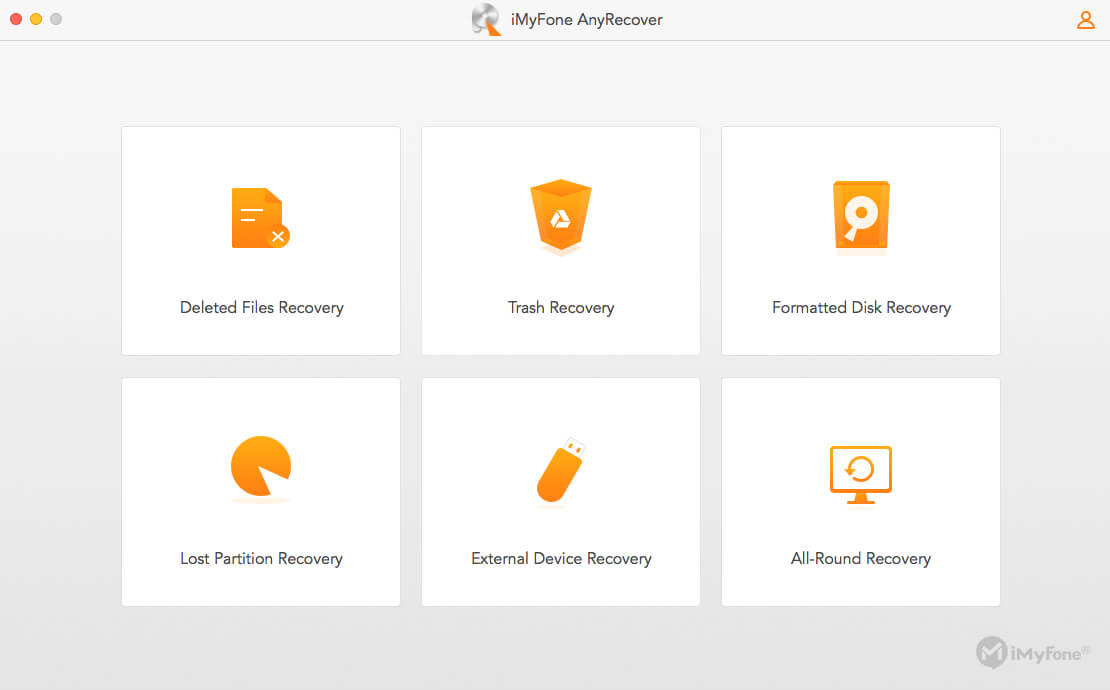
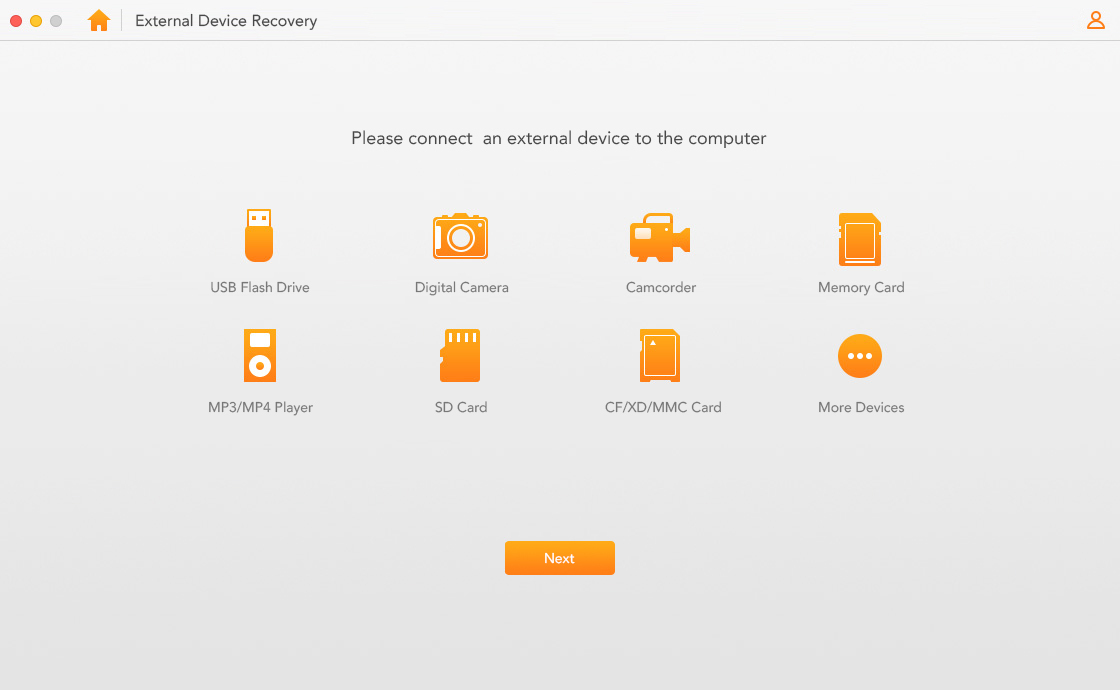
Step 2: Connect your external hard drive to the computer. Select the hard drive and then click Next.
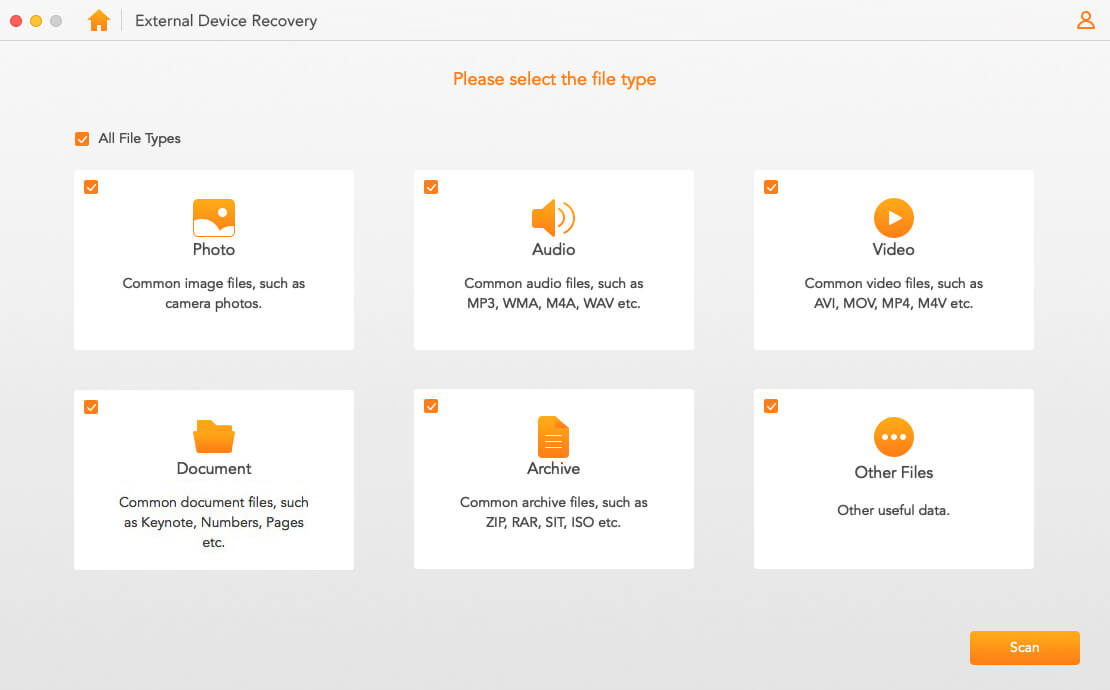
Step 3: Choose the file types you intend to recover and then click Scan.
Step 4: After the scan, preview the files and select the ones you intend to recover. Next, click Recover.
Step 2: Reformat the External Hard Drive
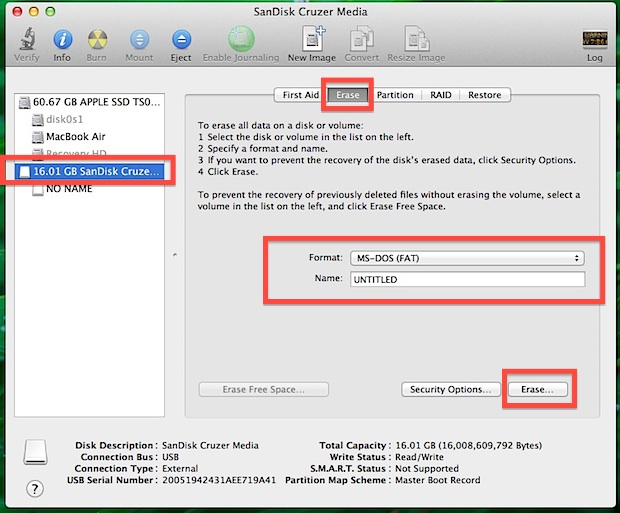
After recovering the data on the external hard drive, you can fix the error by reformatting it. Use the steps below to reformat the drive:
Step 1: With the hard drive connected to the computer, open Disk Utility by doing one of the following:
• Open Applications > Utilities.
• Press Command + Space and then type Disk Utility.
Step 2: Select the external hard drive on the left and then click Erase on the main window.
Step 3: Select the ideal file system and then give the hard drive a new name. Choose either MS-DOS or ExFAT if you would like to use the drive on both Windows PC and Mac. Select APFS or Mac OS Extended if you want the drive to be compatible with only your Mac.
Step 4: Hit Erase to complete the process.
3 Other Solutions to the External Hard Drive Read Only Problem on Mac
1. Ignore Permissions
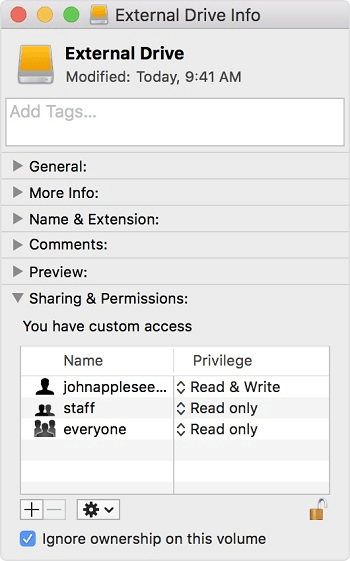
If the external hard drive read only issue is a result of permission settings, the steps below could help you get rid of the problem:
• Right-click the hard drive and then select Get Info.
• Expand “Sharing & Permissions”. Tap the Lock to authenticate.
• Check “Ignore ownership on this volume”.
2. Check and Repair Hard Drive Errors
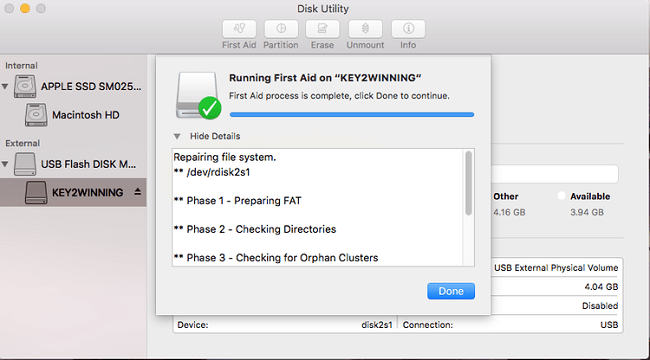
To implement this solution, follow the steps outlined below:
• Open Applications > Utilities.
• Press Command + Space and then type Disk Utility.
• Select the Read-Only external hard drive and then tap First Aid at the top of the Disk Utility screen. Next, click Run.
If you have an external hard drive that you cannot write into, this article can help you fix the issue. There is no guarantee that ignoring the permissions or scanning the drive for formatting errors can help you get rid of the read-only issue. However, changing the file system configuration has a higher chance of helping you get rid of your issue. Before attempting to fix the issue by changing the file system to one that is compatible with the Mac OS X, make sure that you have recovered the files in the hard drive. The process of changing the file system will involve erasing the files in the hard drive. Downloading AnyRecover and try recovering your data for free.
Related Articles:
Time Limited Offer
for All Products
Not valid with other discount *

 Hard Drive Recovery
 Deleted Files Recovery


