How to Create Mac Recovery USB and Recover Lost Data on Mac
"I recently switched over from Windows to a Mac, and I’m really enjoying my Mac. My only issue is I want to create regular backups but don’t know how to. I heard of something called Mac Recovery. Is this the right feature? How does it work?"
Macs are fantastic and exciting pieces of technology, so much that arguments on Windows vs. Macs usually get fierce. These systems have several standout key selling features, one of which is the Mac recovery USB.
Read more to learn all about Mac recovery USB, how to create Mac recovery USB, as well as how to create bootable USB drive and recover data from unbootable mac with it.
What You Should Know about Mac Recovery USB
Mac OS X Lion and higher versions usually create a hidden recovery volume on your startup drive. The reason for this is so that in case of an emergency, you can recover your data using the Disk Utility. Also, the computer keeps a copy of the recovery USB drive that Disk Assistant creates.
How Does It Work?
This is the equivalent of a complete data backup in Windows, but Mac does it automatically, even without an internet connection. The following sections will cover how to create a recovery USB drive on Mac OS X.
To create an OS X Recovery USB drive, here are some things to have:
A usable recovery volume on your computer startup drive. The copy of the recovery volume will be created here.
An external USB drive with not less than 1GB of free storage space.
NOTE: A working recovery volume on your computer is necessary to follow the methods here. Further, these guides will not work for you if you have an older device model that is upgraded on a newer OS.
How to Create a Recovery USB Drive on Mac OS X
All data in the volume will be wiped if you clone the recovery volume on a partition in Disk Utility. Hence, mainly if the USB drive has ample storage space, it is advisable to first prepare the USB drive before creating OS X Recovery drive with Disk Assistant. You do this by creating partitions in the new location that will serve as a special section for the recovery drive. Next, follow the below steps to create a recovery USB drive.
Step 1: Launch Disk Assistant from Applications > Utilities. If it’s not there, download it from Apple’s support site.
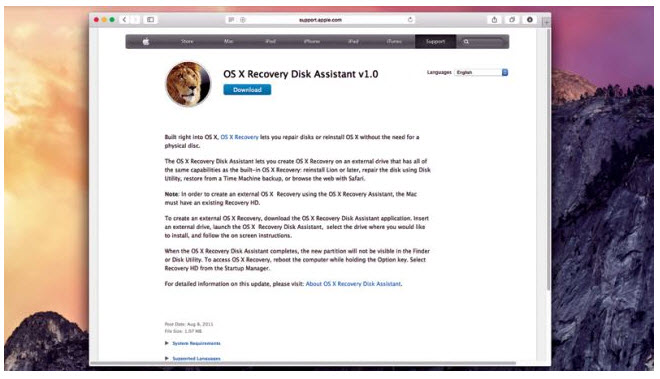
Step 2: Connect a USB drive and run the Recovery Disk Assistant. Select the new recovery disk you just connected and hit Continue.
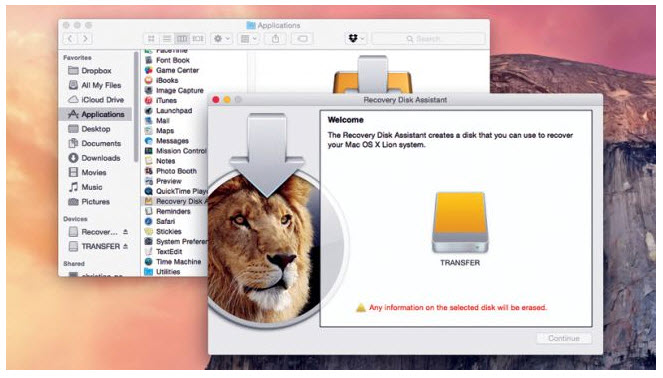
Step 3: Your system will then create a clone of the recovery volume. After this, click Quit and disconnect the drive.
Note: This method is only possible for Macs running below OS X Lion.
How to Create a Bootable USB Drive on Mac OS X
There are times you may need to create or use a bootable USB drive, eg your Mac crashed or unable to boot. At which time, you can count on iMyFone AnyRecover to get the work done for you.
Preparation for Creating a Bootable USB Drive
Before the process begins, you need to prepare:
1. A working computer
2. A blank USB drive
3. Connect the USB drive to the working computer
Then follow the steps below to create a bootable USB drive:
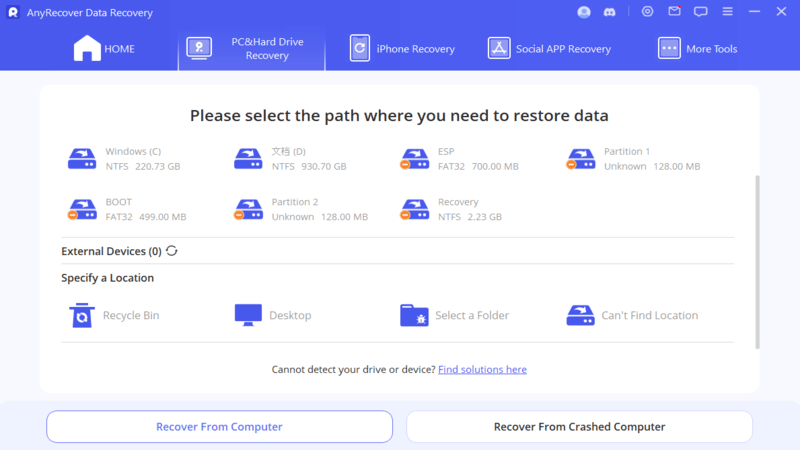
Step 1: Download and launch AnyRecover on the working computer, select "Recover from Crashed Computer" from the first screen, then click "Start".
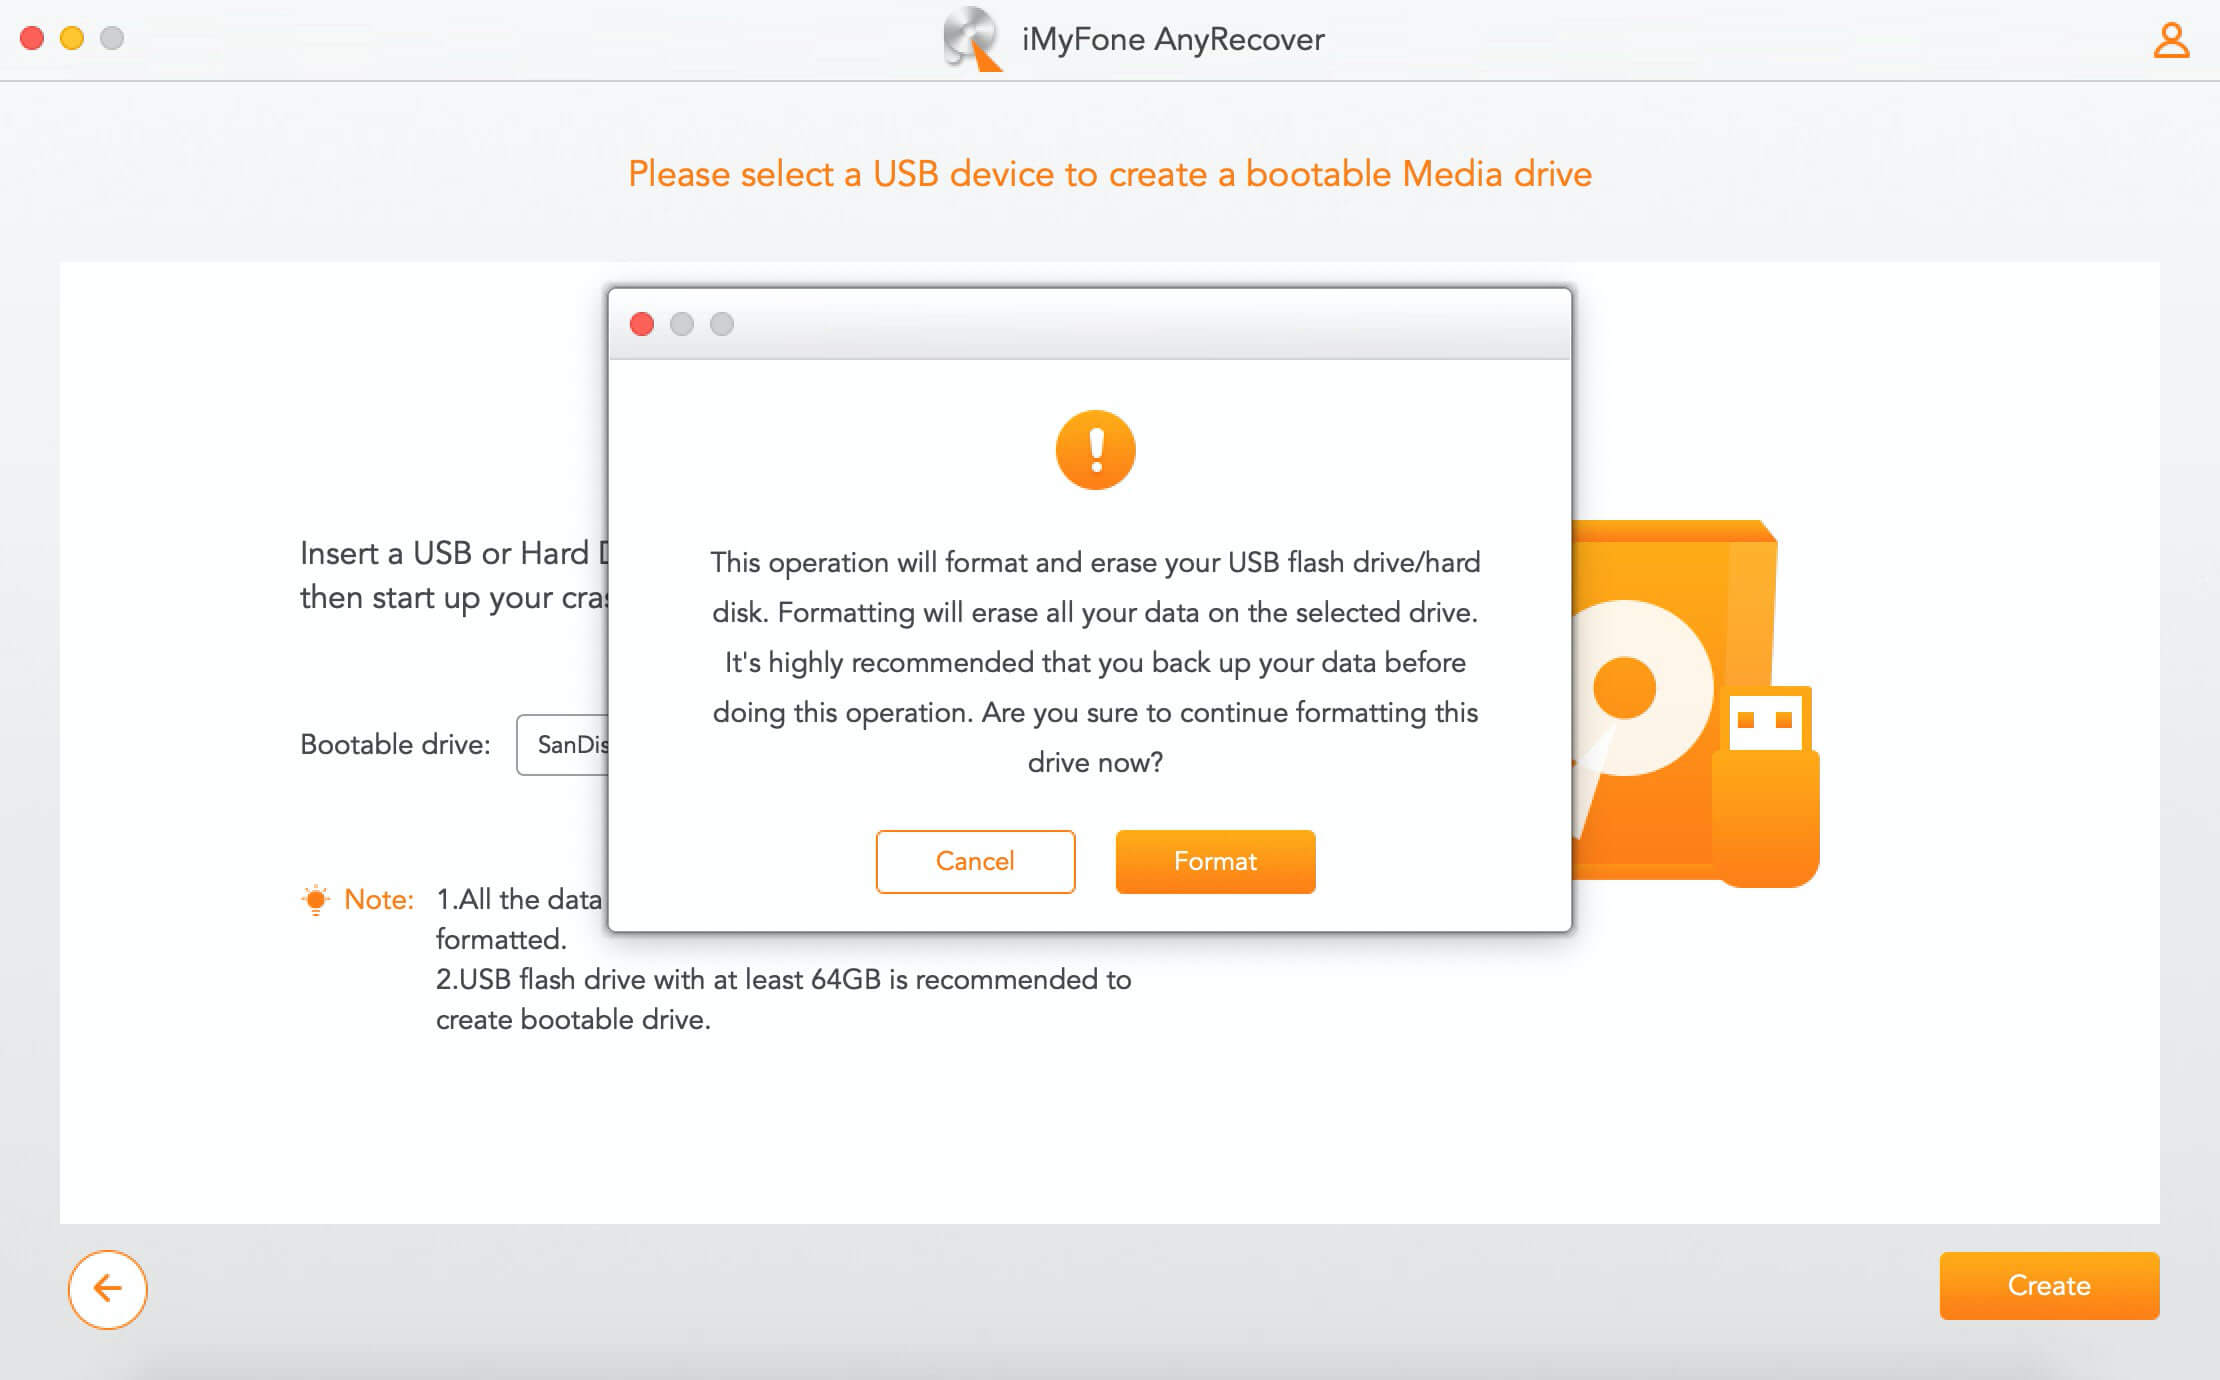
Step 2: Select the USB drive you want to create bootable drive with, hit "Create" button to begin.
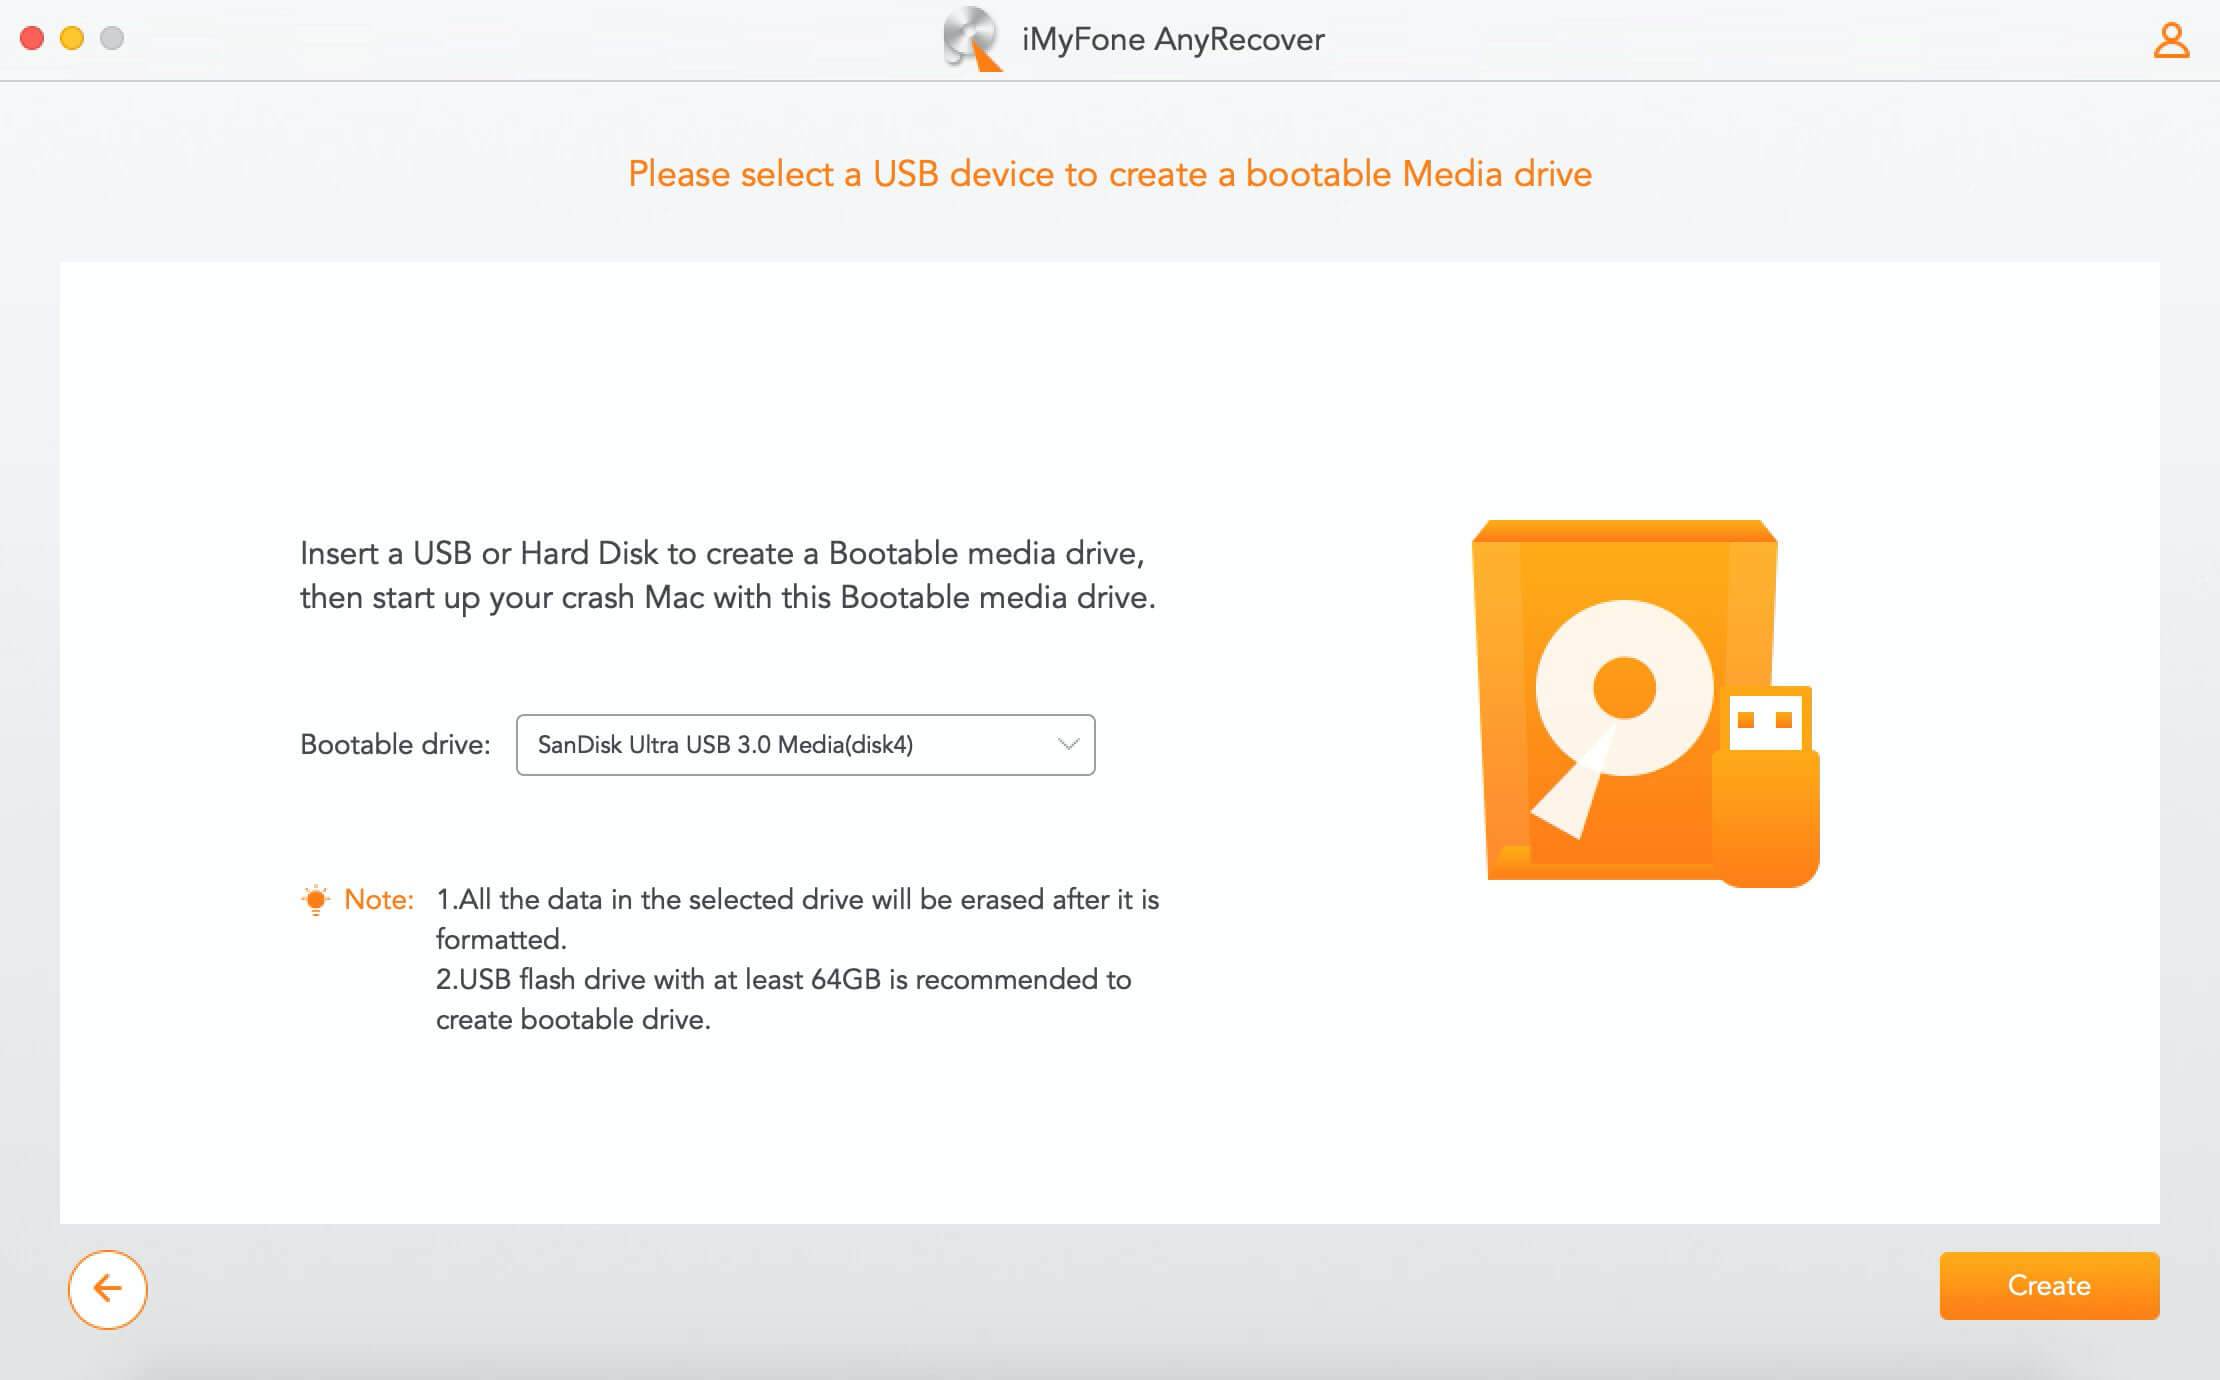
Step 3: A window will pop up, alerting that your data will be wiped out during the process. If you've backed up your important data, click "Format" to continue.
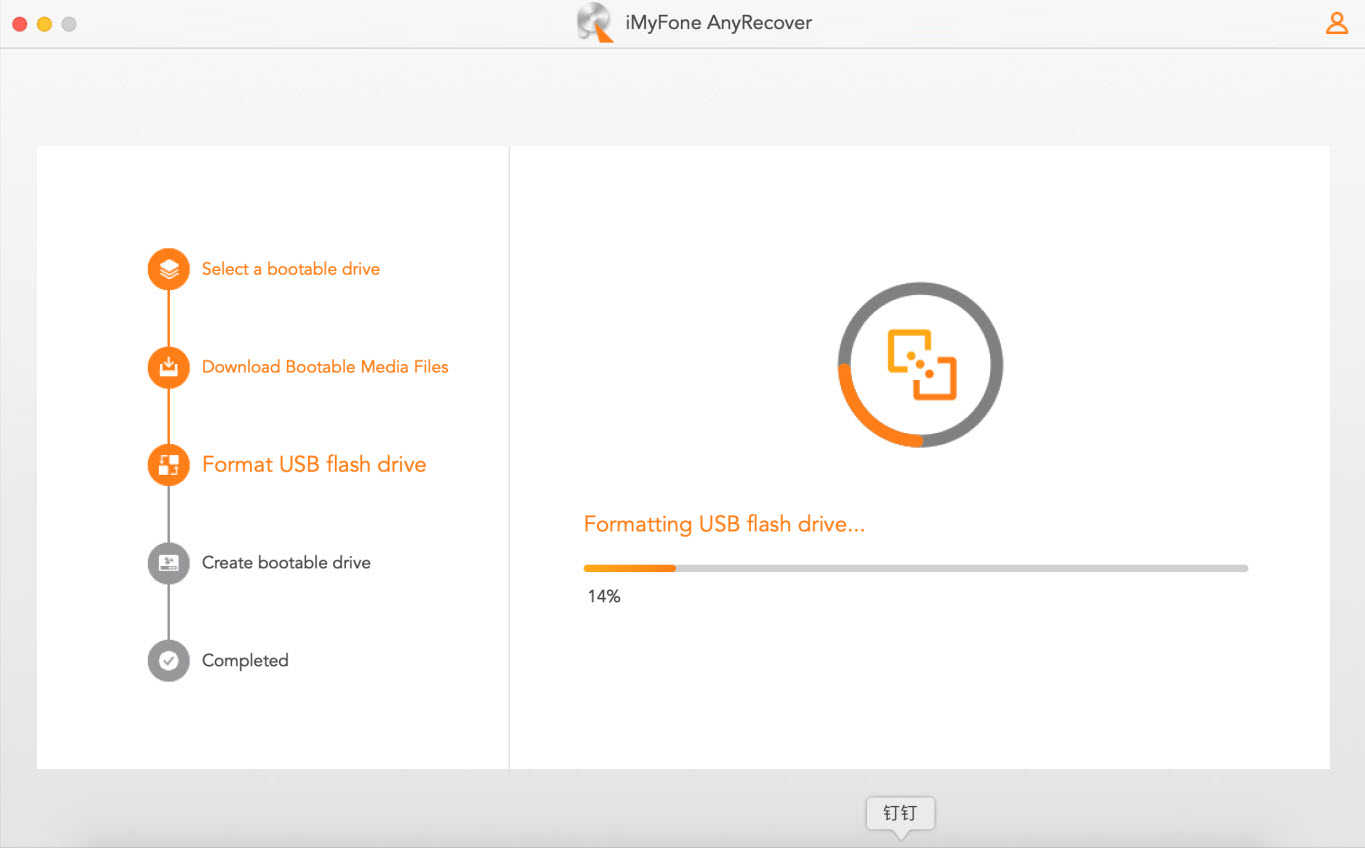
Step 4: Once the format completes, it will start to create bootable USB drive.
Extract/Backup Data from Unbootable Mac with AnyRecover Bootable USB Drive
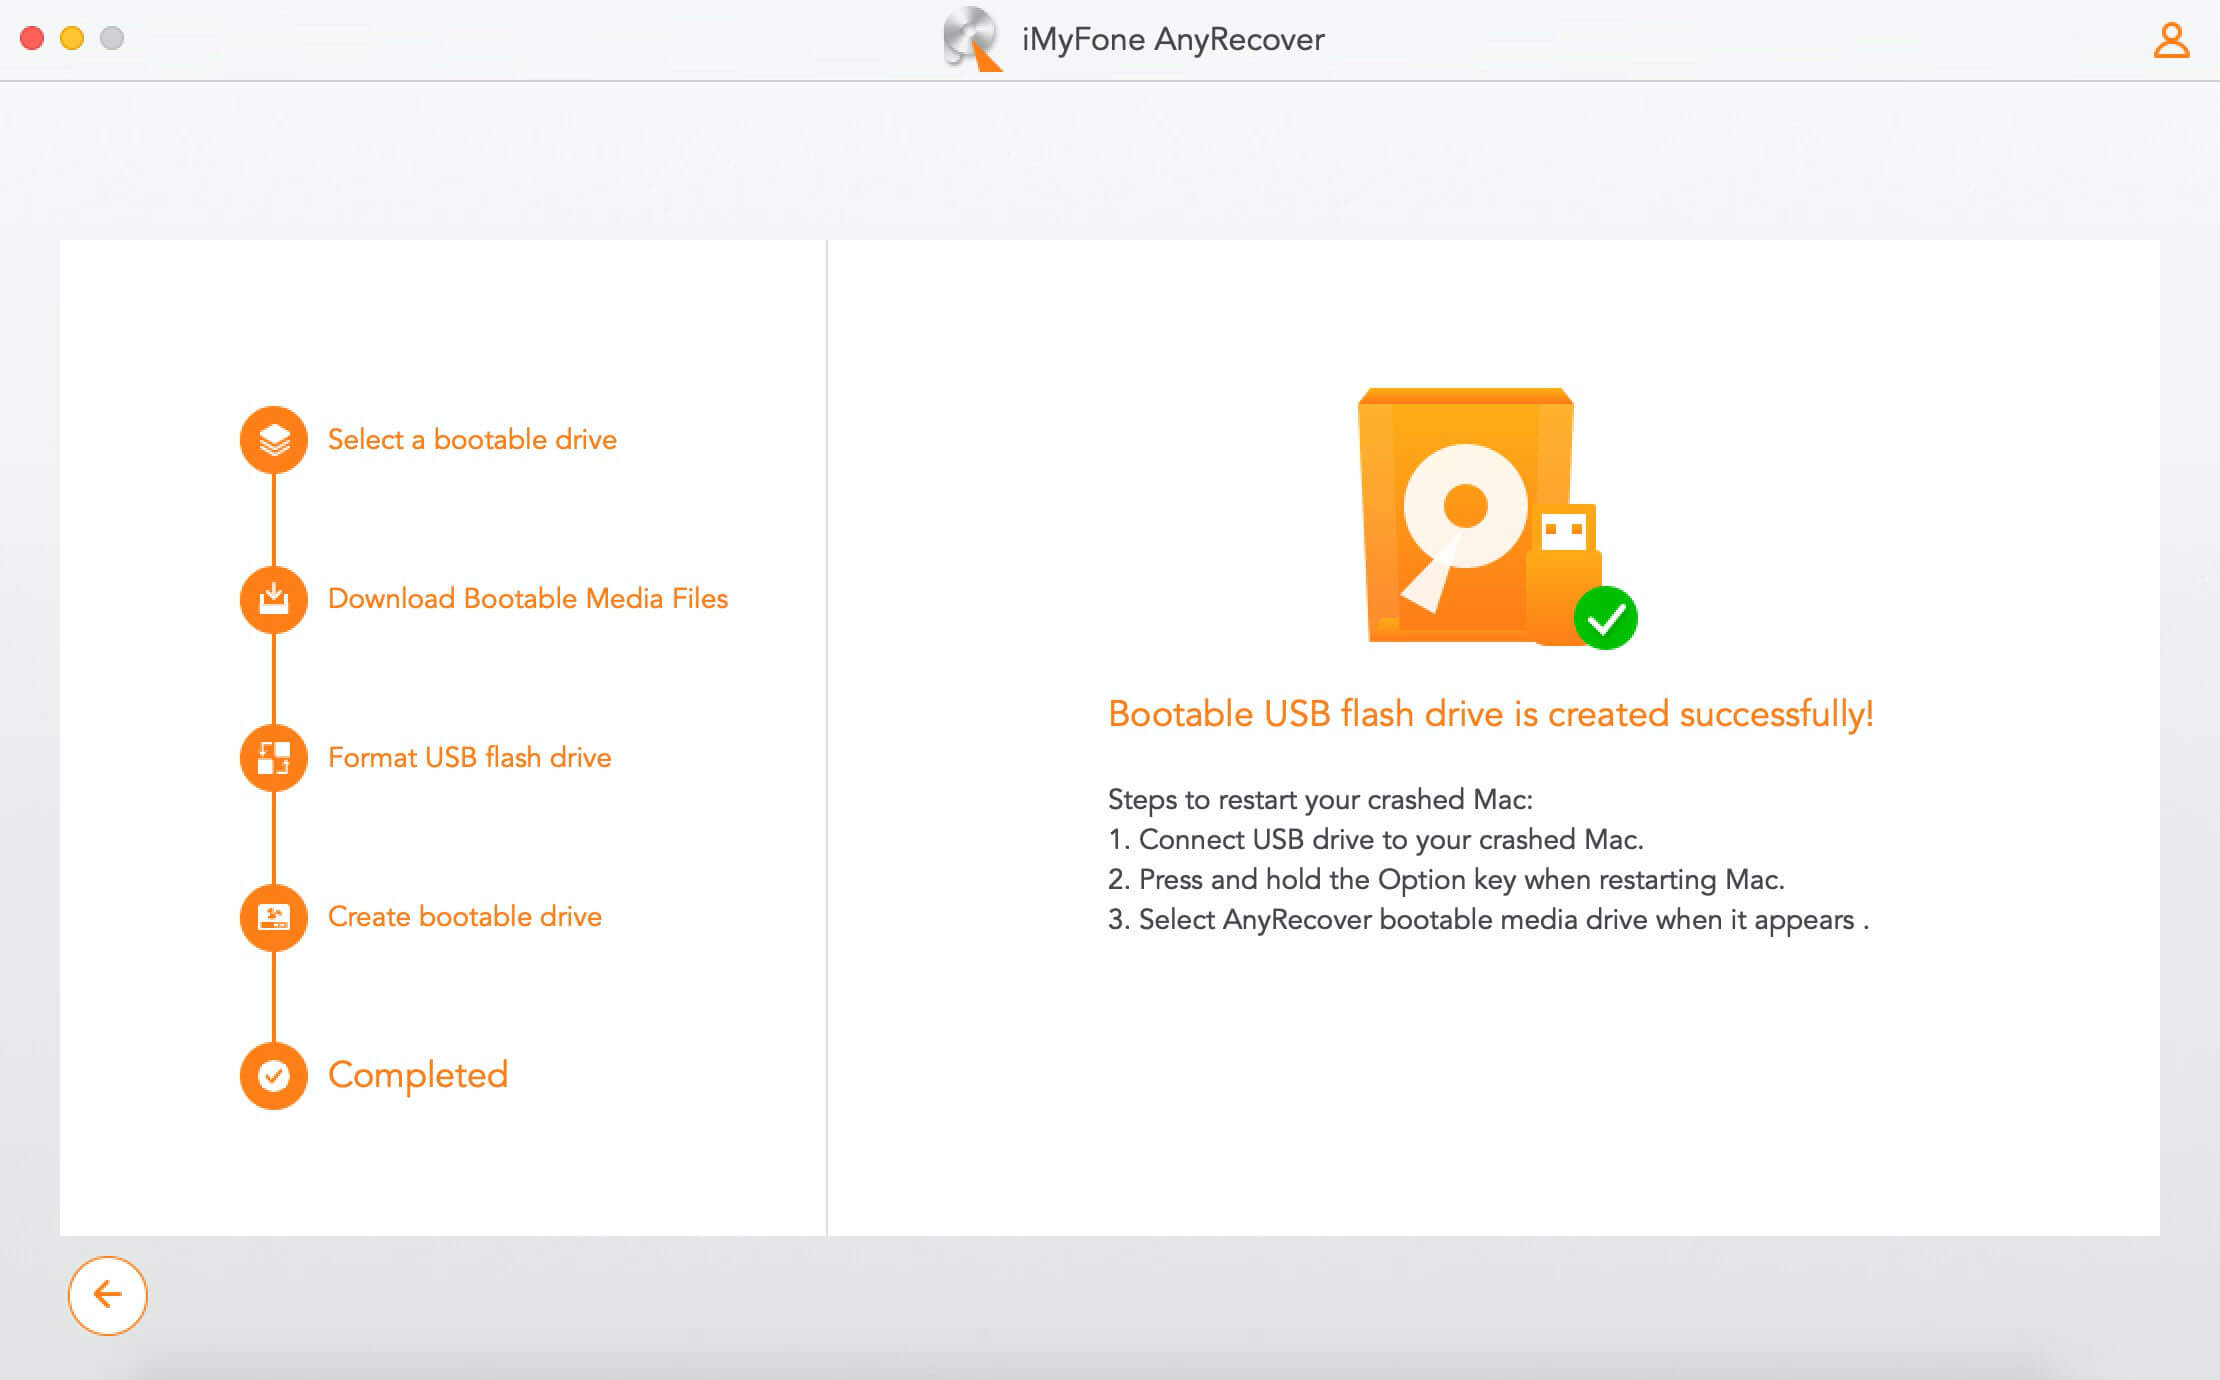
When the USB bootable drive is created successfully, you can follow the on-screen instructions to restart your unbootable Mac then follow the steps below to recover data from your unbootable computer.
Steps to Recover Lost Data from Unbootable Mac Using AnyRecover
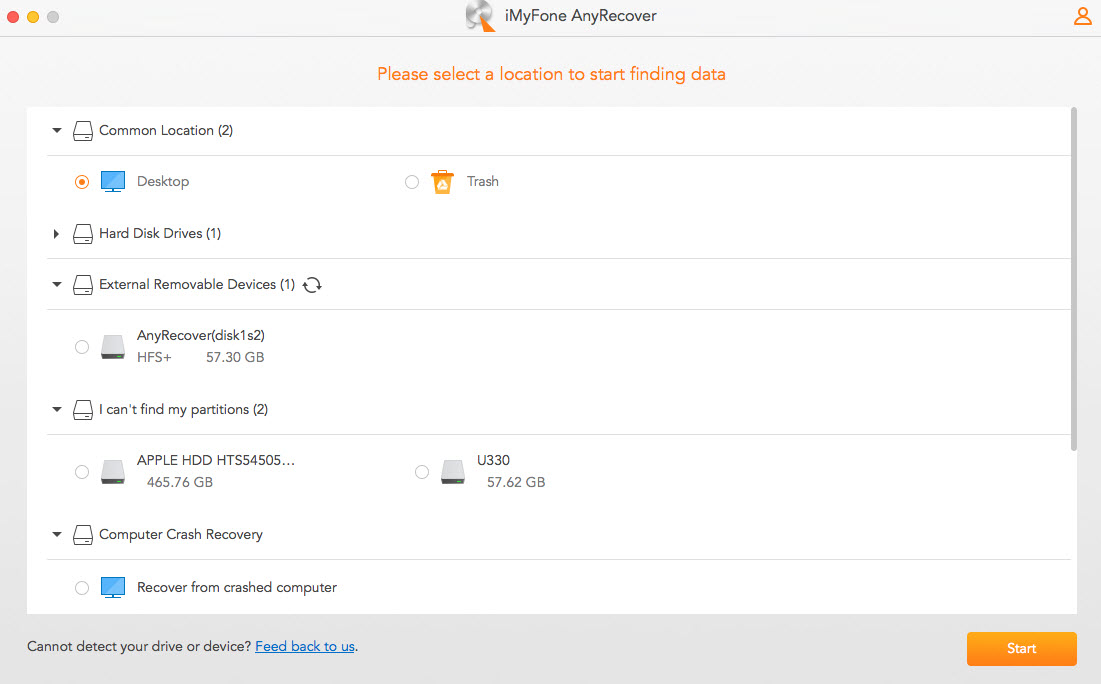
STEP 1. Select a location you want to recover data from, then click "Start".
STEP 2. AnyRecover will start an "All-Round Scan" on your selected drive. You can pause or stop the scanning during the process.
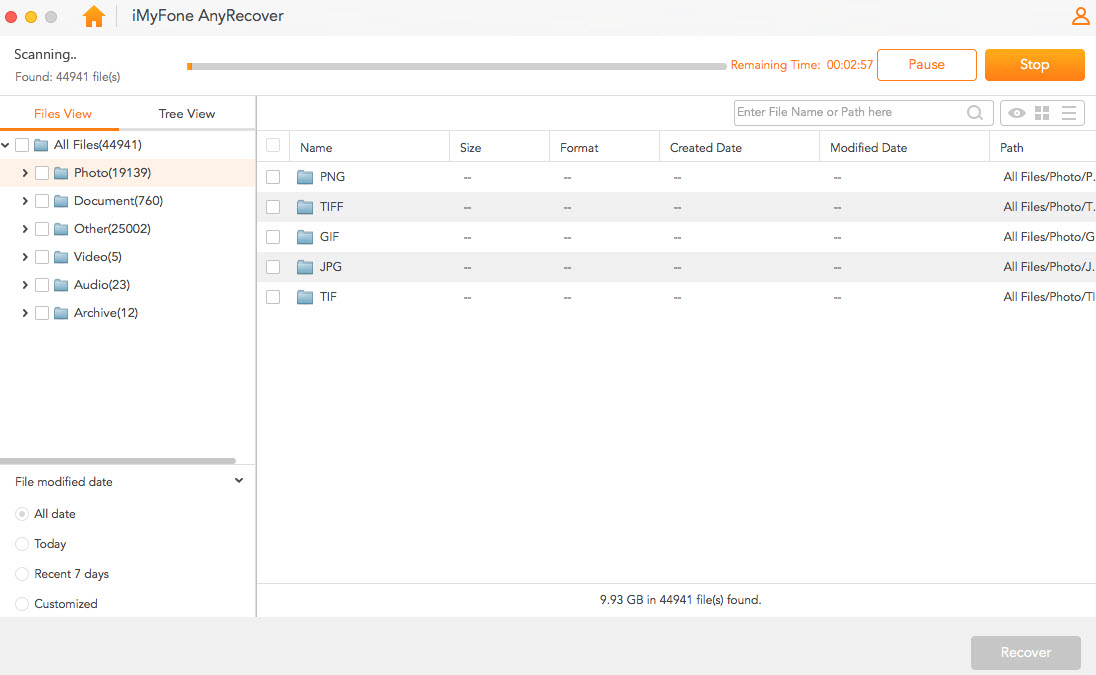
STEP 3. When the scan is complete, all your lost files will be displayed with respect to file type.
STEP 4. Locate the files you want and double click to preview them. Once you are sure, click "Recover" to get them back in no minute.

Why Should You Choose AnyRecover for Data Recovery on Mac
If you want to get back your missing data in the best way possible, or for any Mac recovery needs, we strongly recommend iMyFone AnyRecover Mac Recovery Software. Search through Google for recovery software, and you will see them in the hundreds, but most do not come close to AnyRecover in terms of functionality, ease of use, and compatibility with several models, among other reasons. Still in doubt? We will explain in the next section.

1,000,000 + Downloads
Reasons for Choosing AnyRecover:
Full Scan: Adopting advanced algorithm, goes deep into data structure to retrieve inaccessible data.
Preview Available: Allowing you to preview scanned files before recovery to ensure accurate recovering.
Crash Computer Recovery: Recover data from crashed or unbootable Mac with MacPE bootable drive.
Encrypted Drive Recovery: Supporting to recover data from Bitlocker encrypted hard drive with password.
All Data Loss Scenario Recovery: Recovers data lost in various scenarios like virus attacks, deleted files, or even emptied trash.
Wide Compatibility: Compatible with all Mac OS versions, including macOS high sierra, macOS Mojave, macOS Lion, etc.
100% Safe: The whole process done by yourself, nobody else would view your data.
This list is far from exhaustive, but it gives you a good idea of why AnyRecover should be your go-to tool.
Conclusion
You see, data recovery on Mac is quite straightforward. If you go through the steps in this guide, you will fix any data loss issues you are experiencing with the help of Mac recovery USB or the recommended tool - AnyRecover Mac Data Recovery.
Related Articles:
Time Limited Offer
for All Products
Not valid with other discount *

 Hard Drive Recovery
 Deleted Files Recovery


