How to Restore Mac from External Hard Drive
Last week I went ahead and updated my Macbook Pro to macOS Catalina 10.15.5 after creating a backup of my previous operating system. Unfortunately, I’ve run into several problems with Catalina running slowly, having WiFi problems, and having the storage filling up for no reason. While I have done research into fixes for these problems, I’ve found no luck in getting them to permanently disappear. I haven’t been able to effectively use my Macbook Pro for the past week or so. I am wondering if it is possible to go back and restore my Mac from an external hard drive to my previous operating system, Mojave 10.14.6?
How to Restore a Mac from External Hard Drive with Local Backup?
When it comes to safeguarding your data, the best way you can deal with scenarios like the one above is to create a backup of your Macbook. You can either resort to backing your Macbook up to an external hard drive, using Time Machine, or using iCloud services. In this section, we are going to provide steps on how to use a local backup to restore a Mac from a backup on an external hard drive. Similar steps can be used to boot from a partition or from a bootable disk. Here is how to restore your Mac from a backup on a local device where the backup is a clone.
Step 1. Close all programs and then restart your Mac.
Step 2. As your Mac restarts, hold down the Command & R key at the same time. This should cause your Mac to boot into macOS utilities program. If it doesn’t, repeat.
Step 3. Choose Disk Utility from the macOS utilities program. Hit Continue.
Step 4. Choose your Mac’s hard drive from the list.
Step 5. Click on the Restore tab found at the top of the Disk Utility window.
Step 6. Choose the external hard drive that you cloned your backup too and choose the Restore From option.
Step 7. Now you will want to choose your Mac’s hard drive and Restore to it.
Step 8. Click on the Restore button.
These steps will allow you to restore a cloned backup from your external hard drive and boot it onto your Mac’s internal hard drive.
Pros:
A local backup provides good protection from hard drive failures, accidental deletions, and source data corruption.
The data transfer from the external hard drive to the internal requires minimal technical knowledge.
You do not need to trust a third-party to store your data.
Cons:
An external hard drive can be stolen or damaged. When damaged, the backup has a high likelihood of also being damaged.
If you do not have an external hard drive, you can partition your internal hard drive, but this takes knowledge.
You will need to use a third-party program to clone your backup to your external hard drive.
How to Restore Mac from External Hard Drive with Time Machine Backup Disk?
If you chose to use Time Machine to create regular backups for your Macbook, then you are lucky. You can restore your Mac hard drive using one of the Time Machine backups or by using a local snapshot of your startup disk. Let’s take a look at the steps needed to restore all of your files to your Macbook.
Step 1. Connect your Time Machine backup disk to your powered down Mac. Then power your Macbook on.
Step 2. Head to your Applications folder and open it. Click the Utilities folder and open up the Migration Assistant.
If you haven’t set the migration assistant up, your Mac will start up with the setup assistant on screen. Follow the on-screen instructions and fill out information about your country, network, and keyboard.
If your Macbook doesn’t start up all the way, you will need to restore your macOS and your files. This is a different set of steps which can be found here.
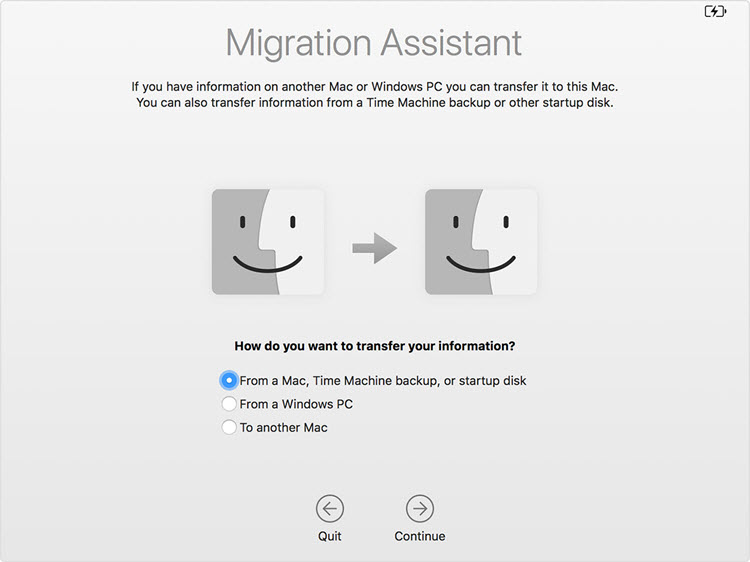
Step 3. Migration Assistant will ask how you want to transfer your information. Choose the first option which reads, From a Mac, Time Machine backup, or a startup disk. Hit Continue.
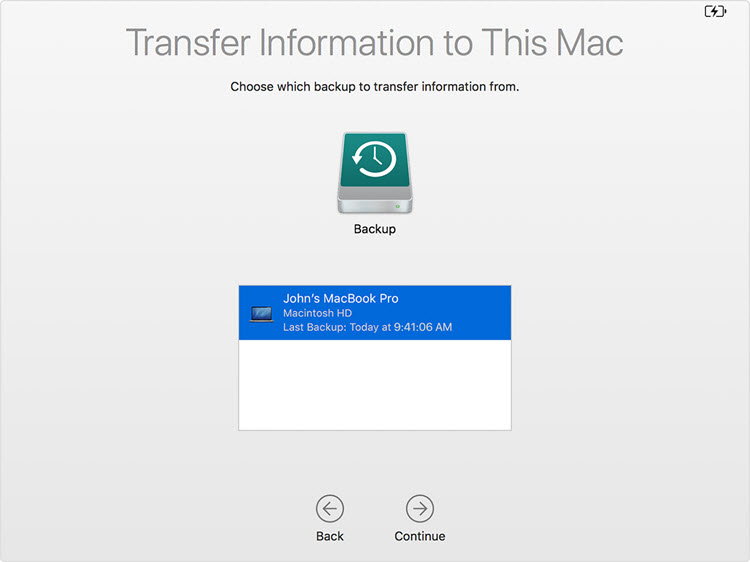
Step 4. On the following screen, select your Time Machine backup and hit Continue.
Step 5. A list of backups will be shown that are organized by their date and time. Choose one and hit Continue.
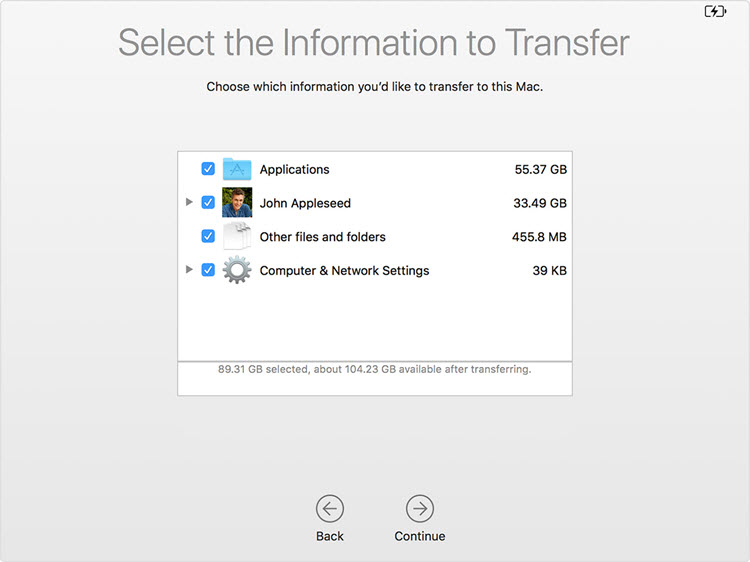
Step 6. Select which information you want to transfer. This could include your profile, applications, other folders, and computer/network settings.
Step 7. Hit Continue and wait while the transfer takes place. This can take hours to finish.
Step 8. When the transfer is complete, restart your Macbook and log in.
Pros:
Extremely easy to use!
Cons:
A Time Machine backup isn’t bootable.
The backup must be saved on an official Apple Network Destination (TimeCapsule) or Mac OS X Server.
Time Machine deletes backups on a scheduled basis.
The destination volume of your backup must be larger than the boot volume.
Requires Apple specific HFS + file systems to store the backup.
Long wait time for the backup to restore.
How to Recover Data from External Hard Drive on Mac?
While restoring your Mac through an external hard drive backup is feasible and works well to recover files, it doesn’t help if your external hard drive is missing data. This is where you would use a third-party program - iMyFone AnyRecover to recover deleted, missing, or damaged files from your external hard drive prior to using the external hard drive to back your Mac up.
Features of AnyRecover:
It covers all data loss scenarios including those where your external hard drive is involved。
It has a high recovery rate of loss data from external hard drives.
It can recover over 1,000 different file types, including videos, documents, pictures, and media that are all stored on your external hard drive.
If you are working with a Mac certified eternal hard drive, AnyRecover is compatible with it. This also goes for any brand of external hard drive.
No matter what you’ve lost or what type of external hard drive you’ve used, you can get the data back without overwriting existing files.
Here are the steps to restore Mac from an external hard drive with AnyRecover:
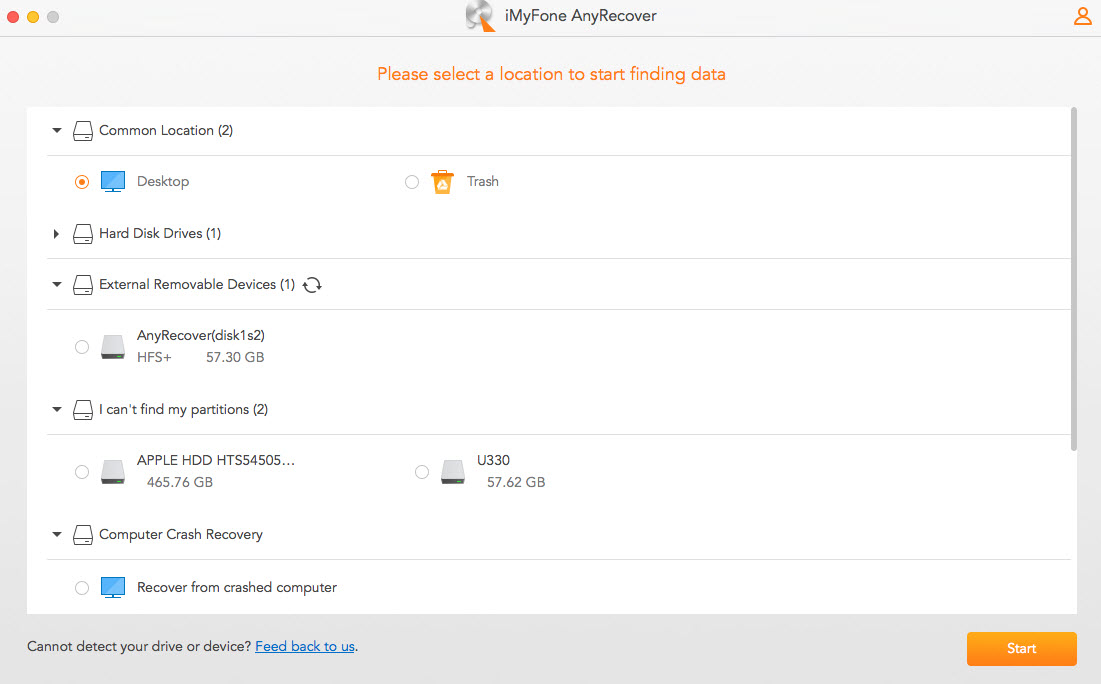
Step 1. Grab your external hard drive and use it’s connecting cable to connect it to your Mac. Launch the AnyRecover Data Recovery program & select the location of the external hard drive where your data has been lost or deleted from. Click Start.
Step 2. Wait while AnyRecover performs an all-around scan and digs deep into your external hard drive disk.
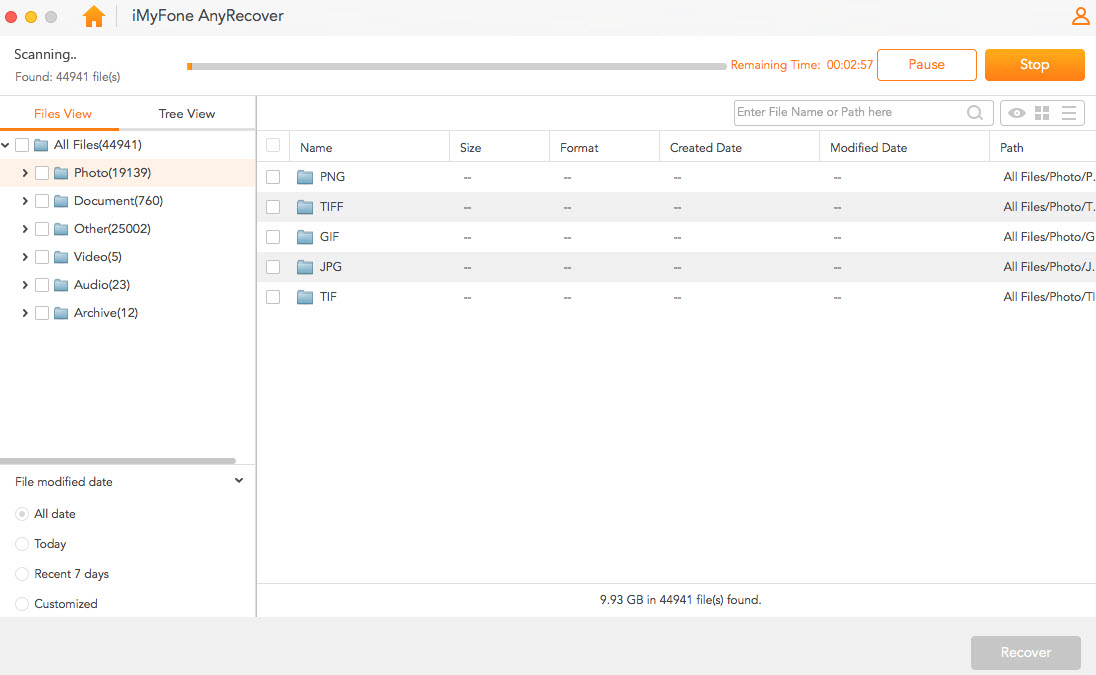
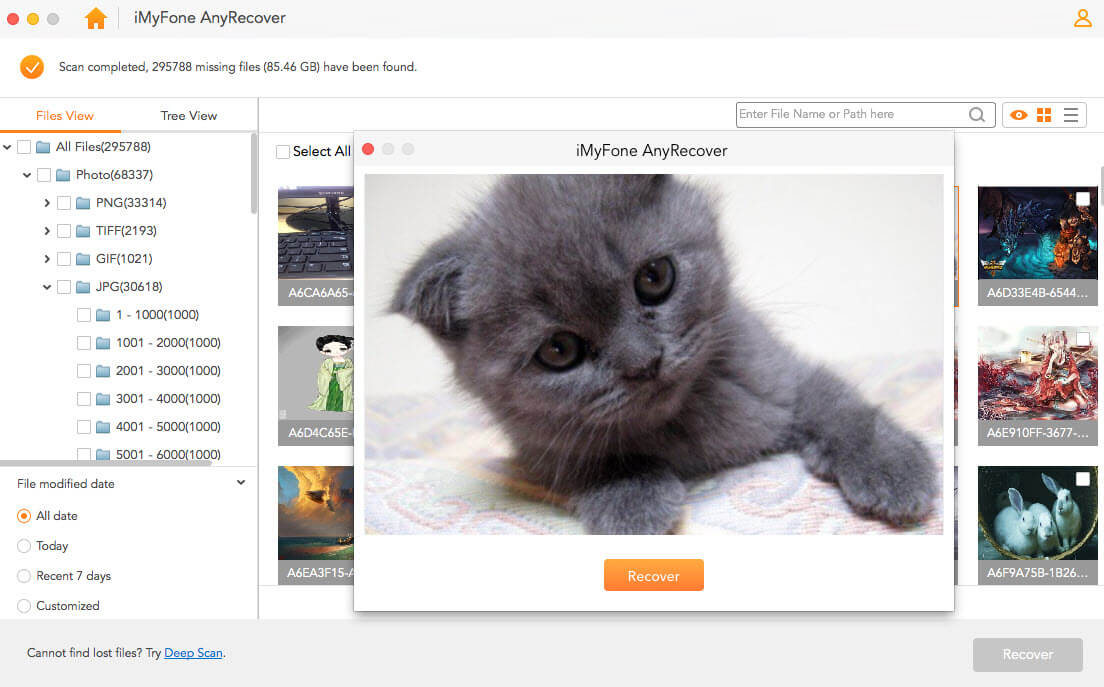
Step 3. After the scan is completed, review the list of files it brings up. Select any file to preview it. Select which files you want to restore and hit the “Recover” button.
Bonus Tip: Backup External Hard Drive Data on Your Mac
You can also use Time Machine to backup external hard drive data.
1. Connecting your external hard drive to your Macbook and open up Time Machine.
2. Once you have Time Machine open, select the backup disk to be your external hard drive and tell Time Machine to use the disk.
3. From this point on, you can use the options menu in Time Machine to set your preferences for how you want it to back up your external hard drive and when to notify you when old backups are deleted.
Related Articles:
Time Limited Offer
for All Products
Not valid with other discount *

 Hard Drive Recovery
 Deleted Files Recovery


