[Solved] How to Fix SD Card Not Showing Up/Readable Mac
SD cards are widely used in everyday life to hold memories such as documents and pictures for lots of people. For Mac owners, you need to understand that the older Mac computers feature an SD card slot, but newer MacBooks require external readers, either way, the SD card should be readable on Mac. Unfortunately, a common problem faced by MacBook or MacBook Pro users is that the SD card not showing up Mac. Have you also encountered the same problem lately? In this article, we are going to analyze this issue and provide solutions to allow the SD card to show up and readable on your Mac again.
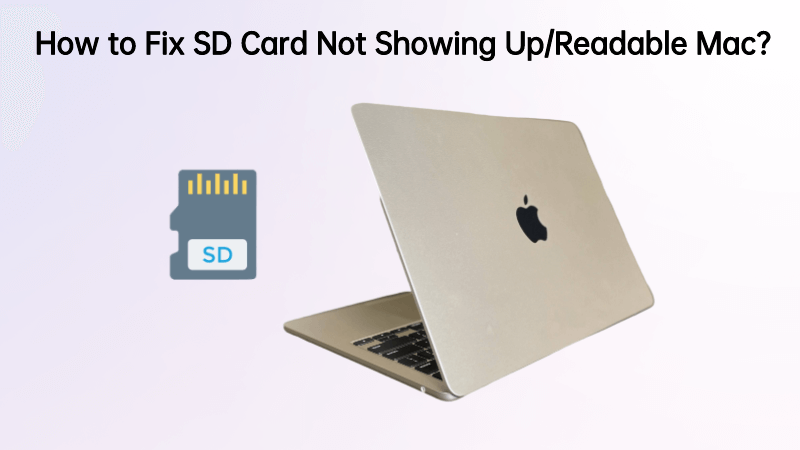
- How to Fix SD Card Not Showing up on Mac? AnyRevoer helps you to fix this problems out in easiest way.
1How to Find SD Card on Mac?
When you insert the SD card into a Mac computer, it may require some time to show up. If you can’t find SD card on the desktop, don’t worry, you can take the following steps to find it elsewhere.
1Show up SD card in Finder
You can make the SD card visible through Finder on your Mac. For this take the following steps:
Open Finder.
Click on the Finder Preferences.
On the top menu, select Sidebar tab and then check External disks under Locations.
Then launch Finder, you can show up the SD card on the Finder sidebar.
2Show up SD card in Disk Dtility
If you can’t show up SD card with Finder, instead try launching Disk Utility by the following steps.
Open Disk Utility.
Click View at the top menu bar.
Select Show All Devices.
Now see if the SD card shows up in Disk Utility.

3Show SD card on the Desktop
By default, the SD card should be visible on your desktop. If not, you can take the following steps.
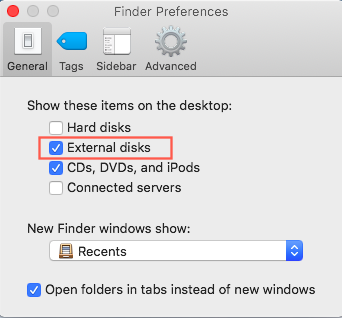
Open the Finder app.
Set your Preferences to show External disks on the desktop under the General tab, which will let you see the SD card on desktop.
If the above processes don’t work for you and the SD card is still not readable, there may be an error, read on to learn what solutions might work instead.
2Why Mac is Not Recognizing SD Card?
If you have taken the steps above and the SD card is not showing up in disk utility, finder or on desktop, it may be due to various reasons. Below are some common ones.
You are using SD card in the wrong way: If you plug in the SD card in the wrong direction, it will not show up and the card slot may even become damaged.
SD card is not in good physical condition:You can check the SD card for errors by going to its properties and do an error-checking section to evaluate the health of the SD card.
Unsupported SD card format: For Mac computers, the SD card should conform to the SD 1.x, 2.x, and 3.x standards and meet specifications of the Mac SD card slot or external reader.
3How to Fix SD Card Not Showing up on Mac?
If you have checked the SD card and found it to be in perfect physical health, yet still not showing up on your MacBook Pro, MacBook Air or any other Mac model, here are effective methods to fix this problem and make your SD card readable.
1Restart your Computer
The simplest solution that may work for you is restarting your computer. This can be done in several ways:
Press the power button and then click on Restart on the dialog box.
Click on the Apple icon and then select Restart.
Simultaneously press Control + Command + Eject to shut it off directly.
After that, try inserting your SD card again, for most people this is successful. But if you restart your computer and still cannot read the SD card, try other methods listed below.
2Mount SD card in Disk Utility
If modifying your preferences still does not make the SD card readable, then you can mount it through the Disk Utility.
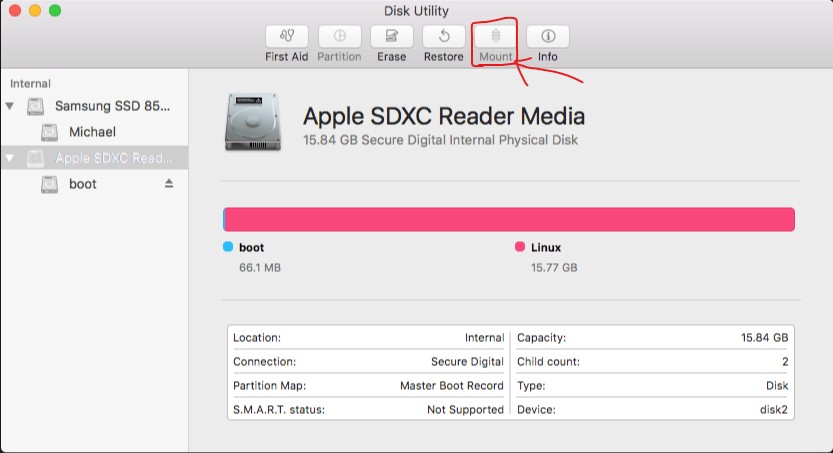
The Disk Utility can be accessed through spotlight by typing it on the search box or using Command + Space.
Select memory card on the left pane, which will then display details on the right side.
On the top, you will find the Mount option. Click on it to mount your SD card.
3Update Drivers on Mac
The problem of SD card not showing up on Mac is also faced by users whose older drivers may be not compatible with latest Mac operating system. A simple fix for this problem is to find the SD Card reader option on the Mac while downloading the most recent drivers to show the SD card on Mac.
4Repair Corrupted SD Card via First Aid
The First Aid check on Disk Utility is carried on when there is suspicion that there are technical difficulties in SD card or any other connected device. To perform a First Aid check, check the following steps:
Launch Disk Utility, then select the SD card option from its left pane.
Click on First Aid.
Disk Utility will perform a check and verify the SD card contents.
You can then click on Repair on the bottom right to repair the SD card if it is damaged.
The Disk Utility also may fail to repair damage on the SD card, for which it will warn you so that you can back up the data on your SD card.
5Format your SD card
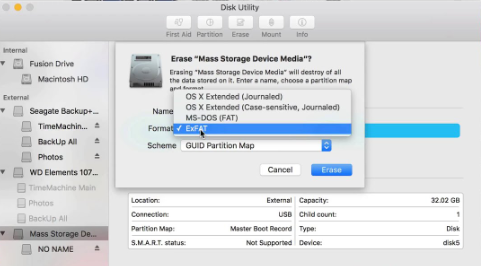
Some SD cards may be so far gone with damage, that the best option is to format them. Do not be dismayed or hesitate from this option because of the potential loss of data. You can still recover the formatted data later which will be addressed ahead. To format your SD card, go once again to the Disk Utility. After selecting Drive, click on the Erase option at the top, which will then provide you with a list of options and the Disk Utility will format the SD card for you.
4Recover Data from SD Card Not Showing Up Mac
After ensuring that the problem was not in your Mac and trying all the other methods, the issue might be that the SD card is corrupted. You need to format the data, but what if you haven’t backed up that data? Here we would like to introduce iMyFone AnyRecover for Mac, a professional Mac data recovery with high recovery rate that is compatible with macOS 10.9 up to macOS 10.15, and ensure 100% security, you can download it for free.
Key Features:
- File Recovery: Recover 1000 files data from SD Card ; recycle bin, formatted disk, external flash drives, etc.
- Preview Function: The software offers a preview function that allows users to preview recoverable data before they make any purchases.
- Support almost all secenarios that you data lost with 100% Secure download and usage
- All-in- one compatibility: Windows&Mac&Android and iPhone operating systems
Here are how to use AnyRecover to restore your data:
Step 1. Download and install AnyRecover to your Windows/Mac computer. Select the location where you lost Documents folder.
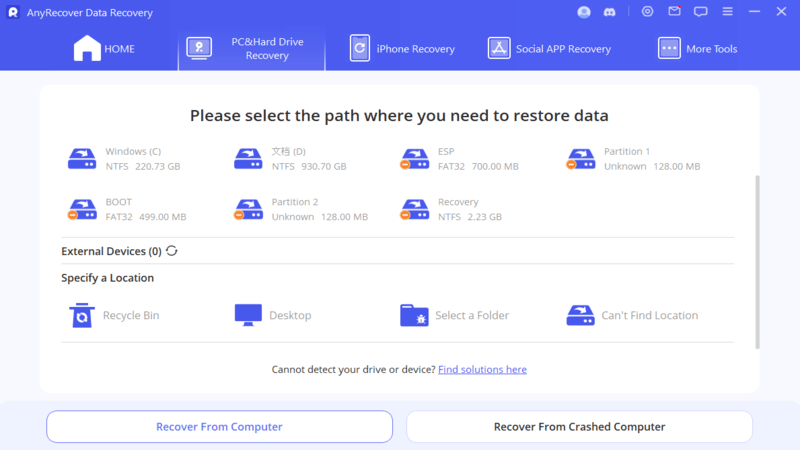
Step 2. After choosing the location, then press "Start"?
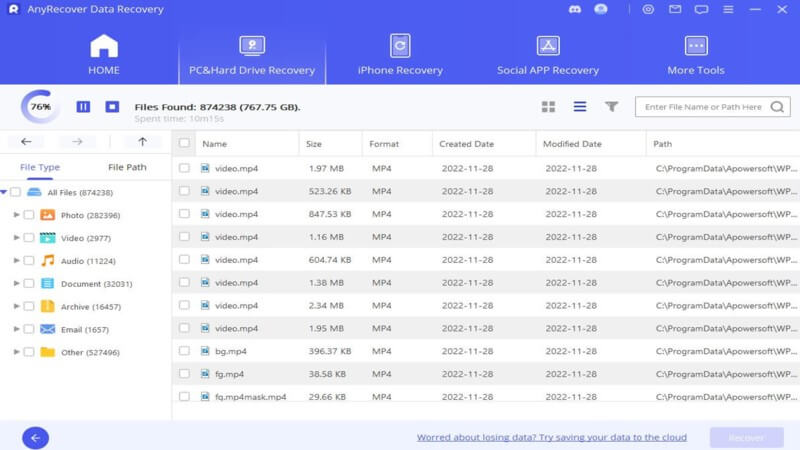
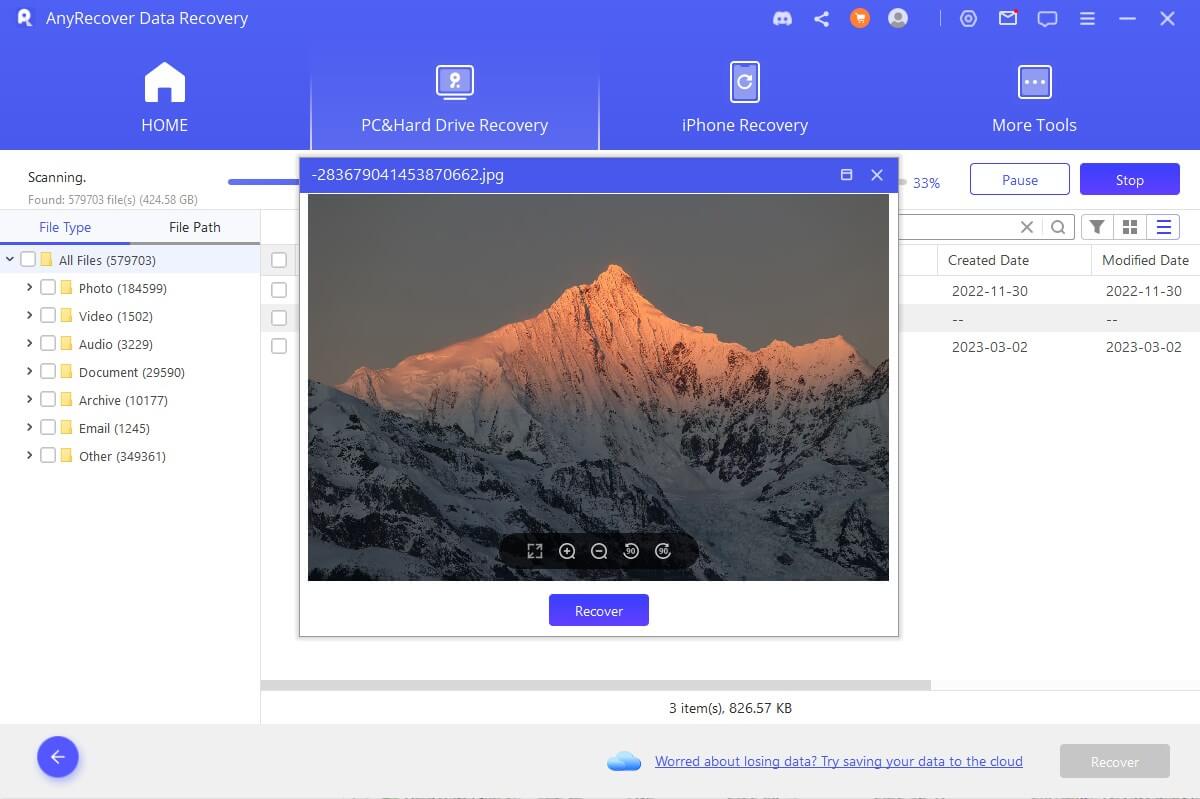
Step 3. When the scanning process completes, preview lost files by double-clicking. Select the files you wish to recover and click "Recover" ?to get them back.
Conclusion:
SD cards are a safe way to store pictures and other data. However, sometimes you may find theSD card not showing up Mac. In that case, just follow the given ways to get your Mac to show the SD card. But if your SD card is the one with problems, iMyFone AnyRecover will help you recover from formatted SD card, so even if you have to format it your information will remain safe and recoverable.Related Articles:
- [2024] Best Way to Recover Deleted Files from SD Card
- 9 Ways to Fix/Recover a Corrupted SD Card
- How to Recover Deleted Files from Formatted SD Card?
- Lexar Recovery | How to Recover Lost Data from Lexar SD Card
- How to Do Corrupted SanDisk SD Card Recovery[Full Guide]
- [Solved] How to Delete Files from SD Card? - 3 Easy Ways
- Top 5 Solutions to Recover Pictures Disappeared from SD Card
- Top 5 SD Card Data Recovery Software Free Download Full Version
- Methods to Recover and Repair Corrupted PSD Files
- How to Recover Deleted Files from SD Card on Mac [100% Work]
- How to Recover Photos/Files From Locked SD Card
- What to Do When Your SD Card is Not Showing Files?
Time Limited Offer
for All Products
Not valid with other discount *

 Hard Drive Recovery
 Deleted Files Recovery

