[2024] Fix "SD Card Showing Wrong Size" Error without Data Loss
The issue of micro SD card showing wrong size is one that shouldn’t be taken for granted in any way. This is because it is a problem that can deprive you of using such SD card in the best way possible. For instance, the files that you can store will be limited to a great extent when this happens.
There is no need to bother though. This is because the major aim of this post is to reveal how to handle any problem related to micro SD card showing wrong size. You will be amazed at how easy this issue can be solved.
Part 1. Why is Micro SD Card Showing Wrong Size
When it comes to a problem such as your memory card showing the wrong size, there are lots of facts that you need to be aware of. Knowing them will help ensure you have an idea about how this problem can be prevented to some extent.
Reasons for This Problem
Your micro SD cad is showing wrong size at the moment due to some reasons. Some of these will be highlighted and briefly explained below:
Expansion Card
This simply implies that your SD card isn’t copyrighted in the first place. It means that an illegal software has been used to boost its capacity. It will be showing large capacity but this isn’t true.
Virus/Malware Infection
This is another problem that can lead to micro SD card showing wrong size. It will begin to show smaller size or capacity once attacked by virus.
Another cause of this problem is when an SD card is wrongly re-partitioned.
Part 2. Fixes to “Micro SD Card Showing Wrong Size” Error
Fix 1: Disk Management
One of the most effective ways of fixing this problem is disk management. Below are the steps for this solution:
Step 1. Get My Computer/This PC > Manage right clicked on.
Step 2. Under Device Manager, Disk management should be selected. Locate SD card and get it right clicked on. Format should then be selected.
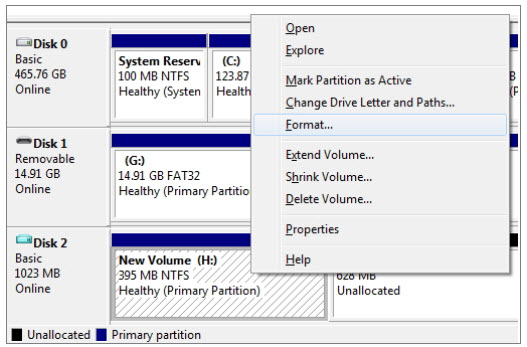
Step 3. Get the SD file system renamed and reset to FAT32 or NTFS. This will make your SD card size come back to normal.
Fix 2: DiskPart Command Line
It is also possible for this issue to be fixed through DiskPart command line. Below are the steps.
Step 1. In the search box, type cmd. You will be given the command prompt that is the best match. Get it right clicked on and then choose Run as administrator.
Step 2. Diskpart should be typed inside the command prompt and then press Enter.
Step 3. In order for every available drive to be listed, type list disk and press Enter.
Step 4. Select disk + disk number should be typed. This will enable you get the particular SD card which is to be formatted selected. After that press Enter.
Step 5. Clean should be typed for the SD card to be cleaned. Now press Enter.
Step 6. Create partition primary should be typed for partition to be created on the SD card which has been cleaned. Now get Enter pressed.
Step 7. Get format fs=exfat or format fs=ntfs typed and press Enter for the drive to be formatted with exFAT or NTFS.
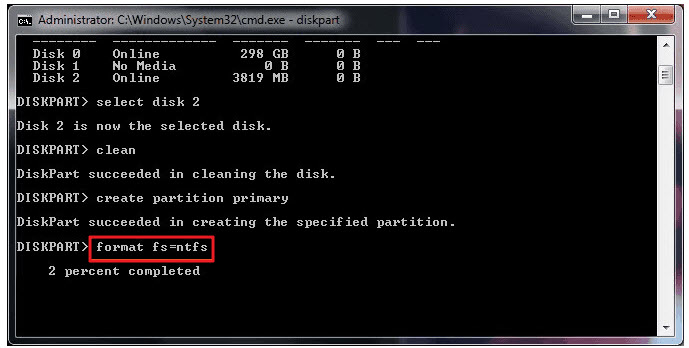
Step 8. Assign letter=drive letter should be typed for drive letter to be assigned. Now press Enter.
Fix 3: Format Micro SD Card to Original Size with SD Formatter
This is another way to correct an issue like Micro SD Card Showing Wrong Size. What is only needed in this method is a software. Follow the steps below for better understanding.
Step 1. Download and install the software.
Step 2. Open the application and get the right drive selected. After that, locate the Format option and click on it.
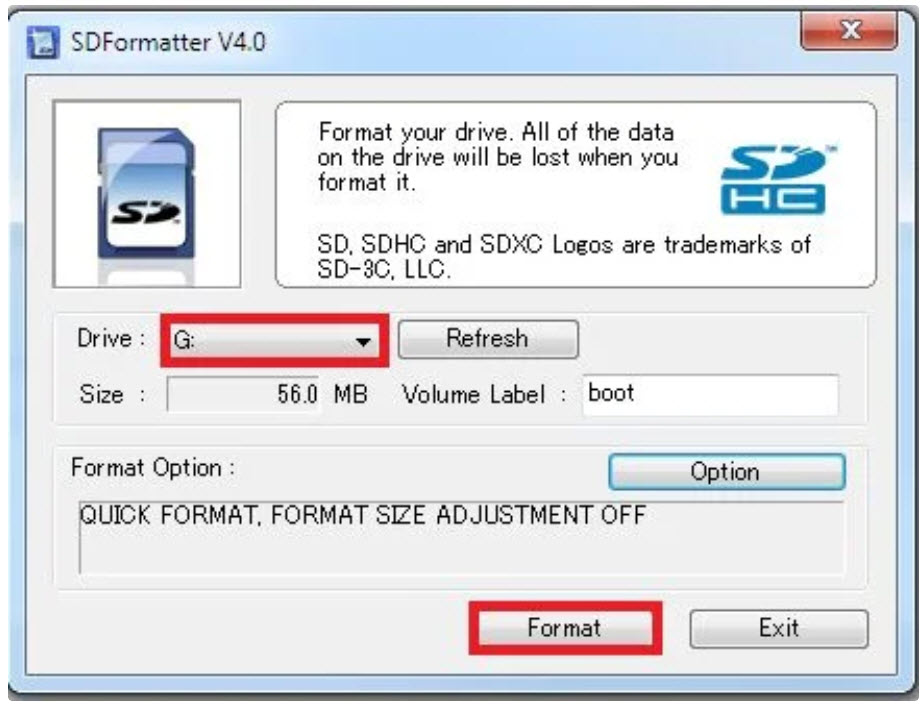
That is it, as your SD card has been formatted successfully.
Part 3. How to Recover Data from Formatted Micro SD Card?
Formatting your SD card will make you lose vital files or data. It can be difficult to get these data back without the use of a powerful tool like AnyRecover. Through this tool, you will not need to rack your brains about how to recover lost files anytime your SD card gets formatted.
One of the reasons why AnyRecover has been very successful amongst its users in recent times is the fact that it makes data recovery process very easy. This couldn’t have been possible without its impressive features. Some of them are:
![]()
2,061,704 Downloads
Features of AnyRecover
-
It supports more than 1000 file types, including images, PDF documents, videos, archives, office documents, emails, etc.
-
It is super easy to use, you can restore the permanently deleted files with AnyRecover in 3 steps.
-
Retrieve permanently deleted files from any device like computer hard drive, external drive, USB flash drive, SD card, SSD, camera, etc.
-
Windows 11/10/8/7/XP and MacOS supported.
Steps to Recover Data from Formatted Micro SD Card with AnyRecover
Step 1. Get AnyRecover tool launched and choose the option which says External Device Recovery.
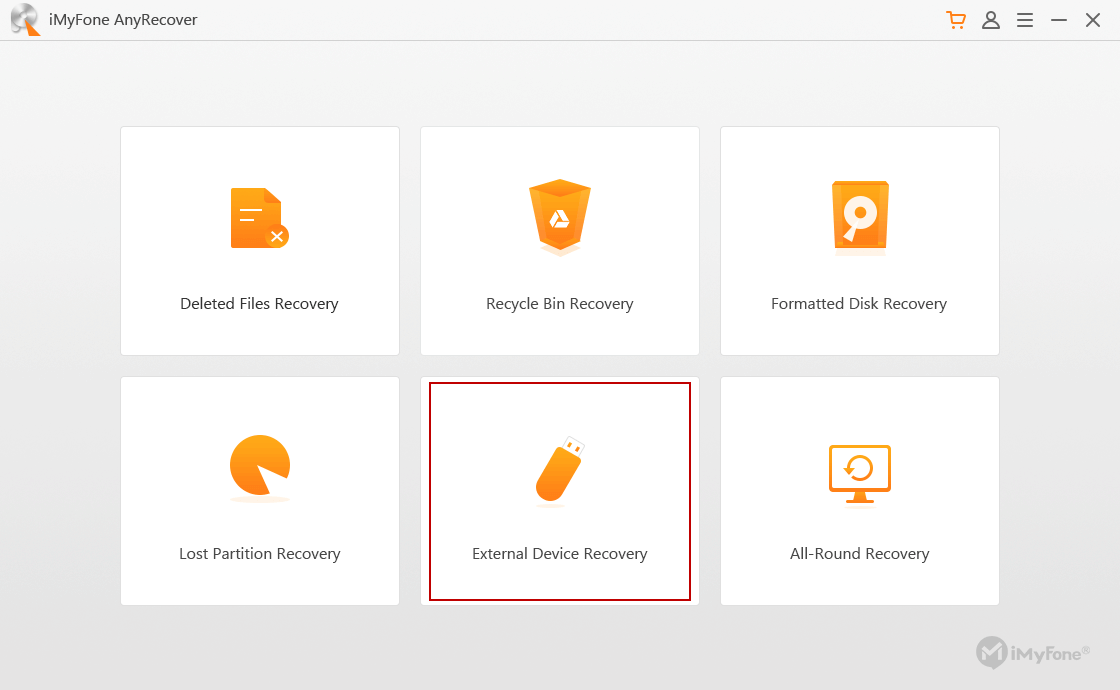
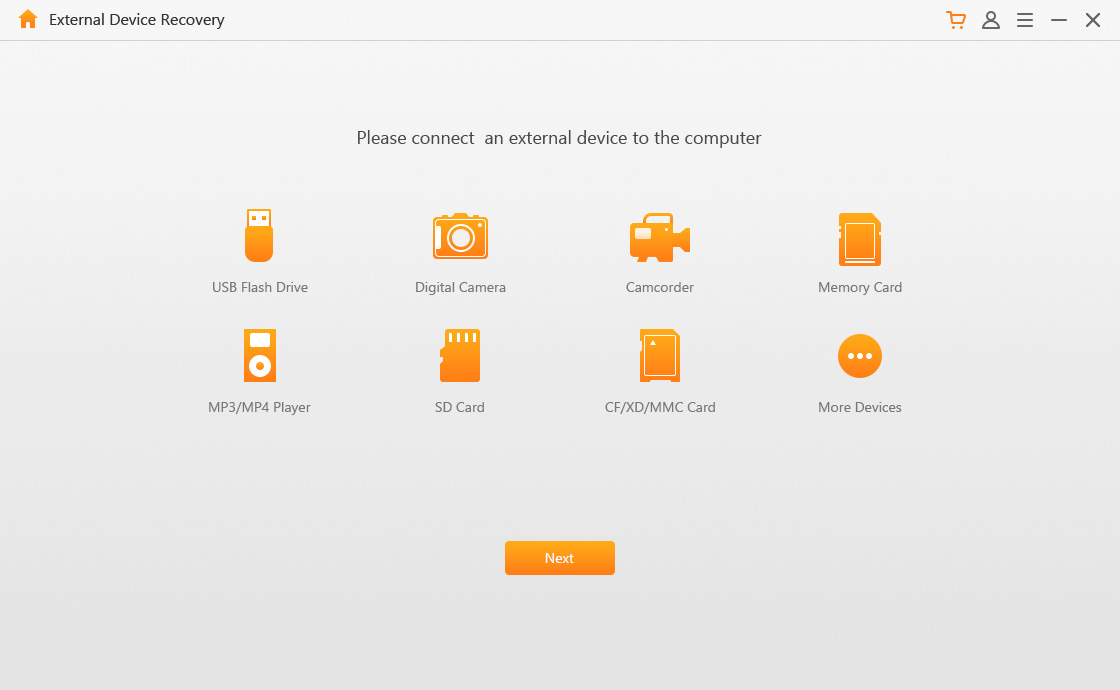
Step 2. Get the external device connected to your system. These could be SD card, memory card, camcorder, digital camera, or others. After that, click on Next.
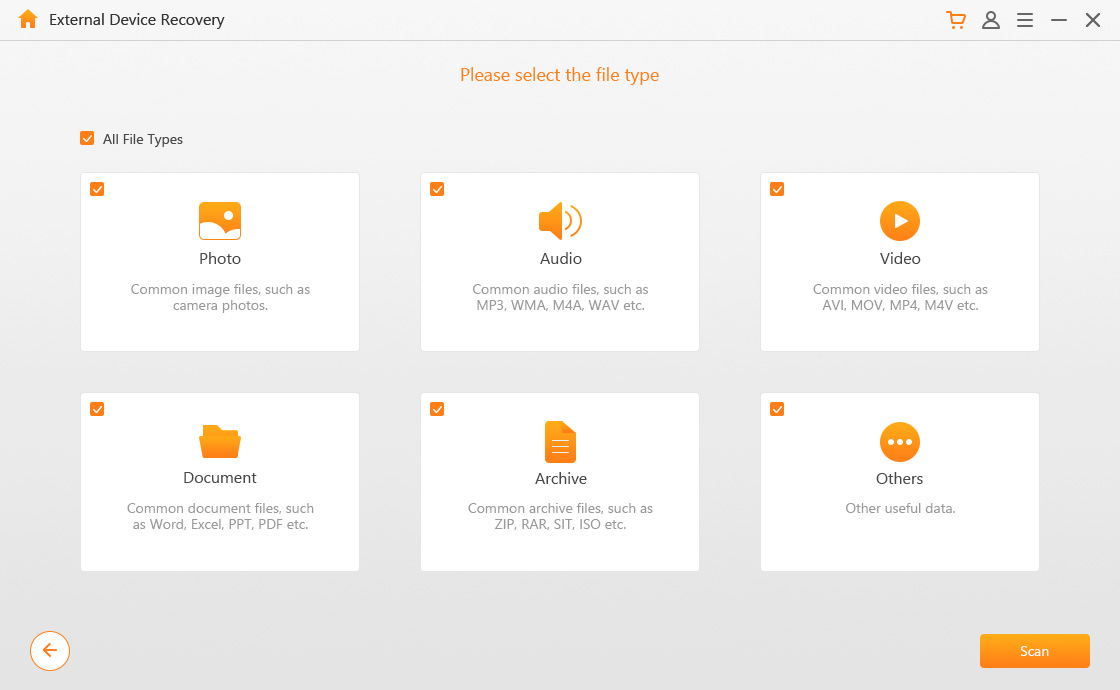
Step 3. Choose the type of file that you want to get back using AnyRecover from your SD Card. It could be files like videos, audios, photos, and more. After choosing the file, click on Scan.
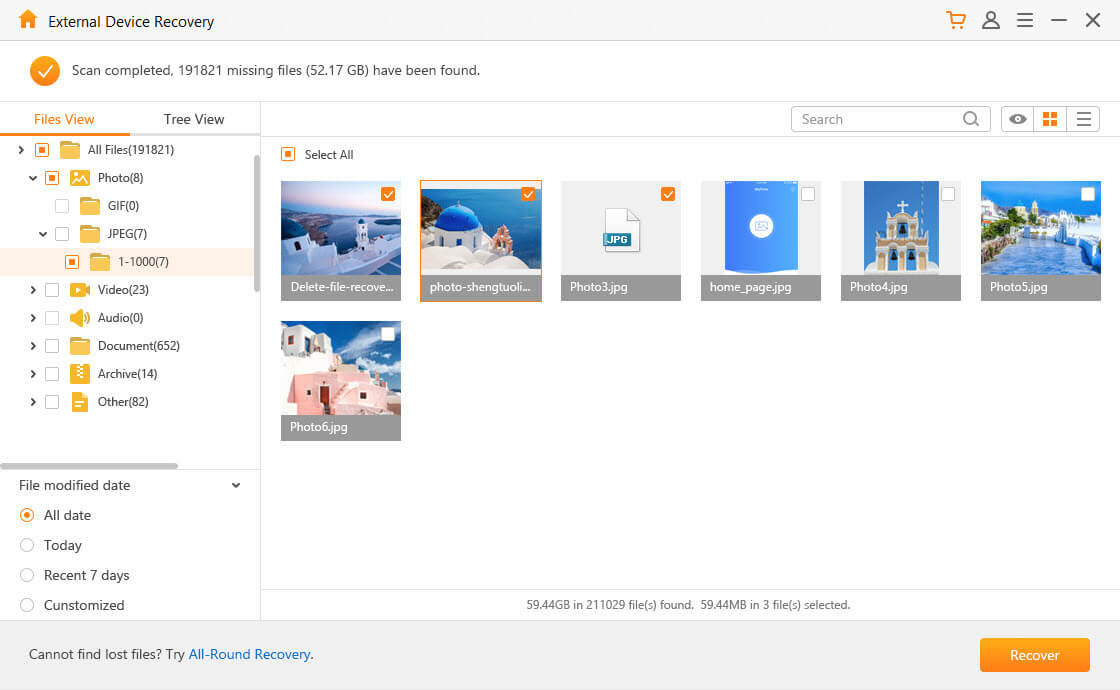
Step 4. Files will be displayed on your screen once the scanning process is complete. You can get them previewed before deciding the ones to recover. After that, click on Recover.
Conclusion
Based on the facts above, it is very obvious that there are certain problems which can be responsible for a problem such as micro SD card showing wrong size. Also, you can see that formatting of SD card can make you lose your files permanently. However, the good part is that such data can be recovered easily and safely using AnyRecover.
Time Limited Offer
for All Products
Not valid with other discount *

 Hard Drive Recovery
 Deleted Files Recovery
