[Easily Solved] How to Format a Write-Protected SD Card?
Have you ever tried to format your SD cardon your PC( Windows, Mac) only to see its write-protected, which means you can't even access the SD card, can't access your files on the SD card, that can be distressing right? Here's your relief, in this article, I'll teach you easy ways you can remove write protection from your SD card and then format it.
Part 1. What Does Write Protection Mean?
Write protection (read-only) is the ability of a storage media such as SD card to prevent new data from being written or changed. This means you can read the information contained in the disk, but cannot delete them or copy files, so you can't format the SD when it's write-protected. When this happens, your SD card becomes useless until you remove the write protection from the SD card.
SD Card Data recovery Software
Recover photos, videos and 1000+ file formats with AnyRecover Software.
Part 2. How to Remove Write Protection from SD Card?
How to format sd card which is write protected? One easy way you can remove write protection from your SD card is to make sure the tiny lock switch on the left side of your SD card is slid up. However, sadly, the SD card could still be write-protected even if it’s not locked. In that case, you can use the following ways to remove the write protection.
Method 1. Check SD Card Properties to Remove Write Protection From SD Card
Go to “This PC”, look for your card reader under “Devices with removable storage”, then right-click it and hit “properties”. There could be an option to remove the write protection, click on the option and try again.
Method 2. Using CMD to Clear Read-Only Attributes from SD Card
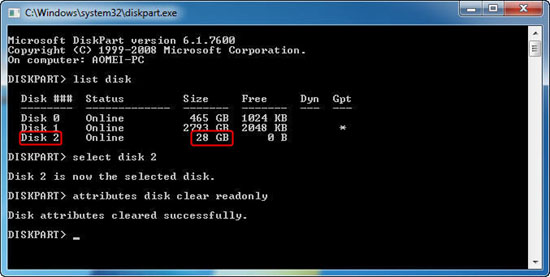
Generally, Windows comes with CMD tools that allow you to check bad sectors on the target drive or create and delete the partition. You can clear read-only attributes using the following steps:
Click on “Start” and type “cmd” in the search box, right-click and select “Run as administrator” to open, then type the following commands and press “Enter” after each:
-
diskpart
-
list disk
-
select disk #
When Disk attributes cleared successfully appear in the window, you can type “exit” and click Enter key. After this, you have removed write protection from SD card successfully.
Method 3. Disable Write Protection with Registry Editor
If the CMD does not work and your SD card still displays “write- protected”, you can also disable the write protection using registry editor using the following steps:
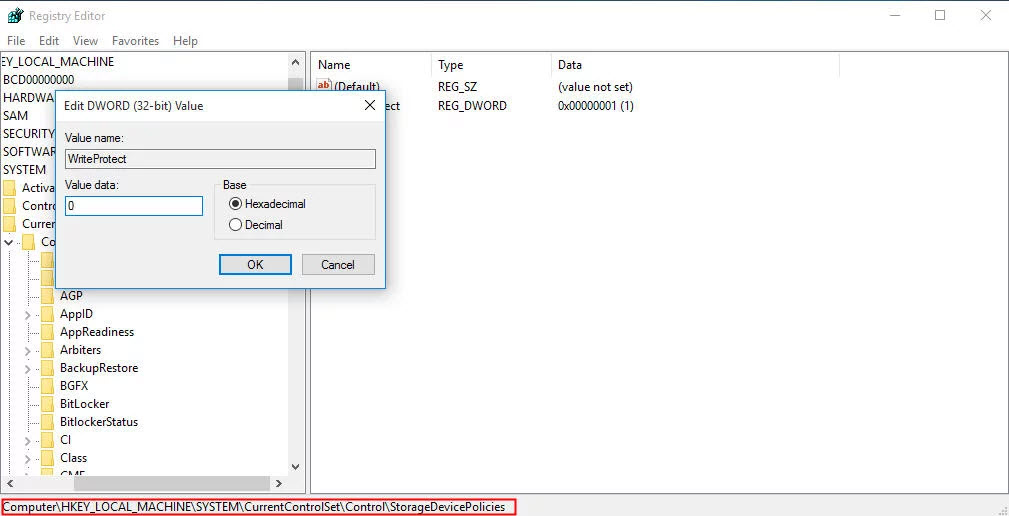
Step 1: Press "Windows key +R" to open the run dialogue. Type " Regedit" and click "OK" to open the registry editor.
Step 2: Expand the entries on the left-hand pane to navigate to the following path.
-
Computer\HKEY_LOCAL_MACHINE
-
\SYSTEM\currentcontrolset\control\storagedevicepolicies
Step 3: Right-click "write protection" and modify the value data from 1 to 0. Then click "OK".
Step 4: Close the "Registry Editor" and restart the PC. Then you have successfully remove the write prtection from SD card.
Part 3. How to Format SD Card after Removing Write Protection?
Many uses may wonder if they can format a write protected SD card. The answer is Yes. Once you’ve unlocked the write-protected SD card, you can use it properly. If you want to format SD card after removing write protection, follow the steps below:
Step 1: Click “Start”, type “Run” in the search bar and hit “Enter”.
Step 2: Now in the run box, type “CMD” and hit "OK."
Step 3: This will open command prompt window, type “diskpart” to run diskpart utility.
Step 4: Next, type “list disk” to locate the drives on your PC.
Step 5: Next, type “disk 1” (where 1 should be the number of your SD card).
Step 6: Next, type “Clean”, this will erase all data on your SD card.
Step 7: Then, you have to create a new partition. Type “create partition primary”.
Step 8: Now type “select partition 1” (where 1 stands for the newly created partition).
Step 9: After this, type "Active" to make the partition active.
Step 10: Finally, type “format fs=ntfs (or format fs=fat32)” to format the partition to the desired file system.
The above method only works for Windows. You can learn how to format SD card on Mac as well.
Bonus: How to Recover Data from Accidentally Formatted SD Card? (Windows 11 Supported)
What if you accidentally formatted your SD card? Here's a great software you can use to recover all your data. This Formatted SD Card Recovery Software - AnyRecover can help you recover any lost data from any storage device quickly. It supports running on Windows 11/10/8/7 and Mac T2, M1, M2. The best part is, you can use it easily even without any special tech knowledge.
Features of iMyFone AnyRecover:
- A professional formatted card recovery software which can unformat the card and get your files back easily.
- Retrieve data lost due to accidental deletion, formatting, virus attack, etc.
- Recovers over 1000 file types including photos, videos, audio files, Microsoft files, Adobe files, etc.
- It is very secure; ensures only you can access recovered files plus it recovers files without overwriting original data.
- Restore all lost/deleted files from the formatted SD card or other memory card types.
Steps to Recover Data from Formatted SD Card with Software:
Step 1. Launch AnyRecover. Connect your SD card to your computer. Choose the SD card where your data is missing under “External Removable Devices" tab.
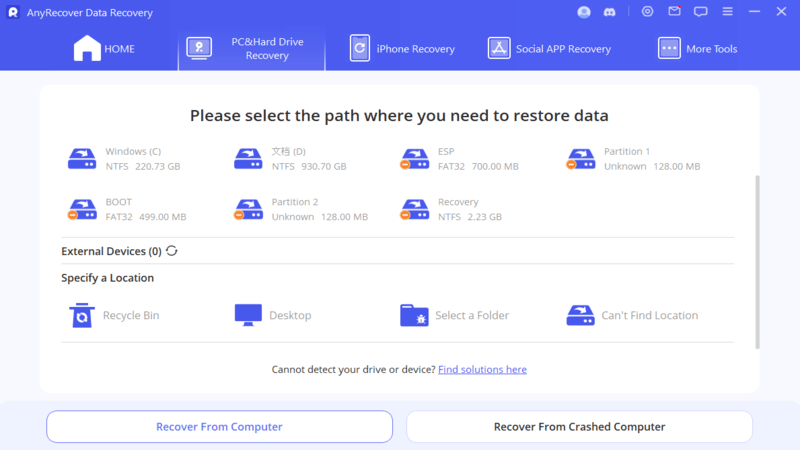
Step 2. After selecting the location, hit “Start” button to start scanning. AnyRecover will begin all-round scanning
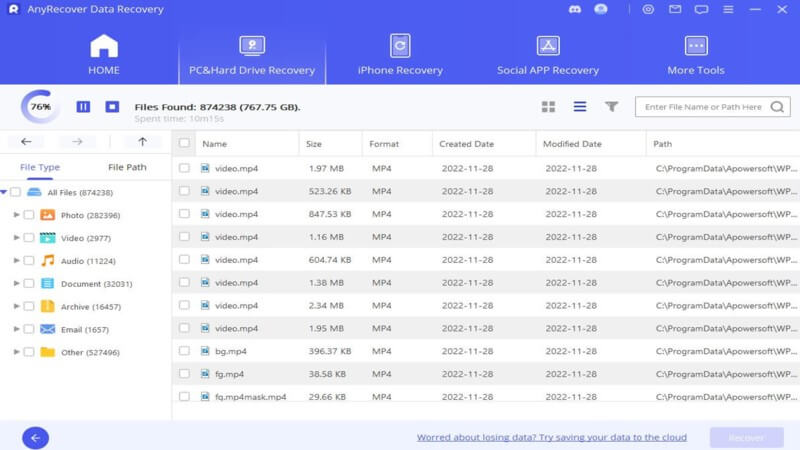
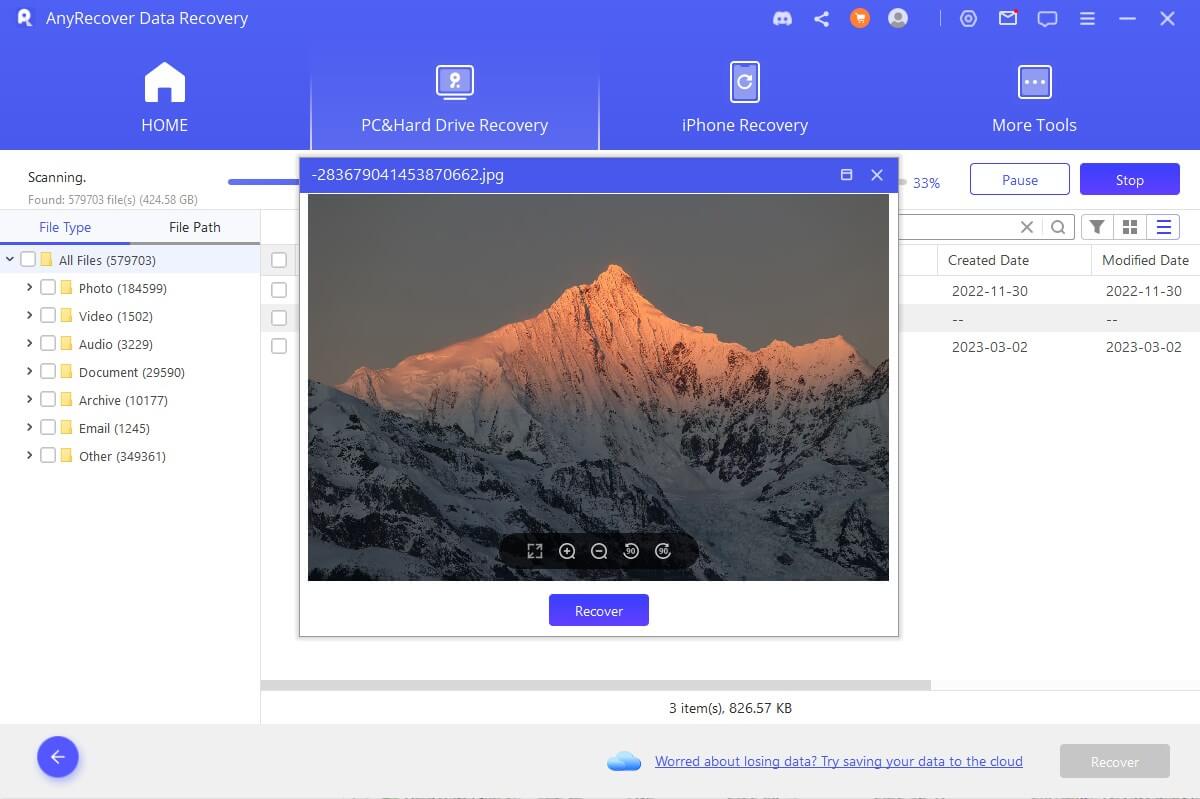
Step 3. Once the scanning is complete, AnyRecover will display all data based on the file type or folder to which the file belongs. You can filter the files you want and select them to preview. Then hit “Recover” to recover your lost data.
Conclusion
By now, you should be able to access or format the write-protected SD Card using the above-stated methods. Moreover, if you've accidentally formatted your SD card on PC (Windows, Mac) , then you can recover all your data using AnyRecover as I mentioned above. So that's it guys, I hope you find this information helpful.
Time Limited Offer
for All Products
Not valid with other discount *

 Hard Drive Recovery
 Deleted Files Recovery

