[Fixed] 'The disk you inserted was not readable by this computer' on Mac
A common issue that usually occurs on Mac OS X and MacOS High Sierra operating systems is that the system does not accept the external drive when it is connected to it. The error message that generally appears is this: "the disk you inserted was not readable by this computer". Fortunately, there are solutions available.
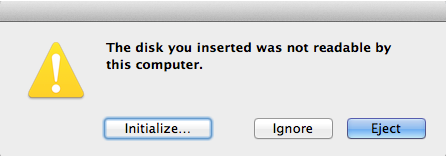
Why "The disk you inserted was not readable by this computer" Happens?
There could be a number of reasons behind the occurrence of this error. Following are some common scenarios that could trigger this issue:
Disk Failure: If the external drive that you are trying to connect has failed, the operating system is likely to show the disk not readable error.
The Disk is Unformatted: If the external drive that you connected to your computer is not formatted, then the chances are high that you will see this error.
WD Software Bug: The issue of drive not being readable might occur with WD hard drives. This generally occurs due to a race condition on 1394 bus that corrupts the table of contents of the VCD.
Verified Solutions for "The disk you inserted was not readable by this computer" Error
1Check if the Drive is Encrypted
If the external drive is encrypted via BitLocker, then it is likely that you will see "The disk you inserted was not readable by this computer" error on your Mac. This is because Mac does not support BitLocker so it will simply show the disk as not readable.
2Check the File System
If your external drive has a file system that is unrecognizable by your Mac, then you will see "The disk you inserted was not readable by this computer" error. This is because the file system of the drive is simply not compatible with Mac. You can check the file system of an external drive via Disk Utility's "Info" section.
3Fix with Disk Utility
If you encounter the drive not readable error, then it is highly recommended that you try to fix it with Disk Utility. This is because several users have reported that they were able to promptly fix the problem via Disk Utility. Follow these instructions:
Step 1. When you see the error message upon connecting the USB drive, click Ignore to dismiss it.
Step 2. Now launch Disk Utility via the Launchpad on your Mac.
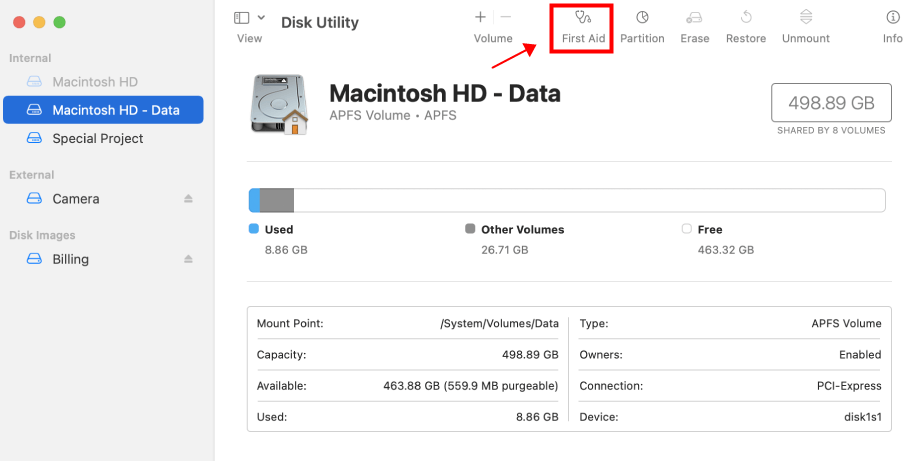
Step 3. Once it is launched, select the USB drive and click on the First Aid button. Now wait for the process to complete. If the repair is successful, the Disk Utility will notify you.
4Initialize the Unreadable Device & Recover Data
If the problem continues, you have no choice but agree to initialize the disk you inserted. Please download and install AnyRecover for Mac because this fix will erase data on the disk.
STEP 1Initialize the Unreadable Device on Mac
Follow these instructions to initialize the unreadable disk:
1. Go to Applications > Utilities > Disk Utility.
2. In the left sidebar, find and select the unreadable external drive.
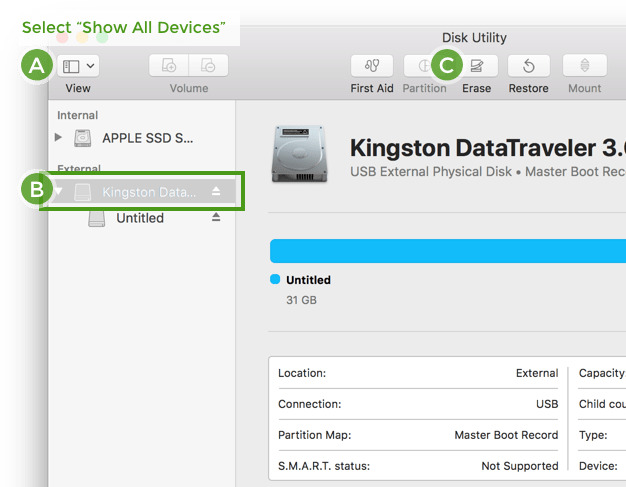
3. Click the Erase tab and input the related info.
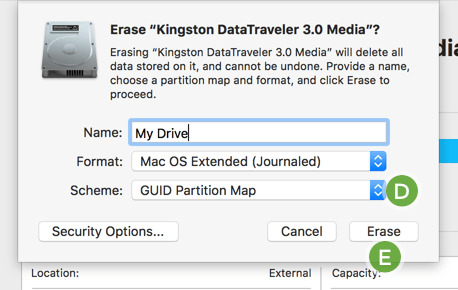
4. Now click on the Erase button to start the Initializing process. Once the formatting process is completed, the unreadable external drive will be initialized and the operating system will read it correctly.
After the formatting process is completed, the device will be readable on Mac now.
STEP 2Recover Data From the Unreadable Device
You won't see "The disk you inserted was not readable by this computer" issue again on your Mac after initializing the unreadable device. But keep in mind that it will erase all the data stored on it. So, it is suggested that you use a professional data recovery tool i.e. iMyFone AnyRecover to recover your important data from it after initializing it.
AnyRecover for Mac is a reliable data recovery tool with a user-friendly interface. You can use this tool to quickly and easily recover your desired data from the external storage device even when it is unreadable.

1,000,000 + Downloads
Features of AnyRecover
Recover all your data from an unreadable external device on your Mac computer.
All types of files are recoverable. Supported file types include photos, videos, music, archives, documents, etc.
All popular file systems are supported, including FAT32, NTFS, FAT16, exFAT, HFS, HFS+, etc.
100% safe data recovery. AnyRecover does not corrupt/damage the existing data on the drive during the data recovery process.
Allows you to preview the recoverable data so that you can restore them selectively.
Recover formatted data on the disk with AnyRecover
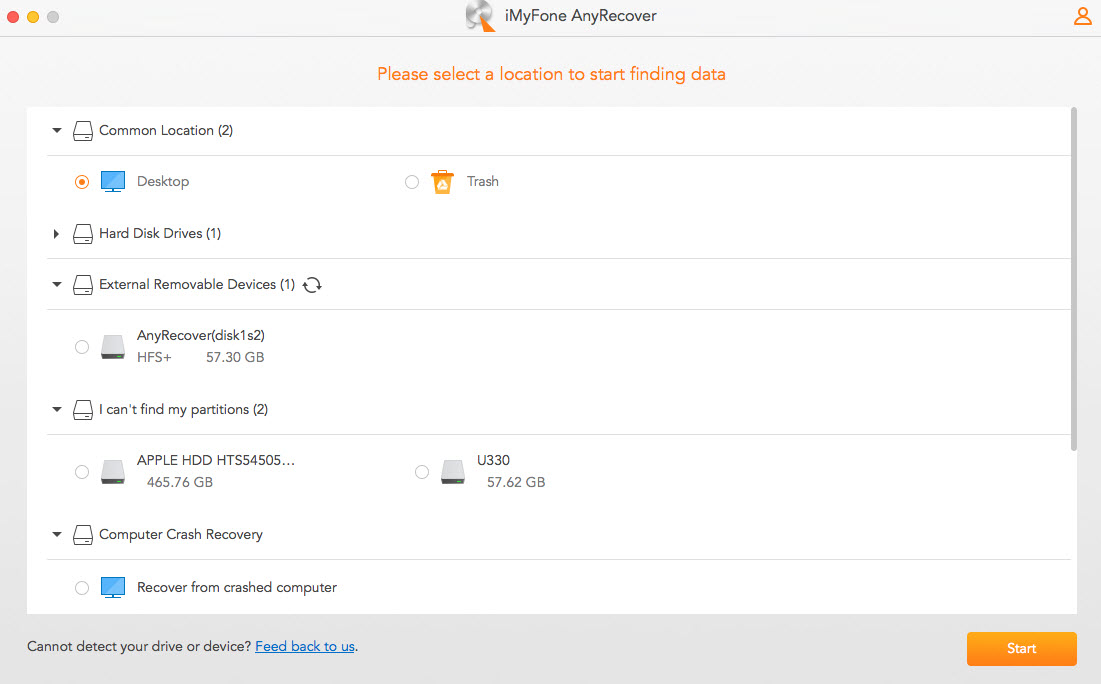
Step 1: Connect your external drive to your Mac and open AnyRecover. And select the formatted disk you are trying to recover from. And press the “Start” button to start the scanning.
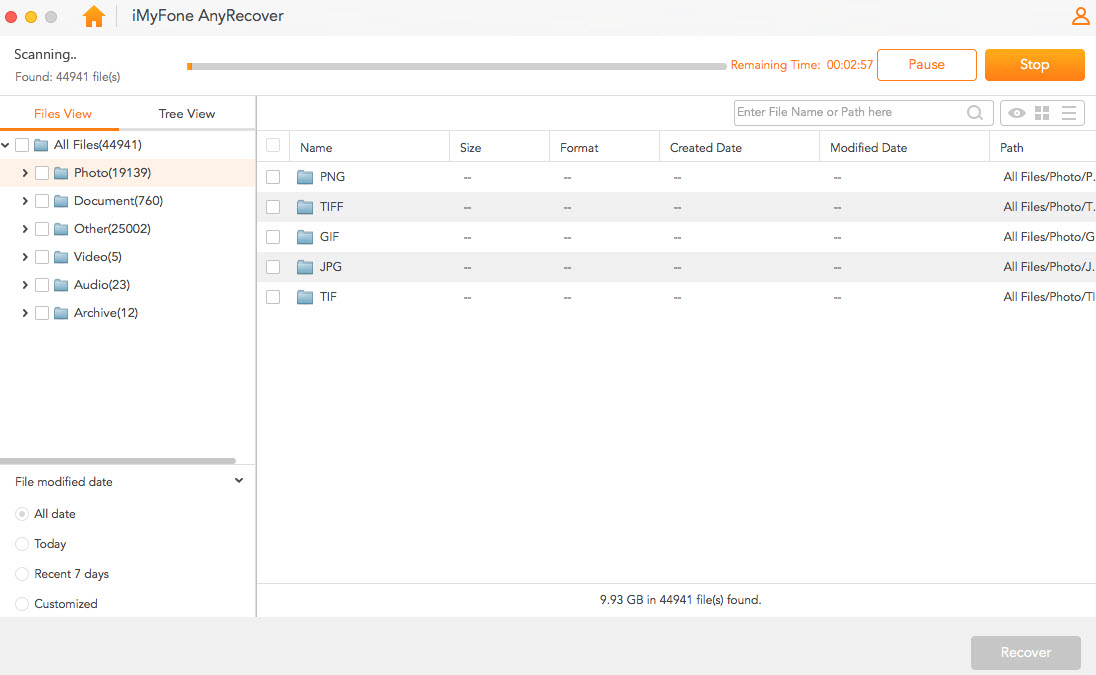
Step 2: The software will automatically begin the scanning process. This can help you recover your lost data from your formatted disk.
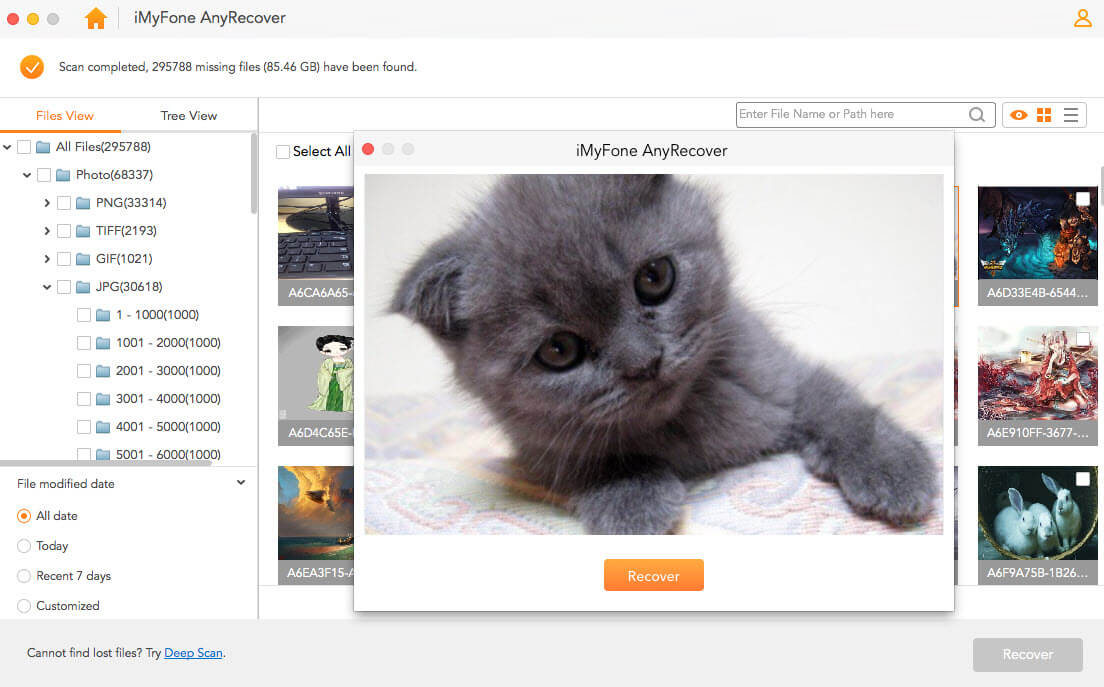
Step 3: Once the scanning is complete, preview and select the desired recoverable files and recover them via the Recover button.
Related Articles:
Time Limited Offer
for All Products
Not valid with other discount *
 Hard Drive Recovery
 Deleted Files Recovery


