- AI Creativity
- Data Recovery
-
Tips
-
 Hard Drive Recovery
-
Photo/Video Restoration
-
 Deleted Files Recovery
- Guide
- Support
- Shop
-
Search
- Store
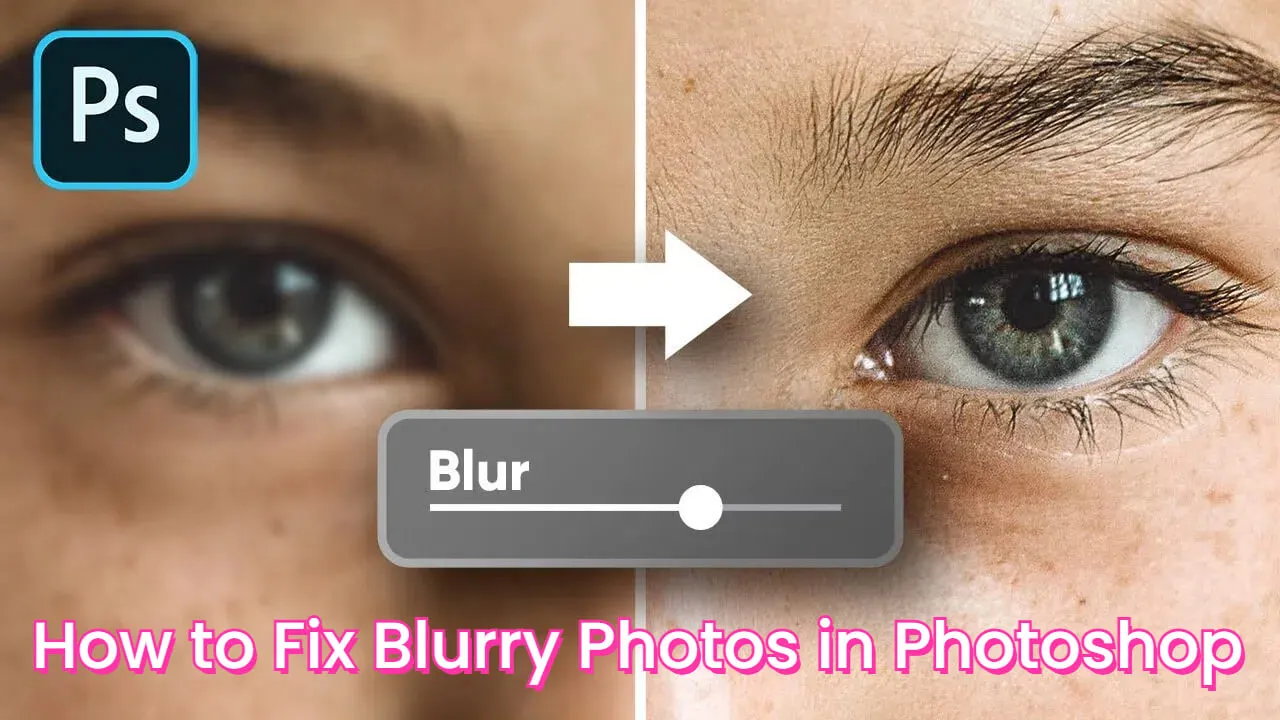
How to Fix Blurry Photos in Photoshop [Step-by-Step Guide]

Luckily, Adobe Photoshop as a powerful photo edit tool offers many solutions to make blurry photos clear again, bringing your blurry images to new life.
In this comprehensive guide, we will explore how to fix blurry photos in Photoshop, equip you with related knowledge about the reasons and prevention of blurry photos, and introduce you to an advanced alternative to Adobe Photoshop, so you can fix blurry photos with just one click.
Part 1. How to Fix Blurry Photos in Photoshop?
Now we've explored the reasons behind blurry photos, let's learn about how to fix blurry photos in Photoshop. Whether you’re dealing with minor softness or severe blurriness, Photoshop offers a range of options to sharpen and clear your images.
1. The Unsharp Mask Filter
One of the most widely used sharpening tools in Photoshop is the Unsharp Mask filter. Though its name seems the opposite of sharpening, this filter is a go-to choice for enhancing the sharpness of your images. Here is how to fix blurry photos in Photoshop use the Unsharp Mask filter:
Step 1. Open your image
Open the blurry image you wish to sharpen in Photoshop.
Step 2. Duplicate the layer
Right-click on the layer in the Layer panel and select "Duplicate Layer". This is to preserve your original image data.
Step 3. Apply the Unsharp Mask Filter
Select the duplicated layer, navigate to the "Filter" menu, then choose "Sharpen" > "Unsharp Mask".

Step 4. Adjust the settings
There will appear the Unsharp Mask dialog box, you can adjust the sharpening effect based on your needs. For instace, you can adjust amount to 150% and adjust threshold to 0.
Here is what each setting does:
Amount: This slider controls the intensity of the sharpening effect. Higher values will increase the sharpness but may also introduce unwanted artifacts or halos.
Radius: The Radius setting determines the size of the area around the edges that will be sharpened. A higher value will sharpen a larger area but may also enhance noise or unwanted details.
Threshold: This setting helps to preserve subtle details by excluding areas with minimal contrast differences from being sharpened.
Step 5. Preview and adjust
Use the preview window to assess the sharpening effect when you adjust the settings. Try different values until you achieve your desired result of sharpening, without introducing excessive artifacts or halos.
Step 6. Finalize and save
Click "OK" to apply the Unsharp Mask filter to your image when you're satisfied. Then you can save your sharpened image or continue with additional adjustments as your needs.
2. The Smart Sharpen Filter
When you need targeted sharpening or when dealing with images with noise or artifacts, the Smart Sharpen filter is especially useful. Here is how to fix blurry photos in Photoshop use the Smart Sharpen filter:
Step 1. Duplicate the layer
As with the Unsharp Mask filter, start by duplicating the layer you wish to sharpen.
Step 2. Convert to a smart object
Right-click on the duplicated layer and select "Convert to Smart Object". This allows for non-destructive editing, ensuring that your original image data remains complete.
Step 3. Apply the Smart Sharpen Filter
Select the Smart Object layer, go to the "Filter" menu, then choose "Sharpen" > "Smart Sharpen".

Step 4. Adjust the Settings
Fine-tune the sharpening effect by adjusting the settings in the Smart Sharpen dialog box:
Amount: This slider controls the intensity of the sharpening effect, similar to the Unsharp Mask filter.
Radius: The Radius setting determines the size of the area around the edges that will be sharpened.
Remove: This setting allows you to remove the blur type you wish to remove, such as Gaussian Blur, Lens Blur, or Motion Blur.
Advanced Options: Clicking on the "Advanced" button reveals additional settings, including Noise Reduction, Shadow and Highlight Adjustments, and Tonal Width control.
Step 5. Preview and adjust
Preview your images to assess the sharpening effect and make adjustments as needed.
Step 6. Finalize and Save
If you're satisfied with the results, click on "OK" to apply the Smart Sharpen filter to your image, and save your sharpened image.
3. The High Pass Filter
The High Pass filter can also help you in sharpening images in Photoshop. This filter works by isolating and enhancing the high-frequency details in your image, to increase sharpness and edge contrast. Here's how to fix blurry photos in Photoshop with the High Pass filter:
Step 1. Duplicate the layer
Still, start by duplicating the layer you want to sharpen.
Step 2. Apply the High Pass Filter
With the duplicated layer selected, navigate to the "Filter" menu, then choose "Other" > "High Pass".

Step 3. Adjust the radius
In the High Pass filter dialog box, adjust the Radius setting. This setting can control the level of detail that will be isolated and sharpened. So you can try different values to find the satisfied balance for your image.
Step 4. Change the blending mode
After applying the High Pass filter, change the blending mode of the filtered layer to one that enhances the sharpening effect, such as Overlay, Soft Light, or Hard Light.
Step 5. Adjust the opacity
When you find the sharpening effect appears too strong or too subtle, adjust the layer opacity to fine-tune the intensity.
Step 6. Finalize and save
If you're satisfied with the results you adjust, flatten the image and merge the layers, then save your sharpened image.
4. Selective Sharpening with the Sharpen Tool
In some specific cases, you may want to selectively sharpen specific areas of your image, such as a subject's eyes or intricate details, rather than applying a global sharpening effect. Photoshop's Sharpen tool offers precise control and allows you to maintain a natural look while enhancing the areas that matter most. Here's how to fix blurry photos in Photoshop use the Sharpen tool:
Step 1. Select the Sharpen Tool
In the Photoshop toolbar, locate and select the Sharpen tool. If it's not visible, you can find it nested under the Blur tool.

Step 2. Set the tool options
In the Options bar, you can adjust various settings for the Sharpen tool, including:
Brush Size: Adjust the size of the brush to control the area you want to sharpen.
Strength: This setting determines the intensity of the sharpening effect.
Sample All Layers: Enable this option to sharpen using data from all visible layers.
Protect Detail: This option helps minimize the introduction of artifacts or halos during sharpening.
Step 3. Selectively Sharpen
With your desired settings, simply paint over the areas of your image that require sharpening. The Sharpen tool will apply the sharpening effect precisely where you brush.
Step 4. Adjust and refine
If needed, you can adjust the tool settings or switch to a different brush size to refine the sharpening effect in specific areas.
Step 5. Finalize and save
Once you're satisfied with the selective sharpening, save your image or continue with additional adjustments as needed.
Part 2. How to Fix Blurry Pictures Online using AI in AIRepair Online?
While Photoshop's built-in sharpening tools are powerful and versatile, a professional AI image enhancer can save you from manually fixing blurry photos one by one. With AIRepair Online Version, the best AI photo enhancer tool, you can repair blurry photos with just one click, even if you're new to image editing tools.

AIRepair Online offers advanced capabilities for restoring clarity and sharpness to even the most challenging blurry images. Just need to import the blurry photos, this tool will fix them with automatic denoising, blur removal, and facial enhancement. It's also very straightforward to use, just needs 3 steps, and you can easily repair blurry photos.
AIRepair – Best Image Enhancer
- Automatically de-noise and remove blurs in your photos, making your blurry photos clear.
- Fix images in any level of broken, allowing you to access the pixelated, greyed-out, and blurry images again.
- Enhance the image quality with AI while repairing corrupted pictures and video files.
- Colorize your old black-and-white photos, making them to be vivid again.
- Easy to use, fix any blurry images with just one click.
How to make a blurry picture clear using AIRepair?
Step 1. Upload Blurry Photo
Click Upload Image to upload the blurry photo you wish to repair.
Step 2. Automatic Sharpen Photo
Once the photo is uploaded, your blurry photo will become clear automatically. You can slide the line in the middle to see the before and after effects.

Step 3. Apply AI Repair Tool
You can also choose other AI tools to enhance your photo. For instance, choose Face Enhance; and you can enhance the facial part in the photo; choose Colorize Photo, and you can colorize the black and white photos;

Part 3. Why My Photos Become Blurry?
After we learn how to fix blurry photos in Photoshop, it's essential to understand the underlying causes that can lead to a lack of sharpness in your images. This can equip you with abilities to prevent your photos from being low quality.
Camera Shake: One of the most common reasons for blurry photos is camera shake. The slightest movement during your taking a photo can result in a blurred image.
Improper Focusing: Another frequent cause of blurriness is improper focusing. Whether due to the user's mistake, not good lightness, or movement of the object, improper focusing can lead to the photo's blurry.
Motion Blur: It can be a big challenge to capture a fast-moving object when your shutter speed is not fast enough to freeze the motion.
Lens Quality and Aberrations: Instead of the reasons for the object, sometimes, a low-quality lens can make the photos to be blurred.
Atmospheric Conditions: Environmental factors can easily be ignored. When there is haze, fog, or heat, the photos you take can be influenced by them when you don't calculate these factors during capturing. These atmospheric conditions can scatter light and reduce contrast, resulting in a softening effect on your photographs.
Part 4. How to Prevent My Photos from Being Blurry?
While Photoshop and AI-powered image enhancer tools offer powerful solutions for fixing blurry photos, the best approach is to prevent blurriness from occurring in the first place. By implementing the following tips and techniques during your photographic process, you can minimize the risk of capturing blurry images and ensure consistently sharp and crisp results.
1. Prevent Camera Shake and Motion Blur
Using a tripod or stabilizer can effectively prevent the camera from shaking. These steady supports can minimize the potential for camera movement during exposure, ensuring sharp and crisp images, even in low-light conditions or when using longer shutter speeds.
2. Increase Shutter Speed
When shooting handheld, increasing your shutter speed can help freeze motion and reduce the chances of blur caused by camera shake or object movement. Generally speaking, aim for a shutter speed that is at least equal to the reciprocal of your lens' focal length (e.g., 1/200 second for a 200mm lens) to minimize the effects of camera shake.
3. Use Image Stabilization
Now many modern lenses and camera bodies have image stabilization technologies, which can help avoid camera shake and blur. When shooting in low-light conditions or with longer focal lengths, enabling image stabilization can significantly improve the sharpness of your images.
4. Utilize Continuous Autofocus
When capturing moving objects, continuous autofocus (AF-C) is a valuable tool for maintaining sharp focus when photographing. This mode can continuously adjust the focus when the object moving, ensuring the images you capture stay sharp and crisp even when capturing fast-paced action.
5. Proper Focusing Techniques
It’s also crucial to master focusing techniques for achieving sharp images. Techniques such as focus-recomposing, back-button focusing, and focus stacking can help ensure precise focus on your desired object or area of interest, minimizing the risk of blurriness caused by improper focusing.
6. Shoot in RAW Format
Capturing your images in RAW format can provide more flexibility and control during post-processing, including the ability to apply sharpening adjustments more effectively. RAW files contain more image data and allow for non-destructive editing, enabling you to fine-tune sharpness without compromising image quality.
Best Photo Repair Tool - AIRepair
If you want to repair corrupted files, you can download the AIRepair application on your device. This app is compatible with Windows and Mac and supports fixing various files, including photos, videos, audio, and other files, making your broken files accessible again.
Part 5. FAQs about Blurry Photos
Q1. How can I fix a blurry image?
To fix a blurry image in Photoshop, you can use various sharpening tools and techniques, such as the Unsharp Mask filter, Smart Sharpen filter, High Pass filter, or the Sharpen tool for selective sharpening.
Additionally, you can leverage AI-powered tools like AIRepair to tackle bad blurriness or motion blur that may be challenging to address using traditional methods.
Q2. How to improve image quality in Photoshop?
Improving image quality in Photoshop involves several steps, including sharpening, noise reduction, adjusting contrast and exposure, and color correction. Techniques like using the Unsharp Mask or Smart Sharpen filters can enhance sharpness, while tools like the Camera Raw filter and adjustment layers can help optimize exposure, contrast, and color balance.
Q3. What is the alternative to Photoshop to fix blurry photos?
While Photoshop is a powerful tool for fixing blurry photos, there are several alternatives available. One notable option is AIRepair, an AI-driven photo repair tool that offers advanced sharpening and deblurring capabilities. Alternatives like AIRepair leverage the power of artificial intelligence to deliver exceptional sharpening and deblurring results, often surpassing the capabilities of traditional software.
Conclusion
When you ask how to fix blurry photos in Photoshop, there are many tools in Photoshop to help users achieve it. From versatile Unsharp Mask and Smart Sharpen filters to the precision of the Sharpen tool, you now have a range of solutions.
Additionally, professional AI-powered photo repair tool like AIRepair Online can save you time from manually fixing blurry images. With AIRepair, you can repair any broken photo and video files with just one click, including the blurry photos.
Related Articles:
- Best Way to Recover Deleted Files from External Hard Drive
- How to Create and Delete EFI System Partition in Windows 11/10/8/7
- 4 Tested Solutions to "Windows can't access the disk" Issue
- Top 5 SD Card Data Recovery Software Free Download Full Version
- How to Deal With Current Pending Sector Count Caution?
- Can't Open Downloads Folder in Windows 10? 5 Ways to Fix it
- Top 6 Free Download Hard Drive Recovery Software
- Top Free Data Recovery Software for Windows 10 – Fast and Secure
- How to Fix Error code 0x80004005 in Windows 10/11?
- How to Fix BSOD PFN_LIST_CORRUPT in Windows 10/11 [12 Solutions]
- Top 4 Best YouTube to WAV Converters in 2025
- Fix Hard Drive not Showing Up in Disk Managemnet
Rated successfully!
You have already rated this article, please do not repeat scoring!
![]()
![]()
![]()
![]()
![]()
![]()
![]()
![]()
![]()
![]()
![]()
![]()
Copyright © 2025 AnyRecover. All rights reserved.
Time Limited Offer
for All Products
Not valid with other discount *