Mac Keeps Crashing? This Is Why and How to Fix It!
We all know how annoying it is when our Mac computers keeps crashing, most notably when it happens during activities we haven’t saved properly. Many factors could cause iMac/Macbook keeps crashing. Still, there are efficient ways to avoid it beforehand as well as fix it afterwards. In this article, we’ll offer everything you need to know regarding solving the Mac keeps crashing issue.
 Problem
"Hi everyone, I desperately need your help. Can you tell me why does my Mac keep crashing? For the fourth time in 24 hours, my Mac is displaying the message 'Your computer was restarted because of a problem' massage. What can I do to prevent my MacBook Pro from dying? Thanks!"
Part 1. Why Does My Mac Keep Crashing?
Although built with considerable durability, Mac computer sometimes succumbs to one issue or the other, which might vary formuser to user. While a common problem shared by a large number of users is that their Mac keeps crashing, aka "Kernel Panic".
Occasional crash happening once or twicemay be considered normal, but if your Mac keeps on crashing frequently, then you should put enough emphasis on it. Like what you do with every other computer problems,the first step to take is figuring out the reason when facing iMac/Macbook keeps crashing.

Below are some possible reasons why your MacBook air keeps crashing:
Inadequate amount of system memory for applications to run on.
CPU drained due to resource-intensive applications, i.e., applications that require a lot of resources from the CPU.
Presence of software bugs and many incompatibilities.
Competition for simultaneous disk access between applications which demand much disk space at the same time.
Incompatibility between the current macOS version and the device.
Low storage space on the startup disc.
Part 2: Troubleshoot: Mac Computer Keeps Crashing
After the searching process for why MacBook air crashing constantly happens, the next step is undoubtedly troubleshooting and fixing it. There are several common methods which are proved effective listed below. Check and see if they work for you as well.
Experts insist that, before getting down to fix issues that Mac keeps crashing, you should try to retrieve your data stored in the device first for fear that data loss disaster might happen.
1System Restore
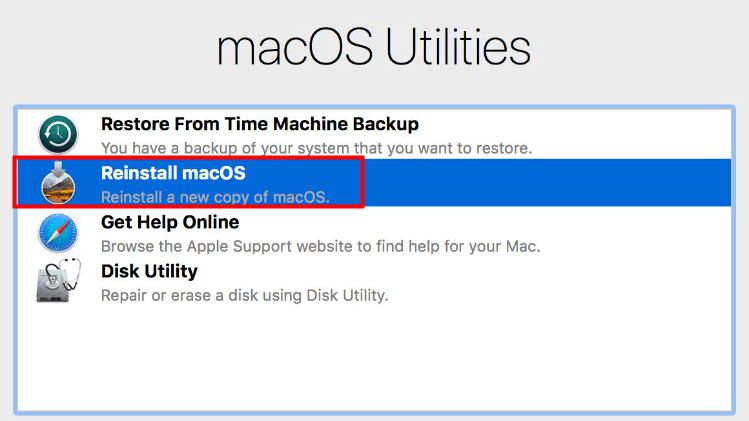
It is often the last resolve, and you should consider this only if you've exhausted every other method. System Restore simply involves "Reinstalling your MacOS".
Step 1: Before you commence, you should backup all your essential files to a hard drive or cloud service.
(You could reinstall your macOS with an installation disk or follow the steps below).
Step 2: Restart Mac while holding down the Command+Run keys to boot into Recovery Mode.
Step 3: While in the Recovery Mode, go to macOS Utility, then click "Reinstall macOS", followed by "Continue".
Here, install the applications you'll need. Apps that read core Duo CPU state are not required.
Step 4: Follow all on-screen instructions stipulated then click "Install".
More often than not, this will fix the "my mac keeps crashing" complaint.
2Reset the SMC to Fix Crashing Mac
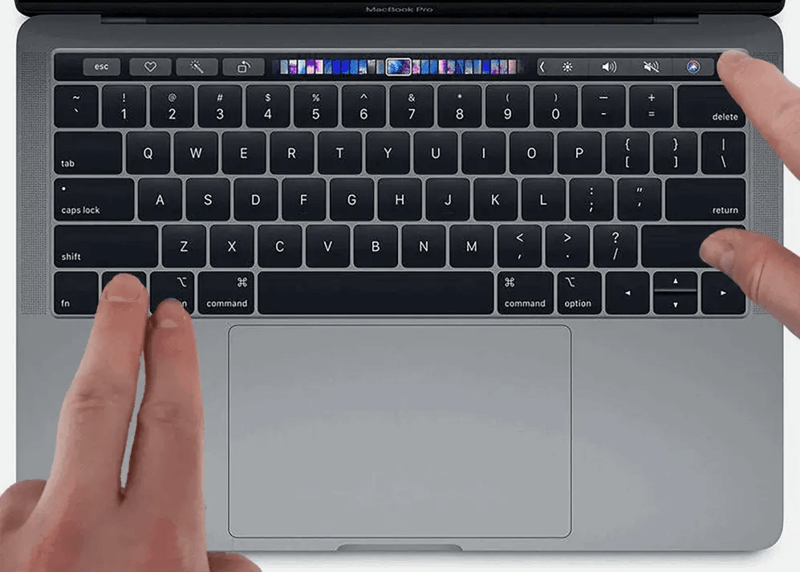
As the System Memory Controller (SMC) takes charge of all sorts of things in Mac in the "backstage", resetting it might work to fix the Mac keeps crashing problem.
For MacBook without a T2 Security Chip, shut it down, then press Shift+Ctrl+Opt and the power button at the same time. Hold these keys altogether for 10 seconds, then release. Next press the power button to switch on your Mac.
For Mac desktop without a T2 chip (such as an iMac), turn the device off, unplug the power cord and wait for 15 seconds. Then plug it back in and turn on your Mac.
For both MacBook and desktop Mac with T2 chips, turn off the device and press and hold the power button for 10 seconds. Then release the button, wait a few seconds, and press it again to turn on the Mac.
3Run Apple Diagnostic
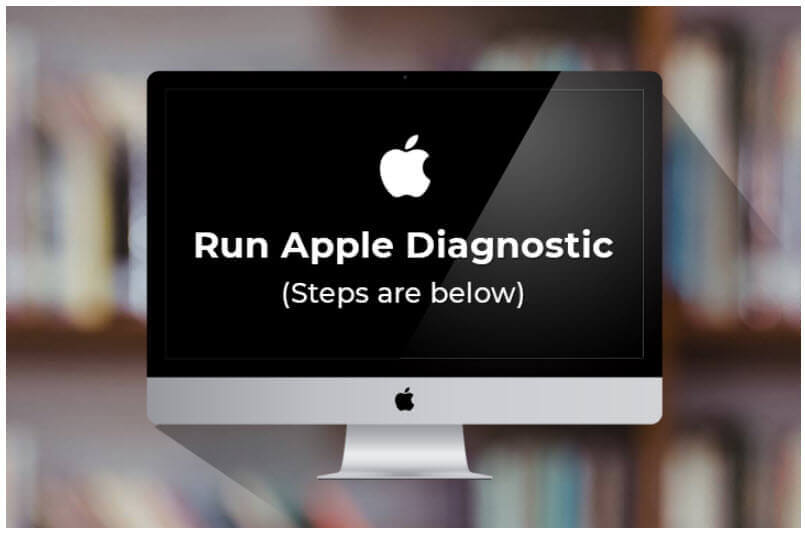
Step 1: Unplug all external devices, excluding the display, mouse, keyboard, Internet connection, and AC power connection.
Step 2: Restart your Mac computer and quickly hold down the D key until the Apple Diagnostic screen shows.
(If the Diagnostic tool doesn’t appear, hold down Option + D during restart to launch diagnostic via the Iinternet or turn off your device’s firmware password then try again).
Step 3: You'll see a progress bar to check your mac. This shows after Apple Diagnostic recognizes your language choice. This operation should take about three minutes.
Step 4: If your device has an issue, Apple Diagnostic tool displays it, suggests remedies, and gives reference codes. Restart your Mac after this or carry out other operations.
4Boot into Safe Mode
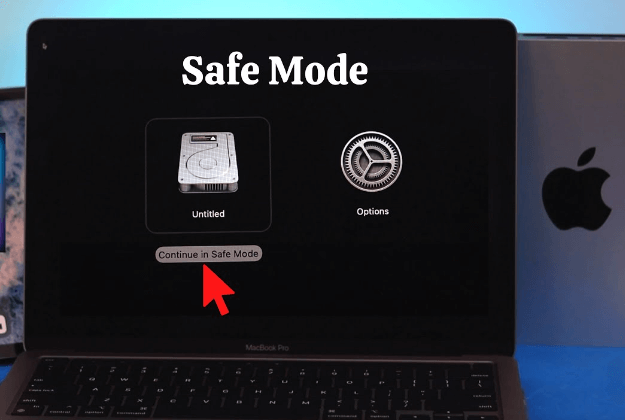
After upgrading your Mac to the latest Mojave or Catalina, the chances are that it will freeze or slow down. Restarting your Mac in safe mode is a common fix. Safe mode loads necessary kernel extensions only verify startup disk and repair directory issues.
Step 1: Restart your Mac and immediately hold down the Shift key until the login window appears.
Step 2: Your Mac is now in Safe Mode. To confirm, open Mac's spotlight and type in "System Information". Next, click the "Software" section to verify your boot mode as Safe, not Normal.
Step 3: If you observe no issue while in safe mode, restart your machine without pressing any key.
Step 4: If the issue comes back in normal mode, your Mac's "login items" may be incompatible with your current MacOS version.
- If your machine doesn't boot into safe mode, there's insufficient space on your startup disk.
5Use Disk Utility to Fix the Issue
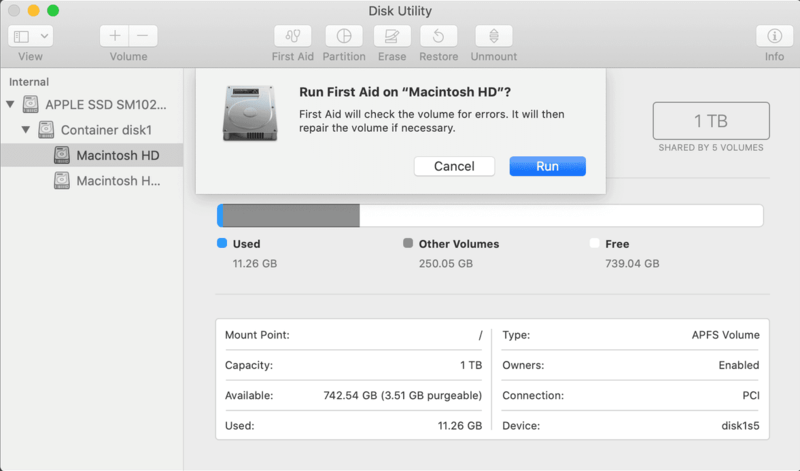
Apple Disk Utility First Aid is a possible fix to repair and confirm your logical disk and startup. To fix the crashing issues, follow these instructions.
Step 1: Restart your Mac computer while holding down Command + R keys till you hear a chime. This successfully boots your machine in Recovery mode.
Step 2: While in Recovery Mode, launch Apple's Disk Utility app.
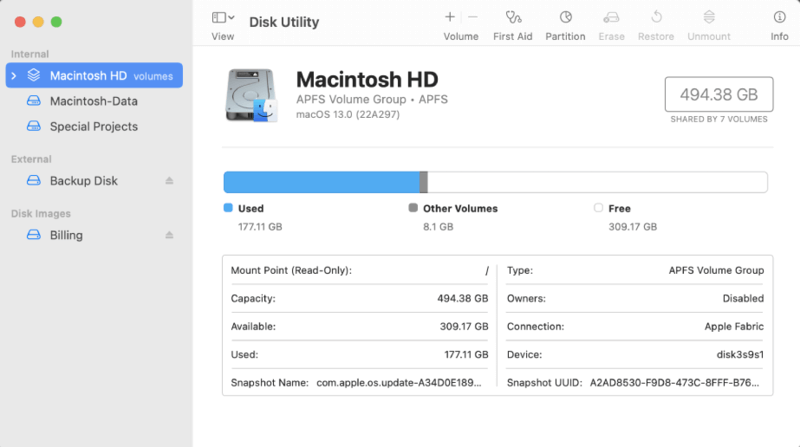
Step 3: Select your startup disk then click First Aid > Run Disk Utility then repairs your Mac and that should fix the crashing problems.
6NVRAM Reset
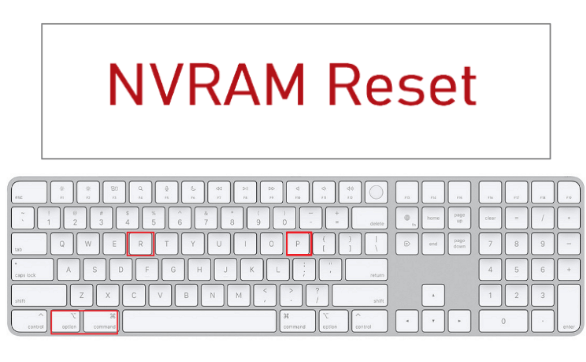
Mac's NVRAM can be reset to help resolve crash issues as well in some ways.
To do this, restart Mac, then press and hold "Command+Option+P+R" on your keyboard after hearing the start-up chime. Release the four keys after you hear the startup chime for the second time.
If the firmware password is turned on, you need to turn it off for the reset to take effect.
7How to Recover Data from a Crashed Mac?
MacBook frequently crashing often leads to file loss. You may lose your important data or unsaved files when your Mac experiences a crash. To make matters worse, many people can't boot up their Mac after it crashes multiple times.
But, don't worry! AnyRecover is data recovery tool powerful enough to help everyone recover lost data from any storage device in three easy steps. With its advanced Mac Data Recovery algorithm, there is no need to be terrified of any data loss issues any more. Before starting to get the crash issue solved, it is the best to recover all the data from the crashed Mac using AnyRecover to ensure the safety of your valuable data.
AnyRecover key features include:
- All-in-one data recovery tool to retrieve lost data from Mac/Windows, iPhone/Android, SD card, hard drive and more.
- Recover deleted or unsaved files in case of data loss caused by crashed or corrupted macOS.
- Recover data from empty trash, formatted hard drive, crashed operating system, infected Mac and more.
- Super user-friendly interface for no tech-savvy.
To successfully retrieve data from the crashed Mac, you need to firstly create a bootable drive to restart the crashed computer. The procedure requires another working Mac and a blank USB drive. Once you're prepared, follow the steps below to create a bootable USB drive:
Creating a Bootable USB Drive
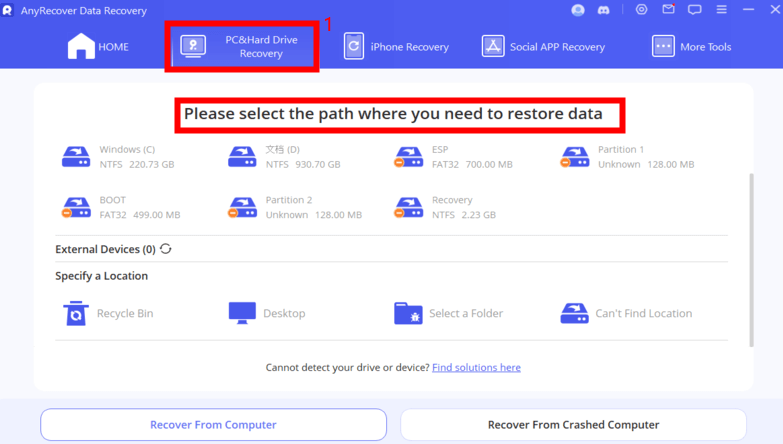
Step 1: Download and install AnyRecover software on your another working Mac, then run the program. Choose "Recover from crashed computer", then click "Start".
Step 2: Select a drive you like from the list and click "Create".
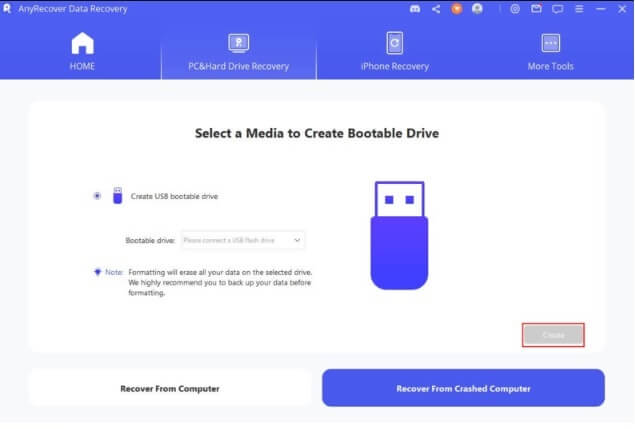
Step 3: A message will pop out alerting you that the process will format your USB drive. If you've backed up important files, click "Format" to go on.
Step 4: When the format completes, it will begin to create the bootable USB drive. Once done, you can officially begin the scan and recovery process.
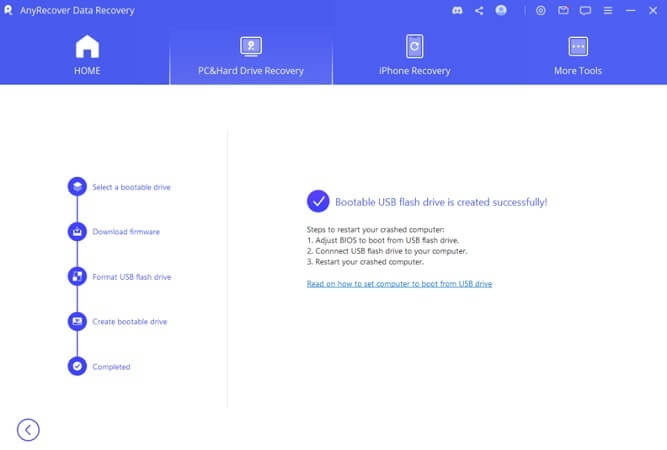
Recover Data From a Crashed Mac With AnyRecover
Step 1: Adjust BIOS to boot from USB flash drive or CD/DVD and connect the bootable drive just created. Select a location where you lost data or want to recover data. Next, click on Start to begin the scan.

Step 2: The program then carries out an all-round scan on the disk you selected and shows every lost file or folder.
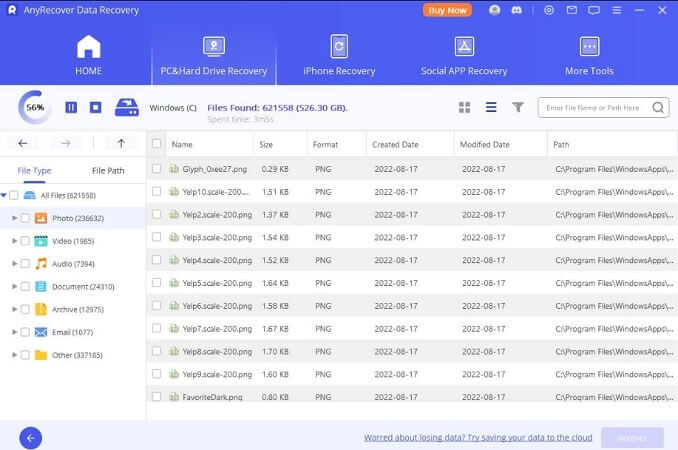
Step 3: Preview and mark files you wish to recover, then click "Recover" from the lower-right part of your screen.

Please save the recovered files in another secure storage location or a removable drive. Besides, AnyRecover offers free trial for every user to freely scan and preview. Don't hesitate to download and have a try first!
Part 3. How to Prevent "Mac Keeps Crashing and Freezing" from Happening?
"Prevention is better than cure." We've seen ways to resuscitate a Mac that keeps crashing, how about we prevent our Mac from crashing in the future? The following are some useful ways to prevent your MacBook from crashing.
Go to the Apple Menu > About This Mac > More Info > System Report to keep track of your hardware status.
Make sure your OS and Apps are updated continuously.
To avoid insufficient RAM, install more system memory.
Carry out a regular "Housekeeping" of your Mac device, e.g., emptying application caches and deleting unwanted/unused applications.
Occasionally restart your Mac system.
Create enough hard drive space.
Conclusion
If your Mac keeps crashing, this tutorial will definitely benefit you. You can learn a lot about the reasons for your Mac keeps on crashing, how to fix the crash issue using five effective methods, and most importantly, how to recover your lost data using AnyRecover tool. If you should encounter any more data loss problems in the future, please remember that you can always turn to AnyRecover for help.
AnyRecover
10% Discount Coupon Code: RECOVER9
Another Mac Guide about How to Fix External Drive Not Detected/Showing Up On Mac
Time Limited Offer
for All Products
Not valid with other discount *

 Hard Drive Recovery
 Deleted Files Recovery

