VMDK Recovery Solution – Best Way to Recover VMDK Files
Virtualization makes data recovery a daunting task. Whether you are trying to recover data physically or virtually, virtualization leads to an increase in the difficulty of managing all these data types at the same time. Even though virtualization is beneficial, it typically results in vulnerable data. Moreover, on the one hand, many IT companies are making the most of virtualization to slash costs, and on the other hand, the virtualization process is changing their IT environments to more complex ecosystems. You’ll be delighted to know that just 10% of critical data stored on a virtual system is protected and safe. In this post, we’ll talk about how you can retrieve data lost in a virtualized system. Read further to know more about VMDK recovery and how it can help you.
Part 1: Can You Recover Deleted Files from VMDK?
As you already know, deleted files can be easily recovered from the hard drive before they are overwritten. Virtual disks store files and data in the same way as hard drives. Files stored on a hard drive are tracked by the operating system through the file system, or precisely pointers. Individual files come with pointer informing systems wherever they’re located.
When you remove a file from a virtual disk, the operating system deletes the information of the file from the pointer and marks available sectors engaged by the files. From Window’s point of view, you can no longer perform any read or write functions on the file since you’ve deleted it. Nevertheless, the truth is that the deleted files can still be recovered before they’re overwritten by new data sectors.
Part 2: What Causes Data Lost in Virtual Systems?
Virtual system users are often victims of unforeseen data loss accidents. In this section, we’ll discuss 4 common data loss situations in virtual systems. These include:
Lost or erased virtual machine
Whether it’s an accidentally deleted file, damaged file system, or formatted hard disk – diverse virtual system faults can result in data loss. Just about 40% of data loss scenarios in virtual systems are erased or lost virtual systems.
Unapproachable databank or corrupt VMDK metadata
Here’s are a few ways to check if the reasons behind the data loss are inaccessible databank or corrupt VMFS metadata:
1. You cannot remove or change files on a VMDK databank.
2. You cannot access certain files on a VMDK databank.
3. You try to read files on a VMDK databank and fail with an error.
Mechanical fault or other storage issues
Since hard disks have numerous movable mechanisms, any physical harm can lead to the failure of single or multiple virtual systems.
Corruption of the Guest Operating System
A corrupt Guest OS on the virtual machine disk (VMDK) can also result in data loss.
Part 3: How to Recover VMDK Files with AnyRecover?
If you’ve lost important data due to one or more scenarios mentioned in the previous section, here’s some great news. You can now get back VMDK safely using AnyRecover VMDK recovery solutions.
Using AnyRecover, you can effortlessly recover misplaced data and erased files in a matter of clicks. Whether you’re looking for VMDK recovery solutions for your external hard drive, flash drive, or memory card, you can use this remarkable solution to recover your erased or missing files.
AnyRecover's Key Features:
- Recover removed, misplaced or missing data Virtual Machine File System and all types of VMDK data – VirtualBox and VMWare Workstation.
- AnyRecover is specially designed to recover over 1000 different file formats of photos, videos, documents and emails, etc.
- Advanced data scanning algorithms. Data scanning speed of AnyRecover is blazing fast, allowing you to scan and look for hidden files quickly.
- User-friendly software interface which is suitable for beginners. Help you recover deleted data easily.
- AnyRecover offers a FREE Trial with 8 files for free recovery with no size limit. You could also preview your data before recovering it. You could also preview your data before recovering it.
- Supports Windows 11/10/8/7/XP and MacOS.
How to use AnyRecover for VMDK recovery
Here’s how you can perform VMDK recovery using AnyRecover. Follow these useful steps and retrieve misplaced, lost, or removed VMDK data quickly.
Step 1. Pick the recovery mode:
Download and launch AnyRecover on your machine, and then proceed to select the option for "Deleted File Recovery" mode.
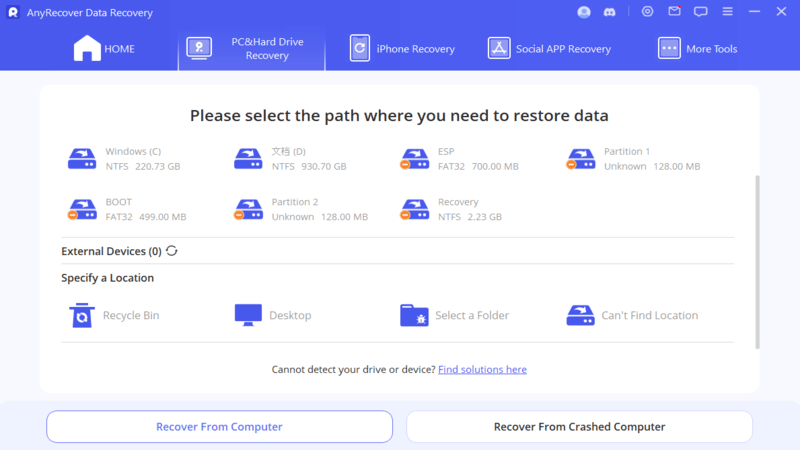
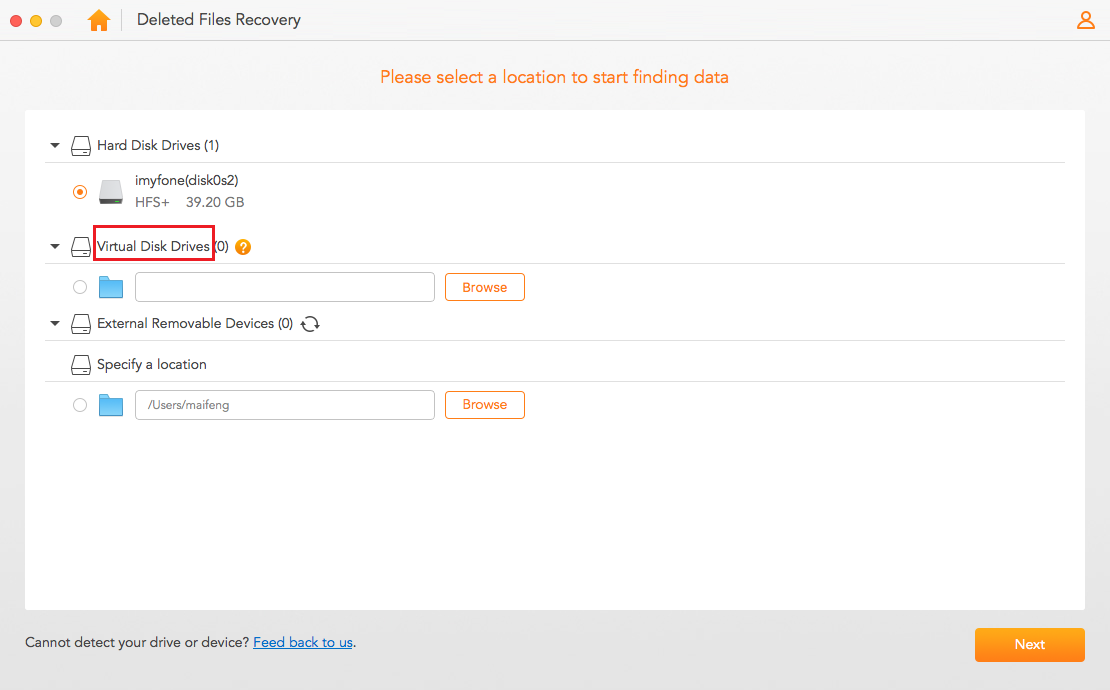
Step 2. Pick a location:
To find the data, begin the process by picking a location. You can pick different locations such as external devices that are removable, hard disks, etc. Once you pick a location, hit the “Next” button.
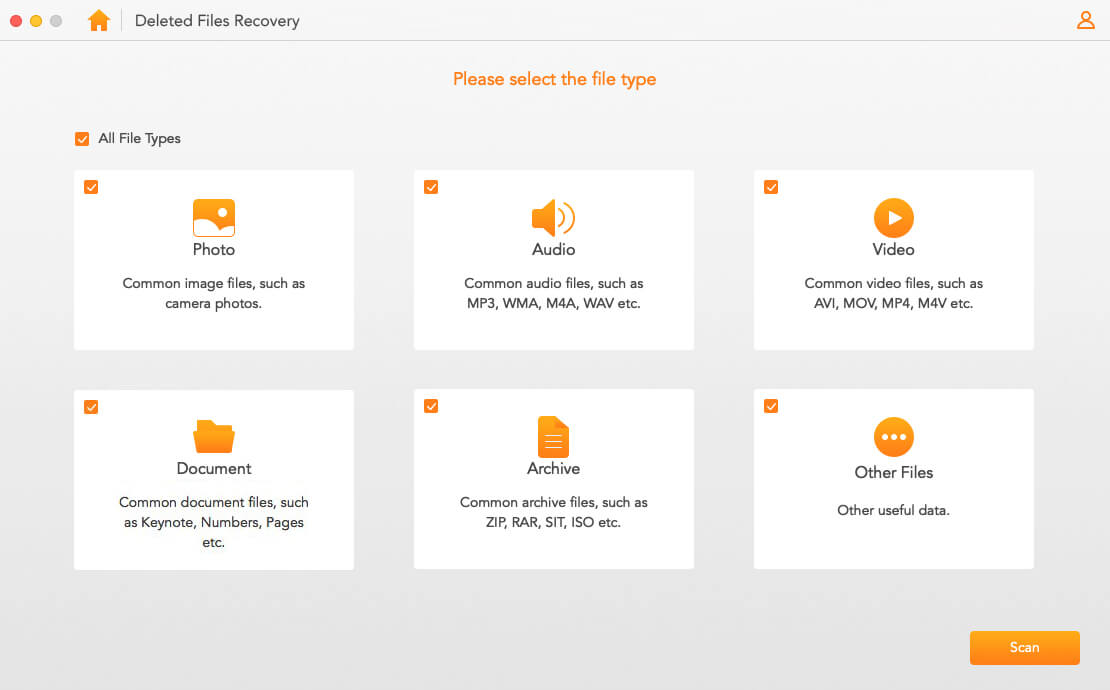
Step 3. Pick the file type:
Next, pick the types of files you wish to recover. The different types of files you can restore are Video/Photo/Audio/Archive/Documents and more. Once you’ve picked the file type, hit the “Scan” button to initiate the search.
Step 4. Begin the scan:
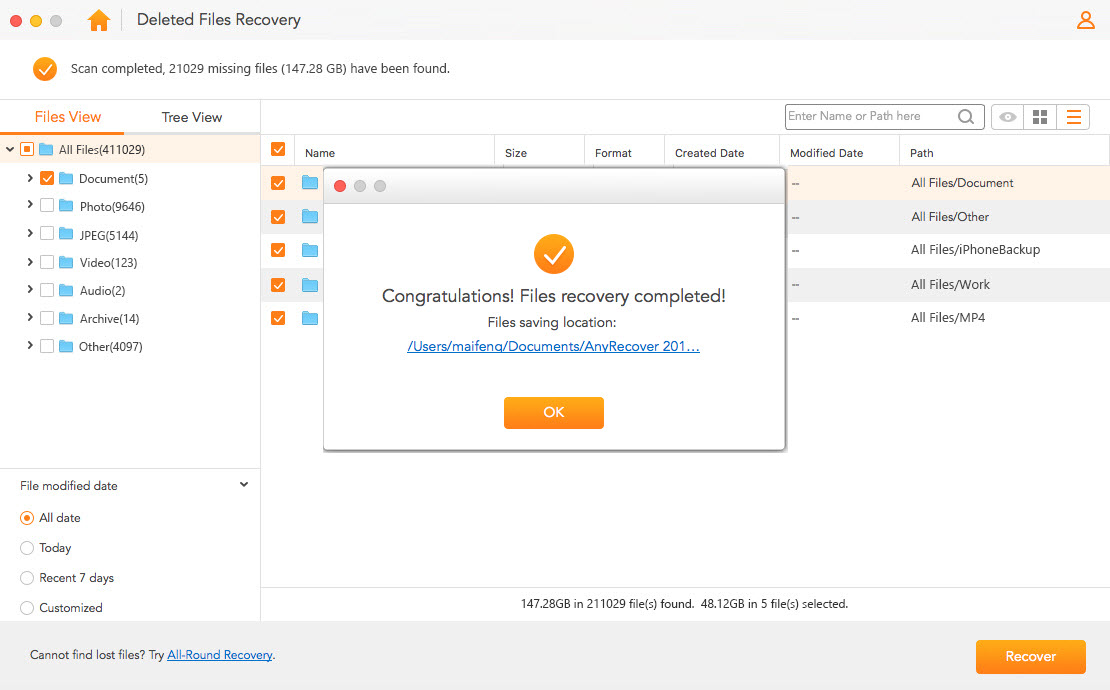
At this point, AnyRecover is scanning for your files. Once the scan is complete, your missing files will be listed on the screen.
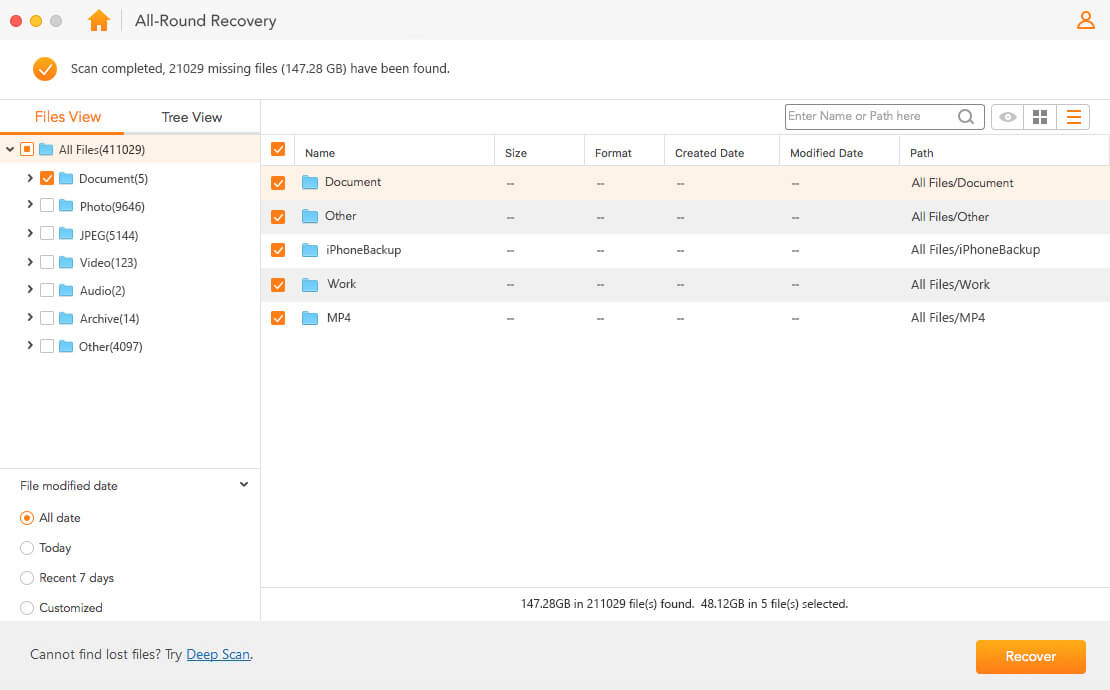
Step 5. Preview and recover your files:
You can also preview your files before recovering them. Once you’ve found your files, hit the “Recover” button to restore them.
Time Limited Offer
for All Products
Not valid with other discount *

 Hard Drive Recovery
 Deleted Files Recovery
