[2024] How to Move/Remove Recovery Partition on Windows 10?
There are lots of Windows 10 users who seem to be struggling when it comes to moving recovery partition. Having knowledge about this will help you make changes in your PC whenever such is necessary. The major aim of this post will be to reveal every detail about how to carry out Windows 10 move recovery partition. There is no doubt that after reading its contents, you will understand how to go about this process without any issue.
1How to Move Recovery Partition on Windows 10?
As you continue to make use of your system without proper maintenance, there is every chance that it can start malfunctioning in terms of the way it works. For instance, it can freeze or even slow down despite its features. This is where you will need to carry out a process of recovery partition. This process will bring your system or PC back to its normal state. Simply put, a recovery partition is that portion of your hard drive that doesn't have a letter.
When Would You Want to Move Recovery Partition
There are circumstances when this process of recovery partition will become very necessary. Some of them will be highlighted below:
Freeing up additional disk space
When your system is slowing down due to too much files being stored
When you want to carry out system file repair process
How to Transfer Recovery Partition to a New Drive
It should be noted that in Windows Explorer, recovery can't be seen. This is due to the fact that it doesn't possess any drive letter. This is what makes the process of transferring it to a new drive in windows difficult using the in-built tool. The only way to do this is by using a third-party tool like AOMEI Backupper.
You can follow the steps below in order to transfer recovery partition to another (new) drive using AOMEI Backupper.
Step 1. Launch the tool and locate the option which says Clone at the bottom left. Click on it.
Step 2. After that, click on Partition Clone on the screen.
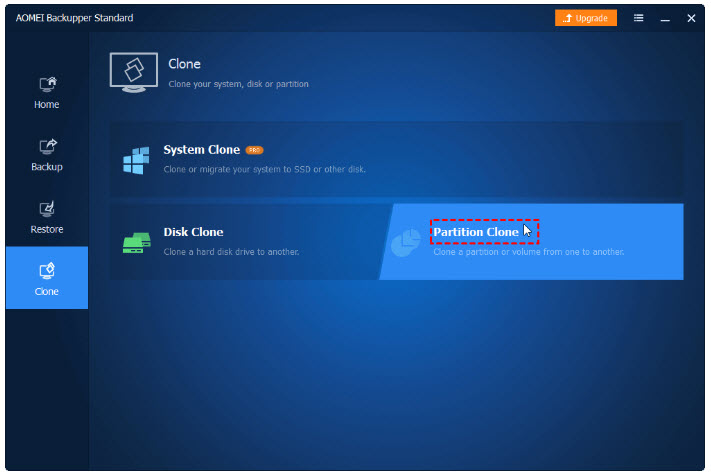
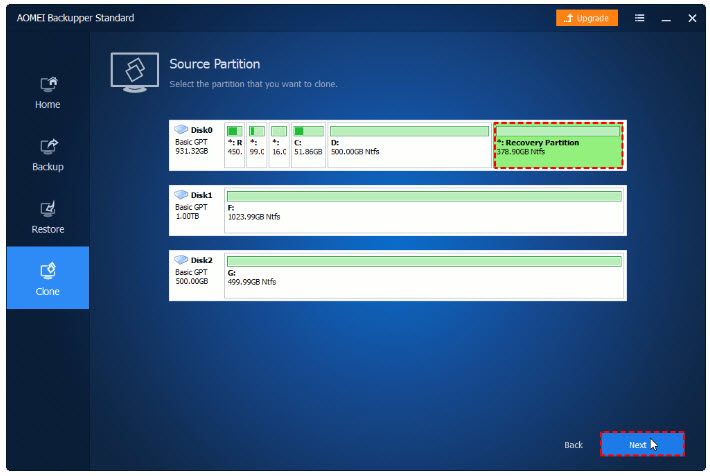
Step 3. Recovery partition should be selected as source partition.
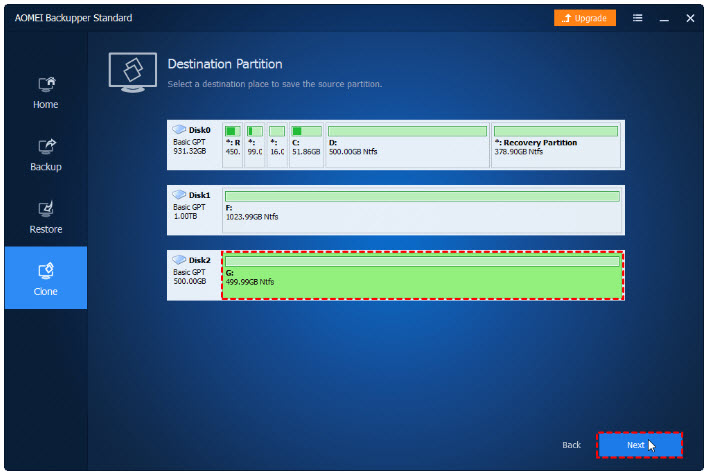
Step 4. The new drive which has been prepared before now should be selected as the destination.
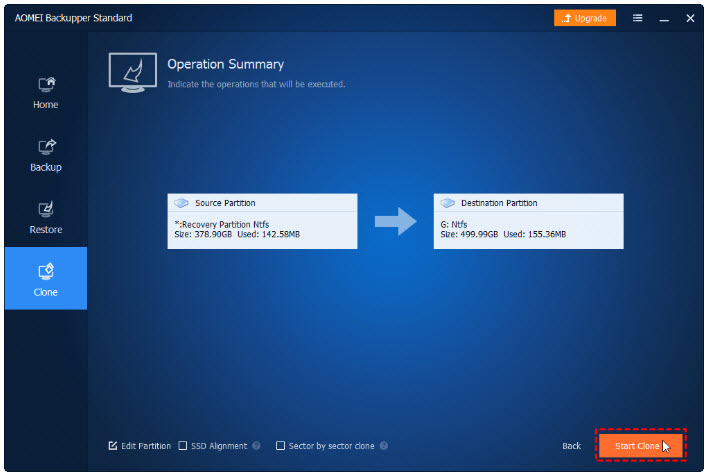
Step 5. You will be taken to a page where all the details/information will need to be confirmed. For the process of commencing, Start Clone should be clicked on.
2How to Remove Windows 10 Recovery Partition?
There are several reasons why you may want to remove Windows 10 recover partition today. The most obvious is to ensure that it is protected from any damage the physical drive may want to suffer. The steps below will show how Windows 10 recovery partition can be removed.
Step 1. The Start menu should be right-clicked on.
Step 2. Admin (Command Prompt) should be selected.
Step 3. Type diskpart.
Step 4. Type list disk.
Step 5. Various disks will be shown. Take note of the disk number that has got the partition you plan removing.
Step 6. Type select disk X (X should be replaced with the partition disk number that you would want to remove).
Step 7. Type list partition.
Step 8. A list or group of partitions will be shown. Locate the one that is known as Recovery. Its size is similar to the one that you want to have removed.
Step 9. Type select partition X (X should be replaced with the partition disk number that you would want to remove).
Step 10. Delete partition override should be typed. Once you do this, such recovery partition will get deleted.
3Bonus: How to Recover Lost Partition on Windows 11/10?
There is no doubt that lost partition can cause you lose vital files on your PC. This can be very frustrating given the fact that you won't have access to such files again. There is good news though which is the fact that your files lost in such circumstances can be recovered through the use of AnyRecover tool.
AnyRecover is proving to be one of the best in the aspect of getting lost files recovered easily. Its features are really impressive and this is why it has been effective in such process. Below are some of these features:

1,000,000 + Downloads
Files lost in any scenario can be recovered easily: malware/virus attack, lost partition, emptied Recycle Bin, system crash, system format, and others.
Recover data from any device: camcorders, digital cameras, flash drives, micro SD cards and more.
Any kind of file can be recovered like documents, audios, videos and photos.
It is absolutely safe and very easy to use.
Compatible with both Windows (even the latest Windows 11) and Mac system.
In order to get back files from lost partition with AnyRecover, follow these steps below:
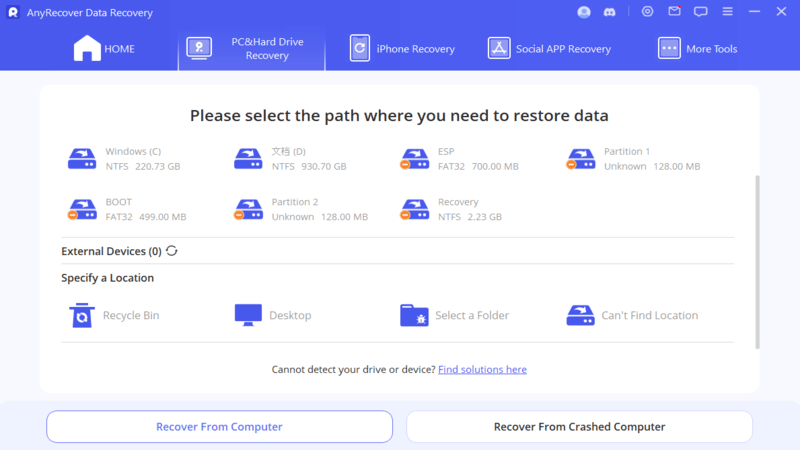
Step 1. Launch AnyRecover and choose the location from which you want to recover data. Click "Start" to begin the scan.
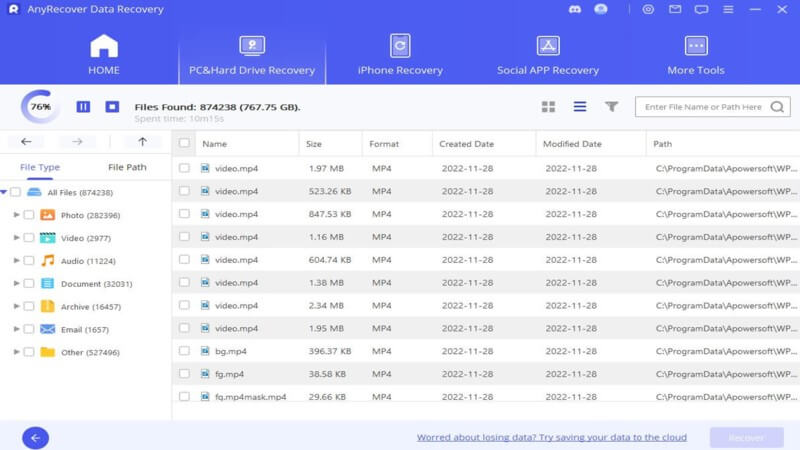
Step 2. This tool will start the process of scanning. Wait patiently for it to complete.
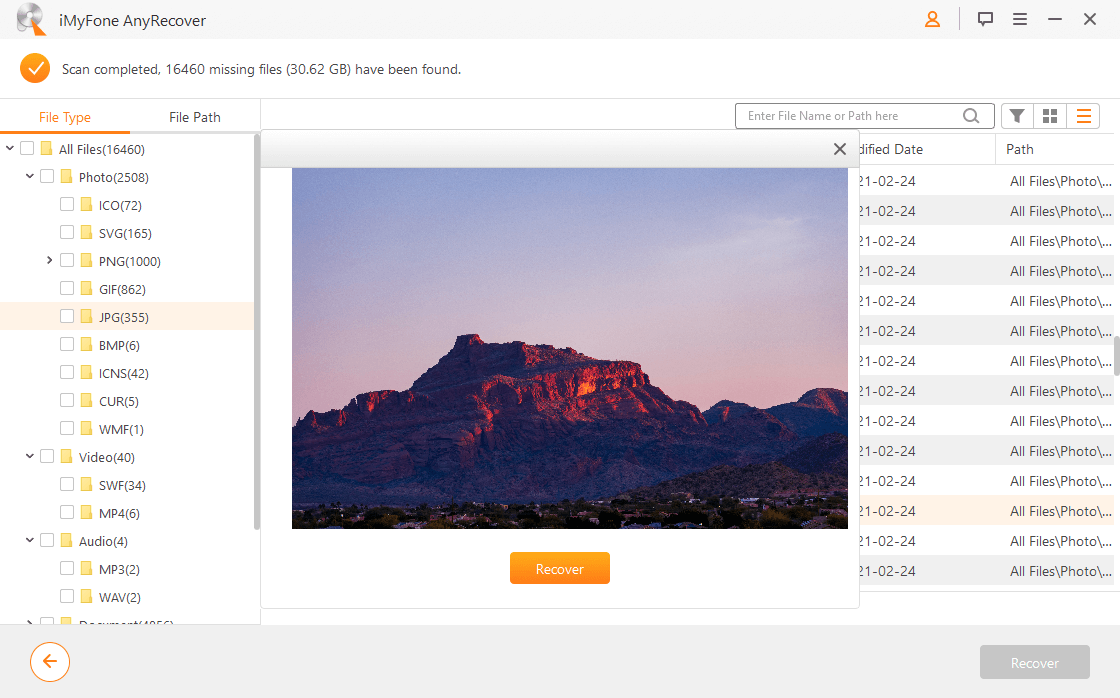
Step 3. After the process is finished, you can choose amongst the various files displayed. Just preview them one after the other and click on "Recover".
Conclusion
From the above details, we can see that any issue related to Windows 10 move recovery partition can be easily resolved. You only need to know the right steps to take in order for such challenge to be handled. The good part is that even when something goes wrong and your files are lost, AnyRecover will help you get them back.
Time Limited Offer
for All Products
Not valid with other discount *

 Hard Drive Recovery
 Deleted Files Recovery

