How to Fix "Windows was unable to complete the format" Error
Most people today, adopt the disk formatting procedure when cleaning up disk partition files because it is very effective when we need to empty an internal hard drive or removable disk.
Sometimes, however, we encounter some challenges in the process, and a prominent one is when Windows gives us a prompting which says "Windows was unable to complete the format." This article will be giving you detailed information as to how to overcome this huddle.
Causes of "Windows was unable to complete the format."
Here are some of the possible causes can lead to this issue:
1Infection of Virus
Due to the fact that USB drives are very portable and can be easily connected to diverse computers to backup or transfer data, they are more prone to virus infection, especially when plugged into a computer that is not antivirus protected.
2Bad Sectors
Storage devices have sectors which are used for data storing, and when it is bad, this means it cannot be read or written, and this can disrupt the formatting process and file recovery.
3Damage in Storage Device
All the components of a local disk or USB drive can't escape physical damage, and when this happens, the computer will not be able to format the storage device. Professionals can replace the damaged circuit or any other thing that is damaged to get the device working again.
4Write-protected Disk
Formatting is a kind of writing operation, and windows cannot format a drive when it is write-protected. If you want to copy files to a USB device and it reports that "The disk is write protected," then you have to remove the write protection or use another disk.
How to Fix "Windows was unable to complete the format" Issue?
Format Using Disk Management
Disk management is provided in Windows to help manage disks and partitions for the computer. It has the ability to create new volume, change drive letter, extend or shrink, or delete/format partition; format damaged flash drives, etc.
Step 1. Open Disk Management: Right-click My Computer; select Manage, then Disk Management on the left corner. You will be able to see local hard drive and partitions in the center section.
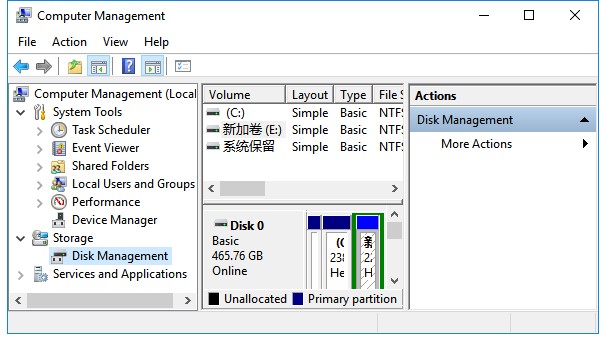
Step 2. Right-click on the drive, choose Format option and then select File system format to conduct a quick format. This step might not work in some cases, so you might need to try the next step.
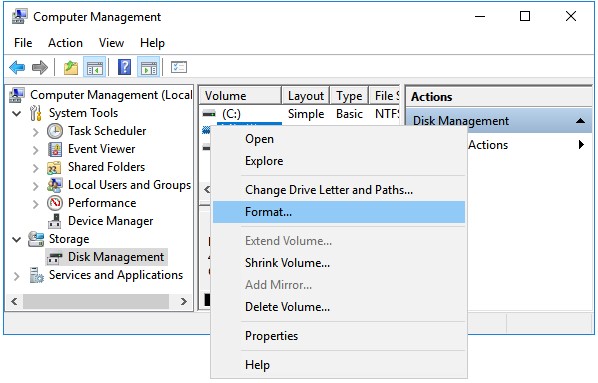
Just follow on-screen instructions, set options, and click the Next tab. When the process is completed, the USB drive would have been formatted and recognized by the system.
Format Using Command Prompt
Disk management might not help in all cases, so you might want to try using the command prompt to fix "Windows was unable to complete the format" issue on your SD card, USB, CD and DVD. Even though common users believe this process is complicated, it actually isn't. Here are the steps:
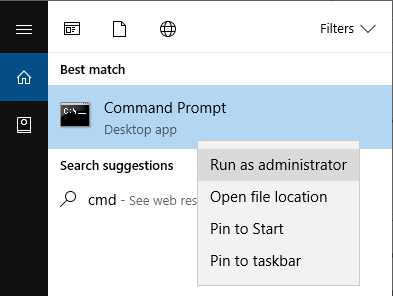
Step 1: Click the Start button and type in CMD in the search box. You will Command Prompt from the start menu and run it as administrator.
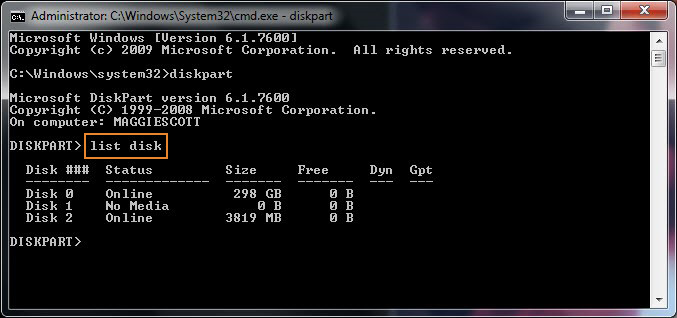
Step 2: Type in diskpart and click the Enter key. Then type list disk. You will then see partition and disk list of the current computer. All the drives are listed in numbers.
Step 3: Now type select disk (disk number) which is the problem drive; type clean and click Enter. This would scan the drive and the damaged file structure will be erased during the scan. Once this is done, it gives a confirmation message to tell you the drive has been cleaned successfully, and a new partition needs to be created.
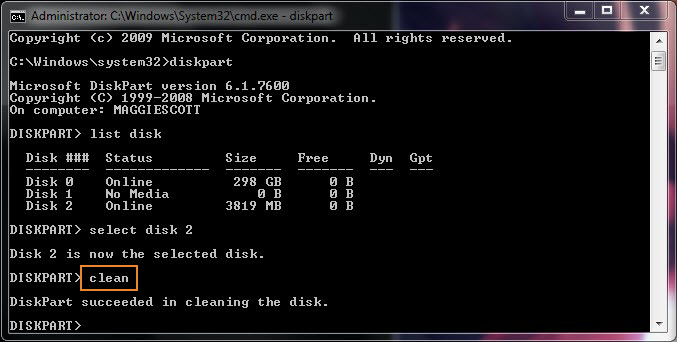
Step 4: Type in create primary partition and press Enter; then type in command prompt format /fs=ntfs and press Enter.
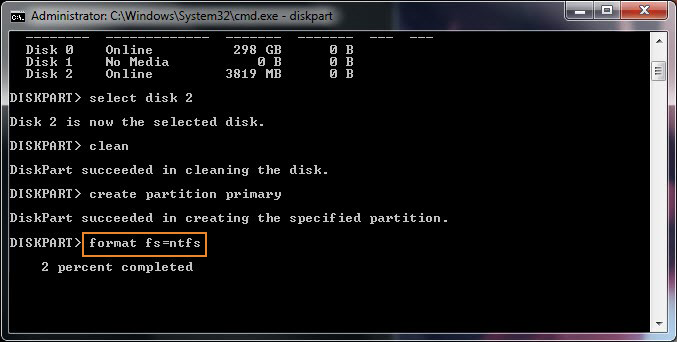
The drive will be formatted to NTFS file system, and formatting is really fast.
Bonus: How to Recover Data When Hard Drive Is Formatted?
In the event that you need to recover data from your Hard drive but it happens to be completely dead or formatted, we put it to you that it is 100% possible to recover data from a dead or formatted drive by using AnyRecover data recovery software - an amazing third-party data recovery software that comes with awesome features for recovering data fast from dead or formatted devices.
Features of AnyRecover
Recover ALL kinds of file/data types - videos, pictures, audios, and documents, etc.
Recover deleted and lost data fast and with ease, regardless of how and when you lost them.
Recover data from all storage devices - hard disk, camera memory, memory cards, phone memory.
You get a free trial before purchase; this allows you to first scan and preview all lost files for free.
Steps for Data Recovery
Step 1. Launch the software, then select a disk under the “Hard Disk Drives” tab.
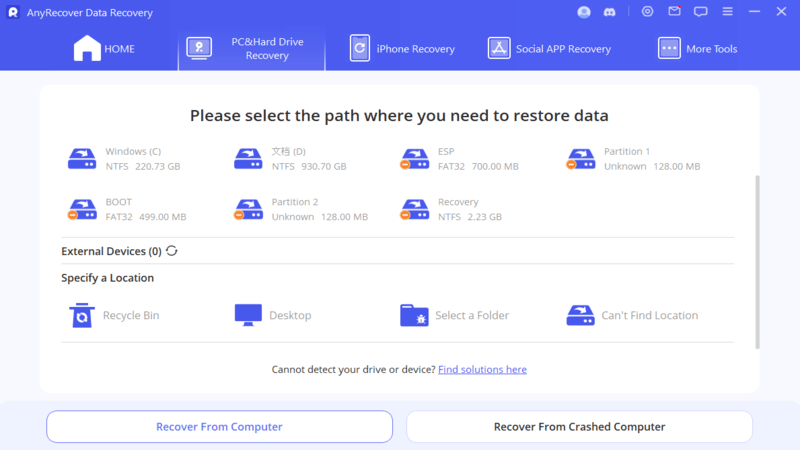
Step 2. After selecting the location, hit “Start” button to start scanning.
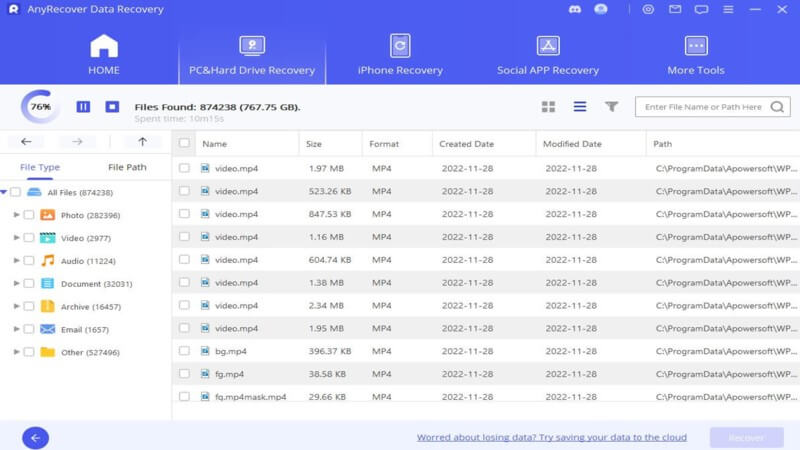
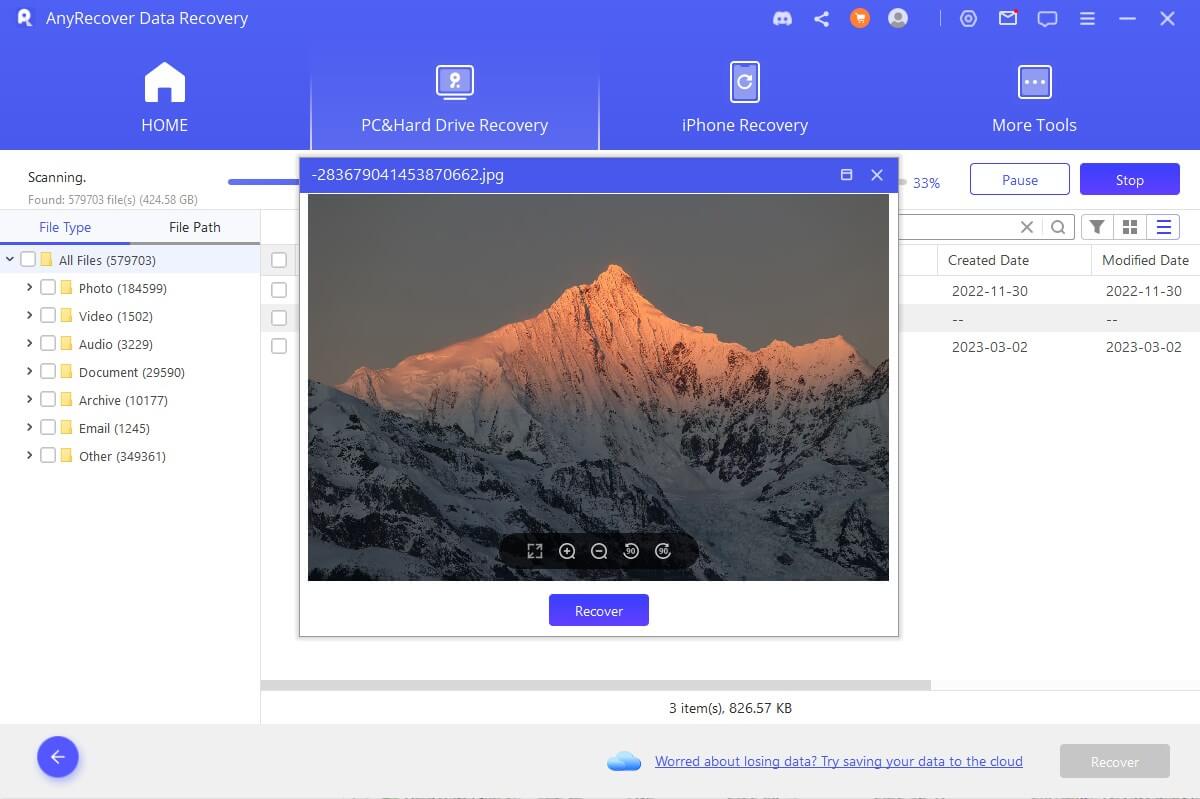
Step 3. When the scan is complete, you can preview by double-clicking each, and choose the ones you want to recover. When you have confirmed the selected files, tap Recover to get your lost data back.
Conclusion
All the above-mentioned methods have been tested to be the most effective ways for solving the "Windows was unable to complete the format" error. However, when looking for the best method to recover data, AnyRecover is definitely your best option.
Time Limited Offer
for All Products
Not valid with other discount *
 Hard Drive Recovery
 Deleted Files Recovery


