How to Get Mac Boot From USB Drive [Ultimate Guide]
Computers (including Macs) do not boot up sometimes. In this instance, you will not even be able to get into your system to diagnose the problem. This can be extremely frustrating in situations where you are trying to use your Mac for work or leisure purposes as you will be stuck looking for different ways to start up your Mac. Creating a bootable USB for Mac can be useful because it will allow you to work around the issue and boot up your Mac computer. In this post we'll focus on how to get Mac boot from USB drive.
Part 1. About Bootable USB Drive
1. What Is a Bootable USB Drive?
A bootable USB drive is a USB drive that contains a bootable program that takes control of a computer. Normally your computer looks for external USB drives and optical disks when it starts booting up; if there are no external drives then it boots up from its hard disk or SSD.
2. What Can a Bootable USB Drive Do?
You can create a bootable USB to use when your Mac system is failing. The OS loaded on the USB can be a lighter version of the OS running on the computer or it may be a completely different OS. But at least the bootable OS should support the file system on your Mac's internal hard drive.
When you boot your Mac from a USB, your USB will also contain troubleshooting and repair utilities. In a situation where the original OS cannot be restored, you will be able to use the bootable disk to copy valuable files to an external drive.
You can also install a Mac OS from a USB. On your Mac, USB will boot a small program that can overwrite the existing OS or install Mac OS from scratch. On a new Mac, the bootable USB will have the option to format the storage drive. The installation program on the bootable USB connected to your Mac will have complete control of the computer.
Part 2. Why Making Mac Boot From USB Drive?
There are multiple scenarios in which you may need to get your Mac boot from USB.
If you are looking to install a new OS on your Mac, a bootable USB drive is a good option. If you are trying to install some software that is only available on Windows or Linux on your Mac computer, then it would also be a good choice to install the software onto your Mac using a bootable USB.
A bootable USB drive is also an excellent tool to use if you need to install the latest Mac OS on multiple Mac computers. Once you load this OS onto the USB drive, you will only have to wait for this download once and then use the same USB device to install the OS on multiple Mac computers, which will save much time and energy.
You can also make Mac boot from USB if you want to have an emergency disk for situations where your Mac encounters problems. If your Mac experiences issues in Recovery Mode or you cannot access Recovery Mode, then a bootable USB on your Mac is quite useful.
Part 3. How to Create Bootable USB on Mac
If you would like to create a bootable USB for your Mac, you will need two things: a USB stick with at least 14GB of available storage and the installation file, i.e. a downloaded installer for macOS Big Sur, Catalina, Mojave, High Sierra, or El Capitan.
1. Preparation Work
To prepare the USB flash drive for getting Mac boot from USB, you need to format it as Mac OS Extended following the steps below:
1. Connect the USB flash drive that you're using for the bootable installer.
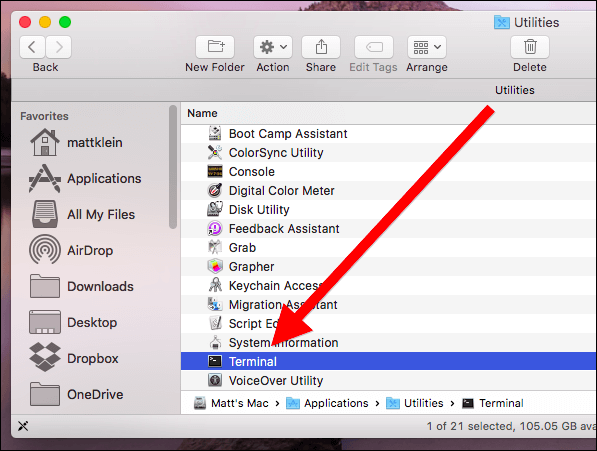
2. Open Terminal in the Utilities folder of your Applications folder.
-
3. Copy the below text. This is for the Big Sur version of macOS - you will need to use different text for different versions of macOS. Replace "MyVolume" in the command with the name of your drive.
sudo /Applications/Install\ macOS\ Big\ Sur.app/Contents/Resources/createinstallmedia --volume /Volumes/MyVolume
-
4. Press Return. Then Terminal will ask for your administrator password. Type your password and press Return again.
-
5. Terminal will give a warning message about to erase the drive. Press Y and then Return to continue.
6. Now Terminal will copy the installer file to your drive, which can take a few minutes.
7. You will get a notification once the process is finished.
- Recovers lost data from different situations like corruption, emptied trash, mistaken deletion and more.
- Recovers 1000+ files in Windows and Mac such as folders, emails, office documents, etc.
- With the fastest files scan speed and the highest success rate, it can also recover your hard drive without overwriting the original data.
- Each user could start a free trial with easy-to-operate steps.
Step 1. Inserted the USB drive, open Finder and navigate to Applications > Utilities > Disk Utility.
Step 2. Here you'll see your USB listed under "External" on the left side. Select your USB device, then click on the "Erase" button at the top.
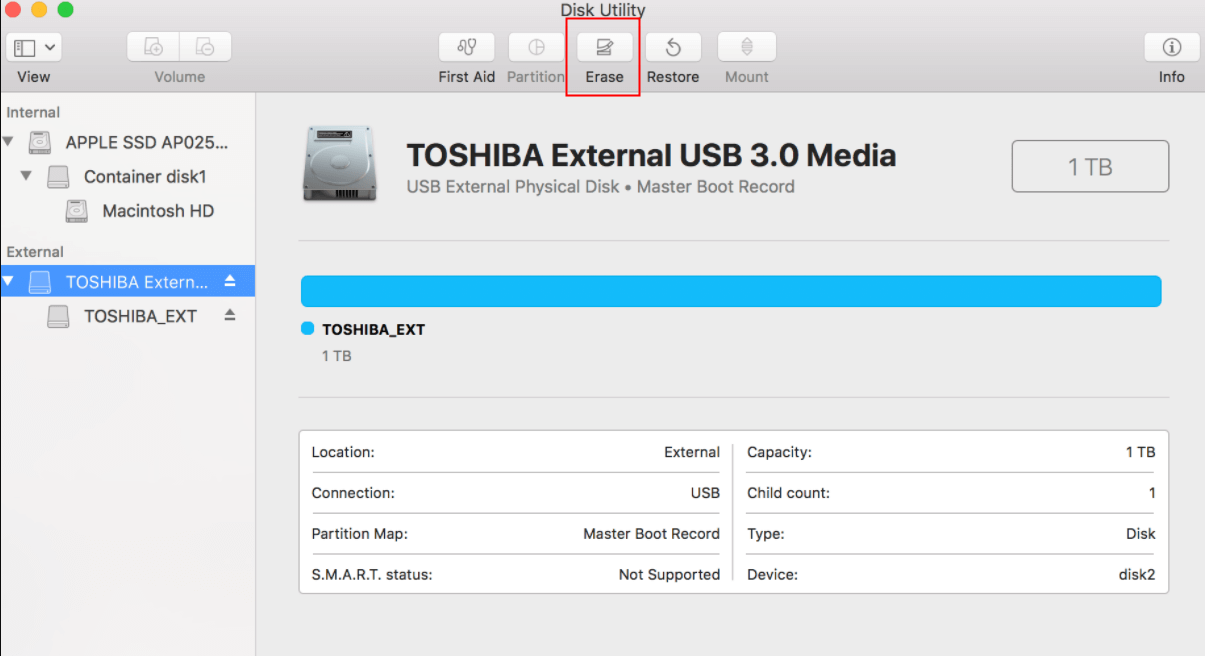
Step 3. Name or rename the drive to a title that is indicative of its function - for example, "Mac Boot Manager." Then select "Mac OS Extended (Journaled)" as the format.
Step 4. Hit on the "Erase" button at the bottom right, and the drive is set up.
2. Download MacOS onto the USB Drive
To download the installation files, open the App Store, download the copy or copies of macOS you want, and install them directly onto the USB. You can also go back through your "Purchased" tab to get older versions of macOS. Unfortunately, if you've upgraded to Mojave or later, you can only access older versions of macOS by legally re-purchasing them.
Besides, it's also feasible to get the macOS you want via the 'createinstallmedia' command in Terminal. Check the following steps to do that:
Part 4. How to Boot Mac From USB Device
1. The Way Mac Boot From USB
Now that you have a USB to use for your Mac to boot from, you should follow the steps below:
Step 1. Insert the bootable USB you created in your Mac. Then press the Power button to switch on your Mac (or restart if your Mac is on).
Step 2. Press and hold the Option key on startup. This will launch the Startup Manager.
Step 3. Release the Option key once Startup Manager launches. The utility will look for any bootable drives.
Step 4. Select the USB drive you wish to boot from using either your mouse or arrow keys.
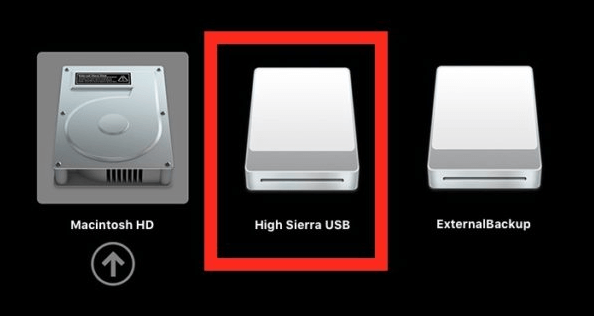
Step 5. Press Return or double-click your selection. Your Mac will start to boot soon.
2. Fix Some Minor Issues
On old Mac models, the latest port such as USB 3.1 or Thunderbolt ports are not recognized at the hardware level. You will have to switch to USB 2.0 for making a bootable USB for Mac.
The version of macOS that you have on the USB drive may not be compatible with the hardware, which means the USB drive won't show up in the Startup Manager. You will then need to load a compatible macOS version on the USB drive to boot your Mac.
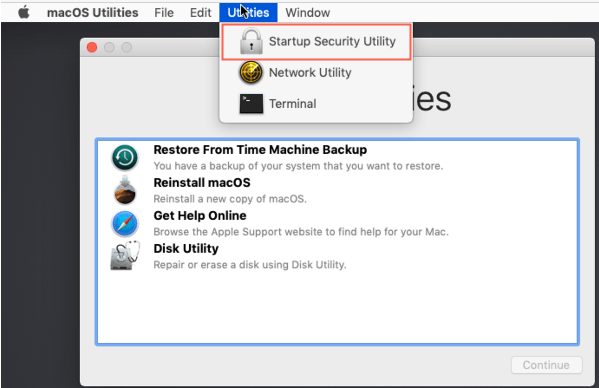
In addition, your Startup Security Utility settings may prevent your Mac from properly booting from USB. In this situation, follow these steps to fix it:
Step 1. Restart your Mac and hold down the Command + R when the Apple logo appears. Your Mac will be in Recovery Mode.
Step 2. Go to Utilities, select Startup Security Utility and sign in.
Step 3. Select "Allow booting from external media." under External Boot.
Part 5. How to Recover Data From Unbootable Mac
In case you are unable to get your Mac boot from USB but you want to recover the precious data from your Mac, you should try AnyRecover. As a professional data recovery tool, AnyRecover recovers deleted and lost files in an easy but effective way. With extremely high recovery rate and fast scanning speed, AnyRecover makes your data recovery experience as seamless as can be.
The software supports over 1000 types of data and works with all kinds of storage devices. It is the perfect tool to use when recovering data from an unbootable Mac and a free trial is available for every user.
AnyRecover Key features include:
To successfully retrieve data from the crashed Mac, you need to firstly create a bootable drive to restart the crashed computer. The procedure requires another working Mac and a blank USB drive. Once you're well prepared, follow the steps below to recover data from crashed Mac:
Step 1. Launch AnyRecover on a working Mac, then select "Recover from Crashed Computer". Plug a USB into your Mac, select that USB device to create a bootable drive, and then click "Format".
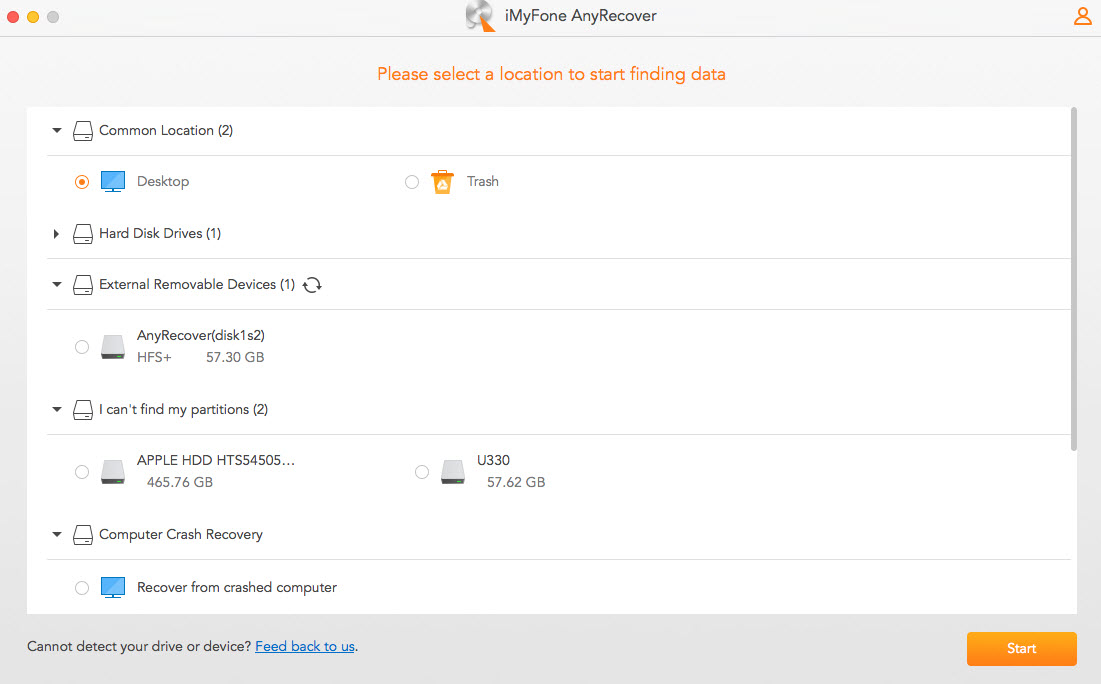
Step 2. When the bootable USB drive is created, adjust BIOS to boot from USB flash drive or CD/DVD and connect the bootable drive just created. Select a location where you lost data or want to recover data. AnyRecover will start scanning the location you selected. All your lost files will appear.
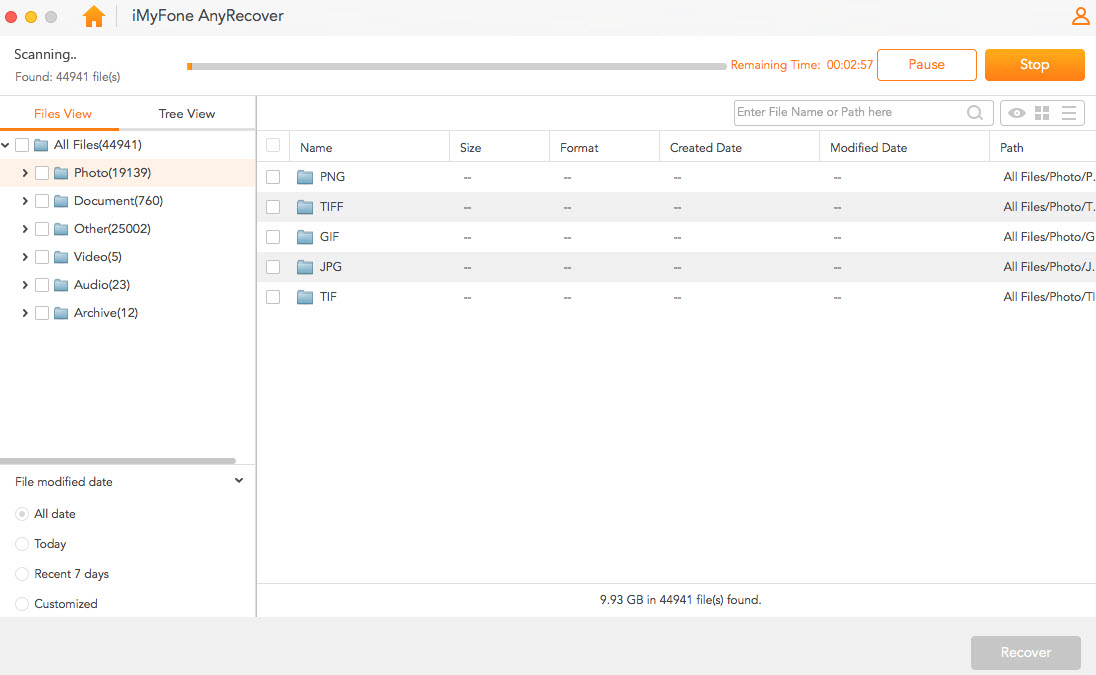
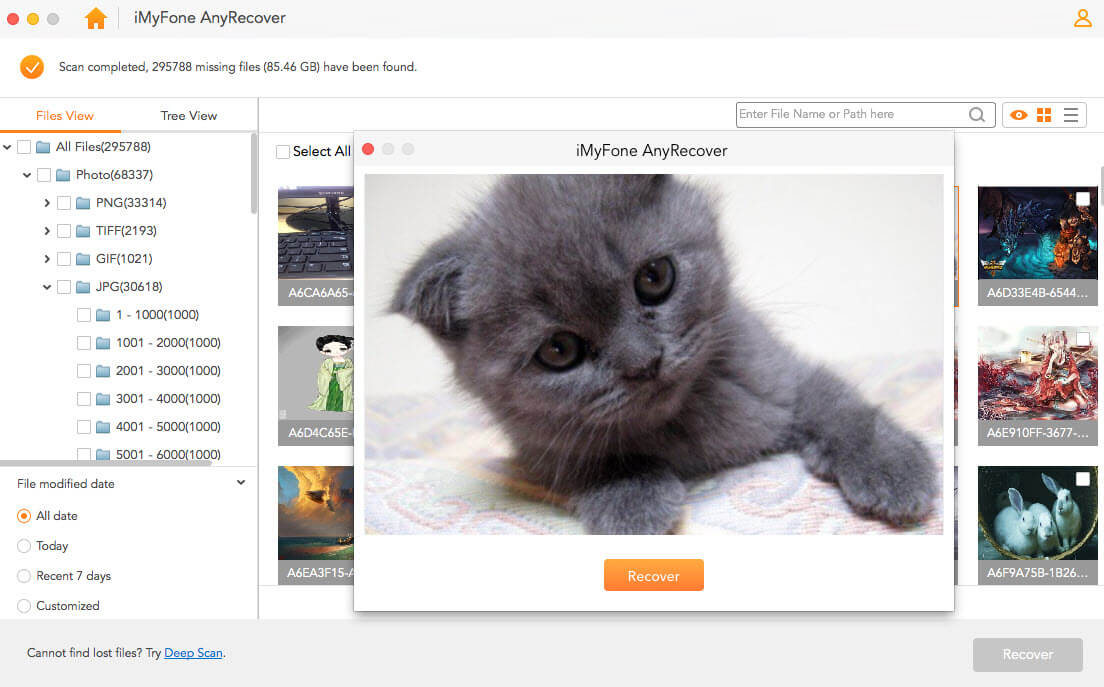
Step 5. You can preview the recovered files and selectively recover the files you need. Once you have selected the relevant files, click "Recover" to initiate the process of file recovery.
Conclusion
A bootable USB drive is extremely useful in instances where your Mac is not booting up. It helps you get an emergency disk with macOS preinstalled on hand for use. And you will be more prepared when you are unsure of which strategy to take for boot up related issue.
If you are looking to recover data from an unbootable Mac, AnyRecover software is the best choice. This powerful data recovery tool is capable of addressing various data loss scenarios.
Time Limited Offer
for All Products
Not valid with other discount *

 Hard Drive Recovery
 Deleted Files Recovery
