[Fixed] Screenshot Not Working on Mac in 2024
Taking screenshots is one of the most common and vital tool features in almost all devices, and it also works on Mac computers. All the devices come up with different ways to take a screenshot, and taking the screen on the Mac isn't a concern.
Unfortunately, many people have complained about facing the "screenshot on Mac not working" issue, and several reasons could cause this unwanted issue. If you're also troubled with the "Mac screenshot is not working" issue, you can explore the 11 amazing ways from this guide to fix the issue.
Part 1. Why is Screenshot on Mac Not Working?
Facing issues like "screenshots not working on Mac" issue isn't a sight to behold, and the following reasons could prompt this unwanted issue.
Part 2. 11 Proven Solutions to Fix "Mac Screenshot is Not Working" Issue
- Fix 1: Set up the Mac's Shortcut correctly
- Fix 2: Restart and update the Mac
- Fix 3: Reset NVRAM
- Fix 4: Load in safe mode
- Fix 5: Check Mac for Malware
- Fix 6: Use Native utilities
- Fix 7: Use Grab to take screenshot on Mac
- Fix 8: Check your Keyboard settings
- Fix 9: Confirm the location of saving the Mac screenshots
- Fix 10: Use the Preview to capture the screenshot
- Fix 11: Move the preference file
Fix 1: Set up the Mac's Shortcut correctly
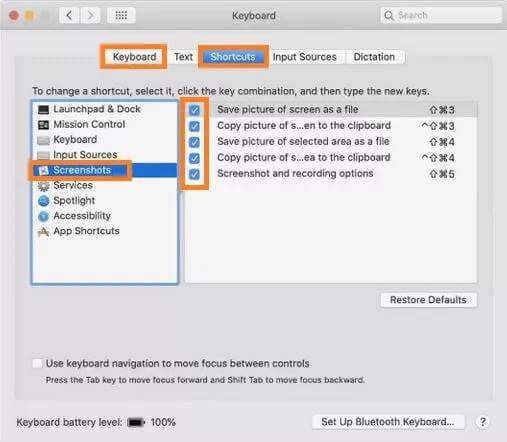
You can take the screenshot on the Mac by pressing ''Command+Shift+3'' to capture the full screen or ''Command+Shift+4'' to capture one part of your screen. If the Mac's shortcuts aren't working, you may face issues like the ''screenshots not working on Mac'' issue.
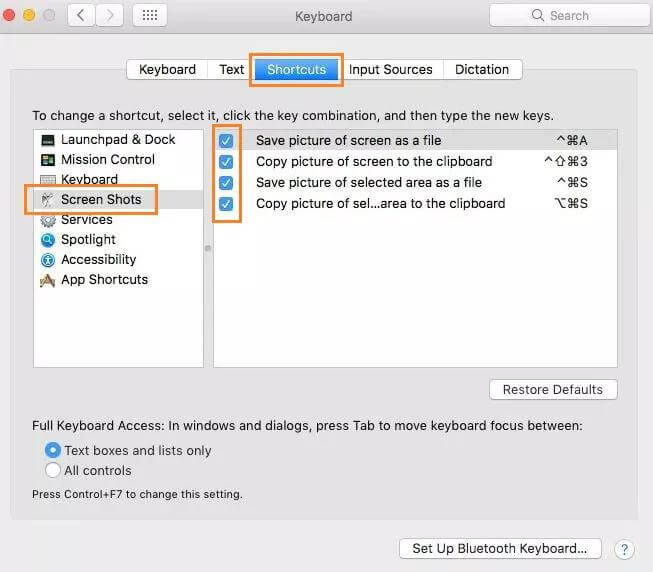
Step 1. After visiting the Apple menu, press the "System Preferences" icon.
Step 2. Press the Keyboard button before hitting the Shortcuts.
Step 3. Choose the ''Screenshot'' icon from the menu and double check all the choices. All the options must be active or checked in this section.
Fix 2: System File Checking
Since some malware can cause the ''screenshot on Mac not working'' issue, you can start and update the Mac to fix the issue.
Step 1. Press and hold the Power button to restart the Mac PC. You can restart the Mac by pressing and holding the ''Control+ Eject'' icon.
Step 2. Click on the Apple icon and then select the Restart button.
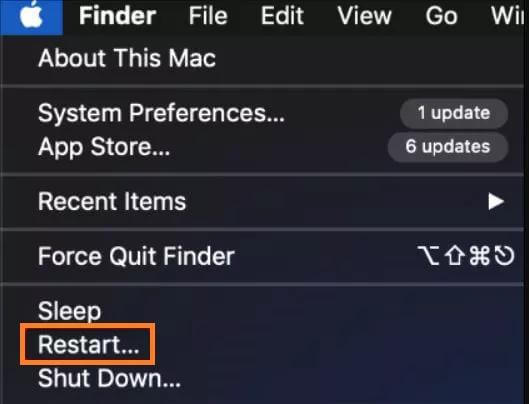
Step 3. Choose the Restart icon after clicking the ''Control+ Command+ Power'' or ''Control+ Command+ Eject'' icon.
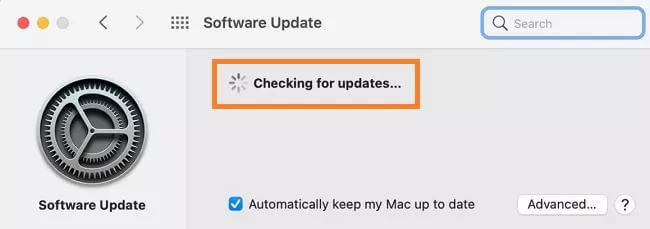
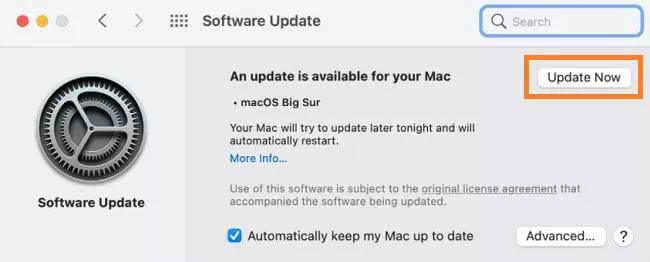
Step 4.Navigate to the Preferences icon, press the System Preferences, and click the Software Update button. Tap the ''Update Now'' button to install the new updates for Mac PC.
Fix 3: 3.Reset NVRAM
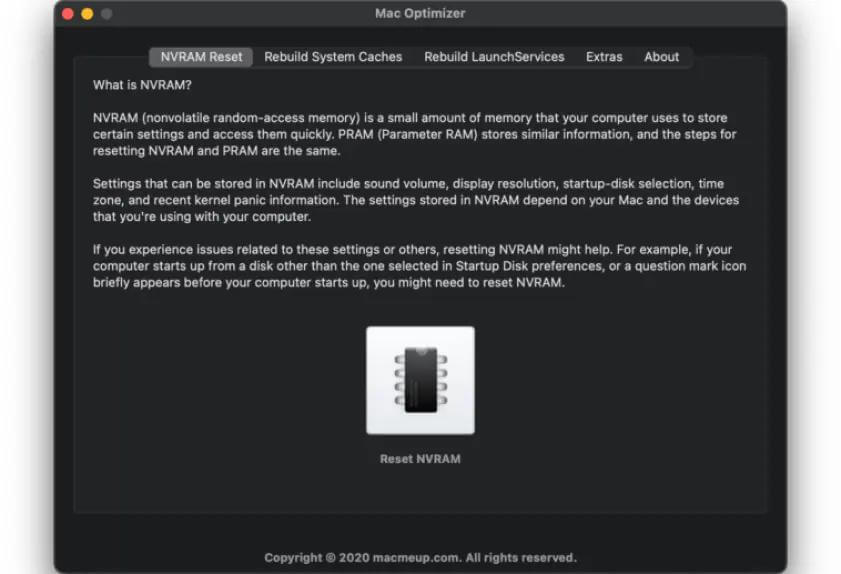
NVRAM keeps track of various things, including the screen resolution, time zone, and sound. Resetting your NVRAM is one of the most efficient ways to fix the ''screenshot not working on Mac'' issue.
Step 1. Press the power button on the Mac to turn it off before restarting it.
Step 2. Press and hold the ''Command+Option+P+R'' icon on the keyboard for about 20 seconds.
Fix 4: Load in safe mode
Some malware installed on the Mac PC might also make the screenshots not work appropriately on your computer. Loading the Mac in a safe helps you to fix the issue.
Step 1. To begin with, you'll need to jump into the Windows 10 Media Creation Tool.
Step 2. Start the Media creation tool after downloading the tool.
Step 3. Select the "Upgrade this PC Now" icon and follow the on screen instructions to get the job done.

Fix 5: Check Mac for Malware
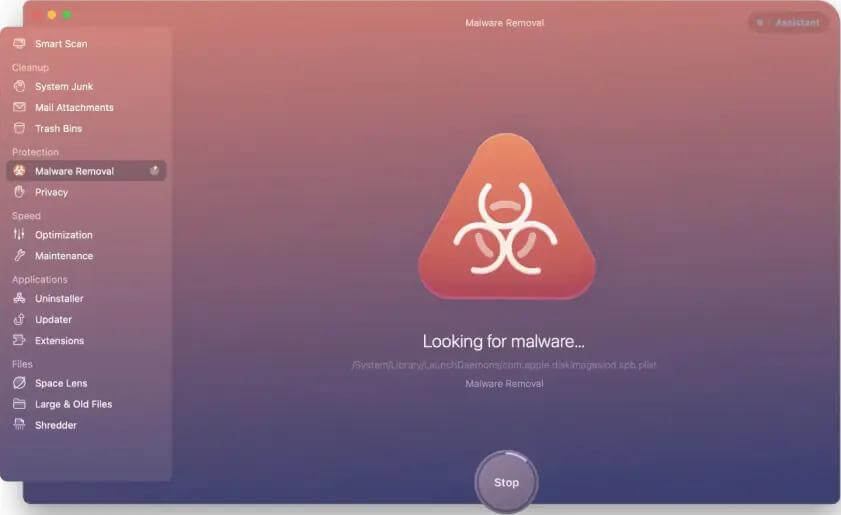
If your Mac PC is affected by the malware, it could end up causing the ''screenshot on Mac not working'' issue. You can eliminate the malware from the Mad by uninstalling programs, removing the malware, optimizing the Mac, and cleaning up the device.
If you're using the Setapp, you can find the ''CleanMyMac X'' icon to discover the app before installing it there. Launch the app and press the Run icon to search for the malware before dismantling it.
Fix 6: Use Native utilities
Using the native utilities is also an appropriate way to fix the ''screenshot not working on Mac'' issue.
Step 1. Navigate to the Finder button and select the Applications icon afterward. Now, the Preview menu appears on the screen's top side.
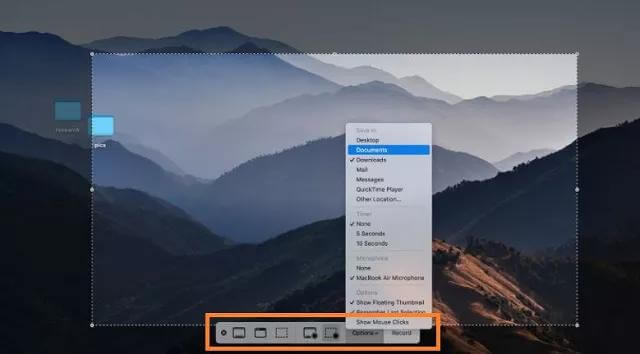
Step 2. Press the ''Command+ Shift+5'' or navigate to the utilities by choosing the Finder icon. Press on the Utilities icon after hitting the ''Applications'' icon.
Step 3. Press the Screenshot button to capture the screenshot. You can also use the various customization options and then have the leverage to modify your default location of the screenshot. To do it, you'll need to press the Screenshot icon after hitting the Options icon.
Fix 7: Use Grab to take screenshot on Mac
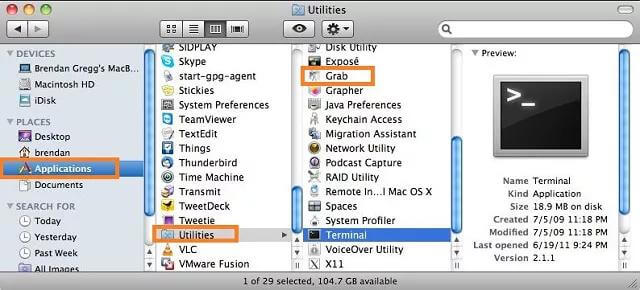
Despite trying multiple options, if you're still asking ''why is my screenshot not working on Mac'', you can use Grab to take screenshots on Mac. It is a built-in Mac tool that helps you capture the screenshot without any issues.
Step 1. Start the Applications and select the Utilities button on the drop-down menu.
Step 2. You can click the Capture button in the ''Grab'' icon. This way, you'll be able to take the screenshot.
Fix 8: Check your Keyboard settings
Disabled keyboard settings might also cause the issue you're dealing with.
Step 1. Press the ''Open System Preferences'' icon in the Dock Apple menu.
Step 2. Find the Keyboard before turning towards the Shortcut.
Step 3. After getting the options there, you'll need to select them.
Fix 9: Confirm the location of saving the Mac screenshots
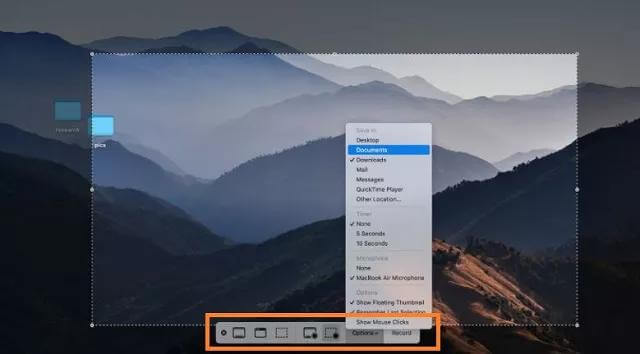
When you take the screenshots on a Mac PC, they will stay on your desktop. If you've ever altered the location of saving the Mac screenshots, it can cause the ''screenshot on Mac not working'' issue.
Step 1. Navigate to the Options icon and start the screenshot app afterwards.
Step 2. After finding the save location, you must alter it to the desktop.
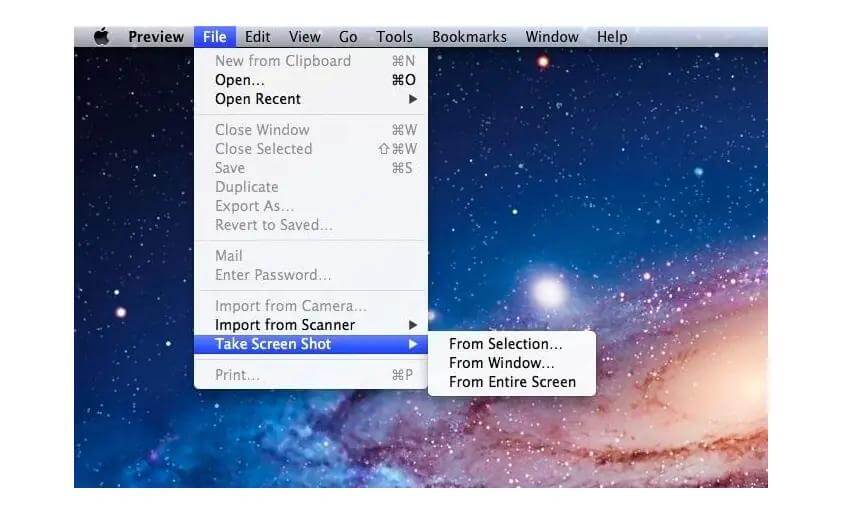
Fix 10: Use the Preview to capture the screenshot
Relying upon the preview option to take the screenshot is another reliable way to fix the ''Mac screenshot is not working'' issue.
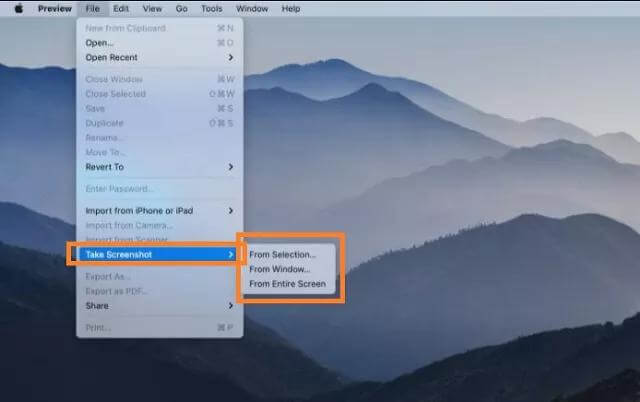
Step 1. Press on the Preview icon and select the File button.
Step 2. Hit the ''Take Screenshot'' icon and select the area you want to capture.
Fix 11: Move the preference file
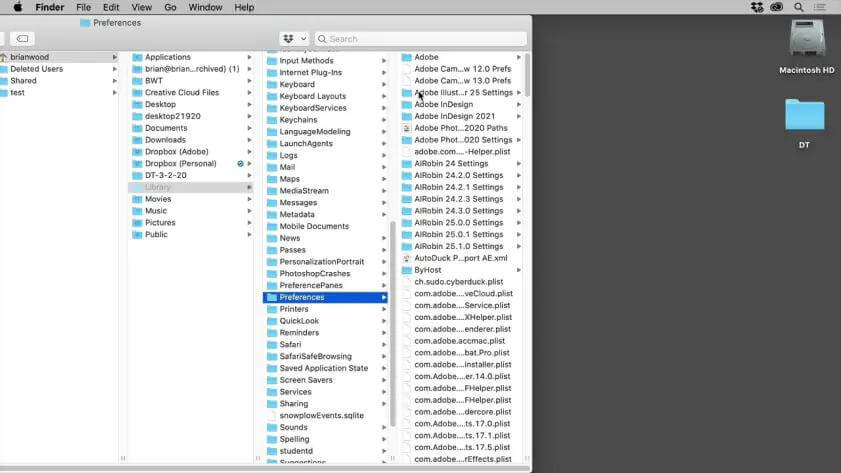
The preference might also prompt issues like ''screenshot on Mac not working'' issue.
Step 1. Launch the Finder and tap on the Go icon. Choose the ''Go to the folder'' before entering the ~/Library/Preferences/.
Step 2.Search for the file listed below
-com.apple.ImageCaptureApp.plist.
Step 3.Navigate to the ''file to the desktop'' icon before restarting the computer. Now, you can check whether you can capture the screenshot.
Part 3. Bonus: How to Restore Deleted Screenshots on Mac?
You may unintentionally delete the screenshots from the Mac and are finding ways to recover the screenshots. With AnyRecover, retrieving the lost data on the Mac has become simple as it lets you recover the 1000+ data types without asking you to do much.
AnyRecover can retrieve the data from multiple scenarios and doesn't mess up the data quality. Moreover, it supports multiple storage devices and has a fast scanning speed.
![]()
19,061,704 Downloads
Features of AnyRecover
-
It can help recover more than 1000 types of files like images, videos, music files, emails, office documents, and other files.
-
Supports Windows, Mac and mobile devices including iOS and Android.
-
It prompts the highest recovery rate.
-
It is compatible with multiple storage devices.
-
It offers users a free trial.
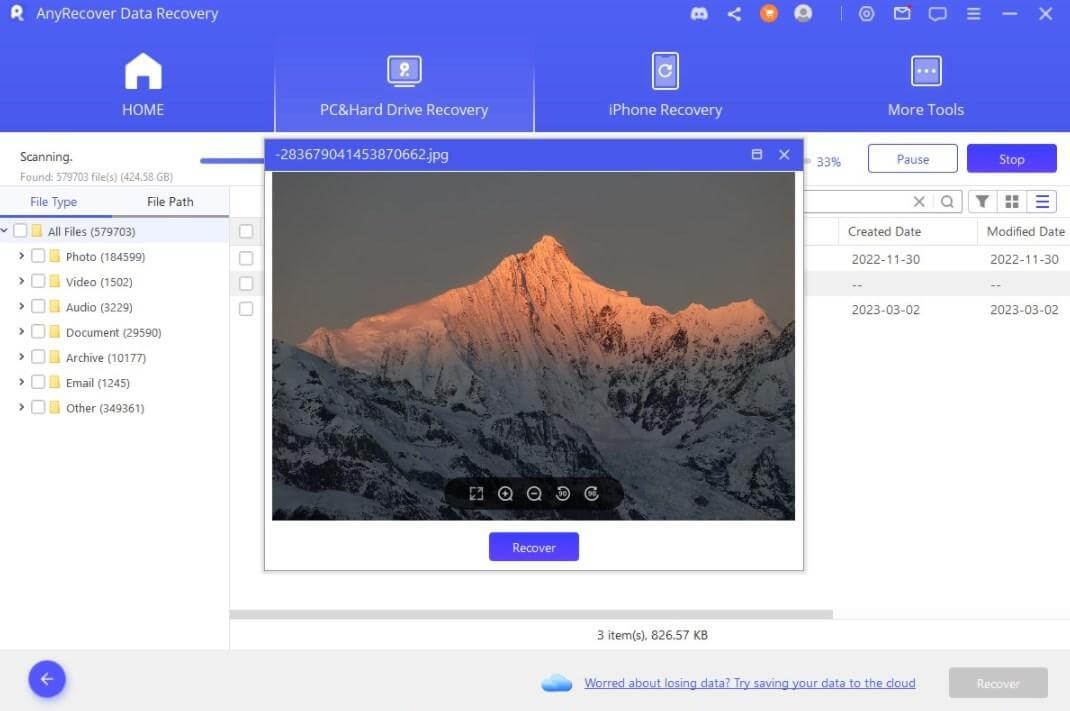
Here's the step by step guide to recover deleted mac screenshots on AnyRecover.
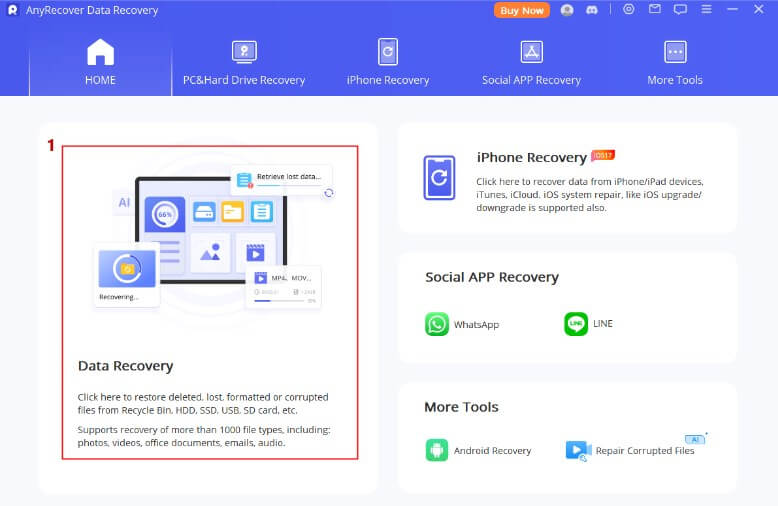
Step 1. Install the AnyRecover on the Mac PC and select the Data Recovery mode after launching the AnyRecover on the Mac computer.
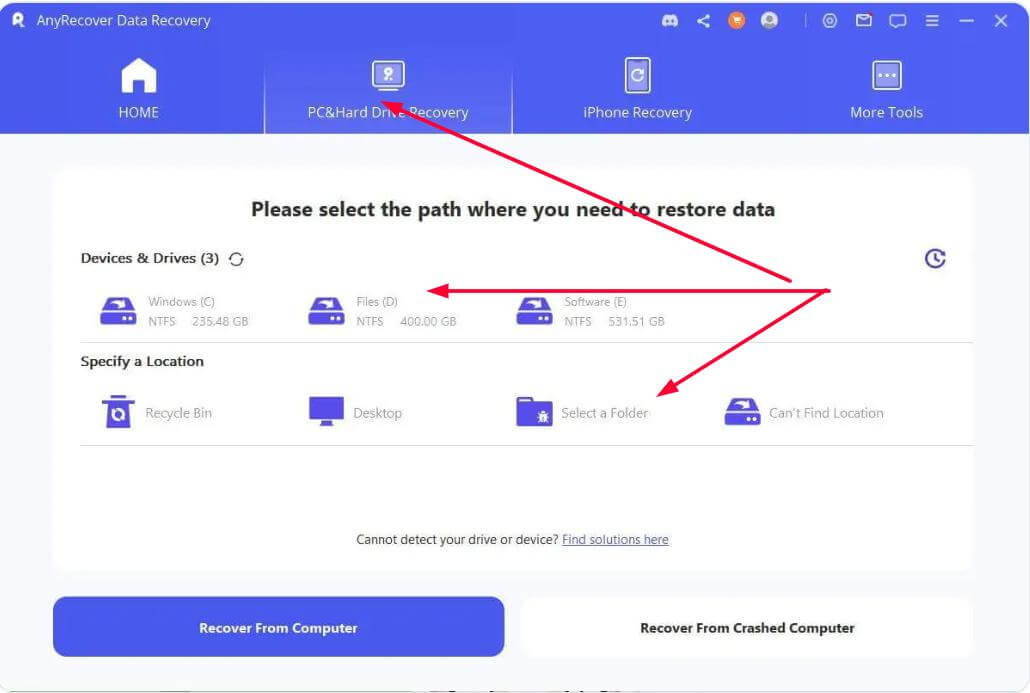
Step 2. After visiting the location where you've lost files, press the Scan icon to initiate the scanning process.
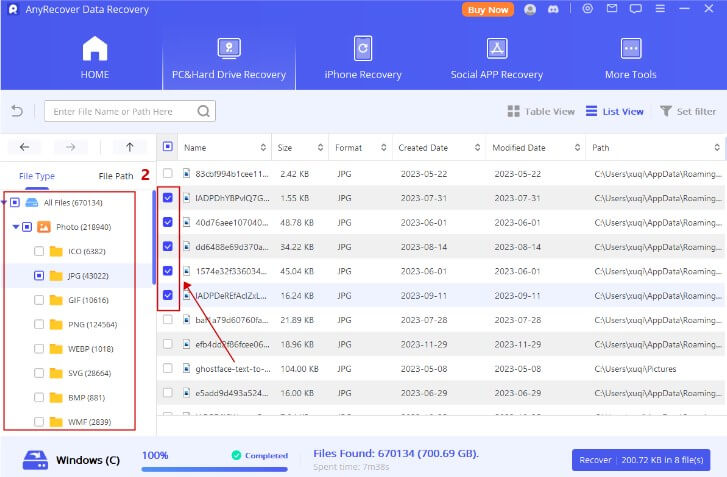
Step 3. Preview the data after scanning it and click the Recover icon to retrieve the lost data.
Part 4. Screenshot on Mac Not Working FAQs
Why are Screenshots not working Mac?
If the Max screenshot isn't working, it could be due to multiple reasons. If the NVRAM malfunctions or your Mac PC is affected by the malware, it could create chaos.
How do I enable Screenshots on my Mac?
You don't need to enable the screenshots on a Mac device as it comes built-in by default to take the screenshot. You can rely upon the following combinations to capture the screenshots.
How do you screenshot on a Mac if Command Shift 3 isn't working?
If the command command+Shift+3 isn't working, you can use the Command+shift+4 icons to take screenshots. While shift+3 allows you to take the full screen screenshot, shift+4 helps capture the specific region on the Mac.
Conclusion
Although you won't face many issues while using the Mac PC, when the ''screenshot on Mac not working'' issue emerges, it could worsen the Mac experience. We have listed the 11 amazing ways to fix the ''screenshots not working on Mac'' issue, and all the options are reliable and worth your attention.
By the way, if you accidentally deleted your screenshots on Mac and want them back, then AnyRecover is the best way to retrieve the lost screenshots provided you've deleted them unintentionally. AnyRecover offers a fast scanning speed, allowing you to retrieve lost screenshots in a few clicks.
Time Limited Offer
for All Products
Not valid with other discount *

 Hard Drive Recovery
 Deleted Files Recovery
