[2024] How to Fix Time Machine Stuck on "Preparing Backup" Stage on Mac
Time Machine is a built-in, handy, and reliable tool to backup your Mac regularly. Once you have set up the backup plan, it is capable to handle backups automatically. Occasionally, it can get stuck or frozen. The common issue that many users have faced with Time Machine is that it gets stuck on the "Preparing Backup" stage. After the initial backup, Time Machine will only backup those files and folders that have seen some changes since the last backup. So, it will display the "Preparing…" status when it is comparing current data with recent backed-up data. But if it remains in that stage for a long time, then possibly it is stuck in this process. So, if you are also facing the Time machine stuck on preparing backup stage issue, then follow this guide to know the reasons and steps to resolve it.
Part 1. Why is Time Machine Stuck on Preparing Backup
There are many reasons that can cause Time Machine to get stuck on the preparing backup stage. Following are some of the common reasons:
You are trying to backup very large files.
Recently installed software is interfering.
You have not updated your macOS.
Corrupted or damaged backup drive.
The previous backup on Time Machine was interrupted.
Antivirus is interfering with the backup drive.
Mac was not shut down properly.
Before you consider Time Machine to be stuck in the preparing backup stage, you have to confirm that it is actually stuck or just taking some extra time. There is a possibility that your Mac is running slow or the large files are making it process the data slowly. You can validate whether your Time Machine is stuck by following the below steps:
Click on the Apple menu and then click "System Preferences".
Look for "Time Machine" and double-click it.
There you will see either "Preparing backup", "Preparing xyz items", or "Scanning xyz items", depending on your macOS.
Time Machine will not be stuck if the number of items keeps increasing even at a slow speed. If they remain unchanged for over 30 minutes, then it is likely that your Time Machine is stuck on preparing backup stage.
If you see that the items count is increasing, then remain patient and wait till the process is completed. If the count is not changing, then wait for another 30 minutes to ensure that your doubts are right.
Part 2. Steps to Fix Time Machine Stuck on Preparing Backup
Since there are multiple reasons that can cause Time Machine to stuck, so you have to carry out multiple steps to bring things back to normal. Follow the below steps one by one:
Step 1. Stop the Time Machine Preparing Backup Process
At very first, you have to stop the current Time Machine backup process before proceeding with other steps.
Click on the Apple menu and then click "System Preferences".
Look for "Time Machine" and double-click it.
In the Time Machine window, click the "X" icon next to the blue color progress bar.
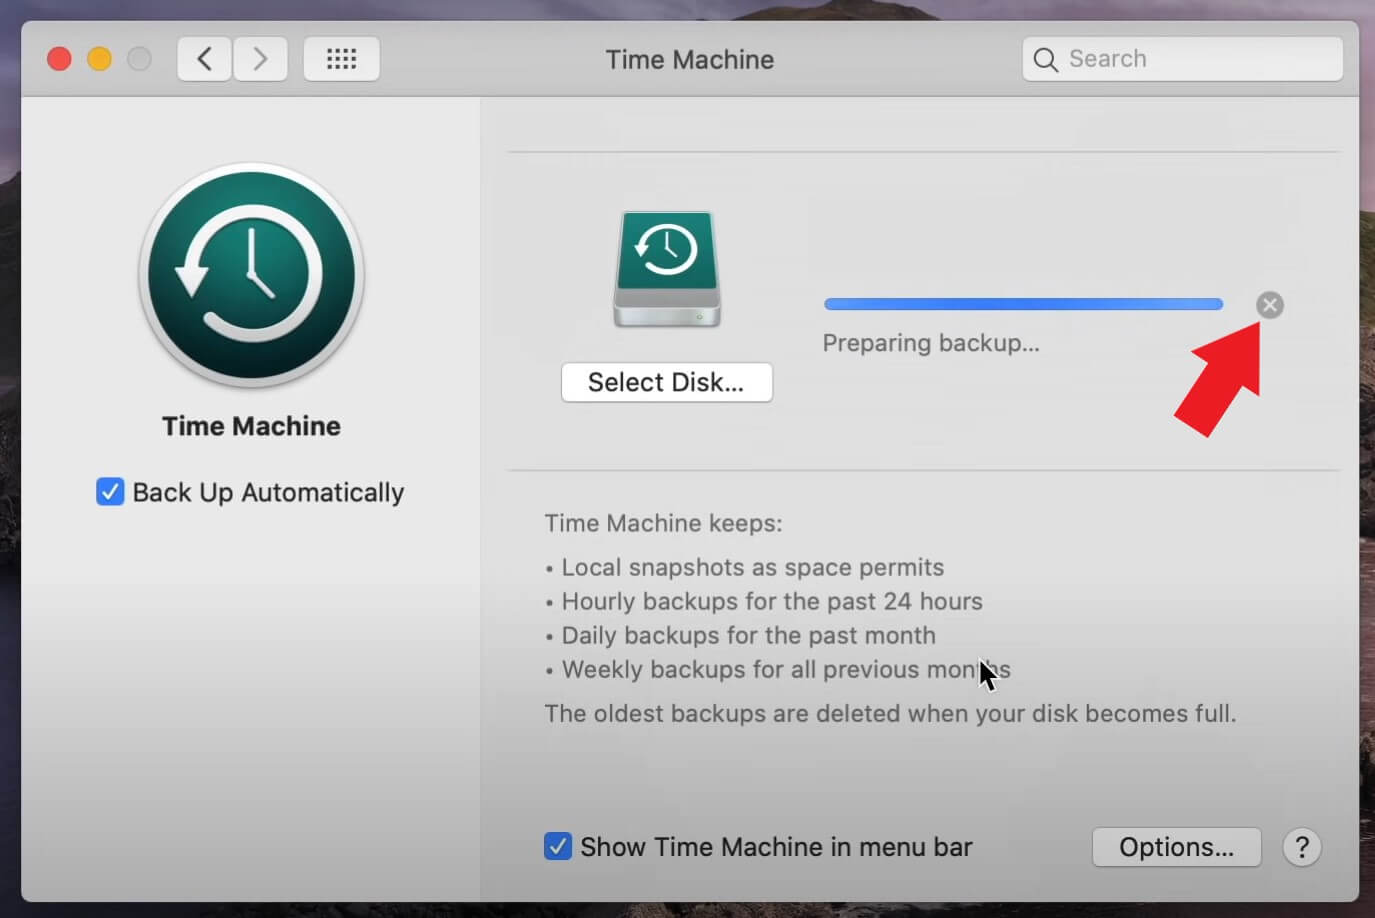
It will take few moments to end the backup process. So, wait till the process is stopped and then proceed with the next step.
Step 2. Locate and Delete the ".inProgress" File
Now you have to find and delete the placeholder file of Time Machine, i.e., the ".inProgress" file from the backup drive.
Open the Finder window and click the backup drive.
Locate and click the "Backups.backupd" folder.
You might have to go to another folder named as per your Mac, such as David's iMac.
Find the file that names ".inProgress" in the end and then delete it.
Remove it from "Trash".
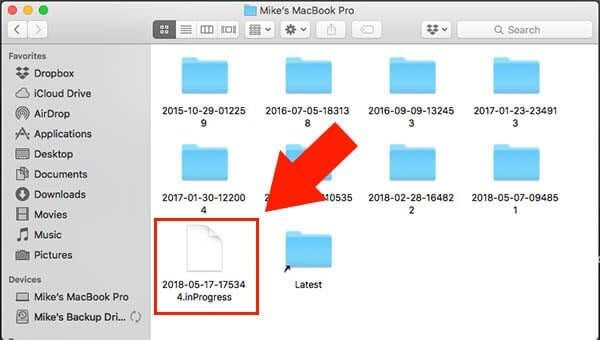
If you are unable to locate the file, then search for ".inProgress" or use "List View" and "Date Modified" to sort the files and folders.
Step 3. Stop Spotlight from Indexing Time Machine Backup
If Spotlight indexes Time Machine backup volume, it can cause interruption during the preparing backup stage of Time Machine. You can add your backup folder to the "Privacy" tab in Spotlight preference to block Spotlight from indexing.
Click on the Apple menu and then click "System Preferences".
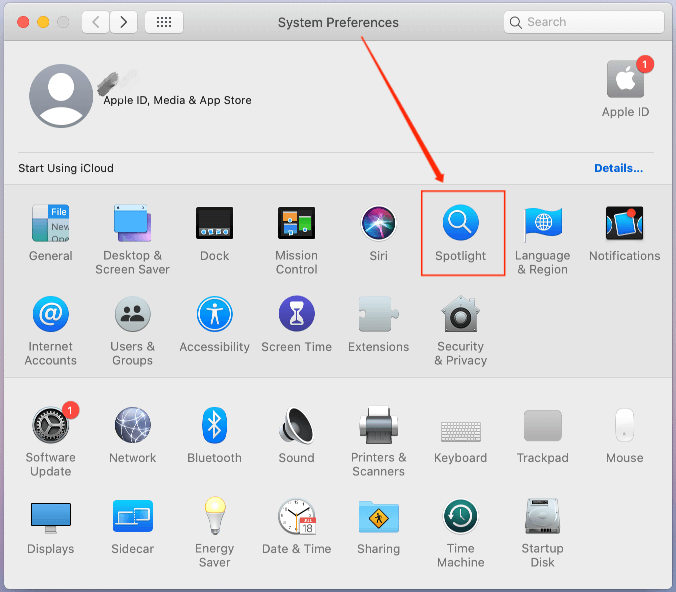
Look for "Spotlight" and double-click it.
Go to the "Privacy" tab and click the "+" button.
Locate and add the backup folder to the index list.
Step 4. Restart the Mac
Once you have completely removed the ".inProgress" file and also fixed the Spotlight interruption issue, then restart your Mac while keeping the backup drive connected. Click the Apple menu and then click "Restart".
Step 5. Retry the Time Machine Backup Process
After proper restart, initiate the Time Machine backup process as usual.
Click on the Apple menu and then click "System Preferences".
Look for "Time Machine" and double-click it.
Click "Select Backup Disk" and then select your backup drive.
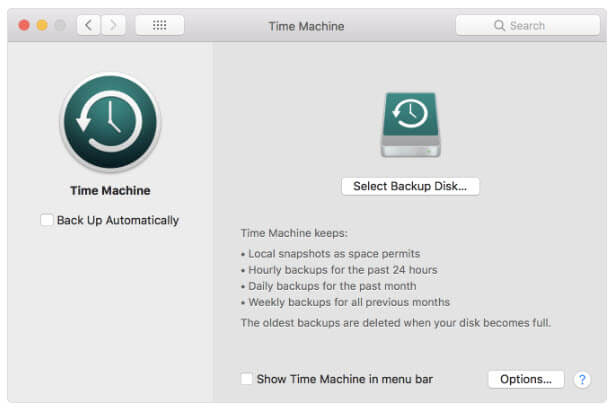
The backup process should begin as normal now. If you still encounter the same issue, then try to change your backup drive and re-do the above steps. Besides that, there are possibilities that some of your files get lost when Time Machine freezes the backup process. But don't worry, they are easily recoverable. So, if you witness any data loss, then use the tool mentioned below to recover all the lost data.
Bonus Tip: AnyRecover for Mac – A Effortless Way to Recover Your Lost Data
Since there is always a risk of data loss when an app misbehaves, you should have recovery software in place to restore back the data in no time. AnyRecover for Mac is one such user-friendly, reliable, and highly efficient tool that can intelligently scan your Mac drive and recover all the lost files. It can:
- Recover lost Time Machine backup data.
- Recover lost data when Time Machine gets stuck.
- Recover 1000+ file types.
- Recover corrupted, inaccessible, and deleted data from your Mac no matter the situation.
Follow the below steps to use AnyRecover for Mac to recover lost data:
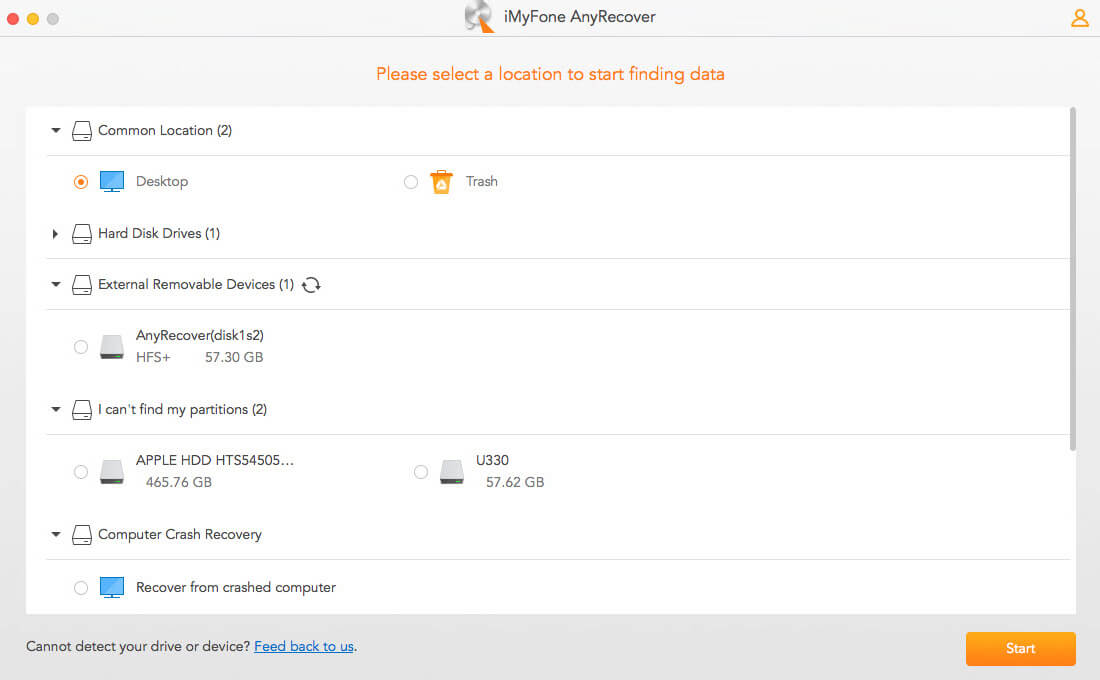
Download and launch AnyRecover for Mac on your computer. Select the drive from where you lost the data.
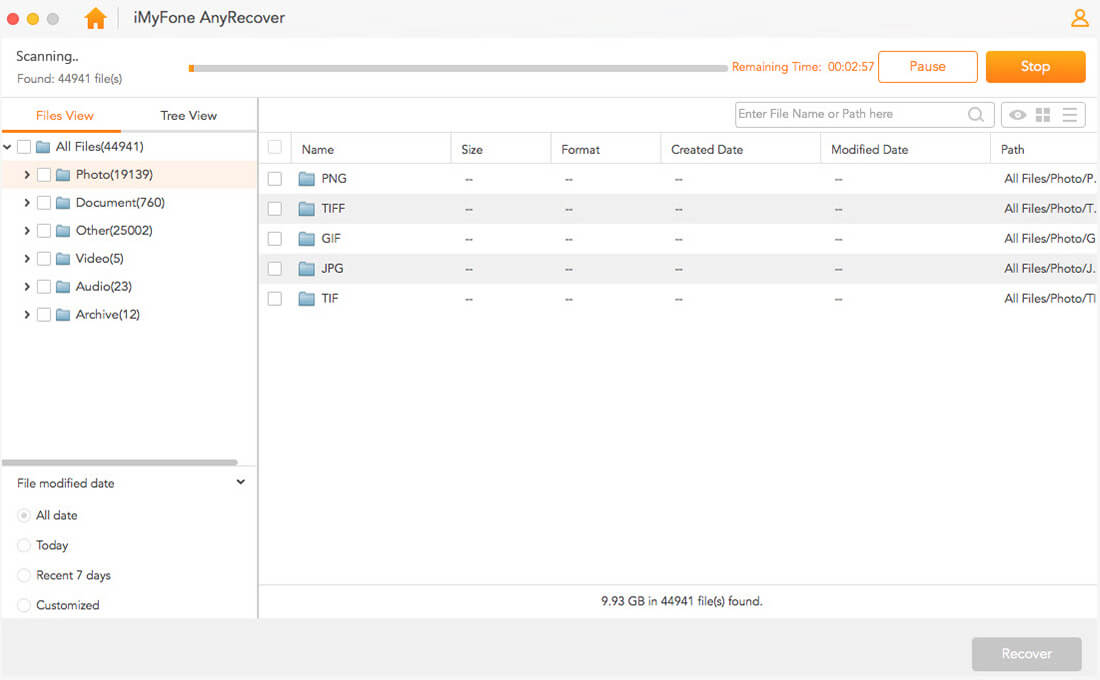
The tool will start the comprehensive scanning process. Wait till it is completed.
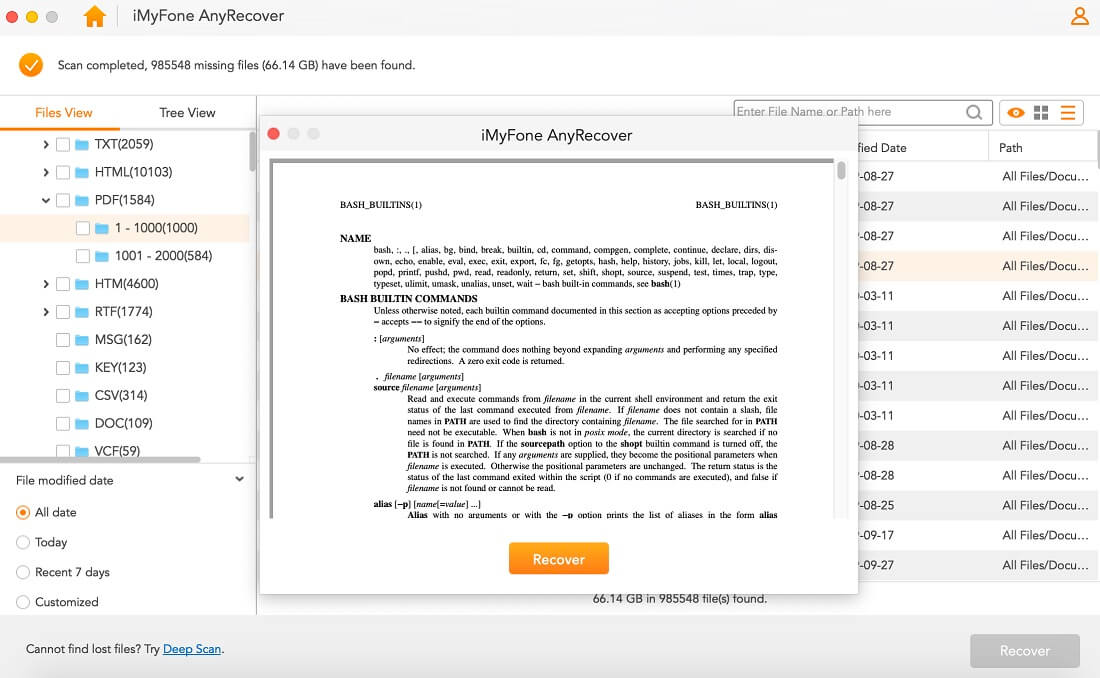
After the scanning is completed, look for the files that were closed. You can even search them in the search field. You can also preview them before recovering. Select all the files you want to recover and then click "Recover". This way, the files will be restored back to your computer.
Conclusion
Although Time Machine is a handy way to backup your data in Mac, sometimes it can malfunction. If you are facing Time Machine stuck on preparing backup stage issue, then follow the above steps one by one. Whatever reason that is causing the issue is likely to be removed once you complete all the steps. And if you encountered any data loss during this process, then quickly recover back the lost data with AnyRecover for Mac intuitive and click-based recovery process.
Time Limited Offer
for All Products
Not valid with other discount *

 Hard Drive Recovery
 Deleted Files Recovery
