5 Common Ways to Convert OST to PST for Outlook 2019/2010...
Unable to view your emails because of problems with the Outlook OST file? This could be due to the mail servers being offline or even corruption. Whatever the source of this problem is, convert OST to PST and there's a good chance your emails will be accessible once again. It goes without saying that this isn't an everyday technique, so we will explain all of the important details.
1Reasons for Needing to Convert OST to PST
Wondering why people need to convert .OST to .PST? There are a number of reasons, including:
Transferring Outlook data to another computer requires users to convert OST to PST.
If the Microsoft Exchange server is down for maintenance or experiences a power surge, users can't access emails unless they convert to PST.
Recovering deleted emails can be done by converting the OST file to PST.
Rebuilding Outlook's OST file can remove junk data that slows down the program. Converting the file to PST ensures no important data is lost when you rebuild it.
There are also more technical reasons for doing it, but you get the gist.
2How to Convert OST to PST in Outlook 2019/2016/2013/2010?
Now to the main question: what are the best solutions for converting and how to convert OST to PST?
1Convert OST to PST via iMyFone ScanOutlook
Standing out from the other solutions is iMyFone ScanOutlook, our recommended solution for converting OST to PST. It is an innovative piece of software which can convert OST file to PDF and also recover emails that you permanently deleted.
Steps to Convert OST to PST
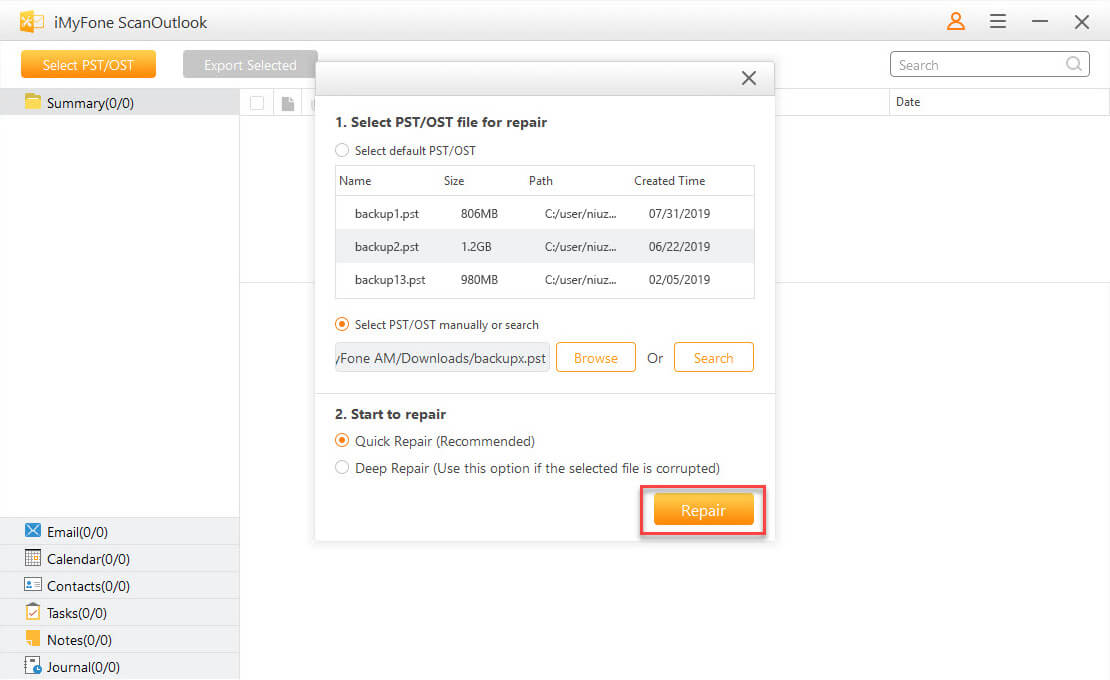
Step 1. Open iMyFone ScanOutlook on your computer. Select the OST file you want to convert and click on "Repair" button.
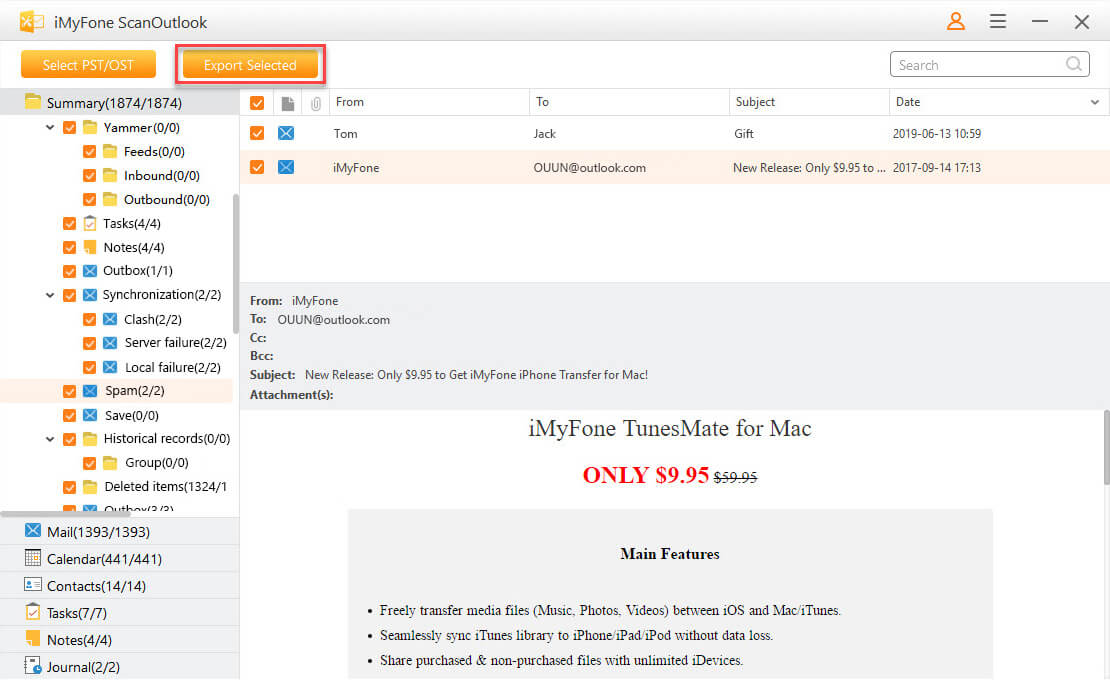
Step 2. It will scan and show you all the items in the OST file, click on "Export Selected" button.
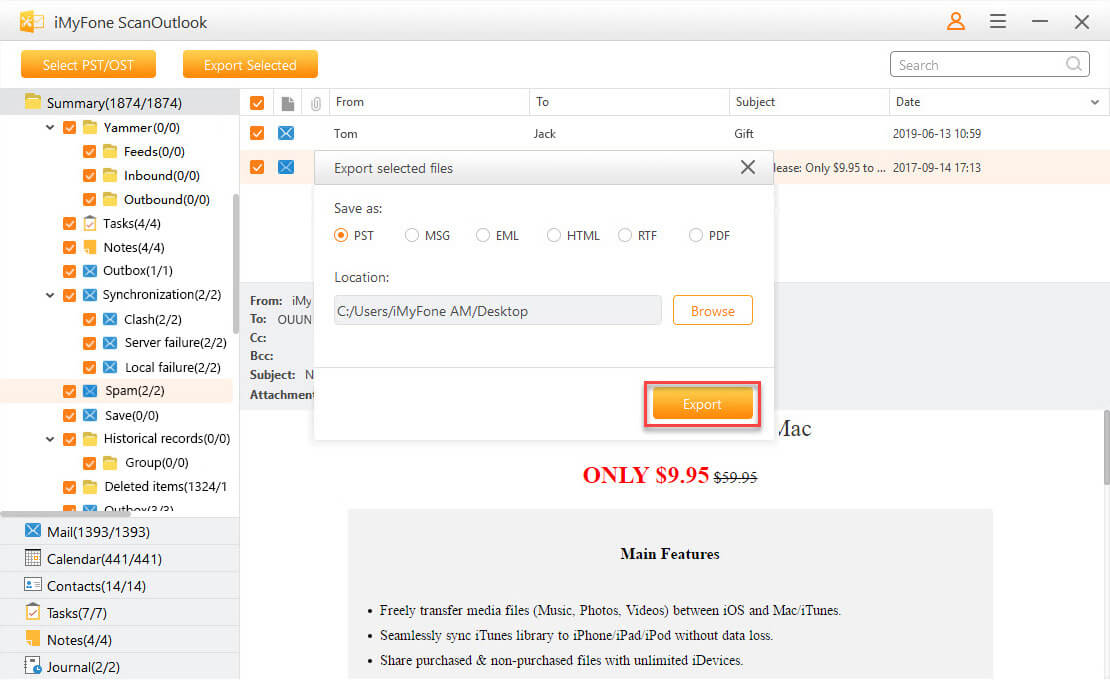
Step 3. Choose PST format and set the location for saving.
Several minutes later, your .ost file will be coverted into .pst.
ScanOutlook is incredibly helpful in different situations, not just to convert OST to PST Outlook 2016. Recovering data from corrupt PST/OST, exporting individual emails or attachments, and even creating PDFs of your emails. these are some other examples of when you might find it useful to use ScanOutlook.
2Using Import/Export t Convert OST to PST
Outlook actually has a built-in feature that lets you export the OST file and inadvertently convert OST to PST free.
Step 1. Open Outlook and sign in if you haven't already.
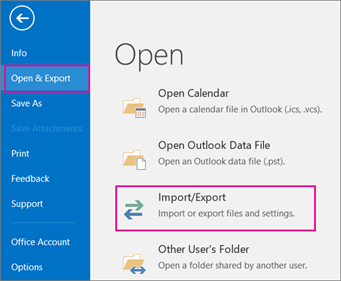
Step 2. Click the "File" tab and select "Open & Export > Import/Export".
Step 3. Select "Export to a file" from the action list and press "Next".
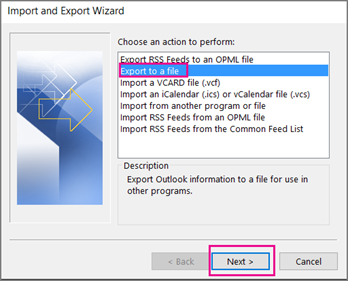
Step 4. Choose "Outlook Data File (.pst)" from the list of filetypes, and click "Next".
Step 5. You will now be able to select the folders from your email's data file to export. After doing this, click "Next".
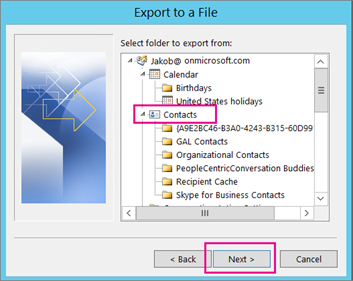
Step 6. On the final menu, choose a save location and check a duplicate setting, and click "Finish".
In comparison to ScanOutlook, this method lacks one key feature: you can't selectively manage the data that is converted.
3Using Archive to Convert .OST to .PST
Another built-in feature that allows us to convert OST file to PST is Archive.
Step 1. Launch Outlook and click the "File" tab at the top-left.
Step 2. Navigate to "Option" and select Adcanced > AutoArchive Settings.
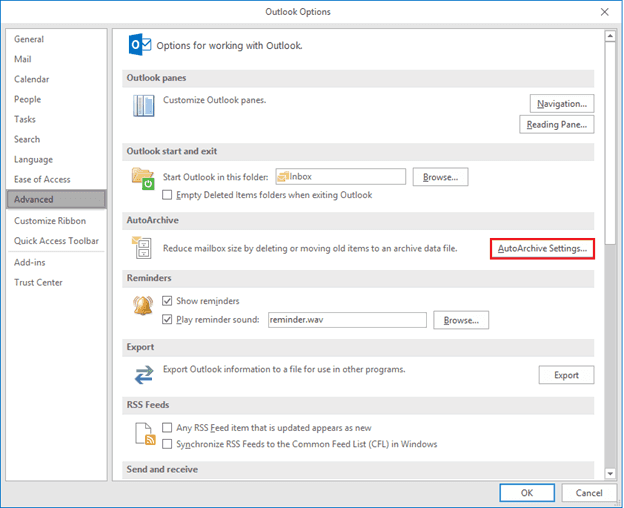
Step 3. Select a folder to convert as PST and if desirable, set an exclusion for "Archive items older than".
Step 4. Below "Archive file", set a folder to save the PST file in.
Step 5. Lastly, press "OK" and OST will successfully convert to PST.
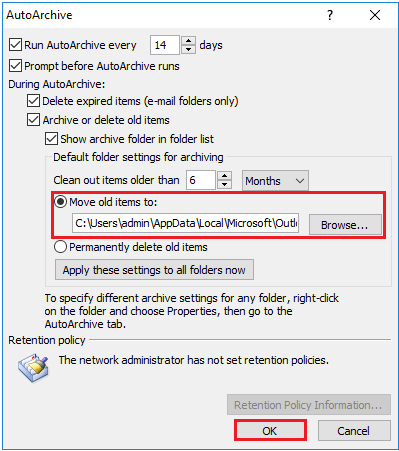
Even though this is meant as a way to take backups of an Outlook OST file, it's also an appropriate solution to convert it to PST.
4Using an OST to PST Online Converter
Whenever someone mentions they need to convert a file, the usual expectation is that they'll use an online converter. Convert .OST to .PST isn't any different and, in this case, OSTtoPST.online does the job.
Step 1. Open a browser and go to OSTtoPST.online.
Step 2. Click "Select File" and select the OST file you want to convert.
Step 3. Type your email address into the box provided and press "Next Step".
Step 4. The OST will now upload and afterwards it'll be converted.
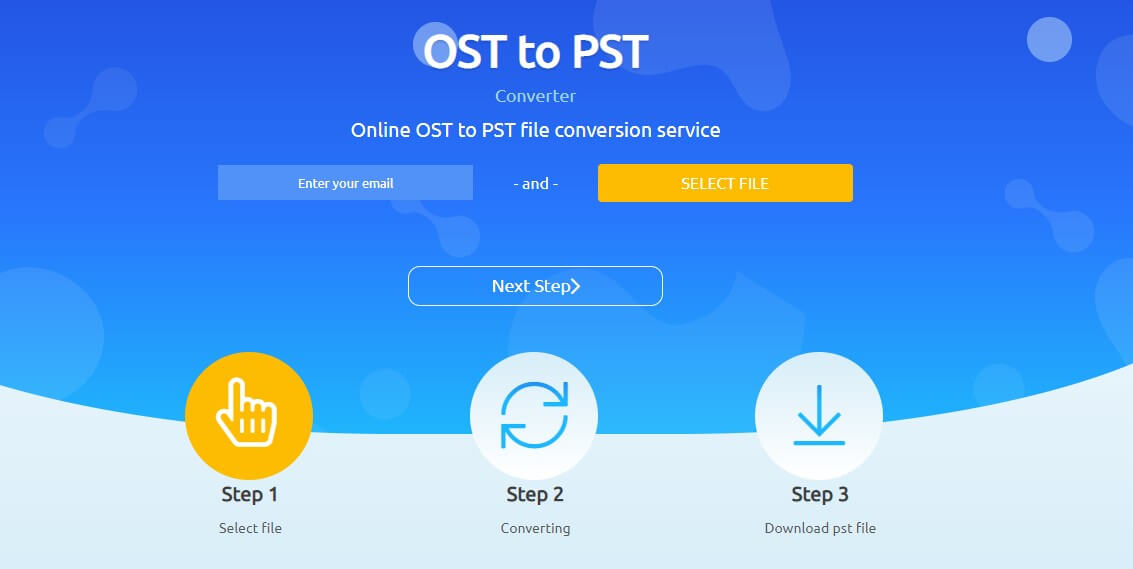
Step 5. Once the conversion is over, download it and use "Import/Export" to actively use it in Outlook.
Unfortunately, there are disadvantages to using online converters. Not only is your email data put at risk of a privacy leak but if your OST has a large file size, uploading it can be difficult and time-consuming.
5Drag and Drop
Our last method is the Drag and Drop method. Again you're able to do this from on Microsoft Outlook and it's relatively straightforward.
Step 1. Launch Microsoft Outlook and click the "New Items" option on the toolbar menu.
Step 2. Hover over "More Items" and click on "Outlook Data File".
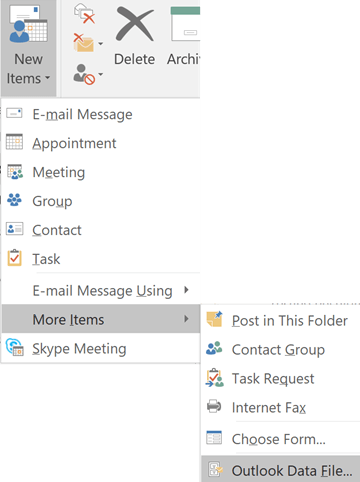
Step 3. Assign the file a name and optionally a password, then click "OK".
Step 4. When the new PST data file appears, drag your email folders into it to create a PST.
Unlike the previous features built into Outlook which let you convert OST to PST, this won't let you include your inbox or contact information in the new PST file.
Conclusion
After you convert OST to PST and obtain the new file, accessing your emails won't be a problem anymore. Preferably you should use iMyFone ScanOutlook. Unlike the rest of these solutions, ScanOutlook can save emails in bulk which is ideal for anyone who wants to access their entire email account.
Time Limited Offer
for All Products
Not valid with other discount *
 Hard Drive Recovery
 Deleted Files Recovery

