How to Repair OST File in Outlook 2010/2013/2016/2019?
On Windows 10/11, Outlook usually stores a copy of your emails, calendars, and contacts using 2 different data files for offline access. If you are using the POP or IMAP account, such as the ones usually provided by the Internet Service Provider (ISP), your account information is usually stored in the Outlook Data File (PST). However, if you are currently using an Office 365, Outlook.com, or Exchange account, your data will reside in the Offline Outlook Data file (OST).
Generally, the data files are very reliable. However, at some point, they may get damaged or stop working. If this happens to you, you will want to repair OST file. In this article, we will focus on making OST repair easier for you.
Method 1. Best Way to Repair OST File – Use ScanOutlook (Windows 11 Supported)
When it comes to the OST repair, the tool that will offer you the best results is known as ScanOutlook. This tool, which is developed by iMyFone, will make the repair process extremely easy for you. In fact, you will not need any tech skills, you will just need to follow some onscreen steps to get your OST repaired. It will finish repairing your OST or PST file within just a couple of minutes or even seconds.

Features
- Repair the corrupted Outlook data files (.pst & .ost) for Free.
- Recover your deleted emails from the OST file, even if you had deleted them permanently.
- Allow you to preview all the data available for free, including the contacts, emails, attachments, calendars, etc.
- Save your data in the mailbox in a wide range of formats, including EML, PST, RTF, MSG, HTML, etc.
- Support both PST and OST files.
How to Repair OST File Quickly and Easily?
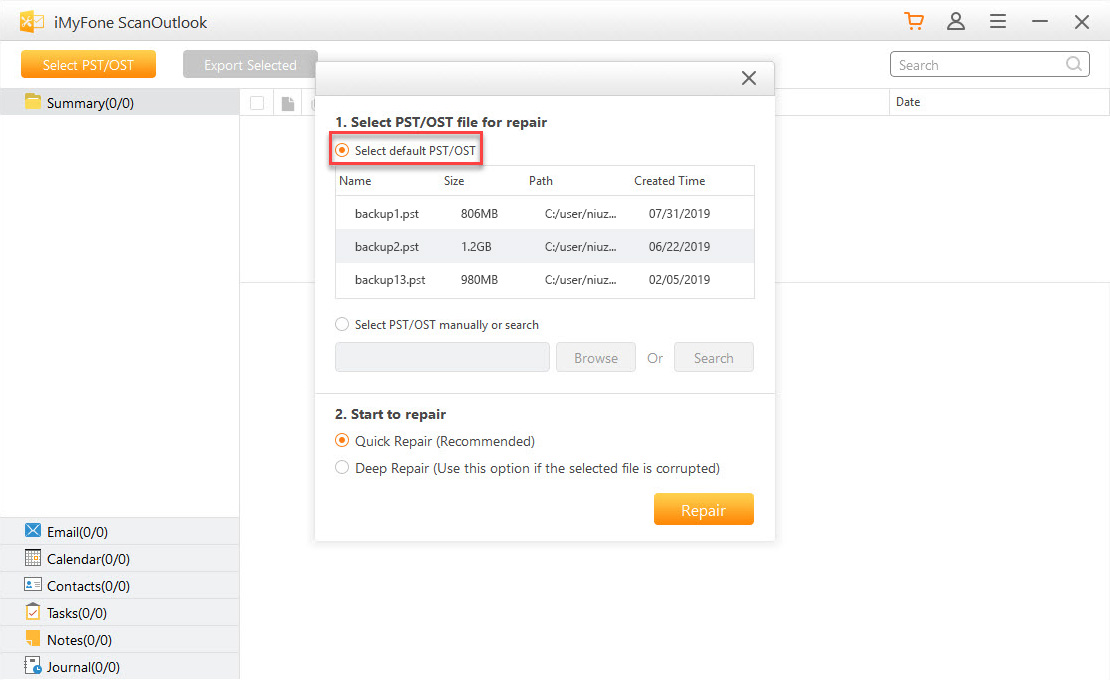
Step 1. Launch ScanOutlook on your computer. Locate the OST file scanned automatically and or choose one manually.
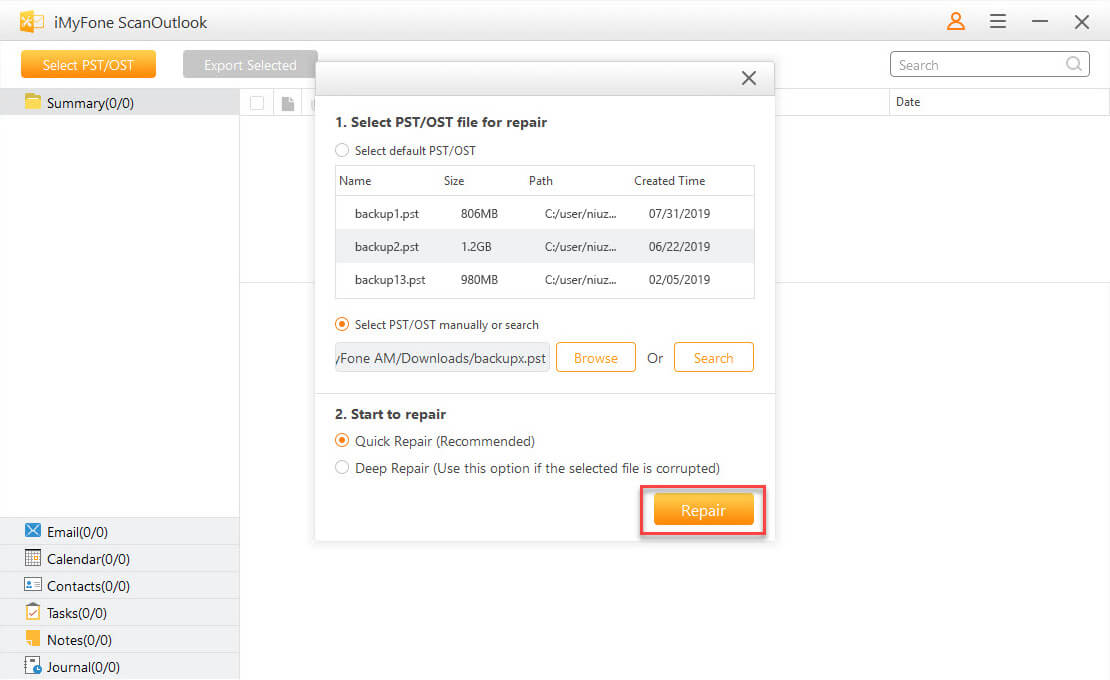
Step 2. Simply click the Repair button to initiate the repair process.
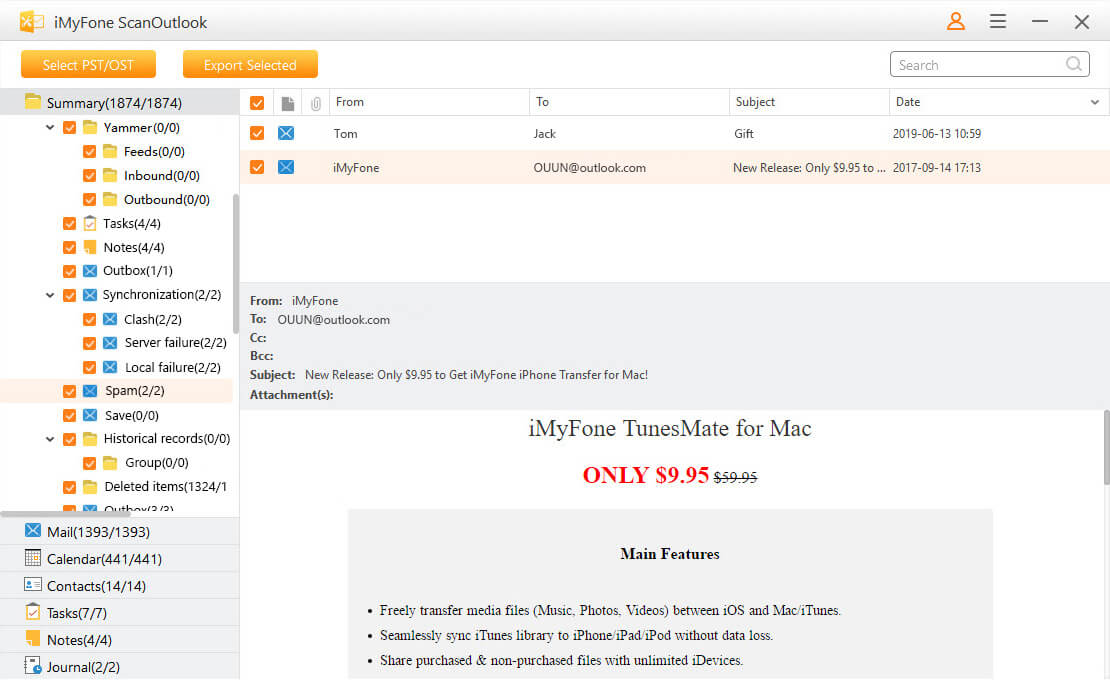
Step 3. After repairing, you can view all your emails and other data available on your chosen file for free.
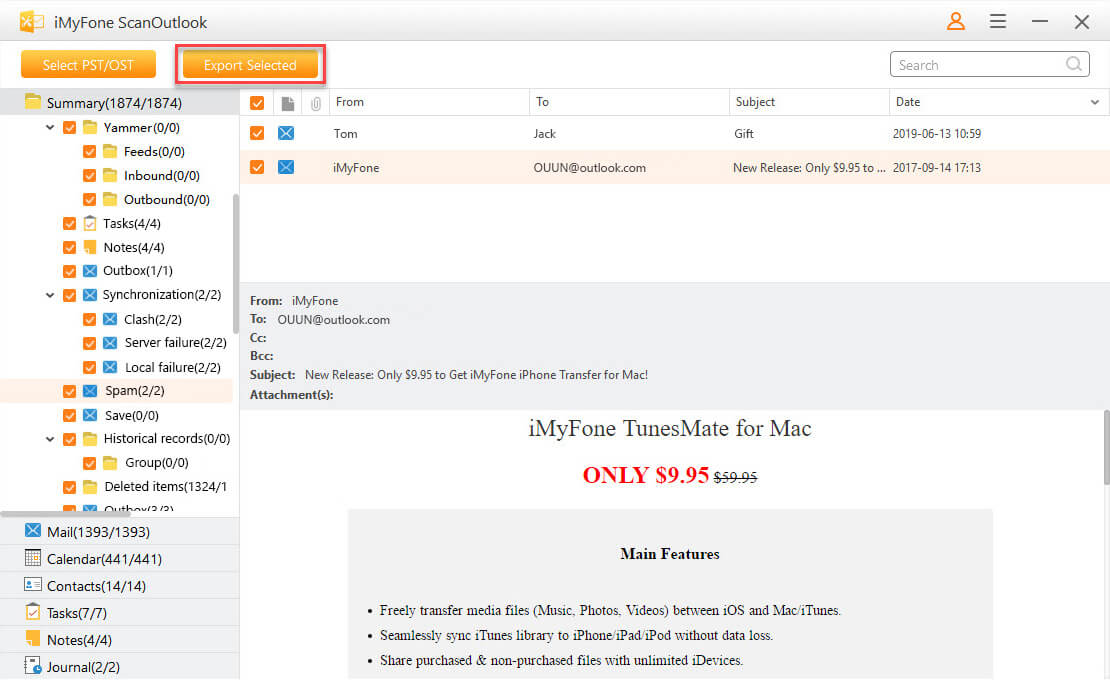
Step 4. Choose the items you want to export and click on “Export Selected” to save your data.
Method 2. Repair OST File Using Scanost.exe
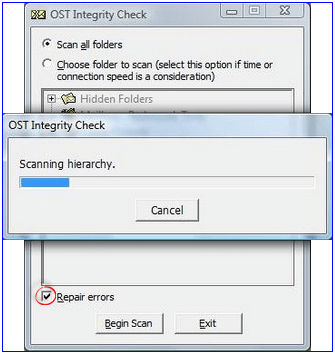
While less reliable, you can use the Scanost.exe – also known as the Integrity Check Tool – to repair OST file. This tool is available by default in Windows 10. The steps outlined below should help you perform the OST repair using the Scanost.exe:
Step 1. Launch the Outlook application on your computer.
Step 2. Visit the Task Manager and then open the Process tab.
Step 3. Locate Outlook.exe and right-click on it.
Step 4. Select “Open File Location” and then open the Scanost.exe location.
Step 5. After finding the Scanost.exe file, double-click on it.
Note: Before double-clicking the Scanost.exe, be sure to close the Outlook application.
Step 6. On the “Microsoft Outlook Inbox Repair Tool” window, simply locate and pick the corrupted Exchange profile.
Step 7. From the “OST Integrity Check” window, select the “All Folders” option to scan. Alternatively, you can choose specific folders from the list.
Step 8. Tap the Begin Scan to initiate the scanning process.
Step 9. On completion, you should see a “successful” message. Click Ok on this message. Hopefully, this should conclude the repair process.
Cons of Using the Scanost.exe to Repair OST File:
The process has numerous steps – this could be confusing to anyone who has never used the process before.
There is no guarantee that the Scanost.exe will have the ability to fix the corrupted file. The Scanost.exe success rate is average, at its best.
If viruses/malware are responsible for damaging the OST file(s), the Scanost.exe may not have the ability to fix your issues.
Scanost.exe, unlike iMyFone ScanOutlook, won’t allow you to preview the data items.
Method 3. Repair OST File in Control Panel
This method takes advantage of the fact that if an OST file gets deleted, the user can download a fresh copy from the server. Below, we have the steps that you will need to follow:
Step 1. Close the Outlook application and then open the Mail via the Control Panel. This should open a dialogue with the title Mail Setup – Outlook.
Step 2. Choose Email Accounts. This will open the Accounts Settings dialogue box.
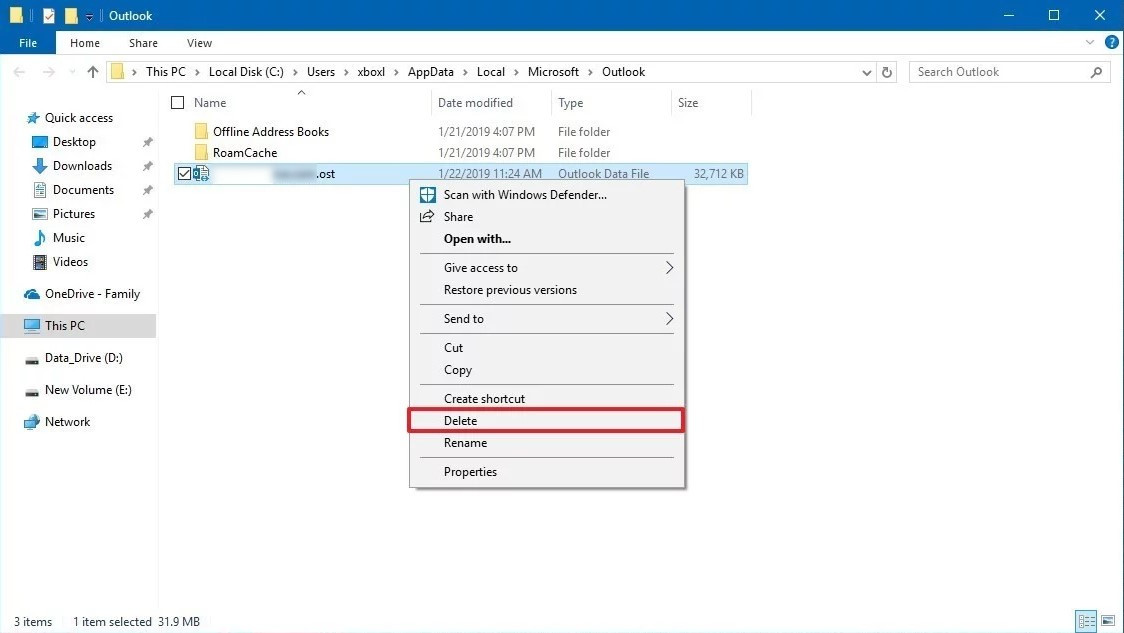
Step 3. Tap the Data Files, select the OST file, and then tap the Open File Location option.
Step 4. Right-click the OST file and then hit the Delete option. This should delete the file.
Step 5. Close the Mail Setup Window and Account Settings before deleting the OST file. If you fail to close the 2 windows, you will get an error message.
Step 6. Start Outlook again. It should recreate the OST file.
Cons of Using the Control Panel to Repair the OST File
You will need to have access to an internet connection.
Instead of repairing the original file, you will be downloading a new file.
The control panel will not allow you to preview the data.
Conclusion
If you are currently having issues with your OST files, you should not assume that the files are completely destroyed. Irrespective of whether viruses have tampered with the files or they have synchronization errors, it is possible to repair the files. While you can use Scanost.exe and the Control Panel to repair the files, you will have a higher chance of achieving ideal results if you use iMyFone ScanOutlook. On top of being easy to use, ScanOutlook has much better features, including allowing you to preview your data after the repair and helping you repair both PST and OST files.
Related Articles:
Time Limited Offer
for All Products
Not valid with other discount *

 Hard Drive Recovery
 Deleted Files Recovery
