How to Send An Email to Undisclosed Recipients in Outlook
Most people usually struggle when it comes to dealing with issues related to Undisclosed Recipients Outlook. If you happen to be one of such person, there is no doubt that you must be finding this issue to be very frustrating at the moment. The good part is that it can be easily overcome today. Just read the details of this post to learn how to deal with issues related to Undisclosed Recipients Outlook.
Part 1: How to Send Email to Undisclosed Recipients in Outlook?
Sending emails to undisclosed recipients Outlook is very easy to do if you know the various steps to be taken. You can follow the steps below to get this done:
Step 1. Create an Undisclosed Recipient Contact
The first thing to do is create undisclosed recipients contacts. The following will help you do this:
1. Head over to your Home tab, locate Find group and get Address Book selected.
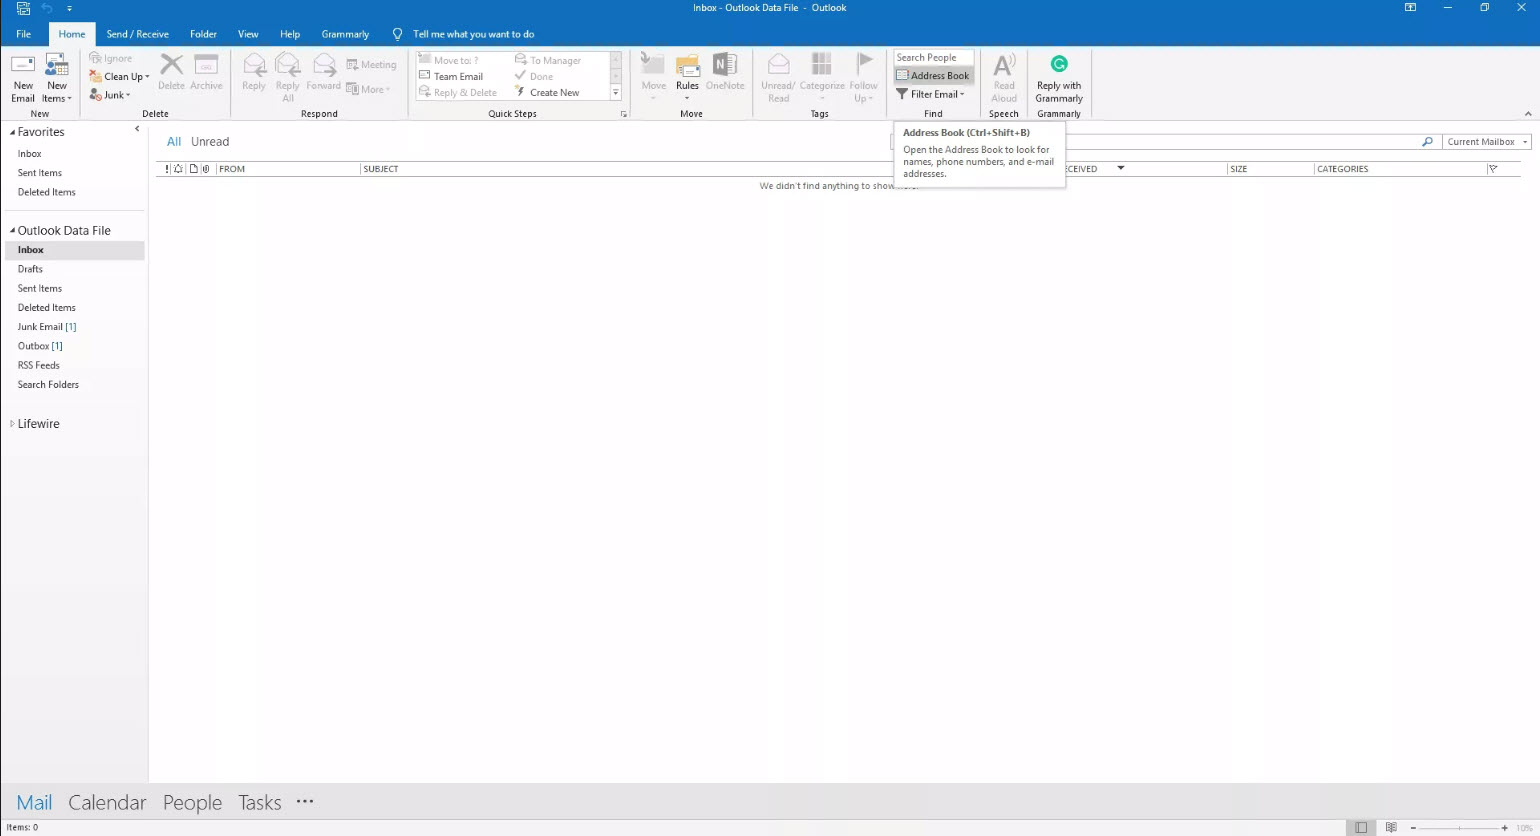
2. Select File > New Entry.
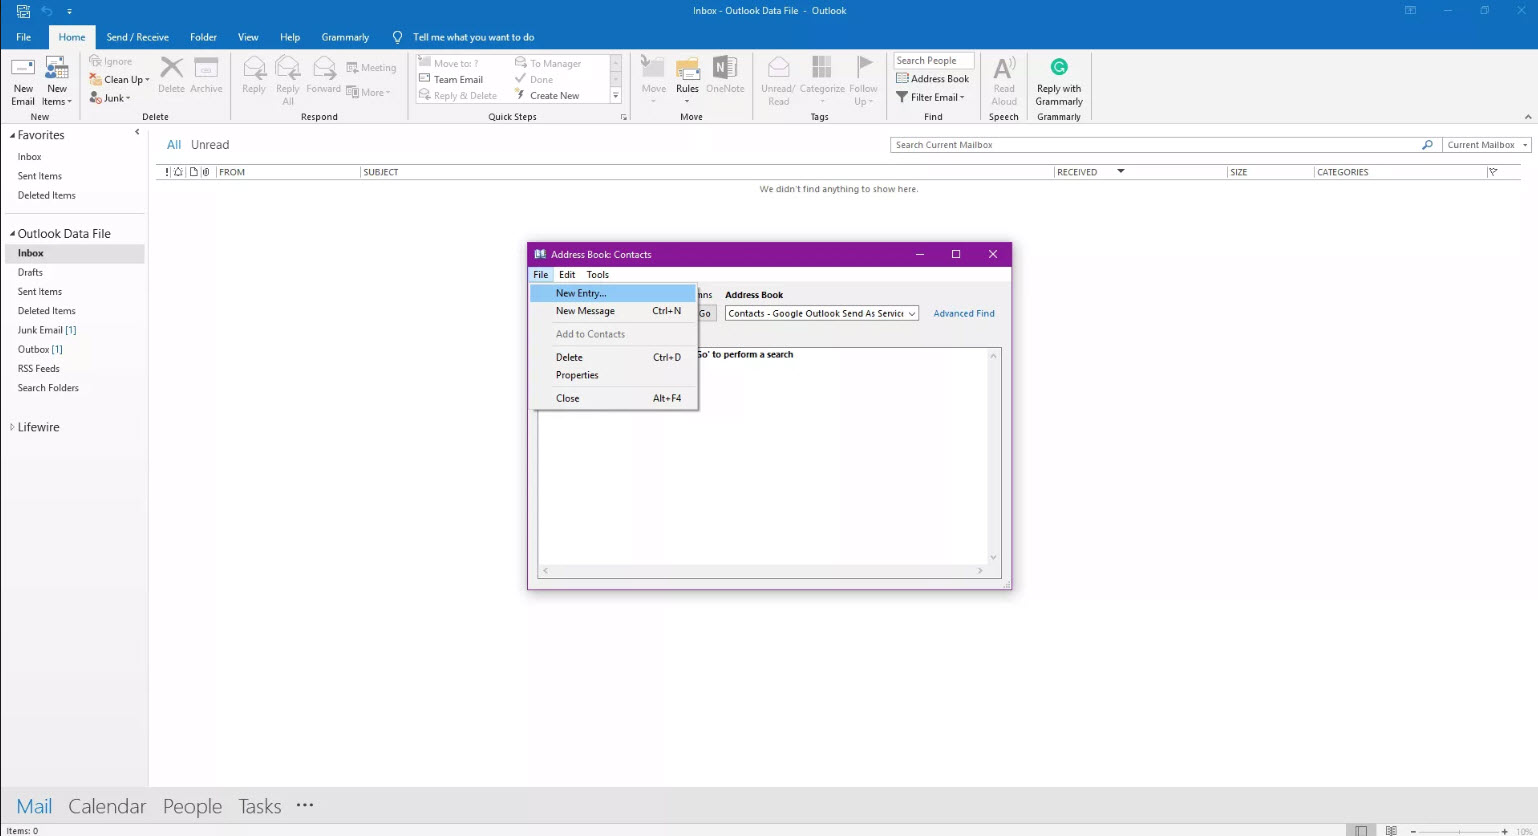
3. A new entry dialog box will show, New Contact should be selected.
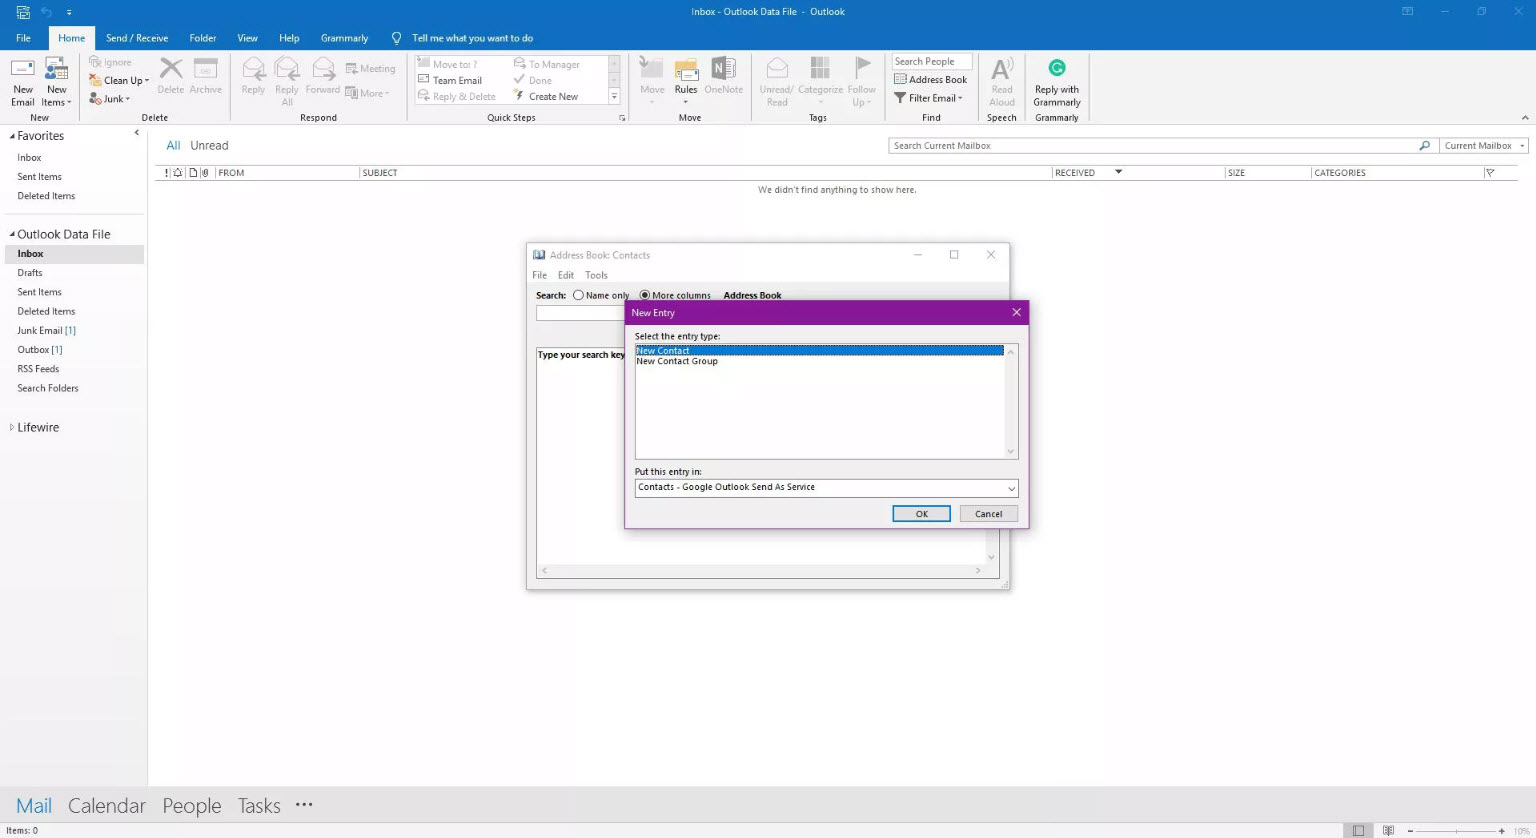
4. OK should be selected.
5. Inside the text box (Full Name), Undisclosed Recipients should be entered.
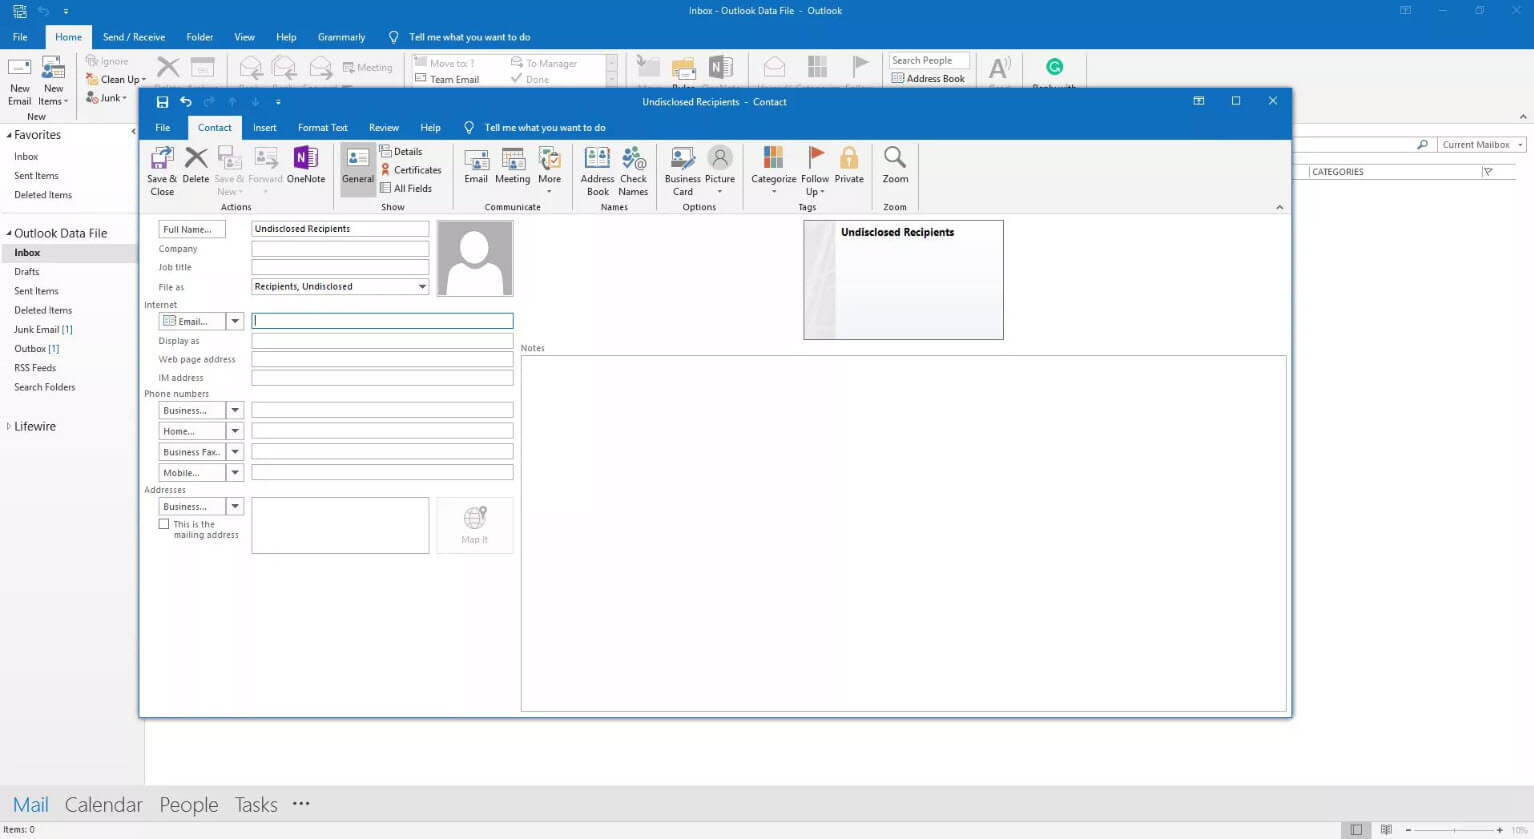
6. Input your email address in the text box for Email.
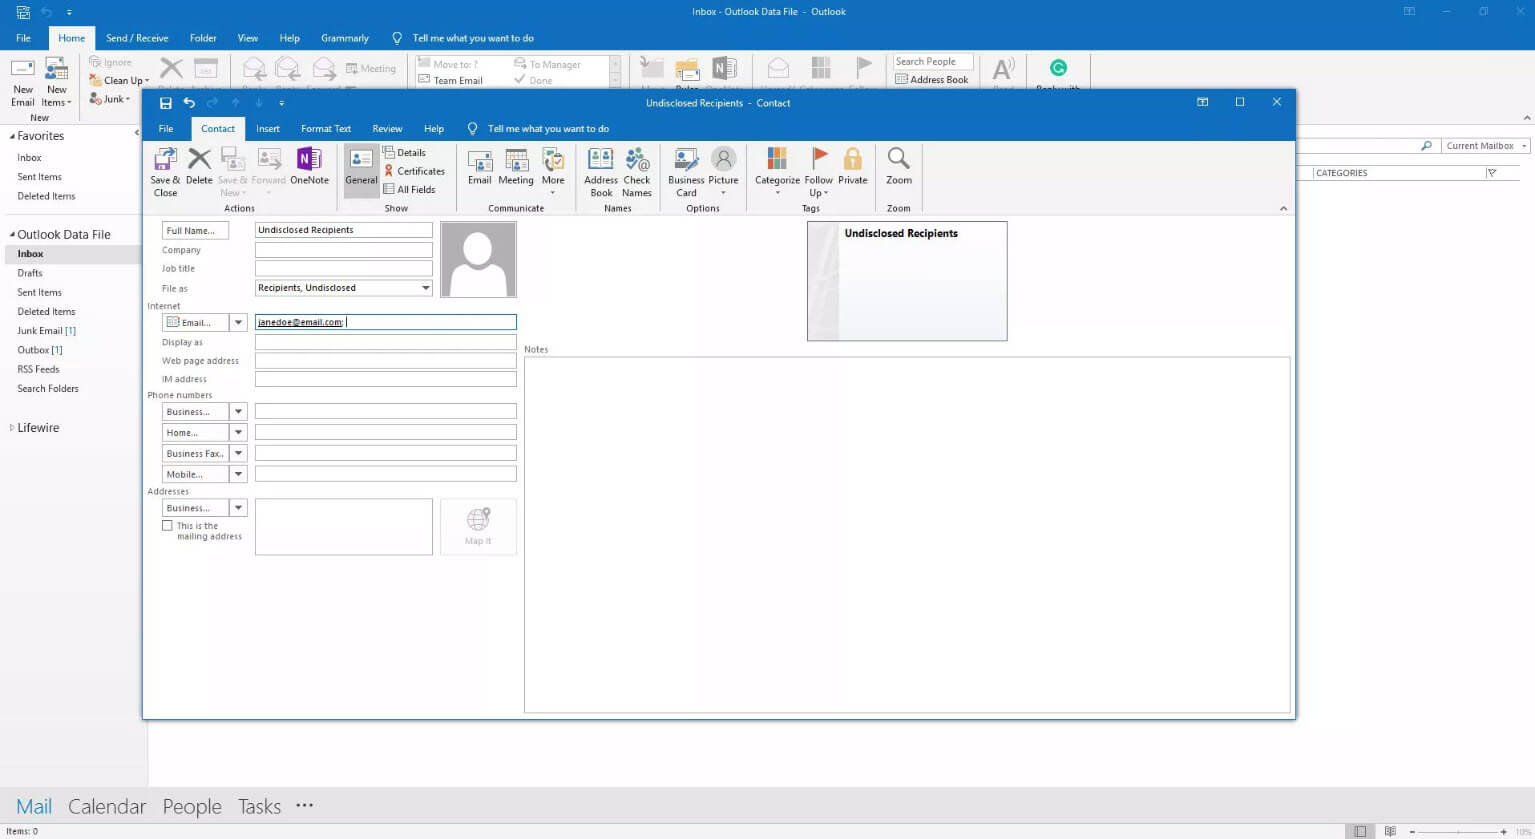
7. Save & Close should be selected.
Step 2. Send an Email Using the Undisclosed Recipients Contact
Once the above has been done successfully, you will then need to get an email composed to be sent to Outlook undisclosed recipients. This is done through the steps below:
A new message should be created in Outlook.
Undisclosed recipients should be entered in “To” field. Suggestions will be shown by Outlook as you're typing. Undisclosed recipient contact should be chosen.
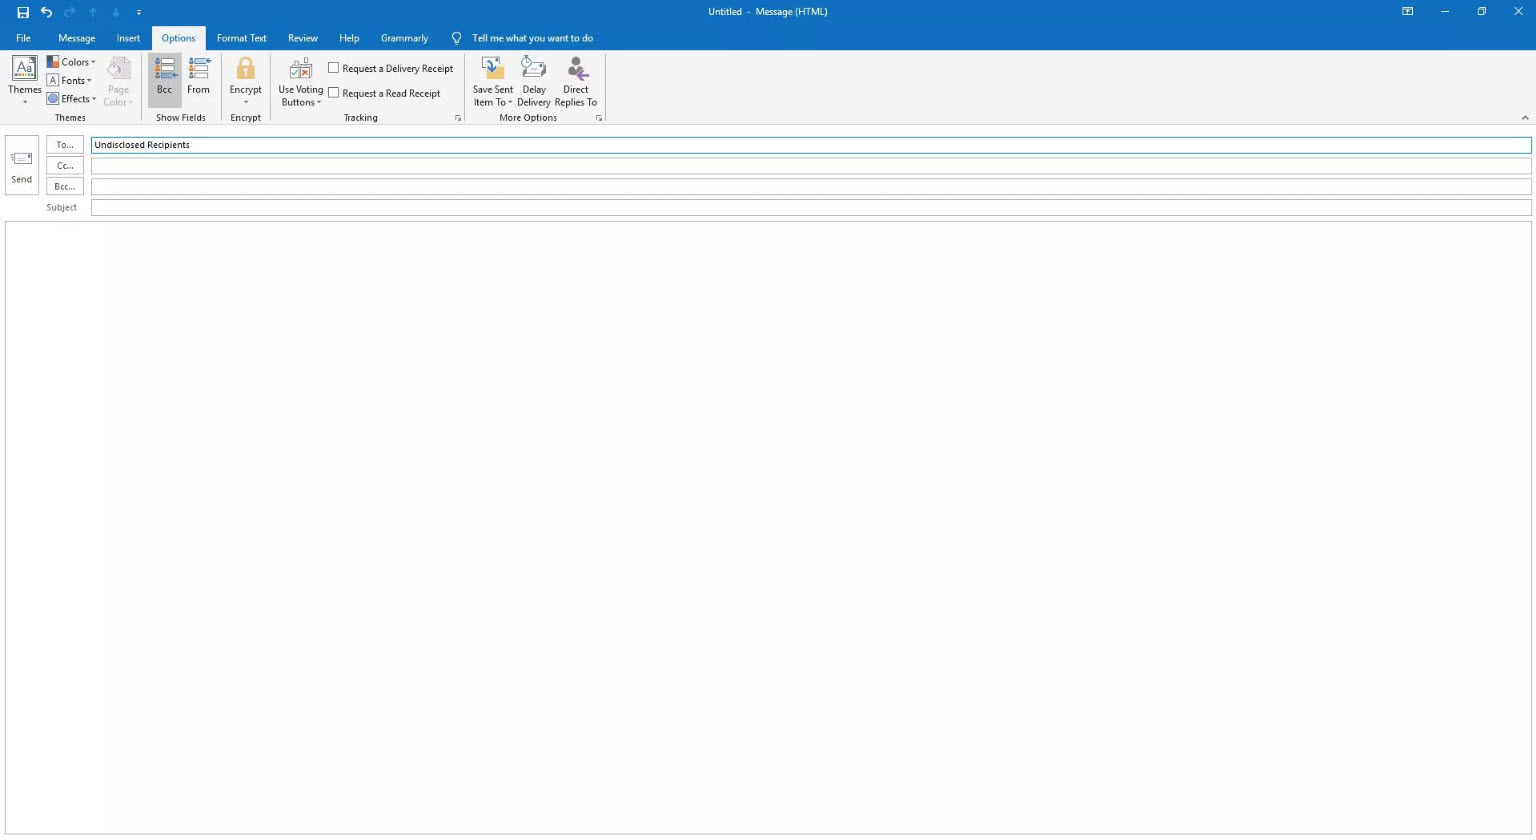
Bcc should be selected.
After getting the email address to be emailed highlighted, Bcc should be selected. In case, you are getting the address typed manually, each should be separated using a semicolon.
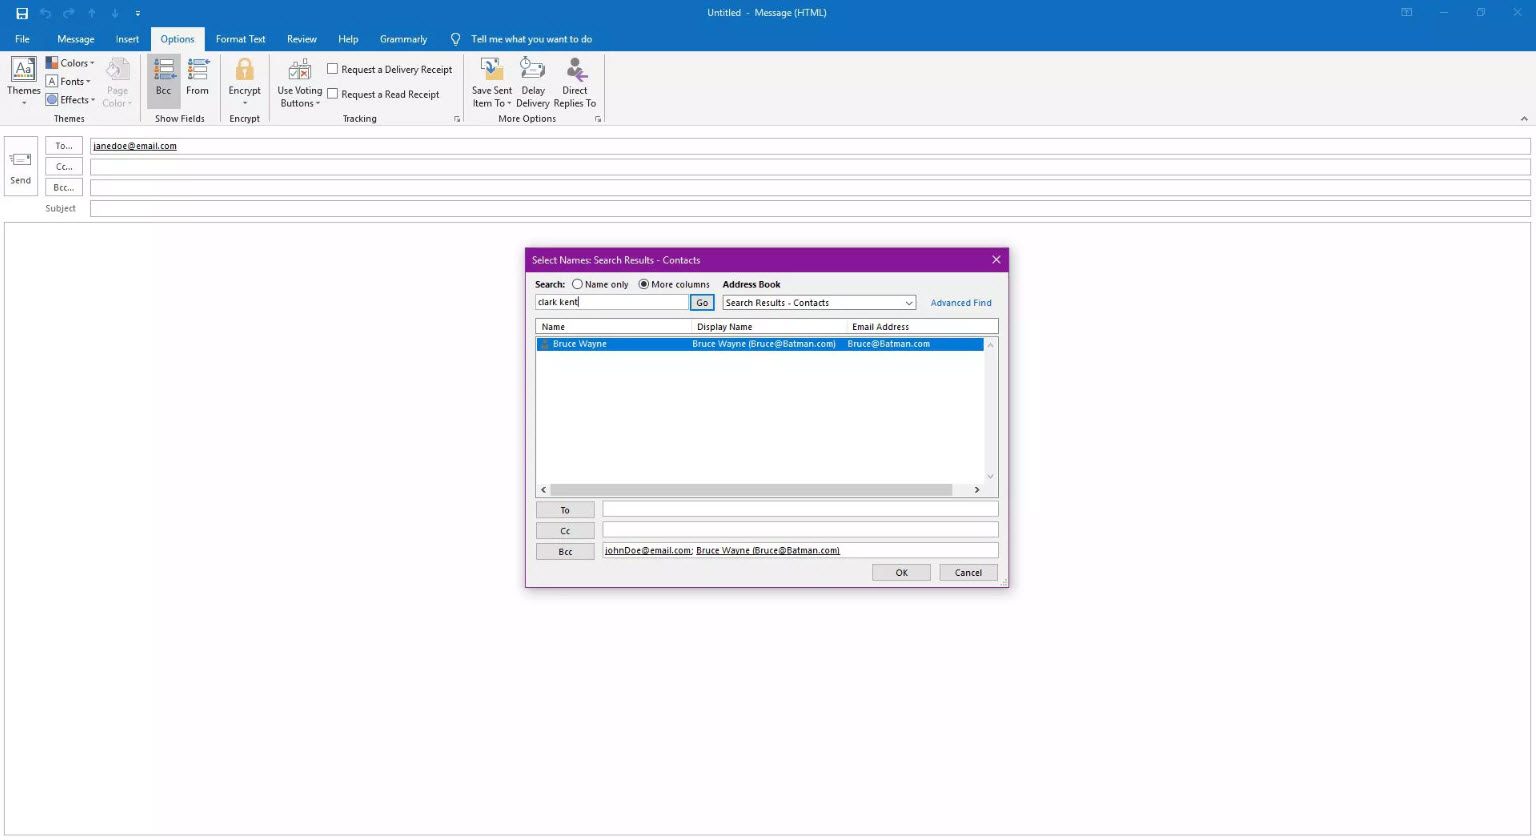
OK should be selected.
Send should be selected. That is it!
Part 2: How to Send Email to Undisclosed Recipients via Gmail?
It is possible to have an email sent to undisclosed recipients using Gmail. There is a very easy way to get this process done. Follow the steps below for this to happen:
Step 1. After starting a message, Compose should be clicked on.
Step 2. Undisclosed recipients should be typed in the "To" field. This should be followed by
Step 3. Get BCC field clicked on.
Step 4. The email address of each recipient should be inputted in the BCC section.
Ensure that names are separated using commas.
Step 5. Compose your email.
Step 6. Now get Send clicked on.
Part 3: What’s the Benefit of Sending Email to Multiple Users Using Undisclosed Recipients?
Do you know that there are various benefits of sending emails to various users with undisclosed recipients? This is perhaps why you need to start exploring such an option today. Below are some of the benefits.
High Level of Professionalism:
When email addresses are concealed, it ensures a better open rate. It is more professional and your recipients’ privacy will be fully protected.
Junk email is reduced. This is another benefit of using undisclosed recipients to send emails to different users. Your mails won’t be filtered into junk folders. It means people will actually be receiving them.
Protection from spam. This option ensures that people are offered full protection from any form of spam or virus. Also, when email addresses are exposed, such can bring about hacking of information by fraudsters.
The last benefit is that it gives you the option of sending emails which are personalized.
Part 4: How to Export Contact from ScanOutlook?
Have you ever want to export your Outlook contacts but found they were corrupted? Are you feeling frustrated by this challenge? There is no need to bother as a tool like ScanOutlook can help you out today. This tool will help ensure your files are in good shape once again.
It is true that ScanOutlook is one of the best out there when it comes to repairing Outlook files and helping you make use of them again. This is due to its advanced features.
How to Use ScanOutlook?
Step 1. The first thing to do is getting ScanOutlook launched after having it downloaded.
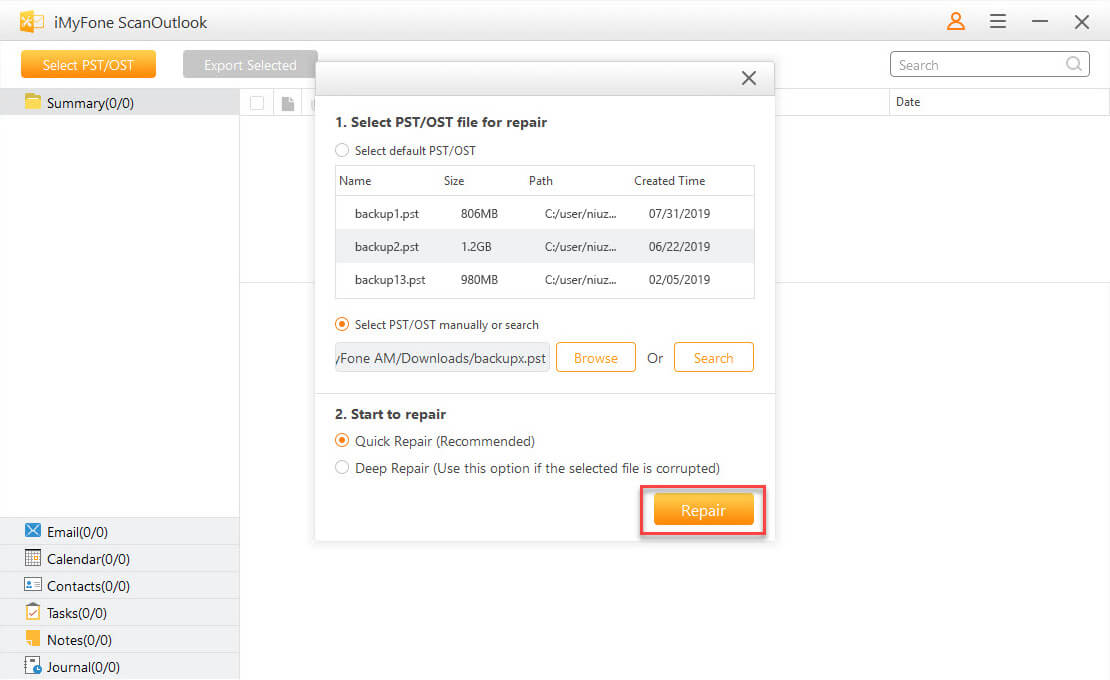
Step 2. You will need to choose files to be repaired/recovered by this application. This can either be done automatically or manually. For the automatic way, ScanOutlook will automatically get those files detected by default. Once the application is launched, this process will commence.
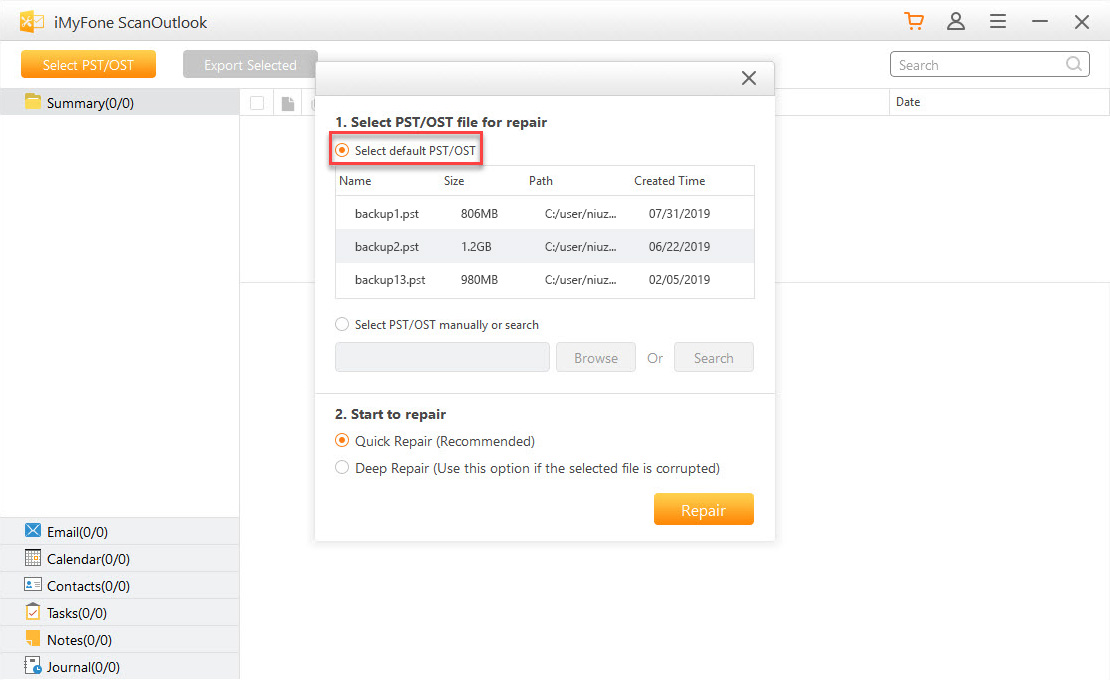
Manual process involves choosing either the Browse or Search option to locate files that you want to repair. Just follow the on-screen instructions for this process to complete.
Step 3. After choosing the files as explained above, click on Repair. ScanOutlook will commence the process of getting your outlook files repaired.
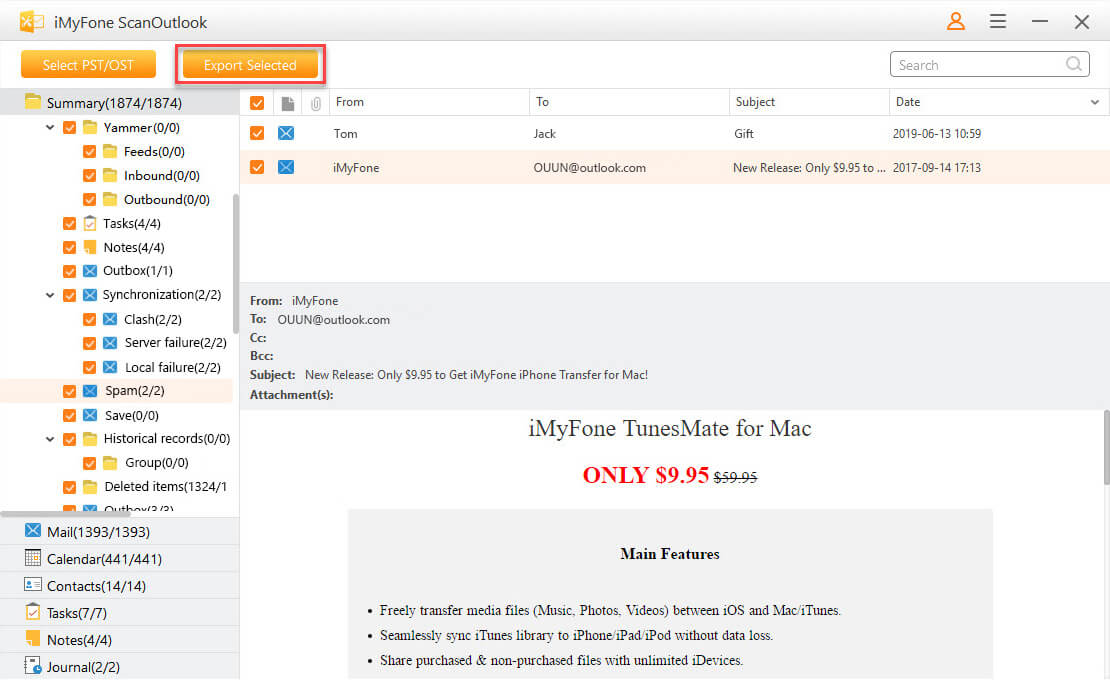
Step 4. Once the process is completed, you can click on Export Selected. This will enable such repaired files to be exported to a folder on your PC.
Conclusion
Based on the above facts, it is obvious that there are various ways to handle any issue related to Undisclosed Recipient Outlook without stress. Even if you want to repair your outlook email files, a tool like ScanOutlook will definitely be of great help. You can try it out today in order to get a firsthand experience of its amazing features.
Related Articles:
Time Limited Offer
for All Products
Not valid with other discount *
 Hard Drive Recovery
 Deleted Files Recovery

