Hypervisor Error in Windows 11/10? 6 Ways to Fix!
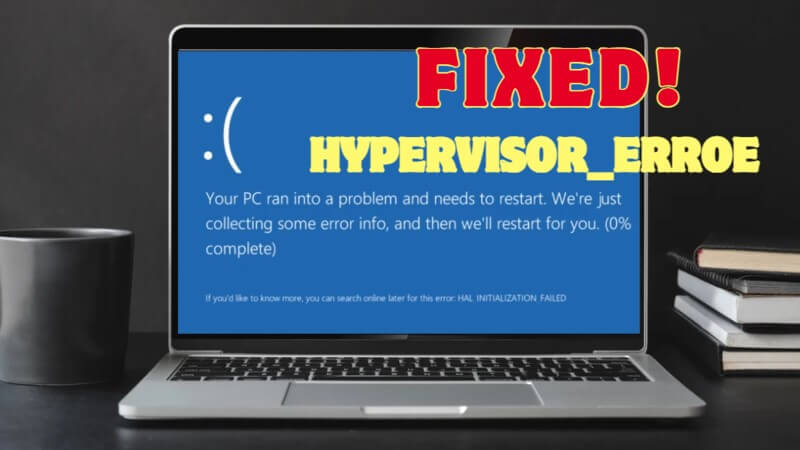
Running into the Hypervisor error could be frustrating–as all you see is a blue screen of death, which ultimately closes all your programs.
In this article, we will explain what Hypervisor error is and why it happens. We will also share how you can fix the hypervisor_error BSoD and recover your lost data due to this error.
| Method | Difficulty | Success Rate | Time Required |
|---|---|---|---|
| Memory Diagnostic | Difficult | High | Moderate |
| Restart Service | Easy | Low | Minimal |
| DISM | Moderate | Low | Minimal |
| SFC Scan | Moderate | Moderate | Minimal |
| Update Driver | Moderate | Moderate | Minimal |
| Windows Update | Easy | High | Considerable |
Part 1. What is Hypervisor Error?
Microsoft Windows allows its users to run virtual machines to use their computers as an Android, Linux system, etc. It does it through Hypervisor, which is a built-in technology to manage virtual machines.
The Hypervisor error means Windows is unable to run Hypervisor virtualization software. When Hypervisor crashes, you see a blue screen on your computer, along with an error, HYPERVISOR_ERROR.
Part 2. Causes for Hypervisor Error
Here are some of the main causes of the Windows Hypervisor error:
Part 3. How to Fix the Hypervisor Error Blue Screen in Windows 11?
You can't certainly determine the exact cause of the Hypervisor error BSoD to fix the issue quickly. Therefore, you can try the following solutions one by one to see what works for you.
- Fix 1: Run Windows Memory Diagnostic
- Fix 2: Restart Hyper-V Service
- Fix 3: Run DISM
- Fix 4: SFC Scan
- Fix 5: Update Hyper-V Driver
- Fix 6: Update Windows
Fix 1: Run Windows Memory Diagnostic
Issues with memory often cause the Hypervisor error. Fortunately, Windows has a built-in diagnostics tool that can detect the issues and try to solve them on its own. So, if RAM is facing potential issues, the diagnostic tool can save you a lot of time.
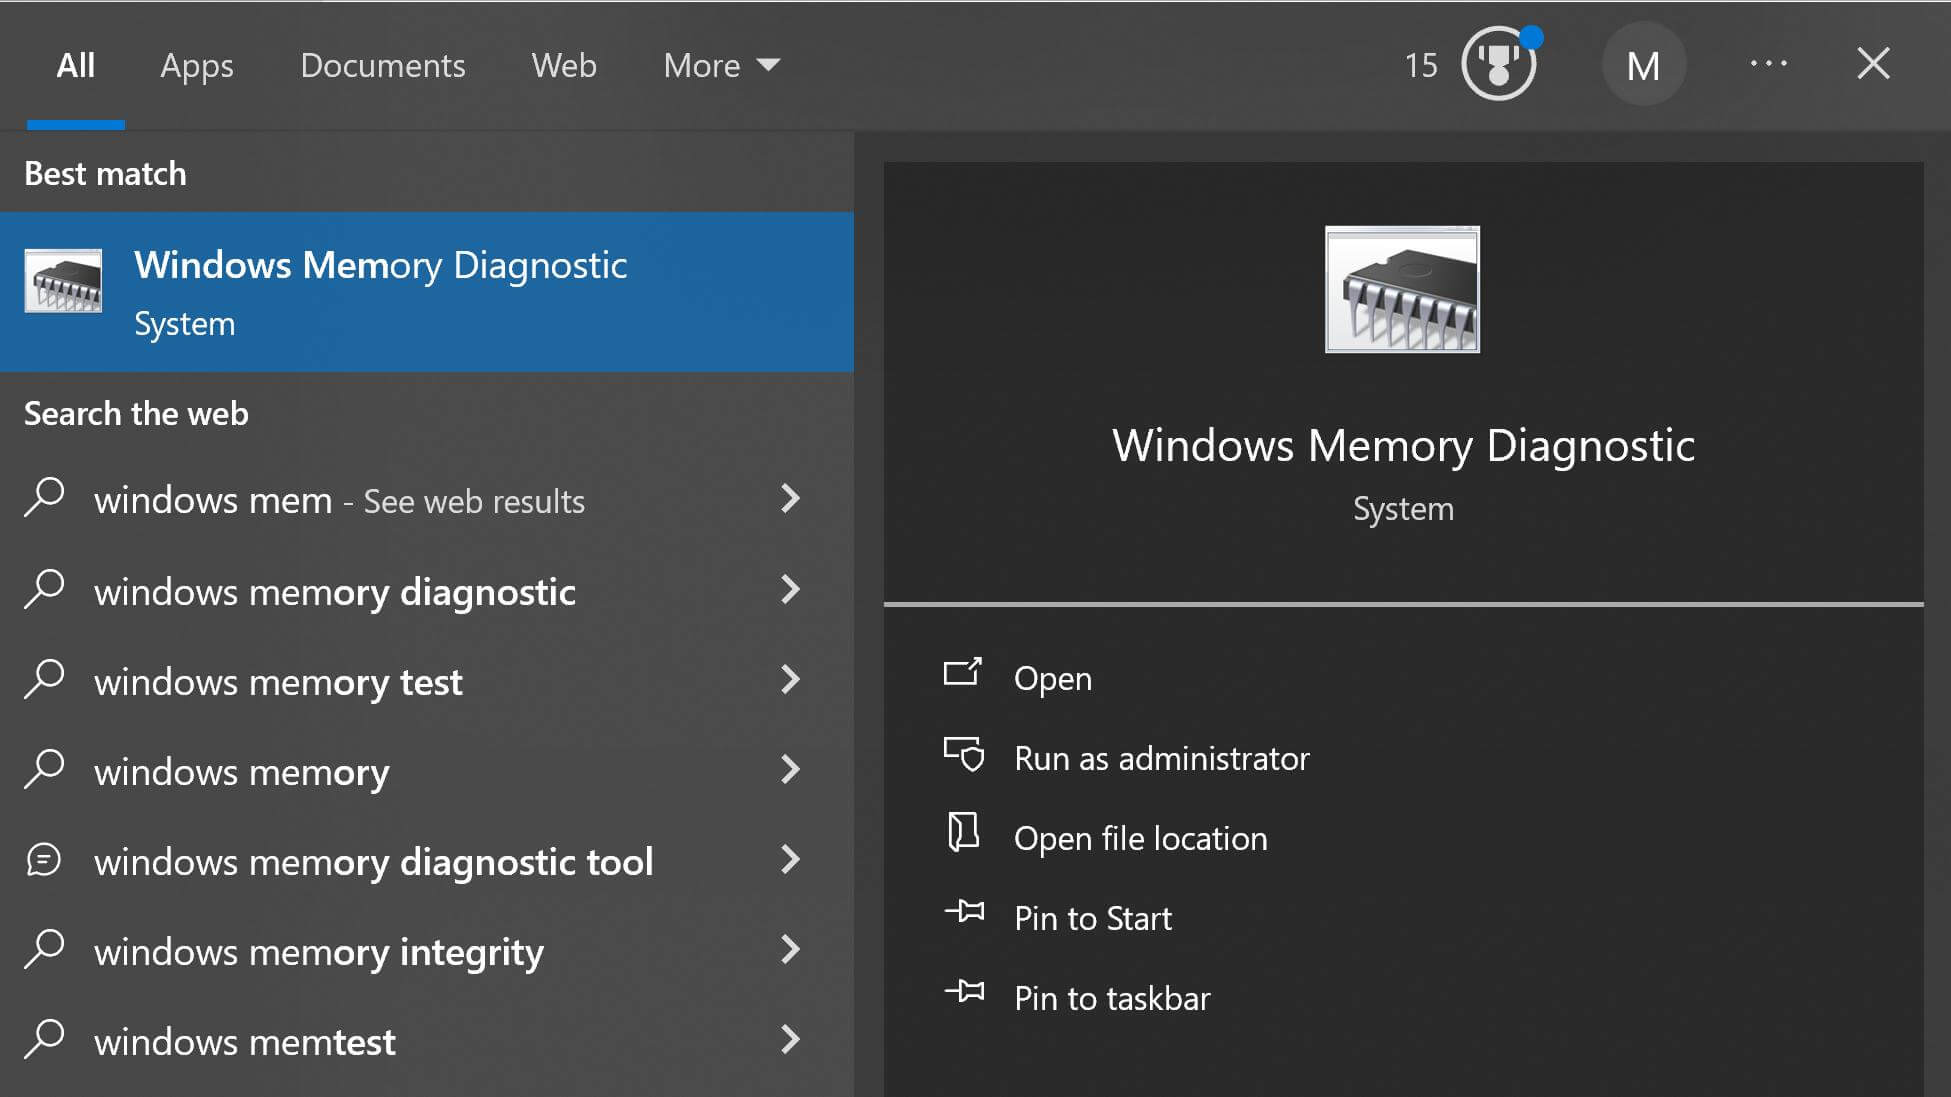
Step 1. Type "Windows memory diagnostic" and open the app.
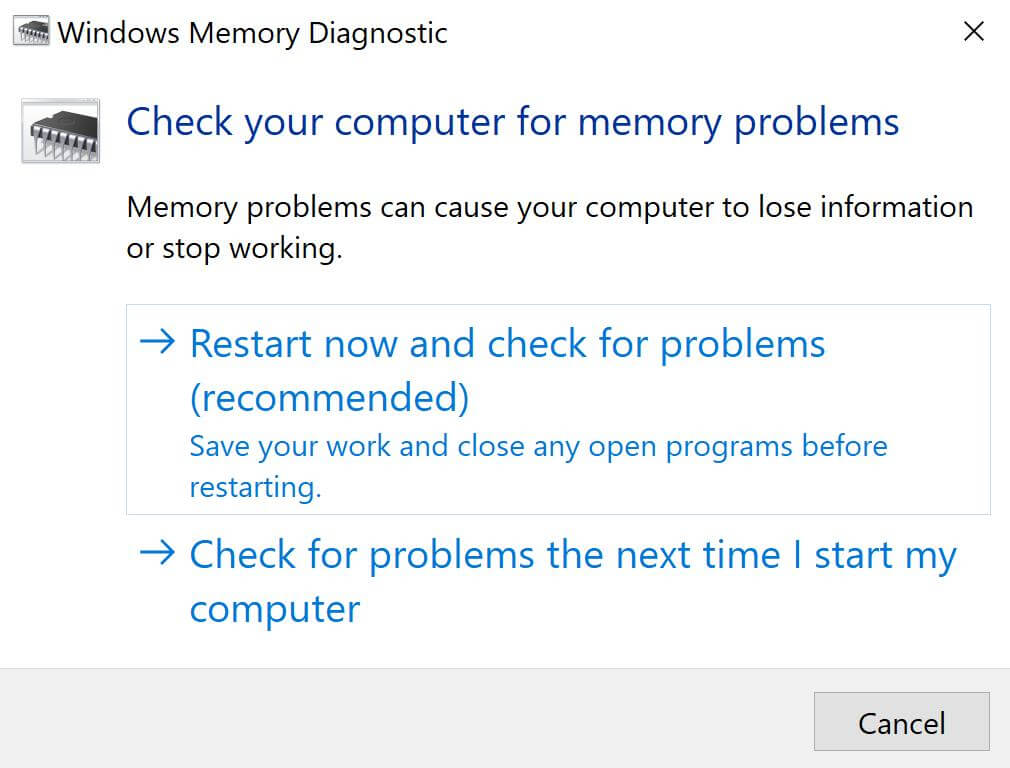
Step 2. Click Restart now and check for problems. Your computer will restart and run a scan on its own. It will pinpoint the issues.
Fix 2: Restart Hyper-V Service
If Hyper-V is creating an issue, the quickest fix is to restart it. It often fixes the error and gives a new start to the service to work properly.
Step 1. Type "services" in the search bar and open the app.
Step 2. Look for Hyper-Virtual Remote Desktop Virtualization Service.
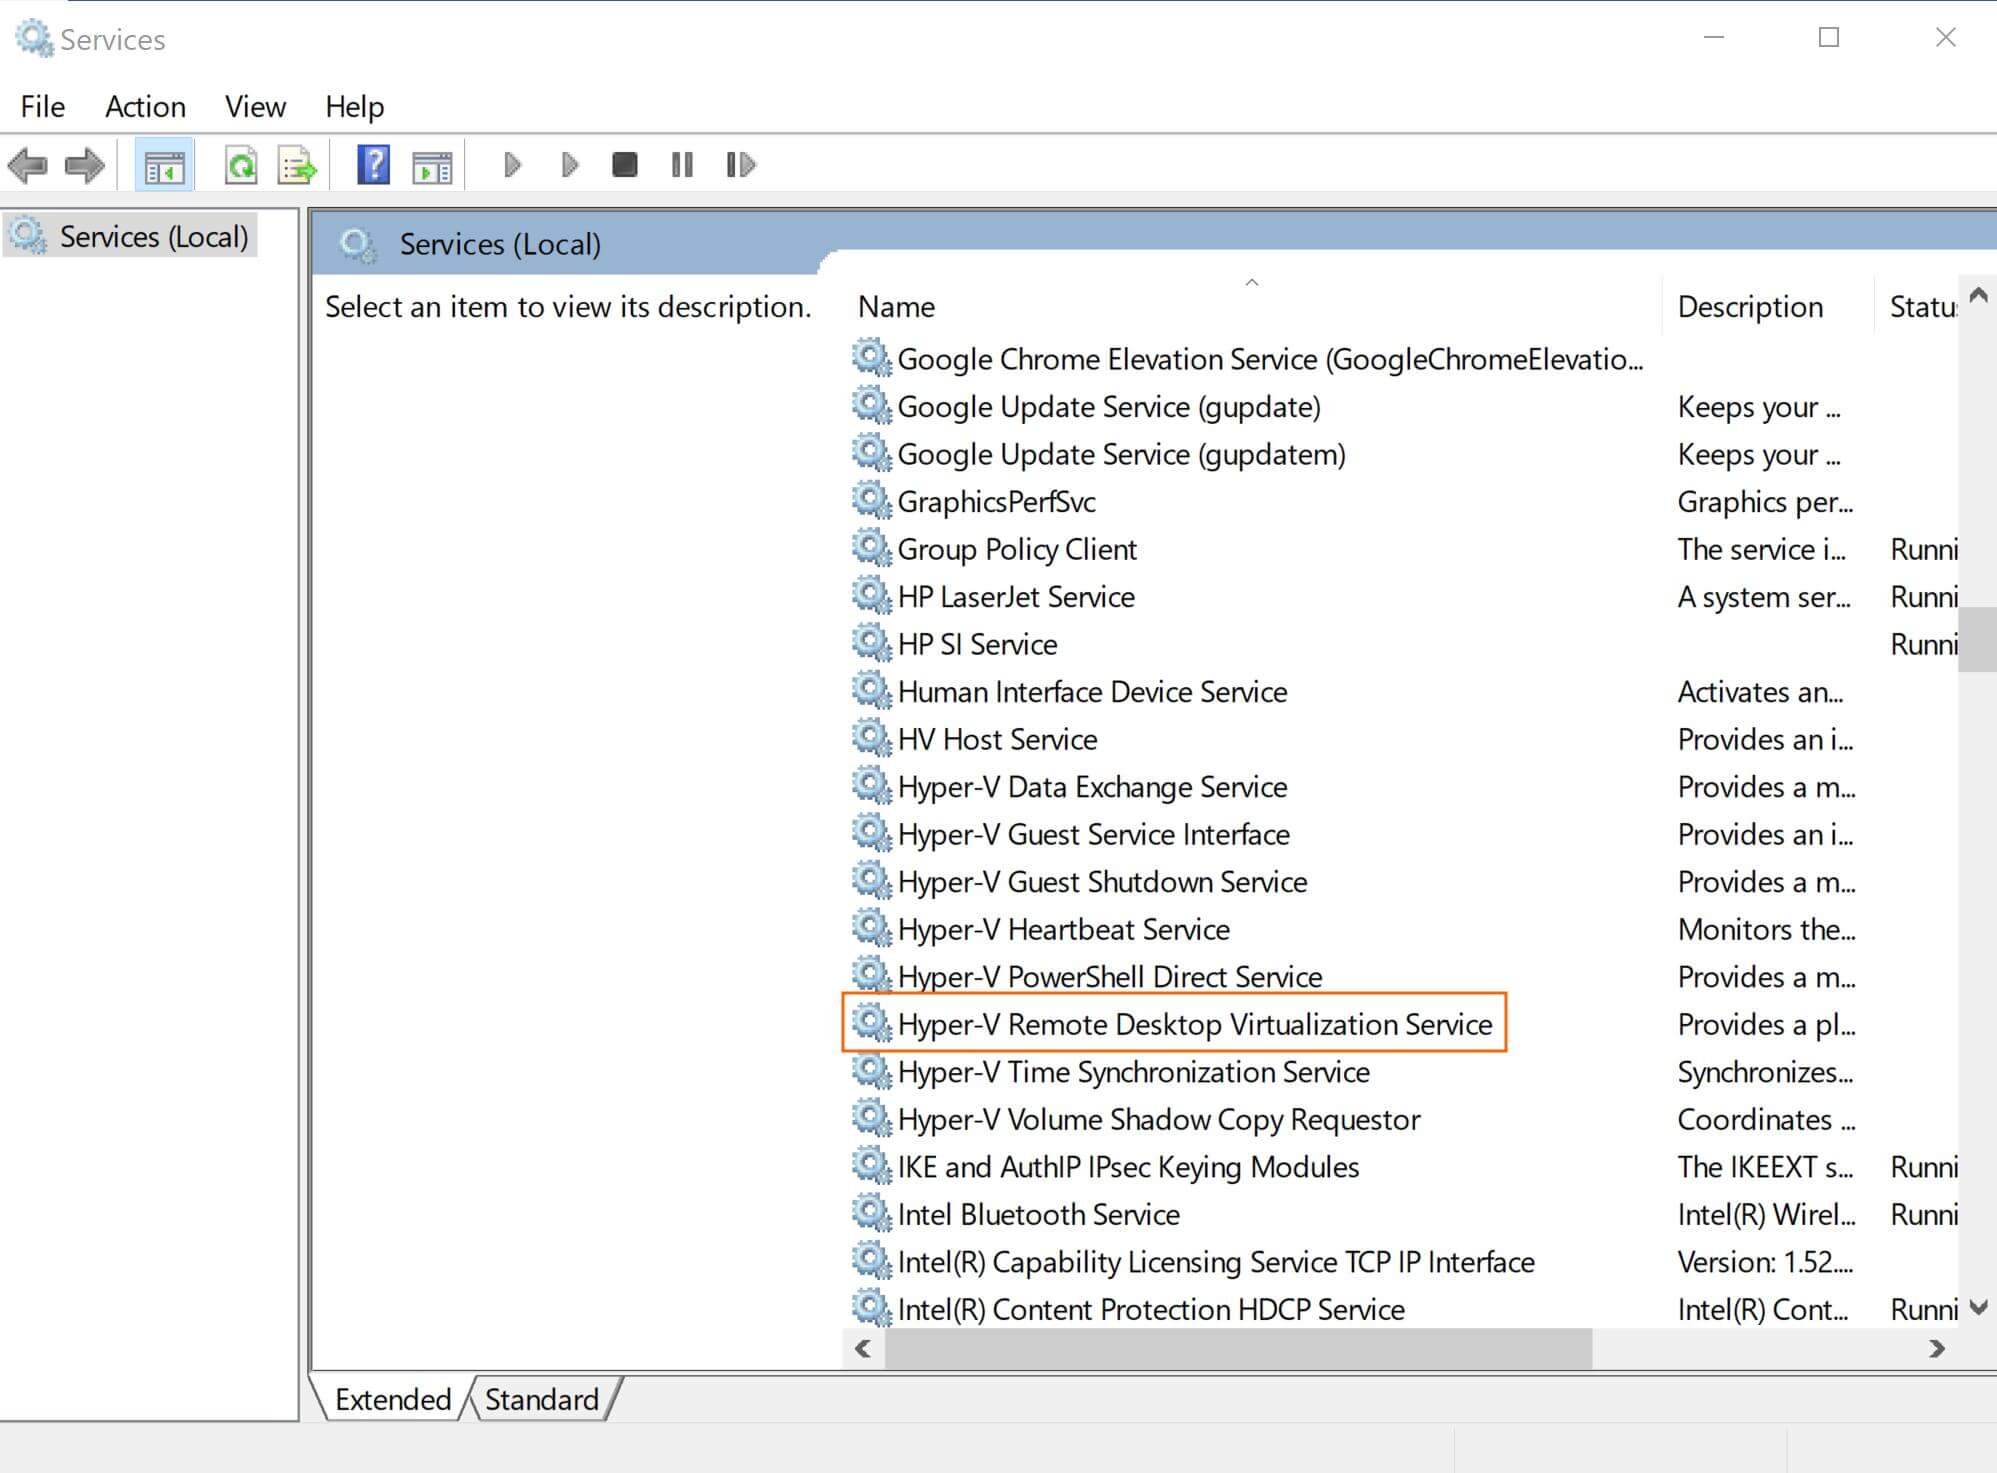
Step 3. Right-click on it and click Stop. After a few minutes, right-click again and click Start. It will restart the Hyper-V service.
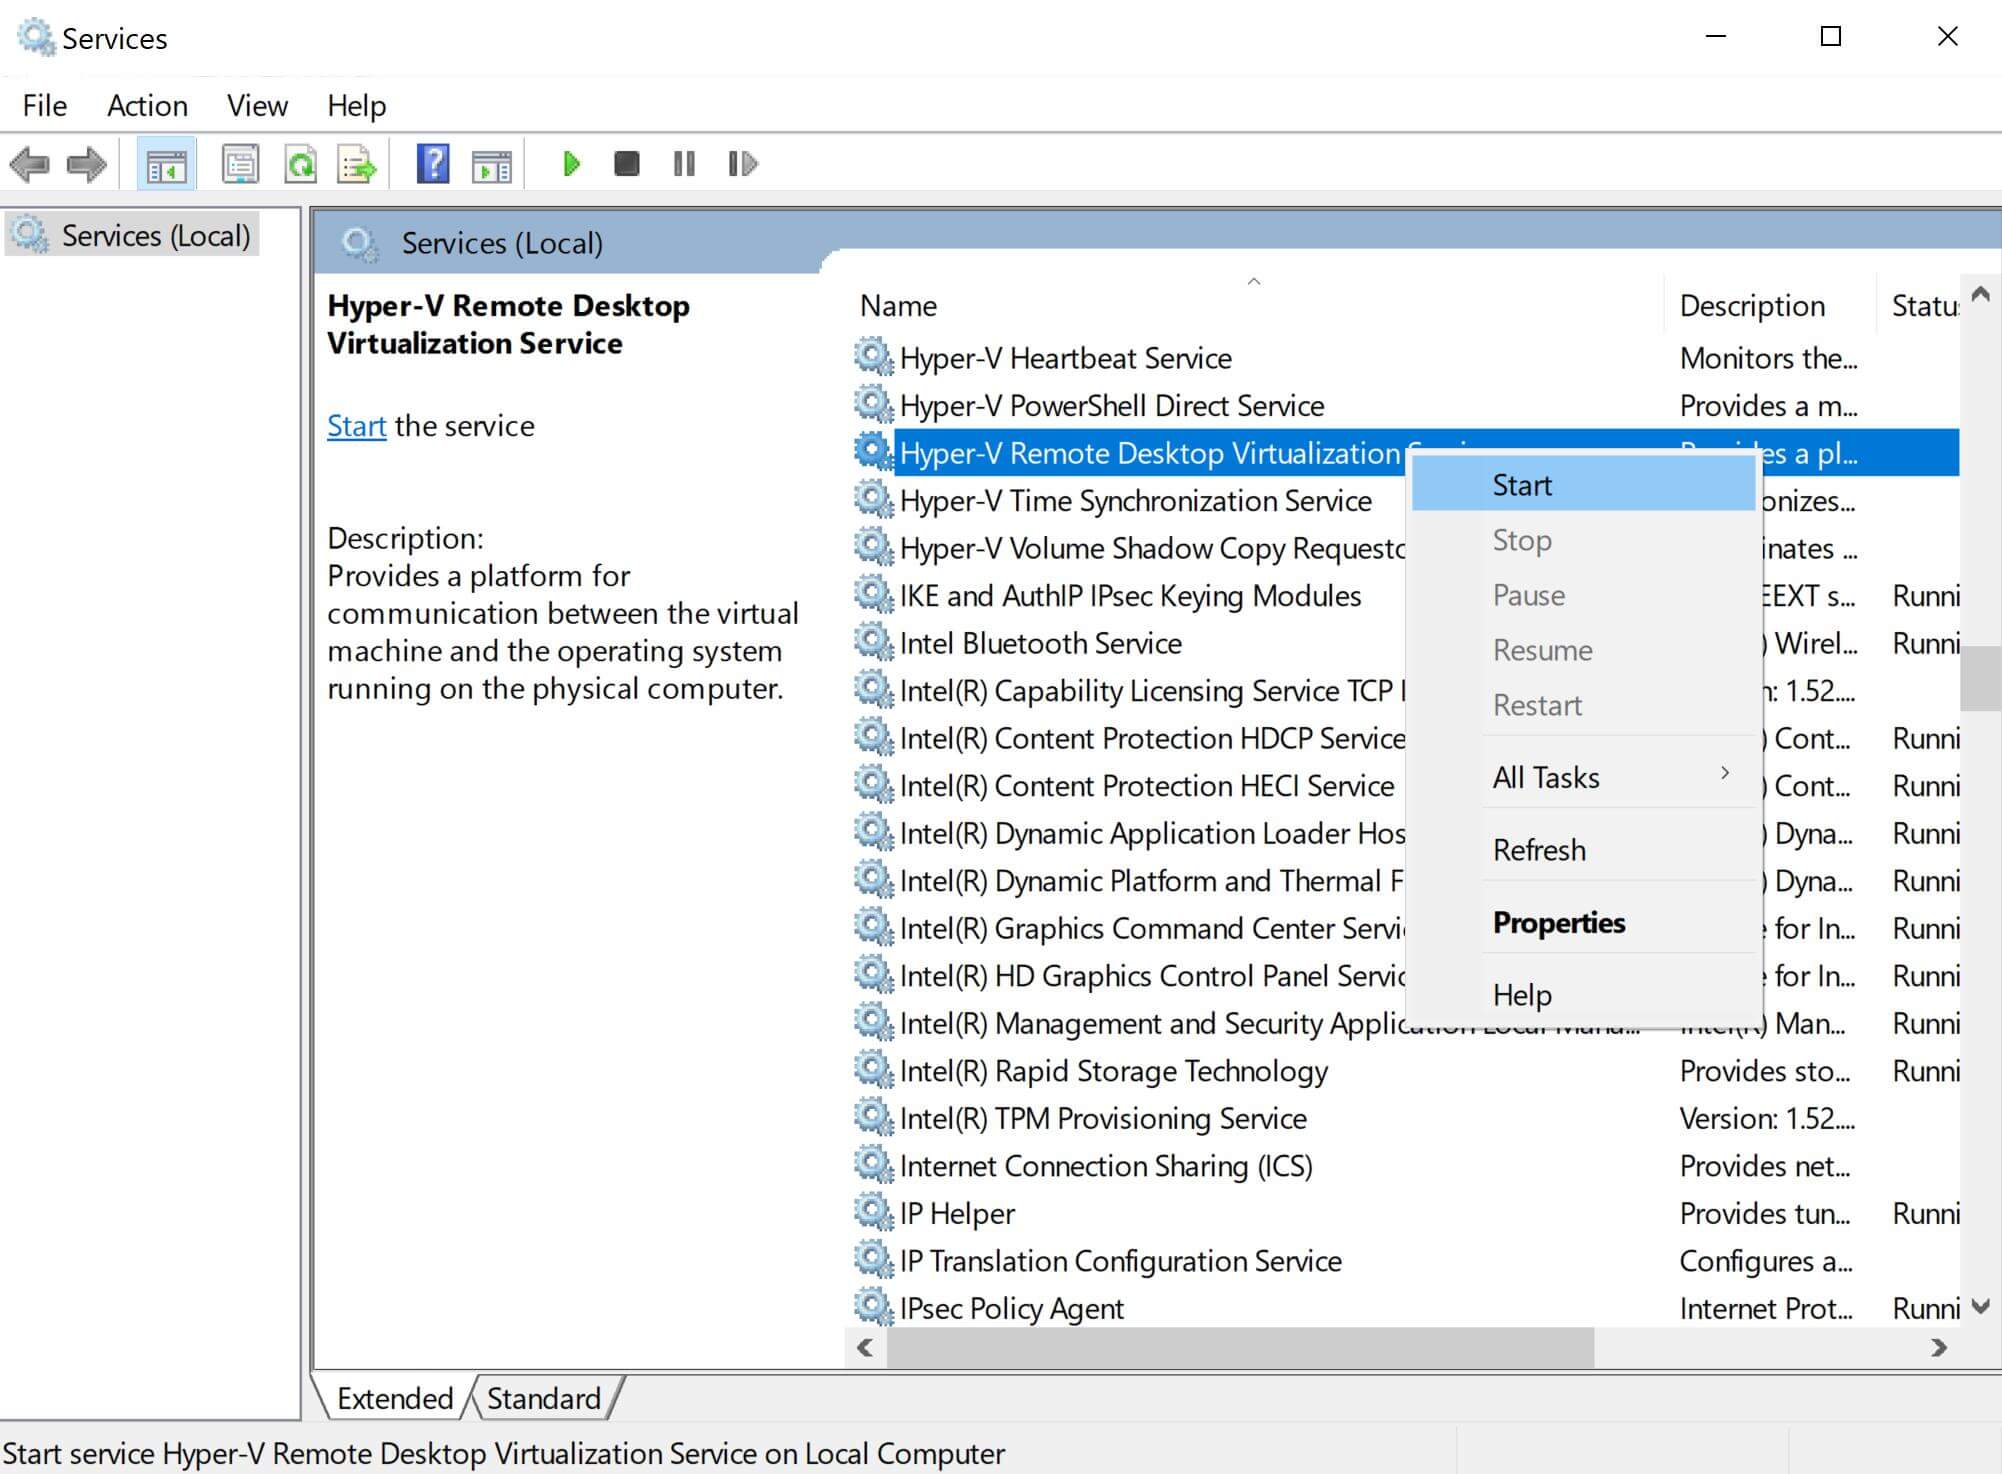
Step 4. Restart your computer.
Fix 3: Run DISM
DISM stands for Deployment Image Servicing and Management. It is an incredible tool to repair system images and solve the Hypervisor error. During the image repair, it also fixes other issues.
Step 1. Open Command Prompt as an administrator.
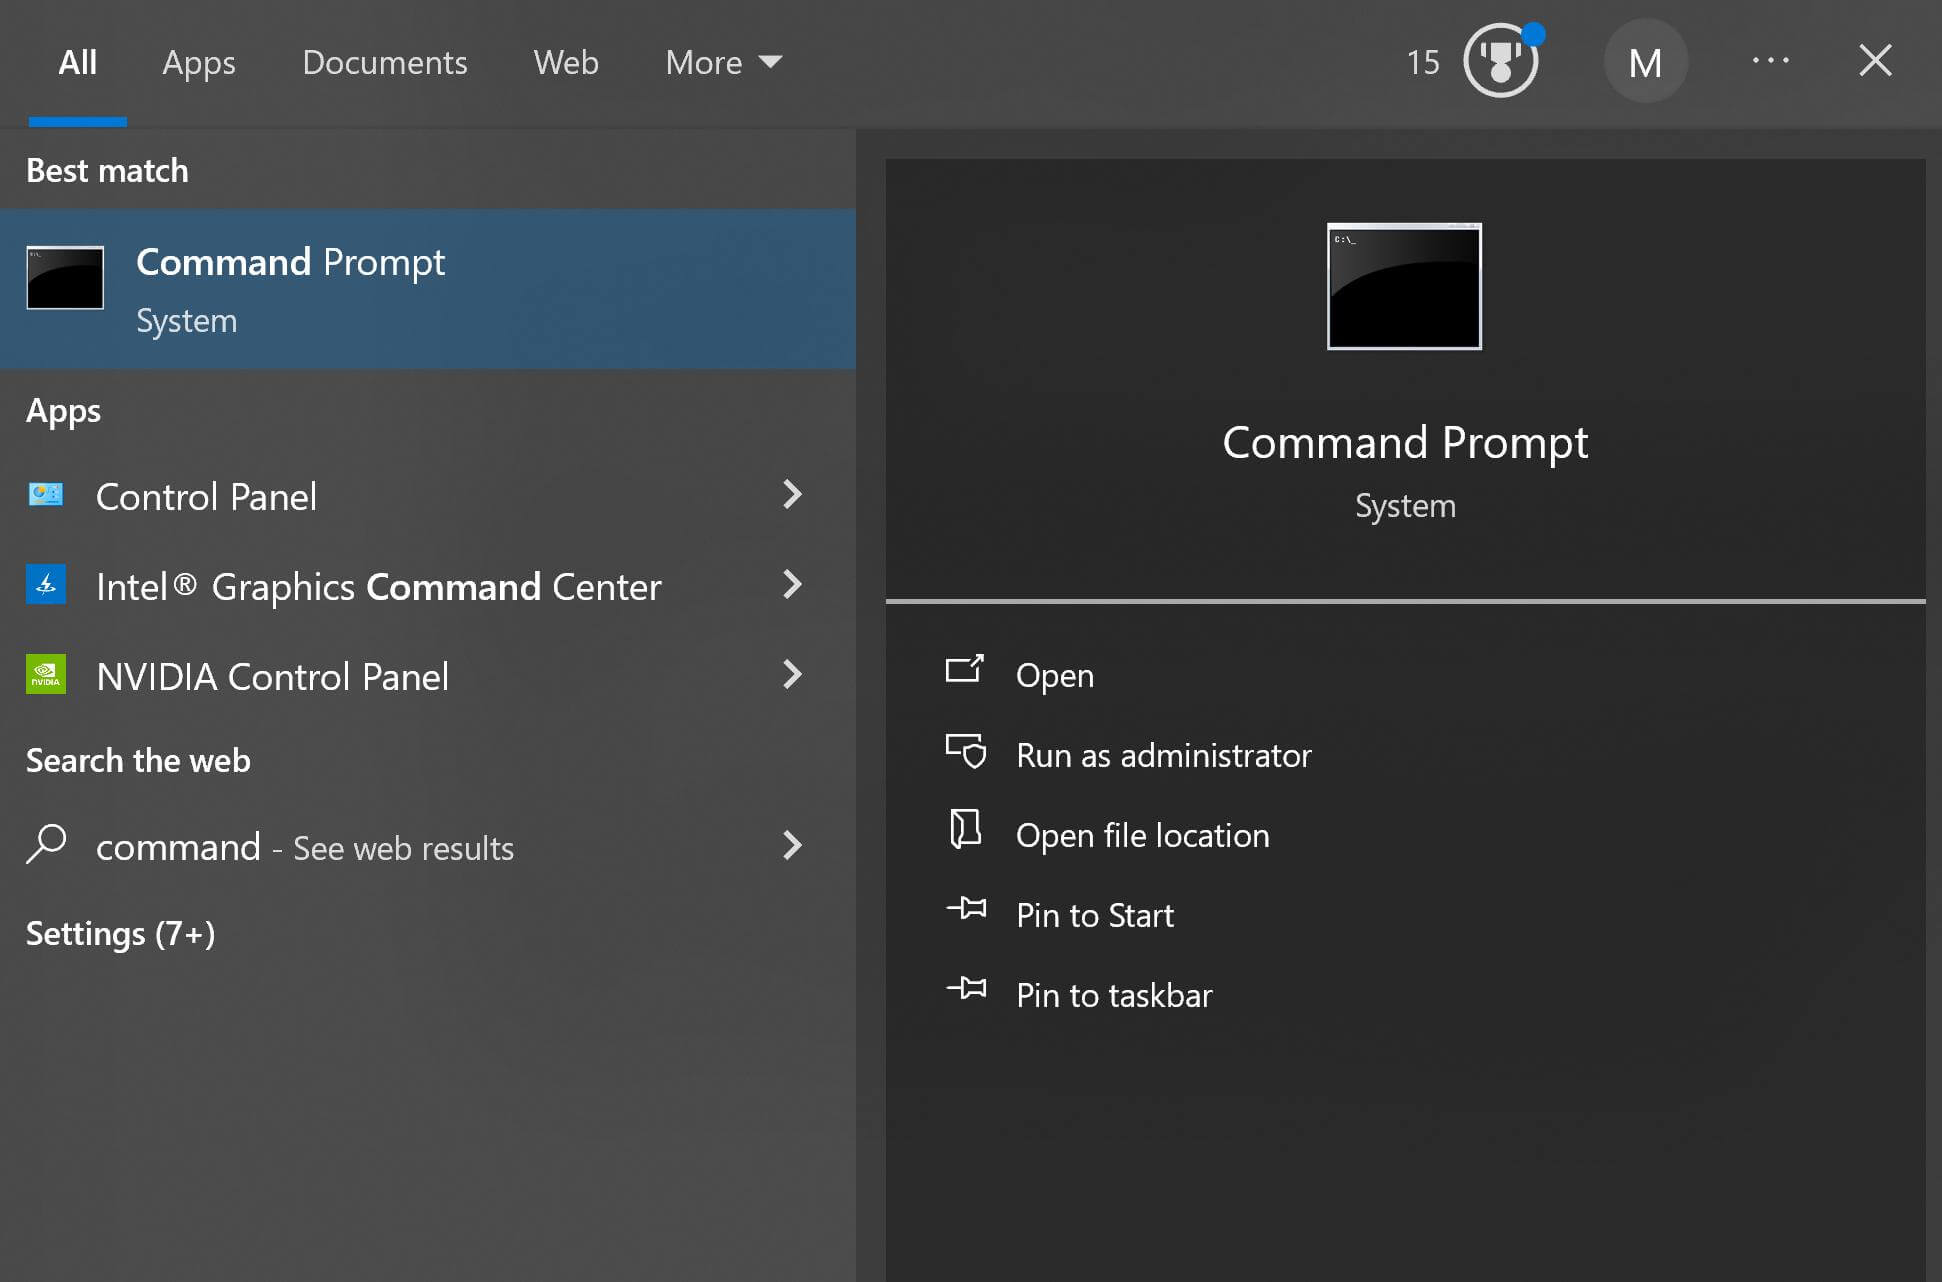
Step 2. Type the following command and hit Enter.
"DISM.exe /Online /Cleanup-image /Restorehealth"
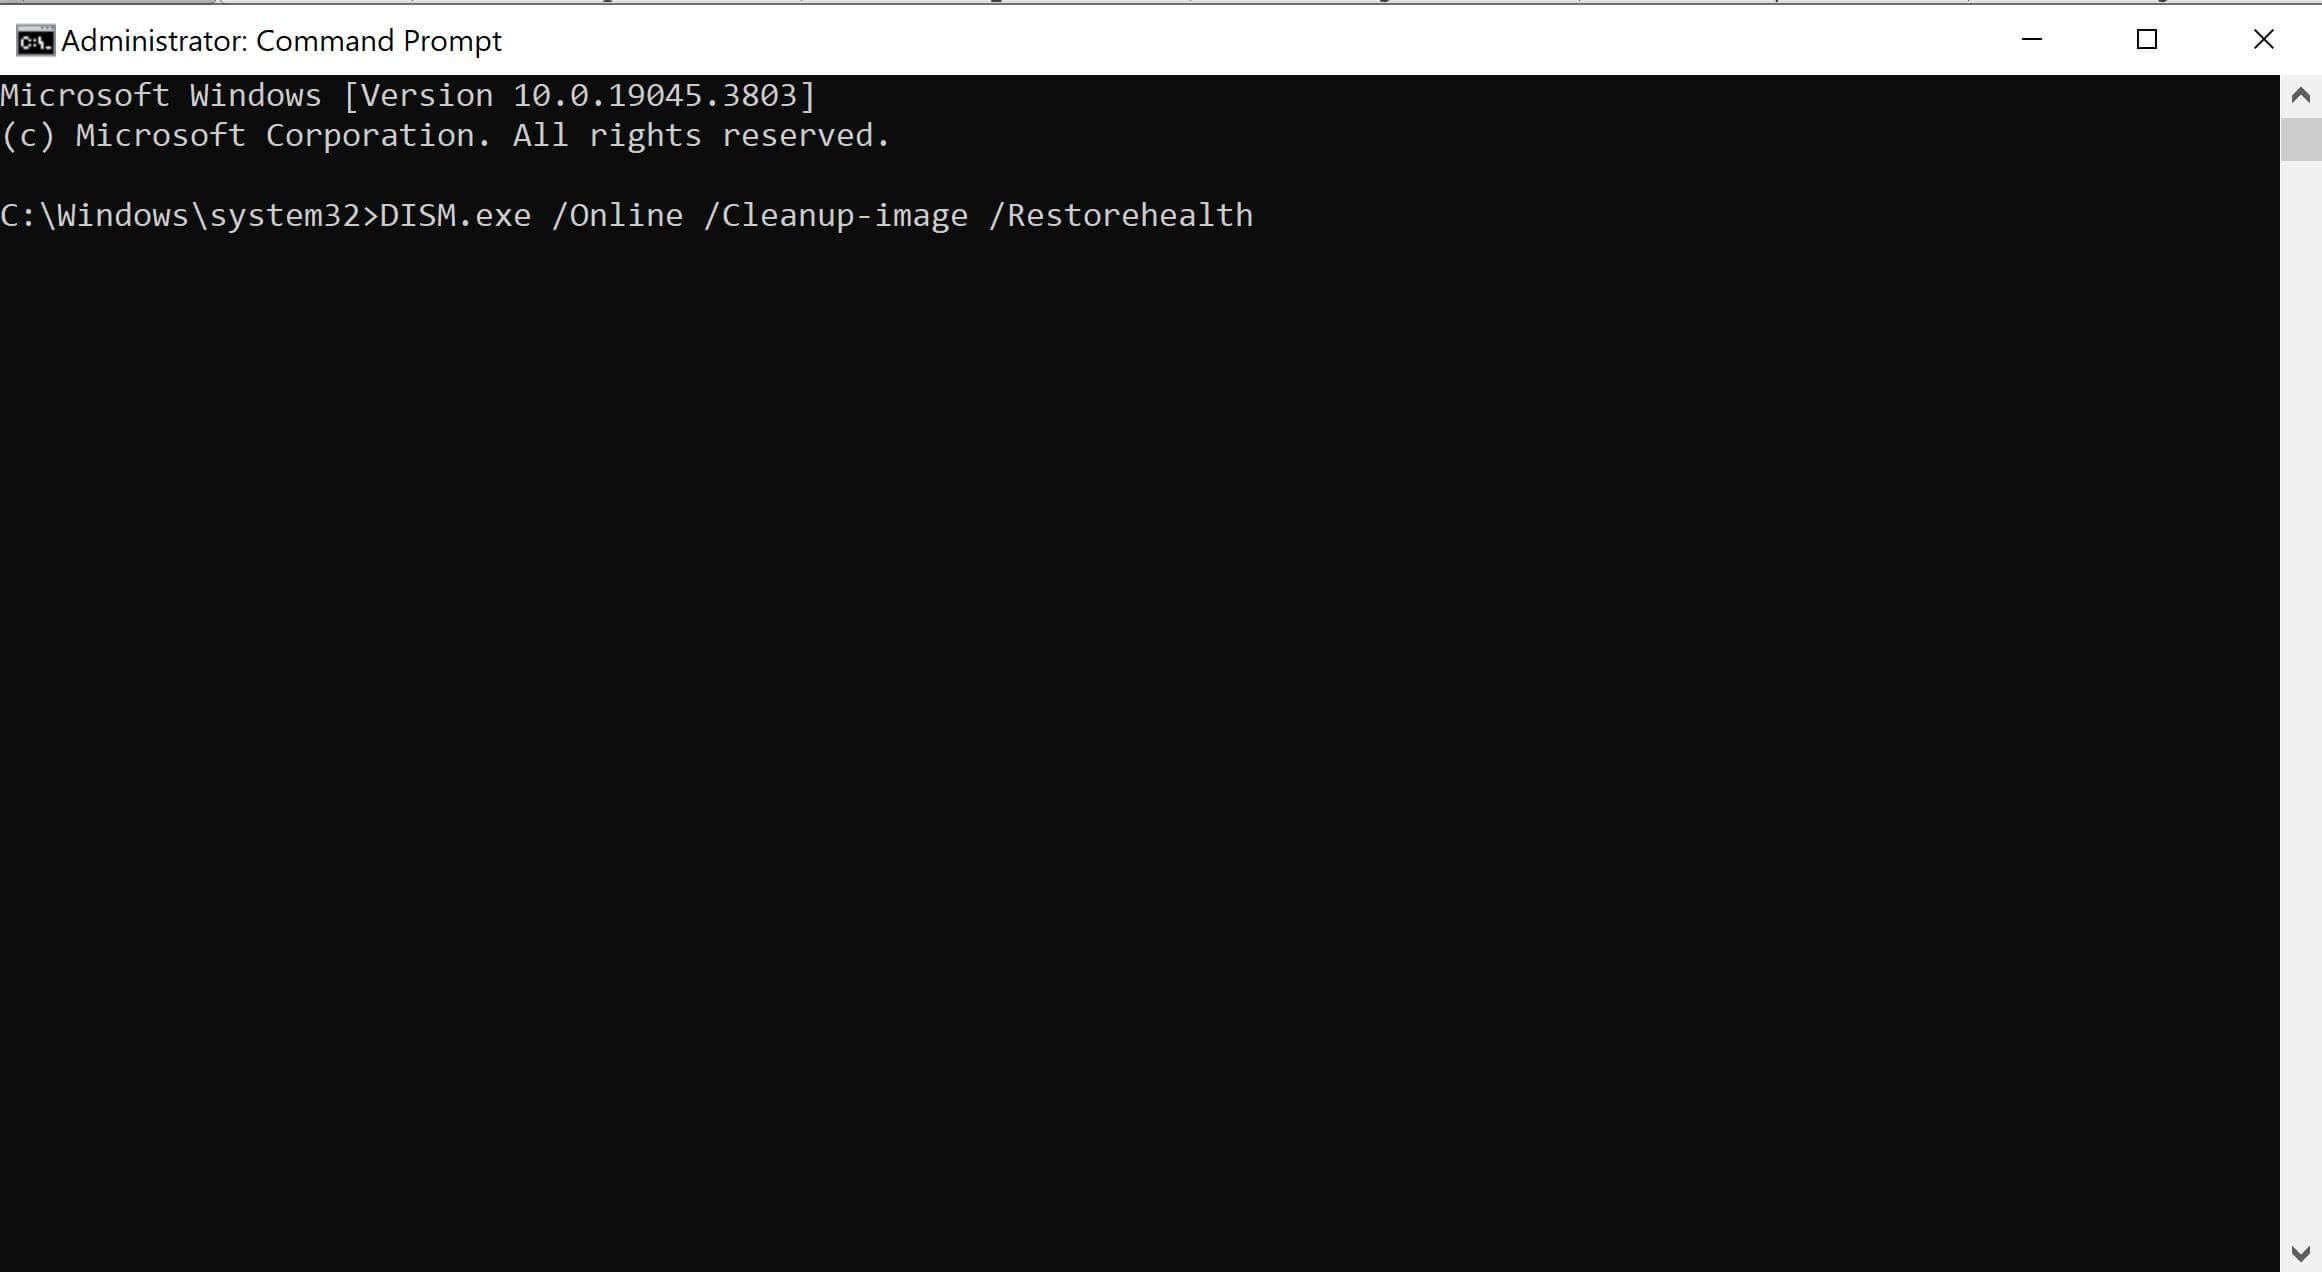
Step 3. It will automatically solve the issues with images. Wait for it to complete, and check whether it has fixed the Hypervisor error.
Fix 4: SFC Scan
SFC scan is the quickest way to repair file systems. Often, BSoD errors like the Hypervisor error are due to corrupted system files.
Step 1. Run the Command Prompt as an administrator.
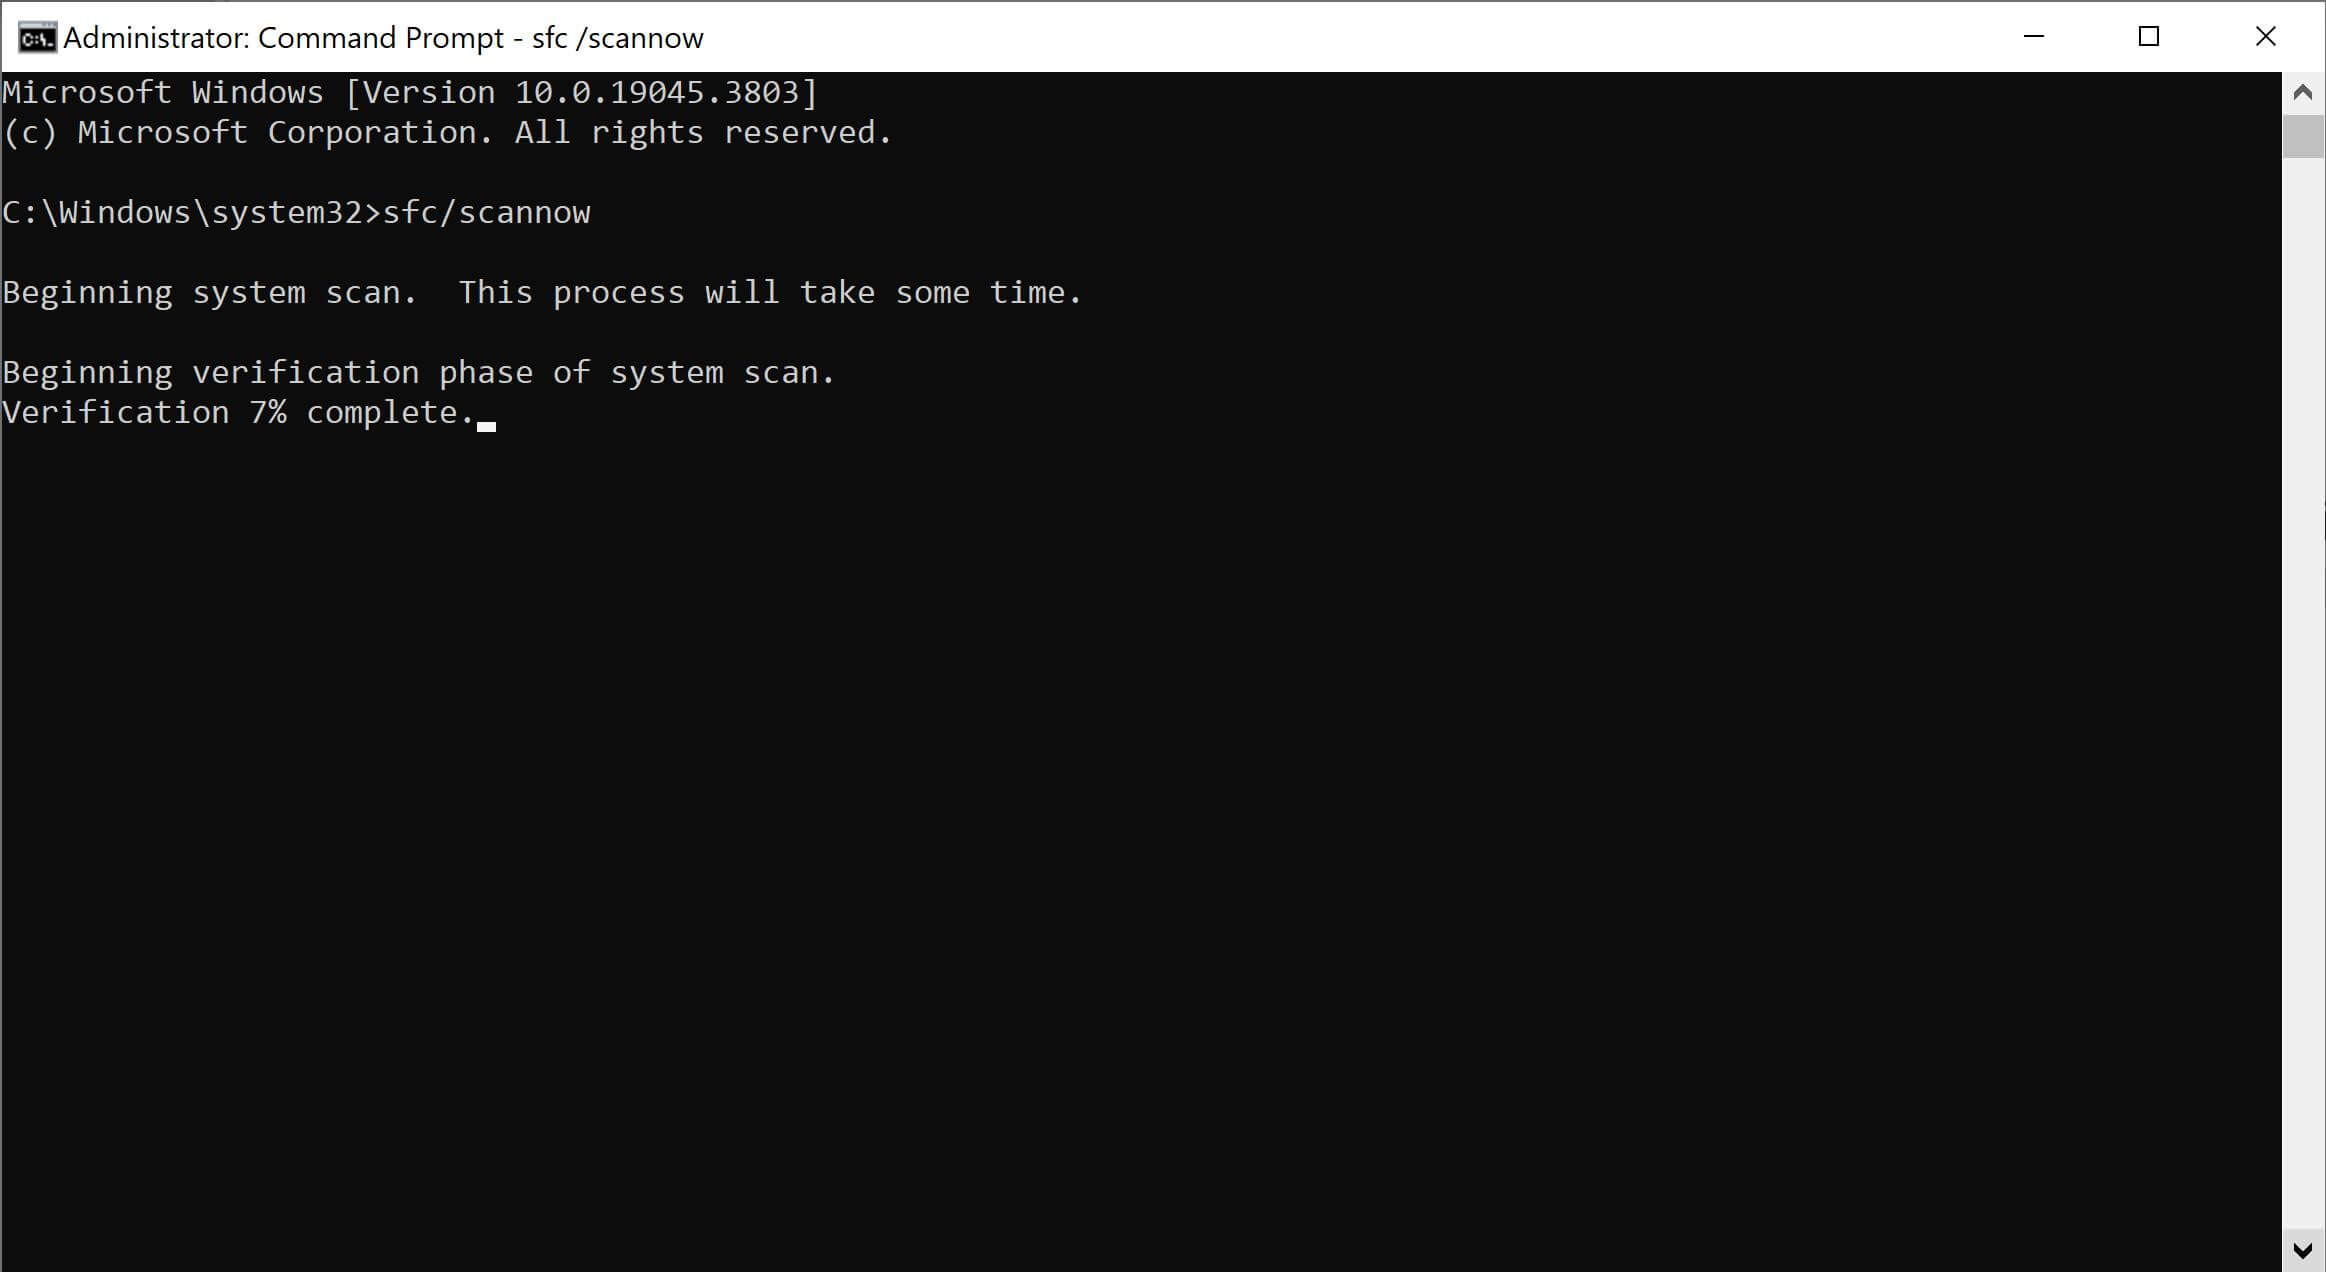
Step 2. Type "sfc/scannow" and hit Enter.
Step 3. It will automatically scan your drives and fix the issues with the system files. Let it complete, and restart your PC.
Fix 5: Update Hyper-V Driver
If the Hyper-V driver is outdated, it can prevent it from working properly. Update your driver to fix the issue.
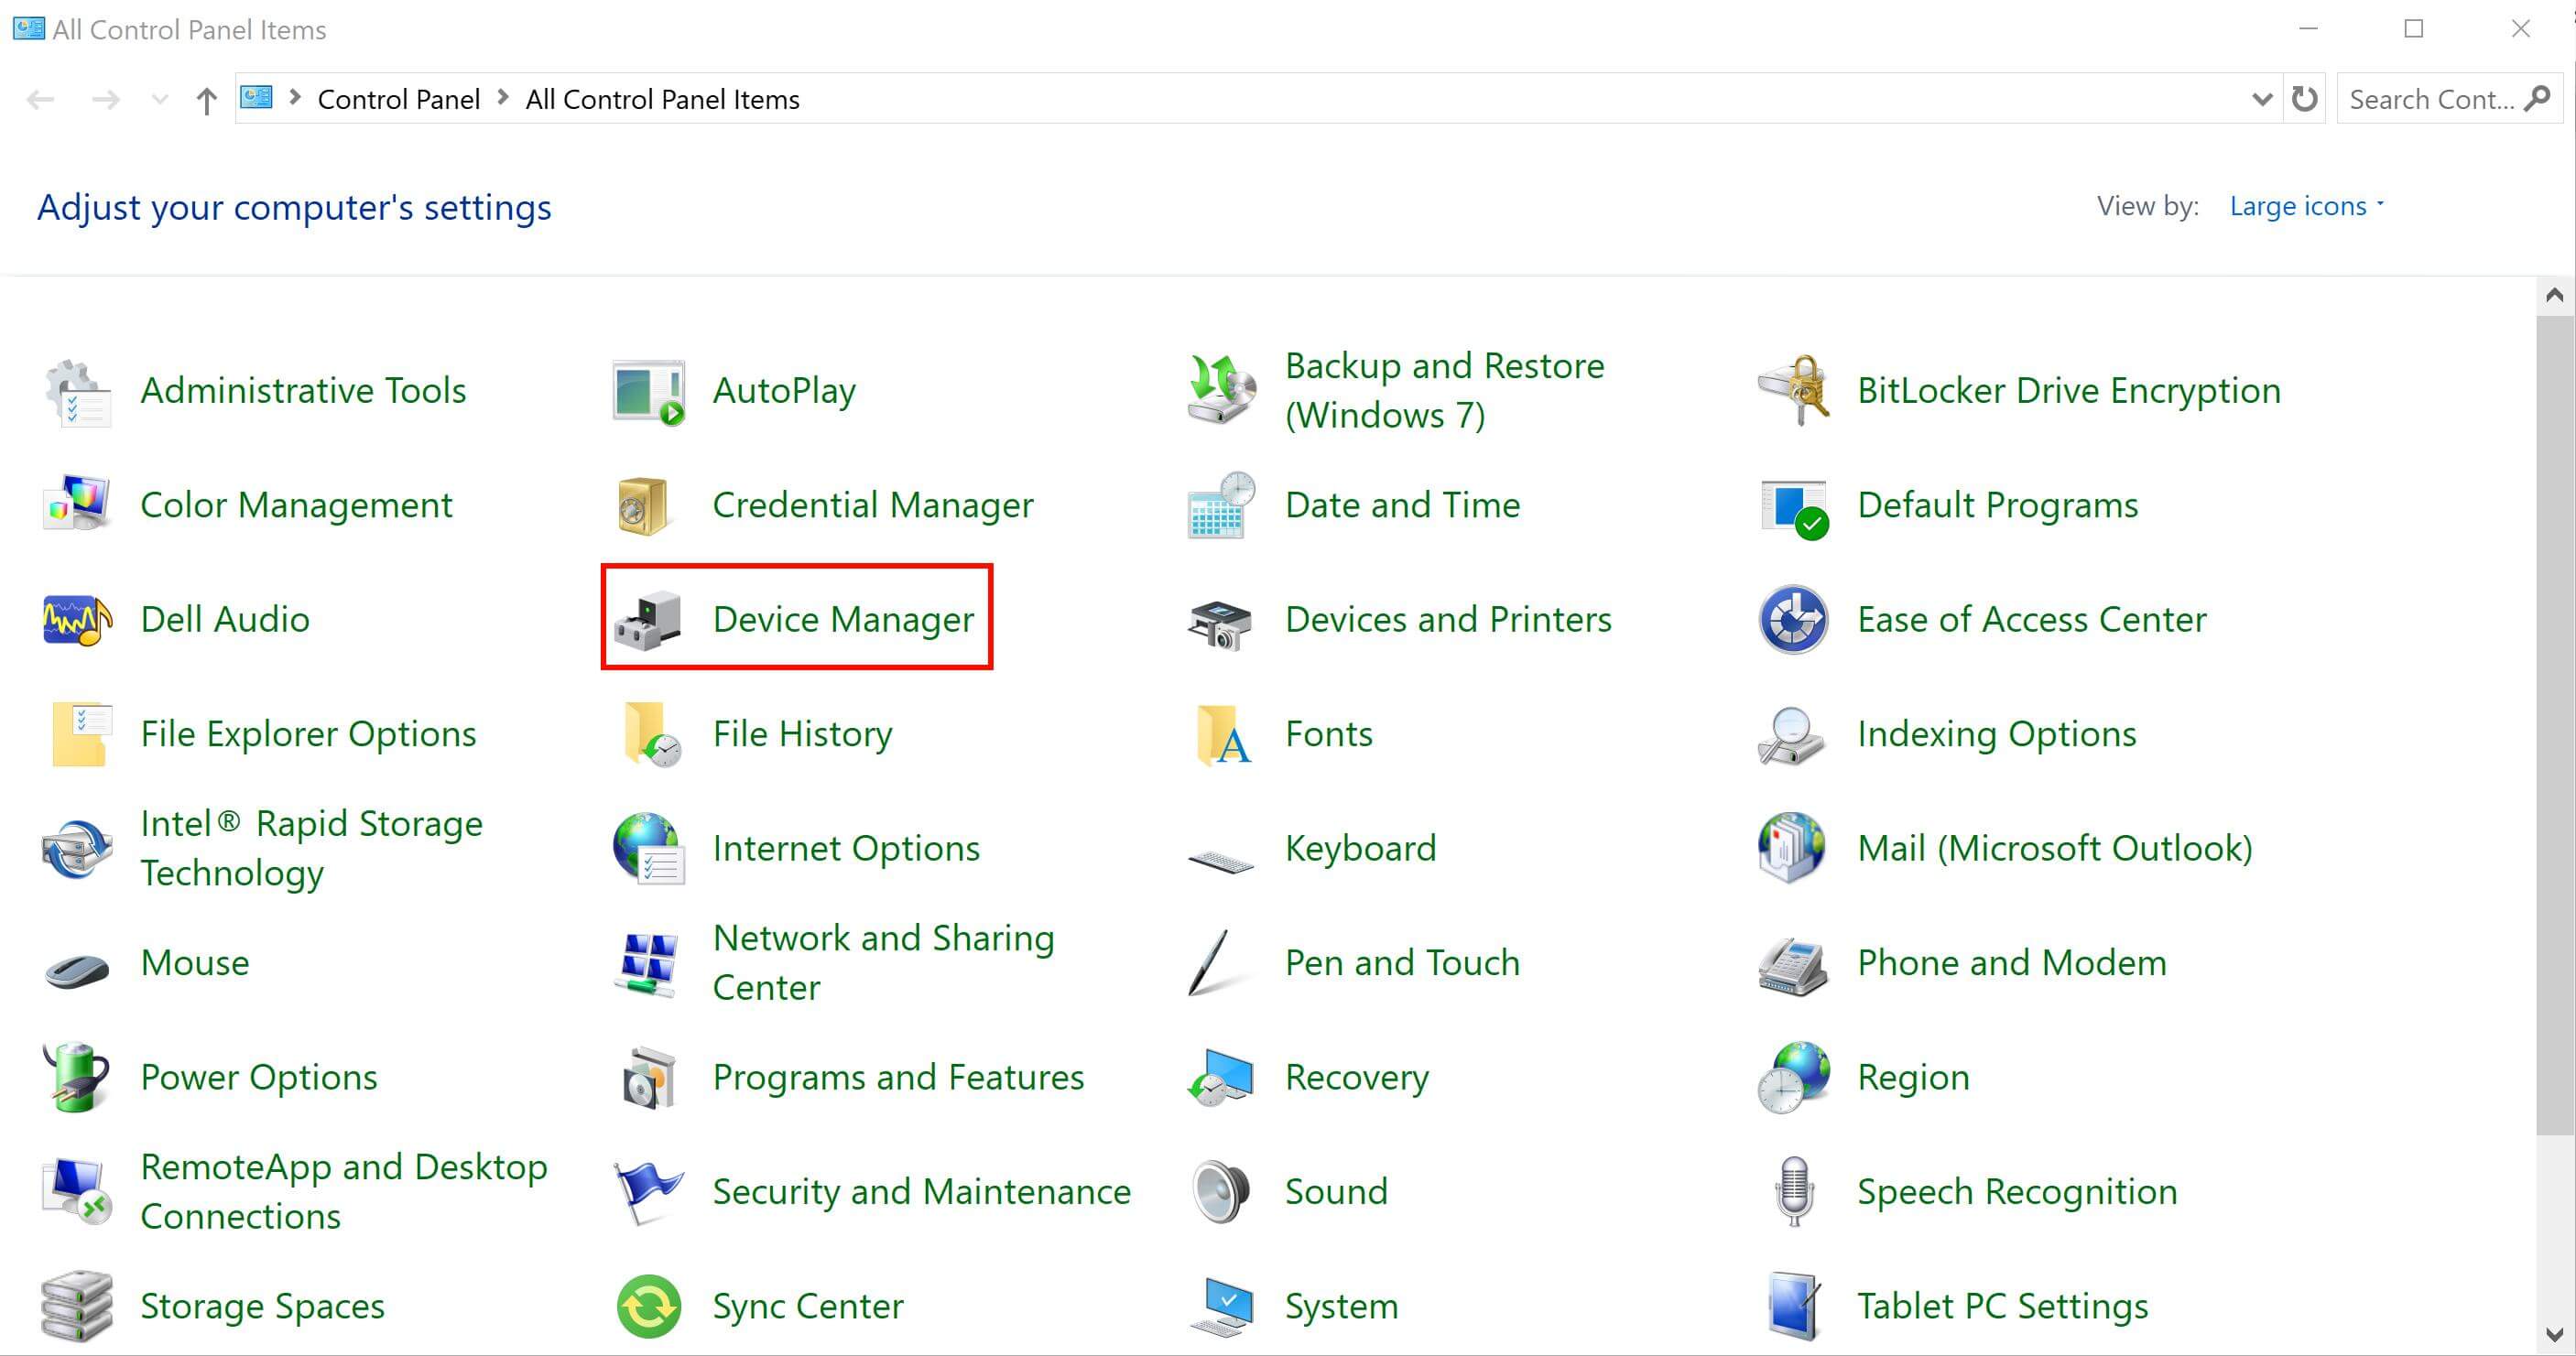
Step 1. Go to Control Open and open Device Manager.
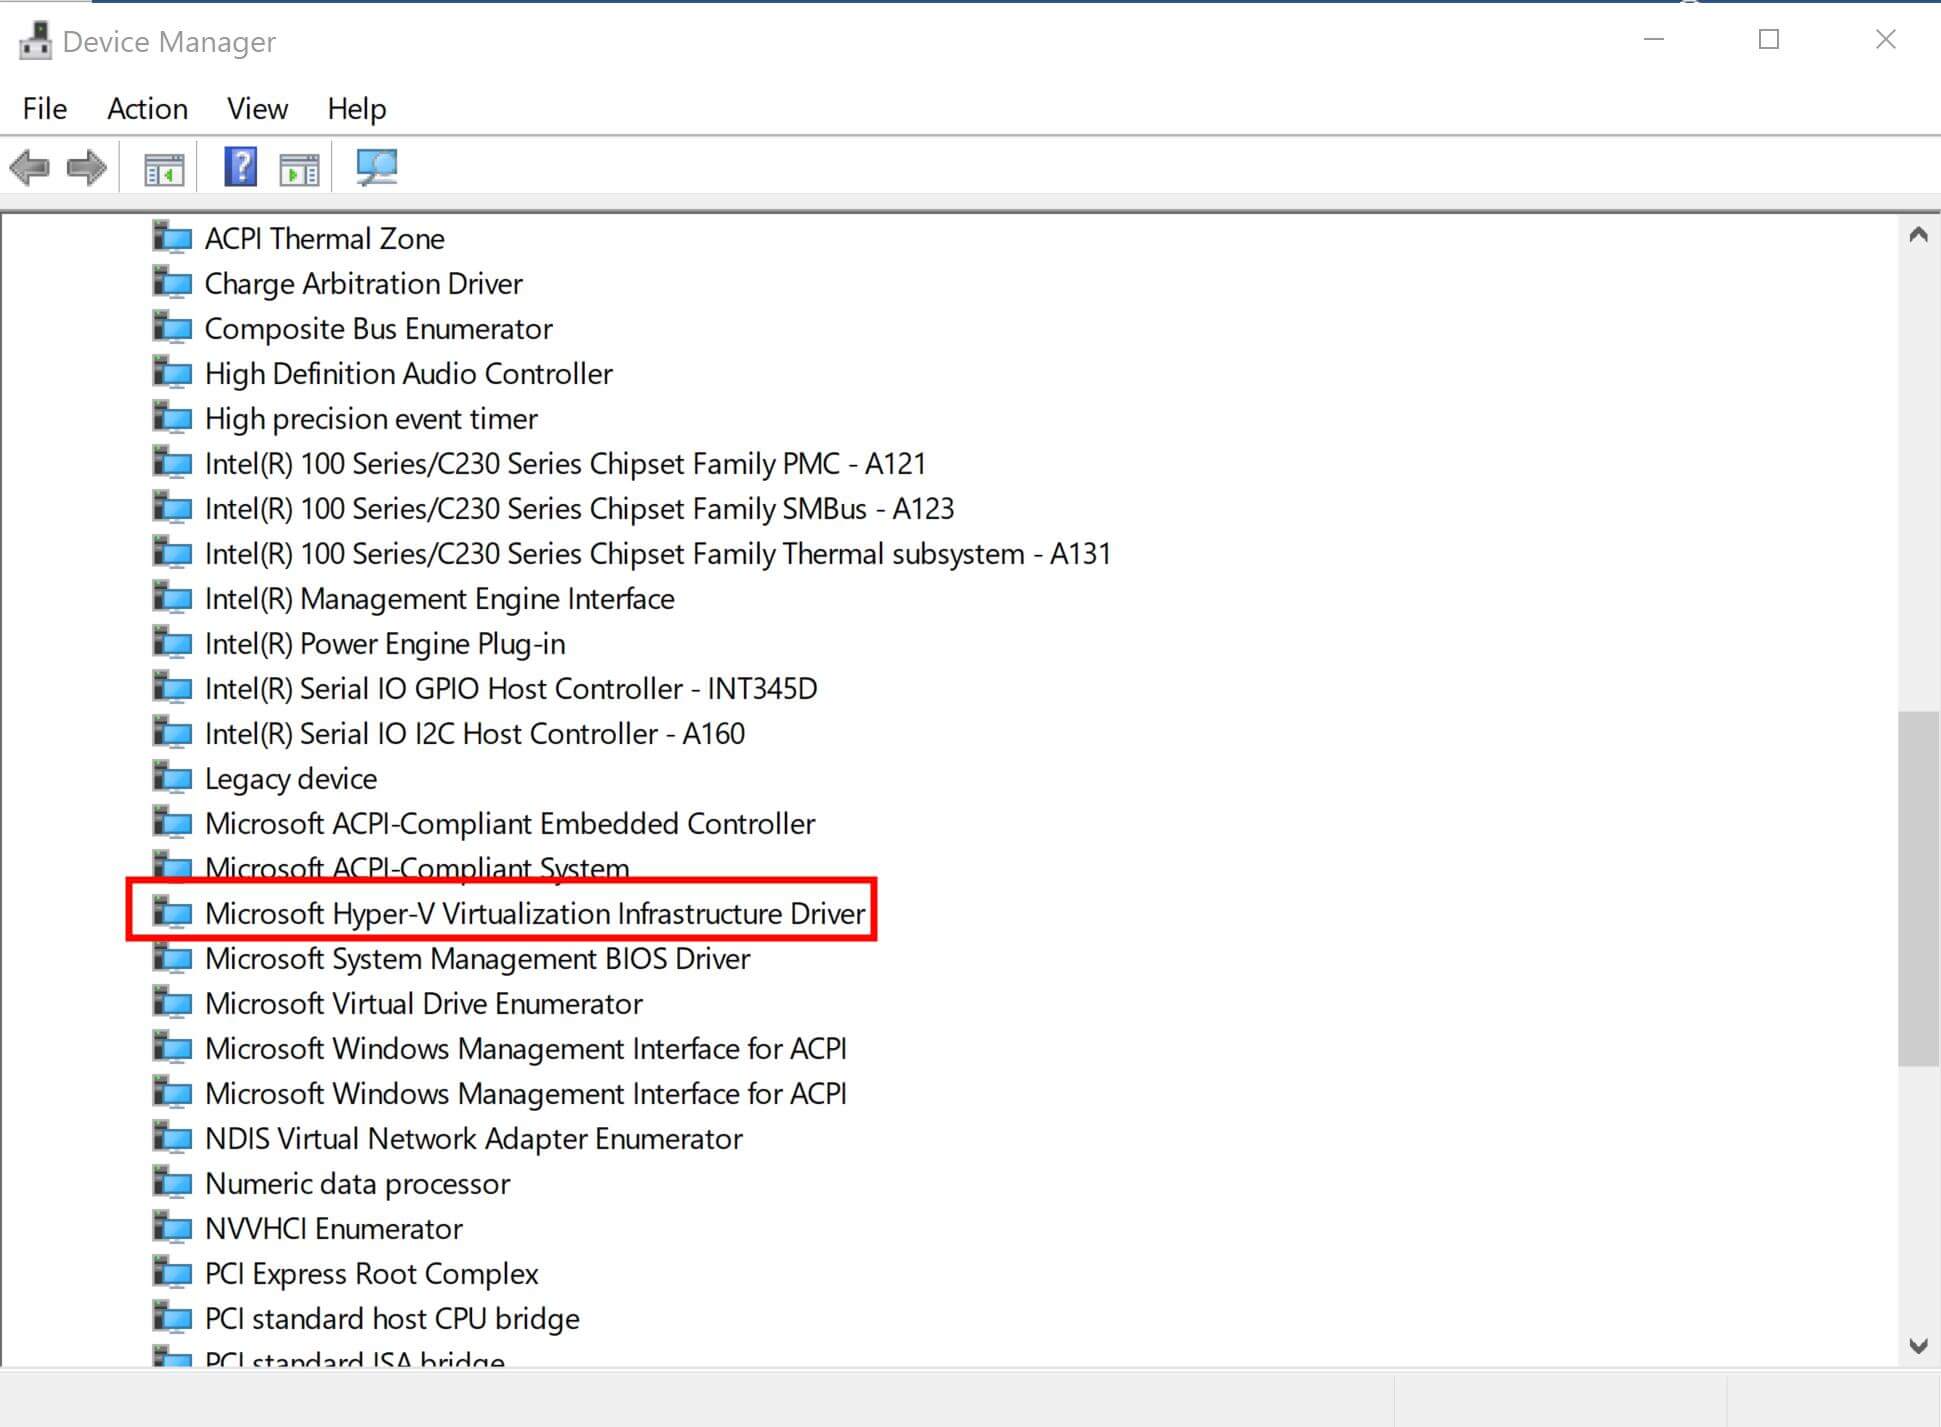
Step 2. Expand System Devices and look for Microsoft Hyper-V Virtualization Infrastructure Driver.
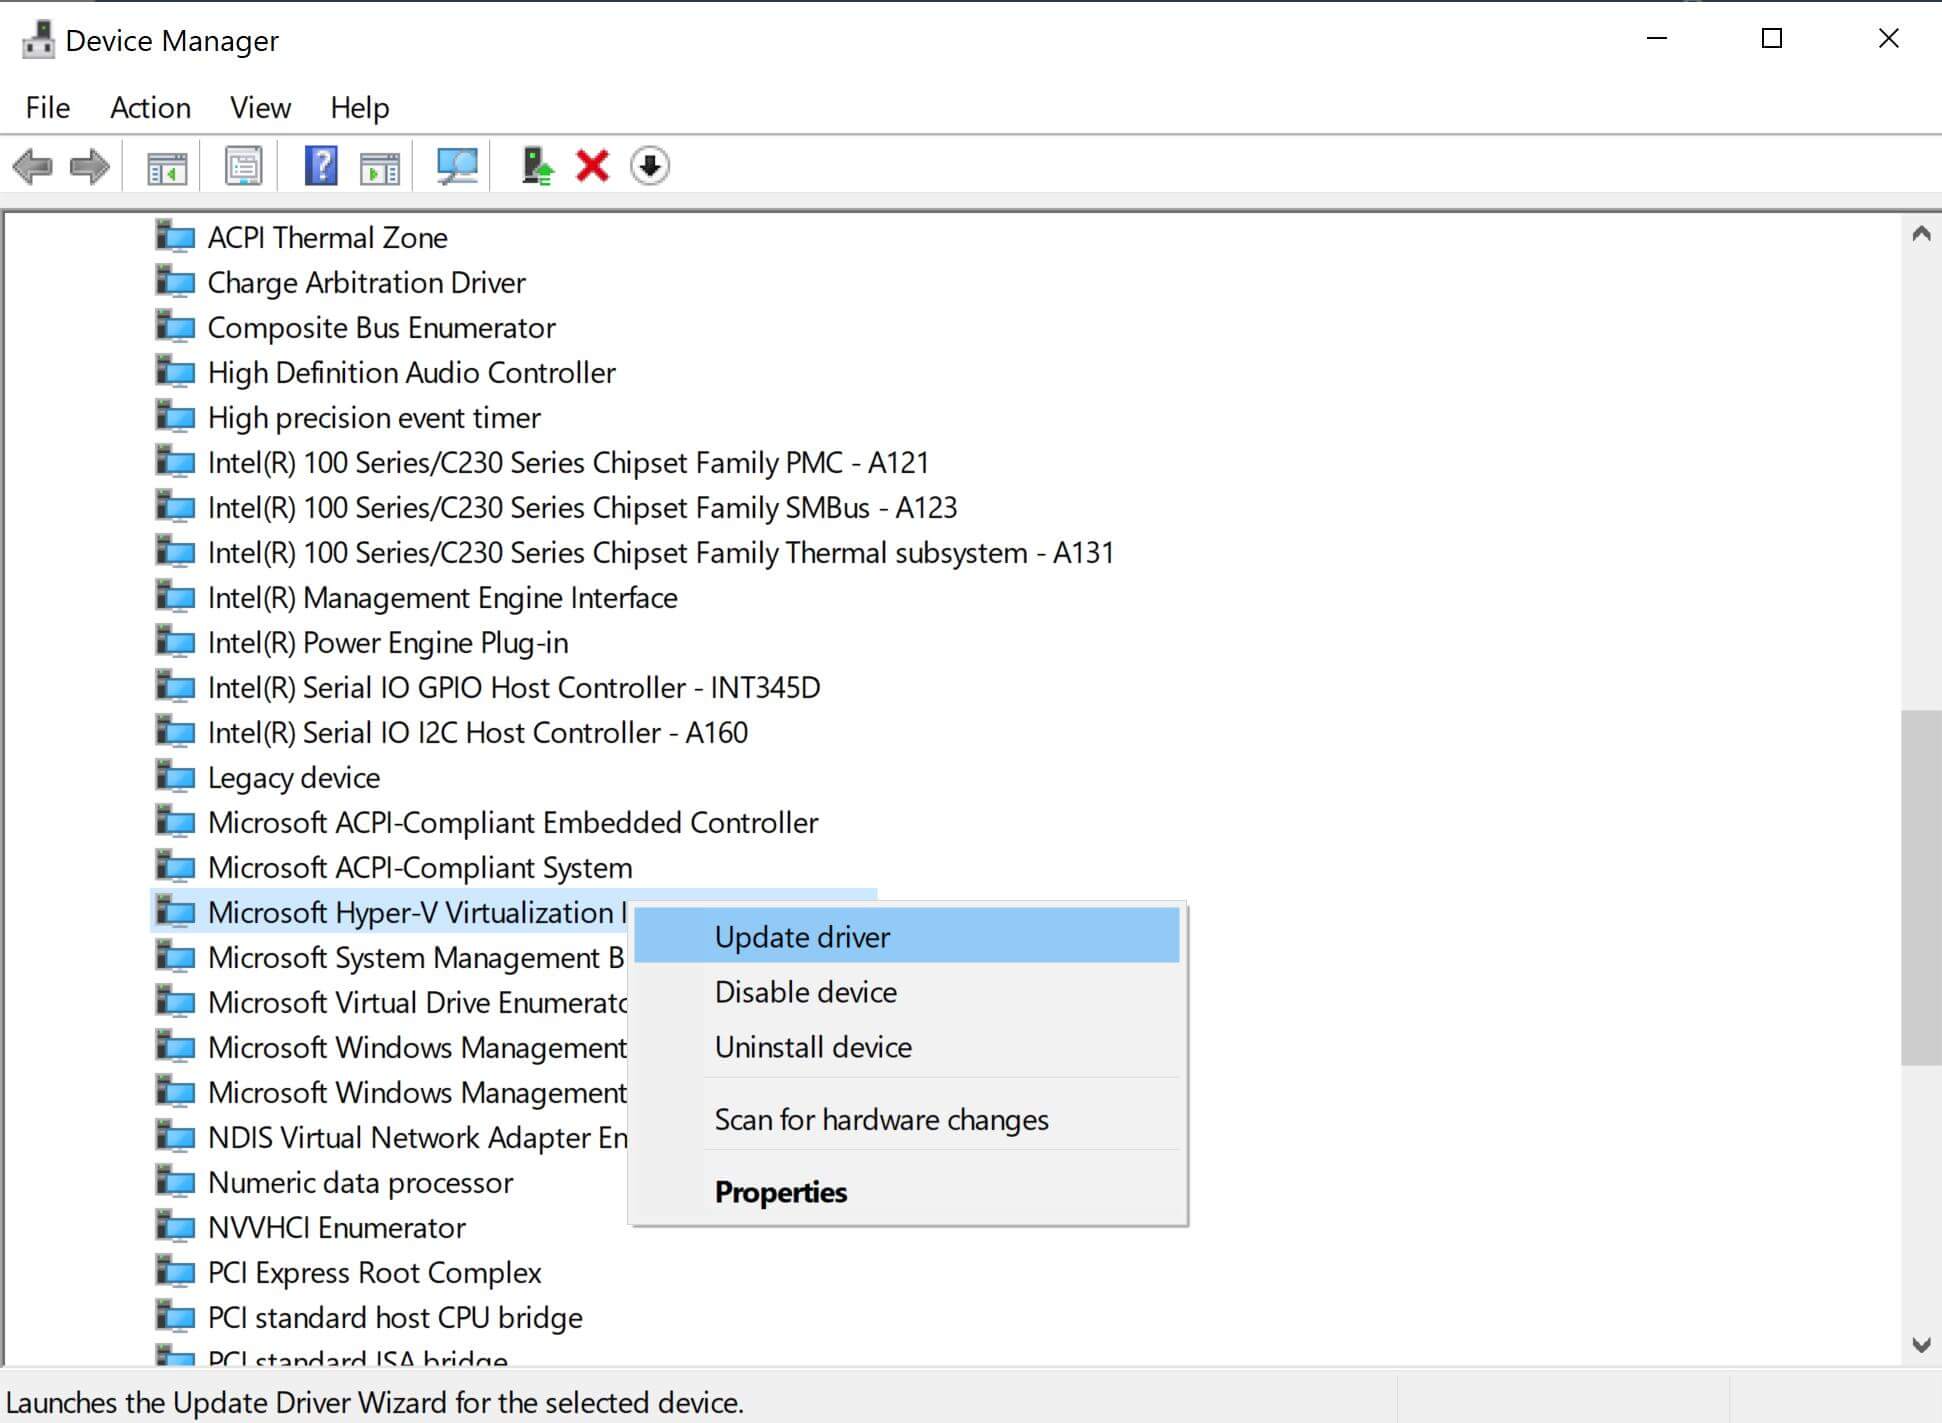
Step 3. Right-click on it and click Update Driver. You can let it search for the driver automatically or upload a driver manually.
Fix 6: Update Windows
If none of the above methods worked in your case, you can try updating Windows. When you update to the latest version, many bugs and issues are fixed. It can solve the Hpervisor error Windows 10/11.
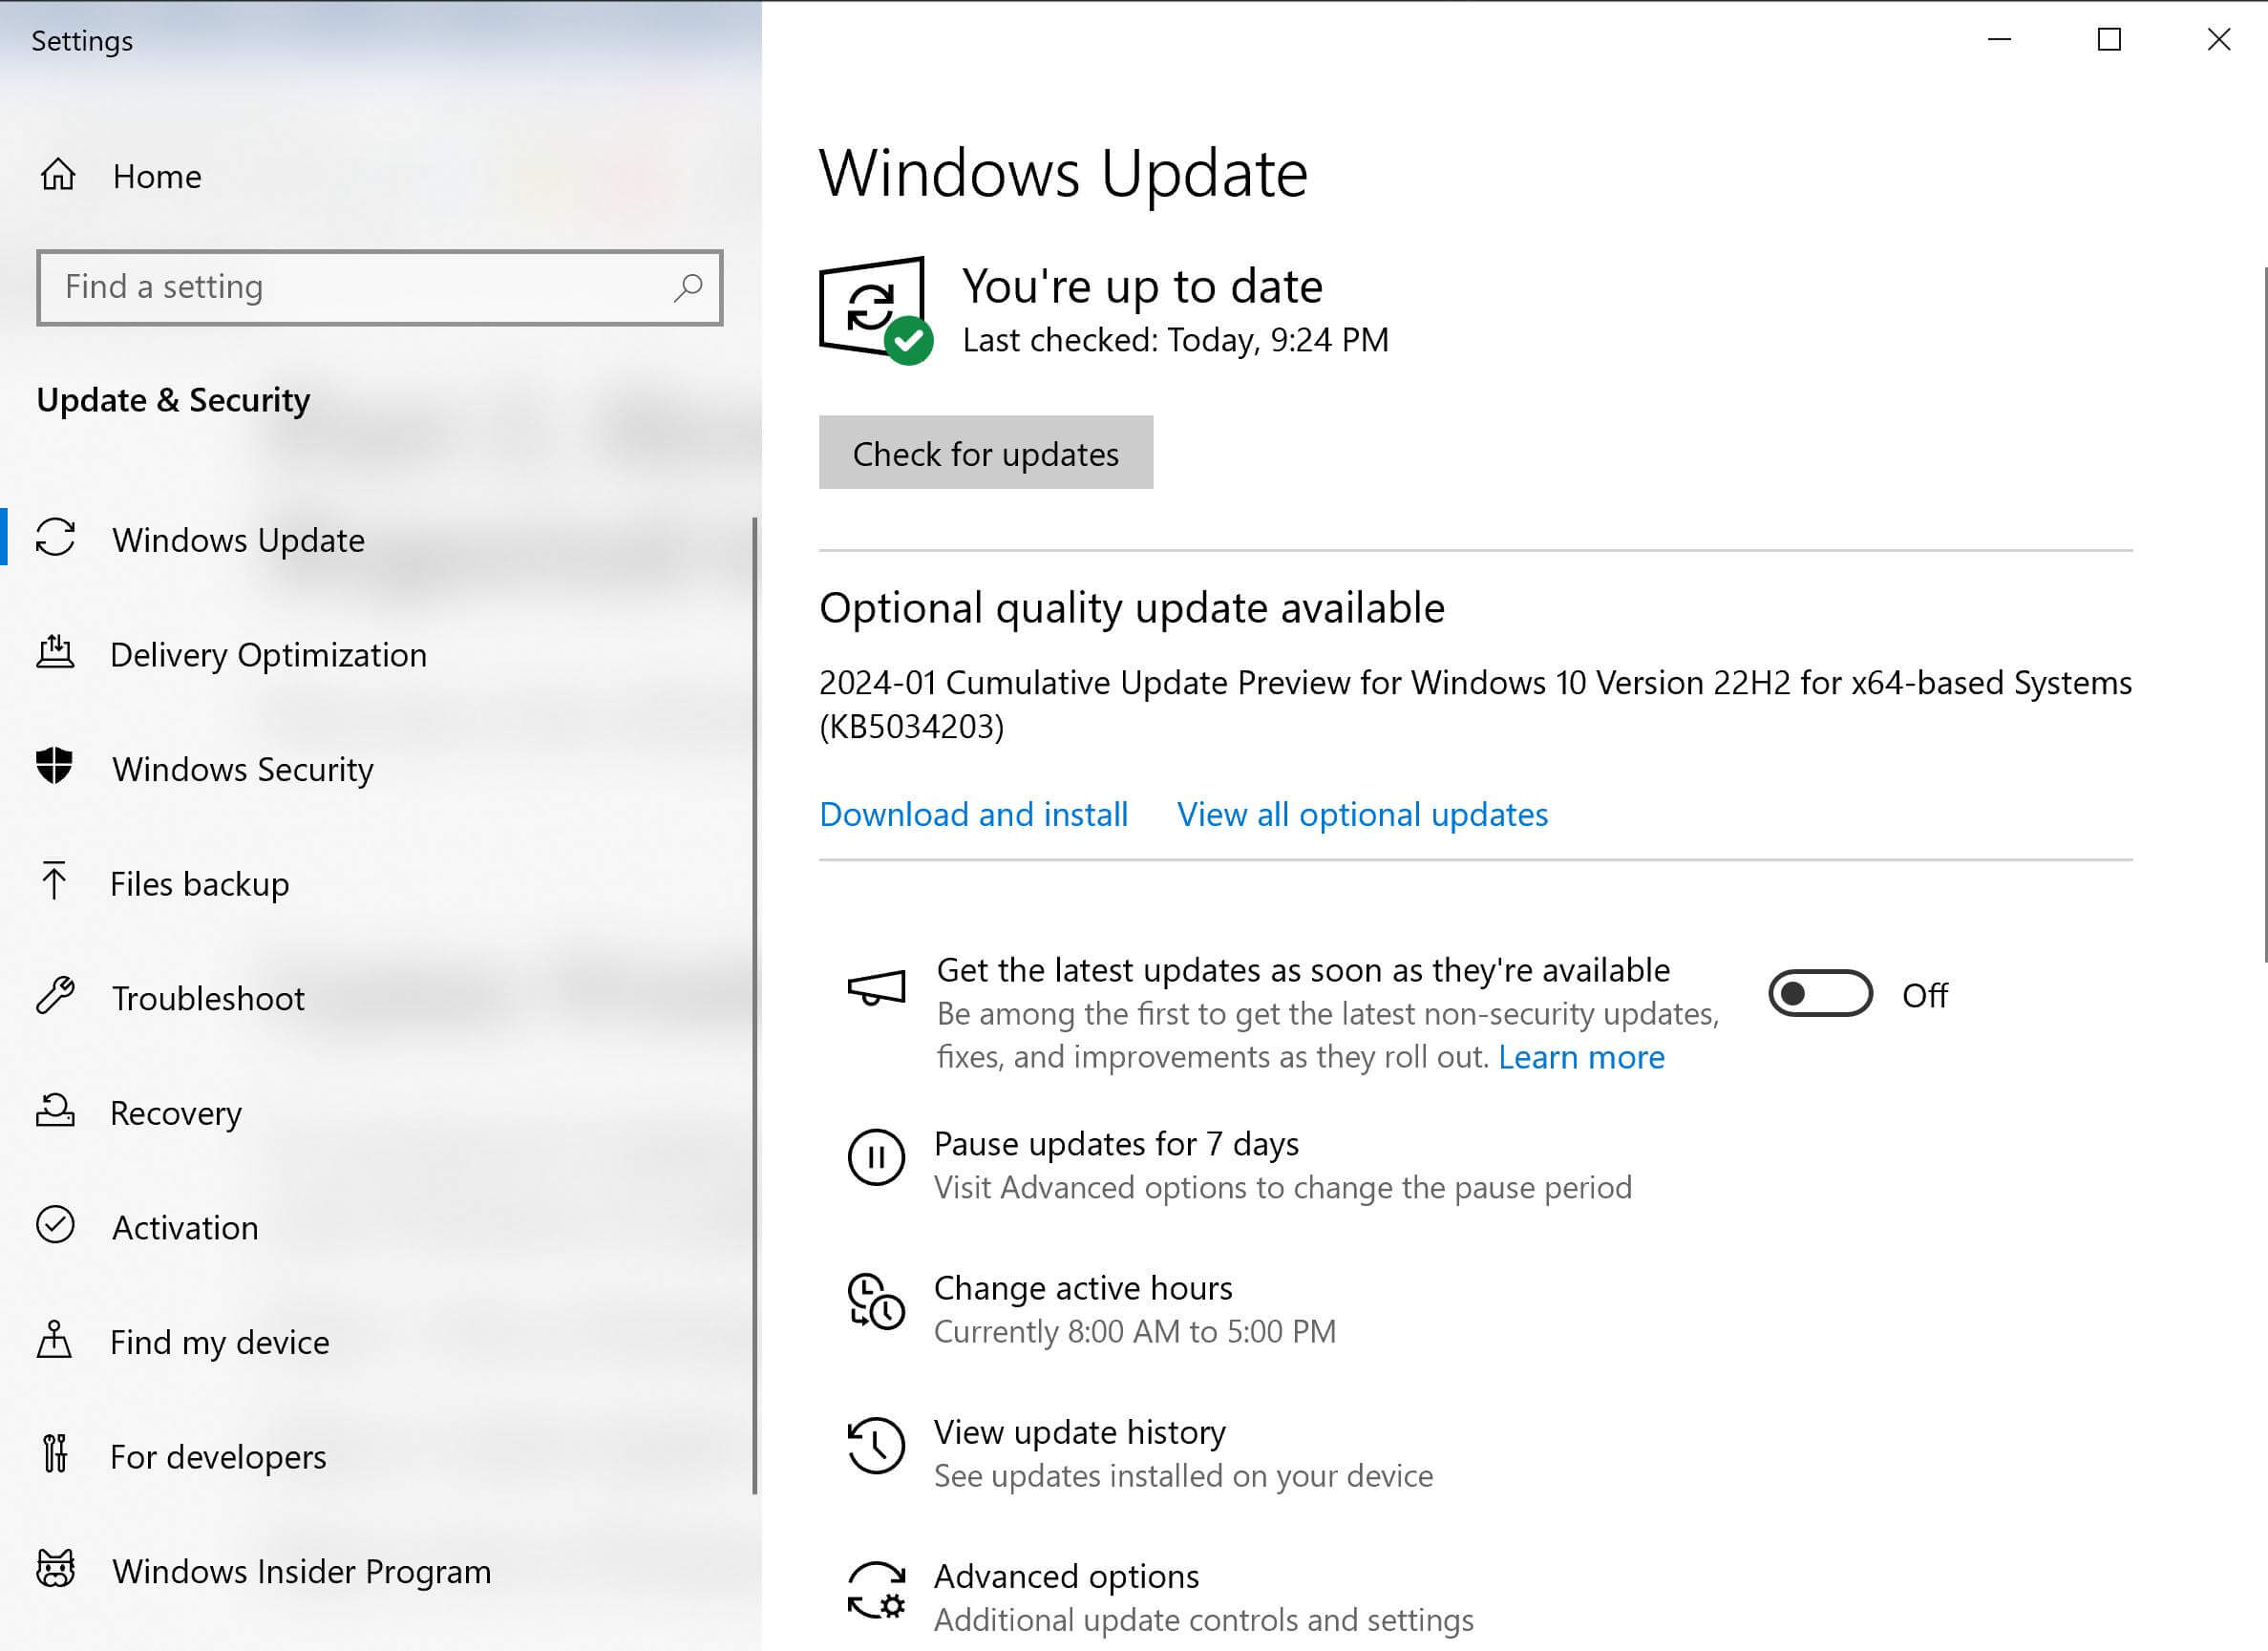
Step 1. Go to Settings and click Update & Security.
Step 2. Click Windows Update. If you see any update available, click Update Now. It will fix various issues in your operating system.
Part 4. Extra: Recover Your Lost Data Caused By HYPERVISOR_ERROR BSoD
In the Hypervisor_error, you see a blue screen, which terminates all your programs and leads to data loss.
Fortunately, you can recover your lost data using AnyRecover. It is a professional and all-in-one data recovery tool for Windows, Mac, iOS, and Android. Within a few clicks, your lost data can be recovered, and it does not require any expertise.
It can recover your videos, images, documents, and almost all types of file formats. It works on your hard drives, SSDs, flash drives, and different storage devices.
![]()
2,061,704 Downloads
Features of AnyRecover
-
Supports 1,000+ file formats to recover all your data
-
Powered with AI repair to fix your corrupted files
-
Works in more than 500 data loss scenarios
-
Ensure incredible data recovery success
Steps to Recover Data After Hypervisor Error
Step 1: Download AnyRecover on your computer. It is available for Mac and Windows. Install it on your computer.
Step 2: Launch the app and click PC & Hard Drive Recovery. Now, you need to select the location for data recovery. You can select a drive or folder.
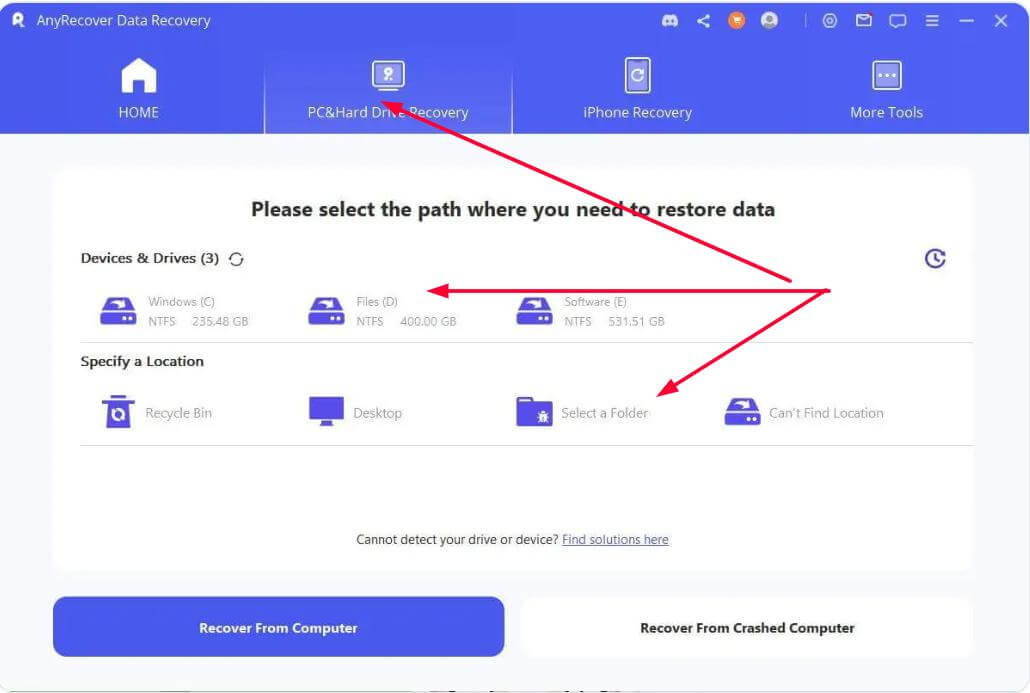
Step 3: Once you select the location, the software will start the scan. It will look for the lost files and recover them. Wait for the scan to complete.
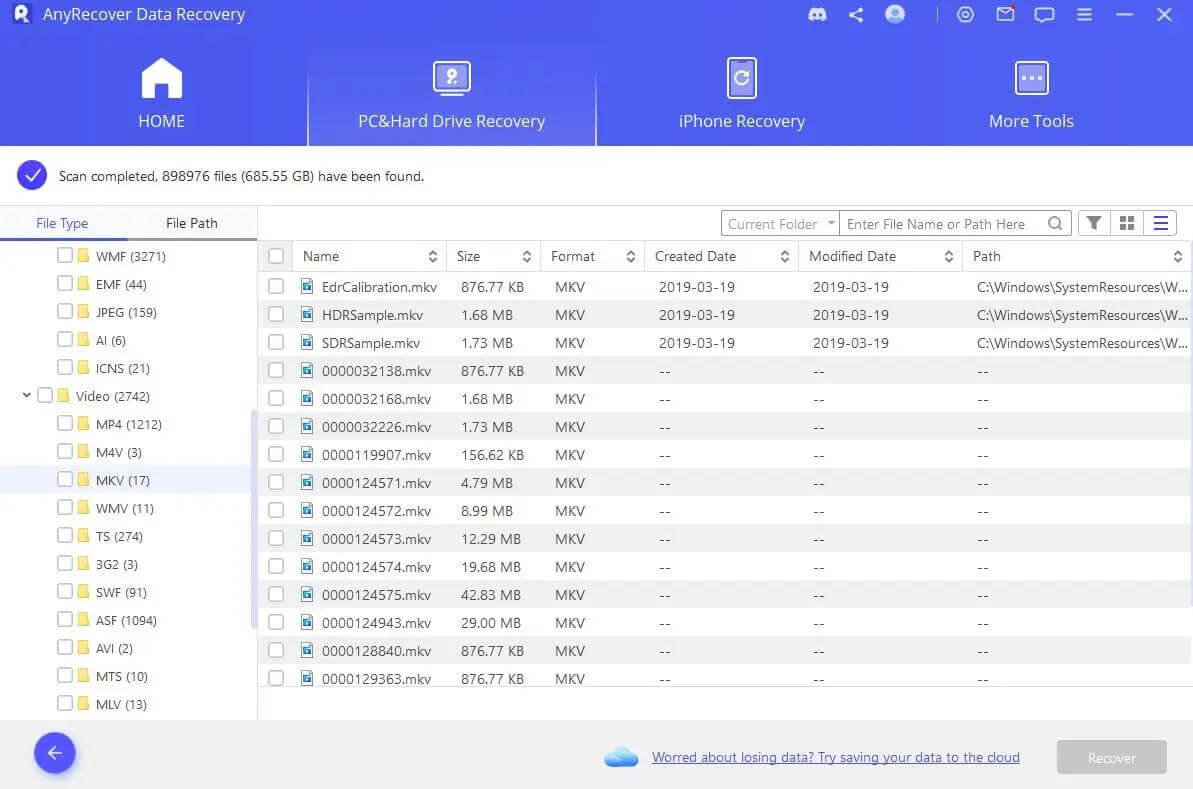
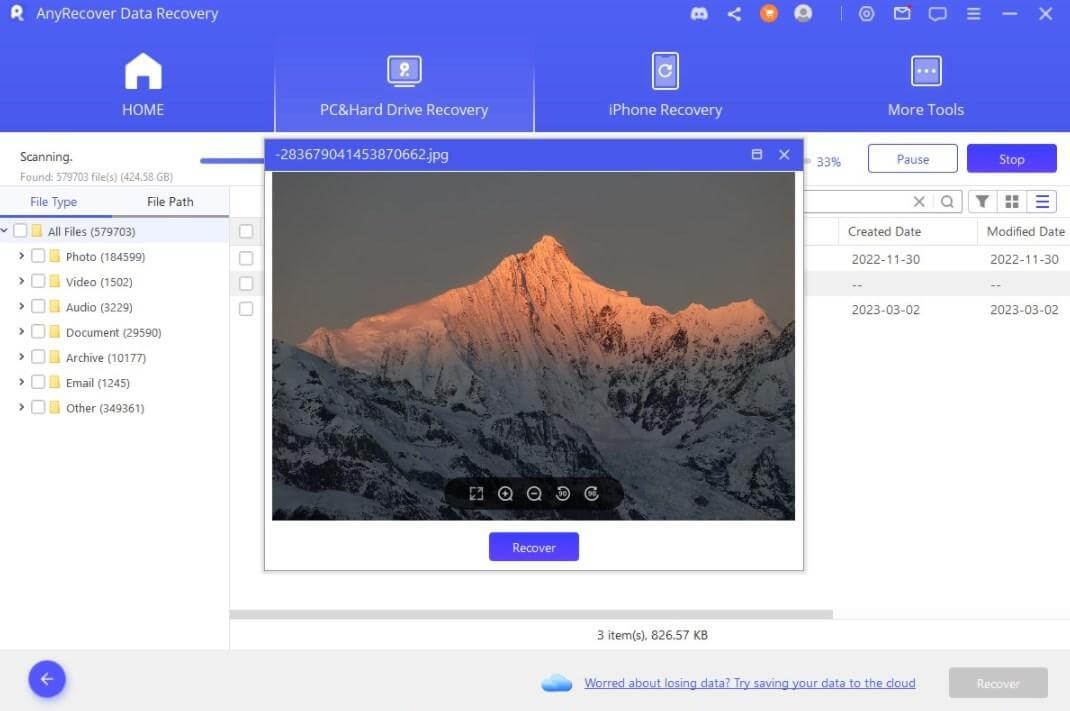
Step 4: You can preview the files and filter them. Select the ones you want to recover and click the Recover button. Select the location and save your files.
Part 5. FAQs about Hypervisor Error
1. How do I fix the hypervisor error in BIOS?
You can enable virtualization from BIOS to fix the issue. For that, restart your computer and enter BIOS by pressing F1, F2, F12, or any other dedicated key. Go to the Advanced tab and look for Virtualization Technology. Enable it, and save the changes.
2. Why is the hypervisor error blue screen stuck?
When you see the blue screen stuck, it means Hypervisor is not working properly. It has crashed, and you can only restart your computer. Fix the issue and ensure Hypervisor is working properly to prevent the blue screen.
3. How do you fix a hypervisor that has been detected?
You can follow the methods we have discussed to get rid of BSoD. Try the methods one by one, and one of them will hopefully fix it.
Conclusion
Windows 10/11 users encounter the Hypervisor error when virtualization software does not work properly. When it crashes, there is a blue screen, which terminates all programs. The situation can be frustrating, but the error can be fixed through the solutions we have discussed in this article.
And if you lose your precious data due to the Hypervisor error, you can use AnyRecover. It will recover all your media, documents, and other important files in a few clicks. Download the free version and recover your data.
AnyRecover Key features include:
- AnyRecover is utterly developed to recover over 1000 different formats of photos, videos, documents and emails, etc.
- You could also preview your data before recovering it.
- This software is developed to recover all the data in its original form without overwriting it.
- It is 100% safe and easy to use.
Time Limited Offer
for All Products
Not valid with other discount *

 Hard Drive Recovery
 Deleted Files Recovery
