How To Fix Internal Power Error On Windows 10/11 [2024]
The internal power error is quite common, and almost every Windows 10/11 user has encountered it once. This error attacks unexpectedly and harms the user's device and data.
If you are also worried about internal power error Windows 10/11, then this guide is for you. We are going to share effective ways to fix the internal power error on Windows 10/11. We'll share the step-by-step methods that you can follow easily.

Part 1: Overview Of Internal Power Error
1.1: What Is Internal Power Error?
Internal Power Error on Windows 10/11 is one of the most common and unexpected errors. It blocks the proper power supply to your device and ultimately forces your system to stop and restart.
This error brings an undesirable condition of a blue screen with stop codes. It closes all your working windows in a second. After this, the PC is forced to restart or log out without letting users do any data safety preventive measures.
1.2: What Causes Stop Code Internal Power Error
The stop code internal power error can occur due to multiple reasons and negligences. A complete understanding of these points will allow users to avoid such an issue.
Here is a list of some possible reasons that cause the internal power error to occur unexpectedly.
-
Poor power supply system
-
Hibernation files
-
Corrupted files
-
Hardware problems
-
Software issues
-
Incompatible applications and software
-
Improper hardware cleaning routine
-
Outdated drivers.
Part 2: 7 Ways To Fix BSOD Internal Power Error On Windows 10/11
Method 1. Increase Hibernation File Size
Method 2. Hard Driver Timer to 0
Method 4. Check Hard Drive Corruption
Method 5. Update Graphic Card Drivers
1Method 1: Increase Hibernation File Size
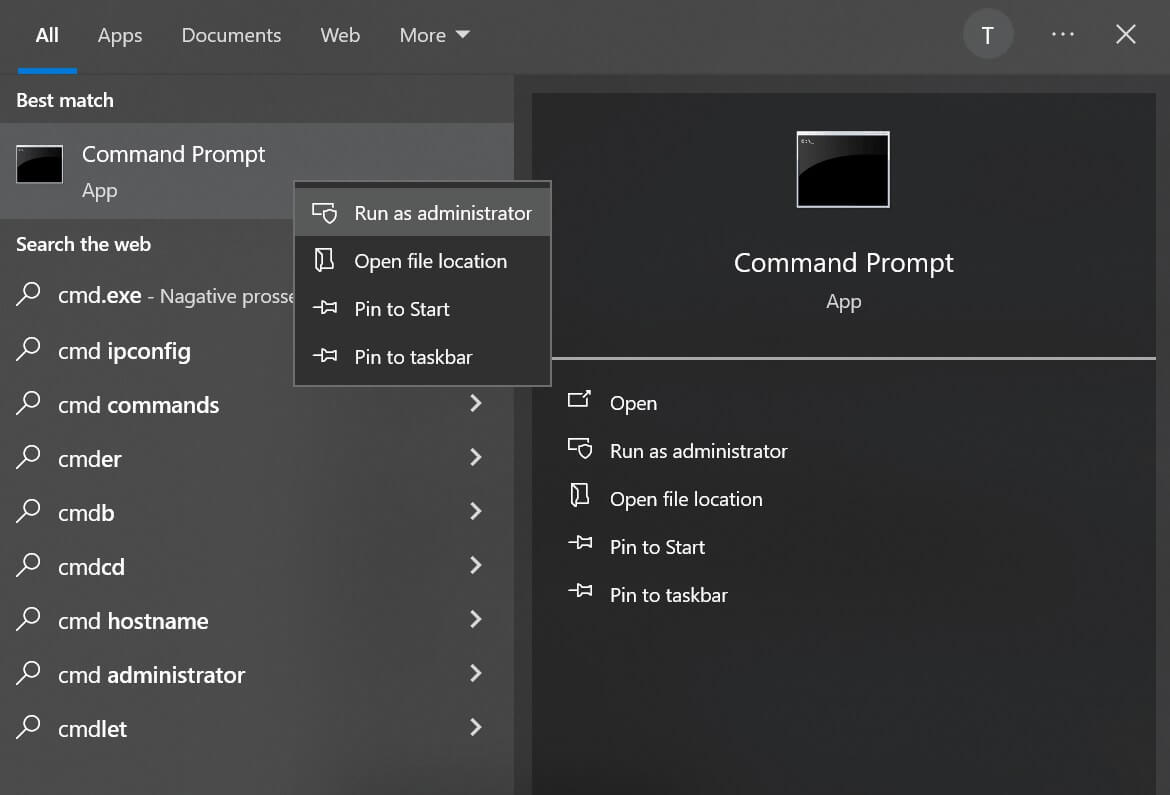
Step 1: Go to the Start Menu on your PC. Type "cmd" and right-click on the Command Prompt > select the option Run as administrator.
Step 2: Type this command "powercfg /hibernate /size 100" and hit the Enter key.
Step 3: This command will start the scan and fix if the internal power error is due to the hibernation file size issue.
Step 4 Restart your PC.
2Method 2: Hard Driver Timer to 0
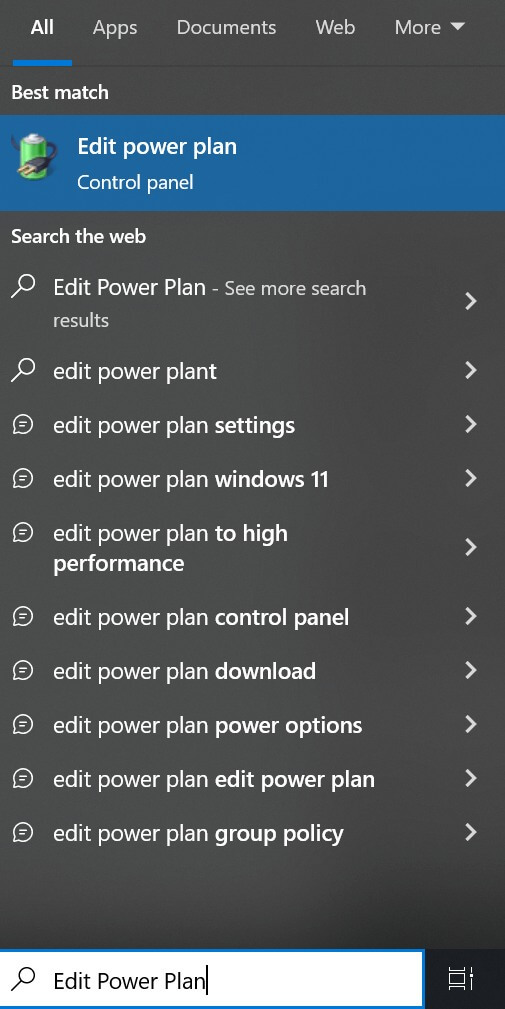
Step 1: In the search bar of Windows, type "Edit Power Plan" and open it.
Step 2: Go to Change Advanced . Now, click on the Hard disk option, and the list will expand. Change the time to 0 under the Turn off hard disk after option.
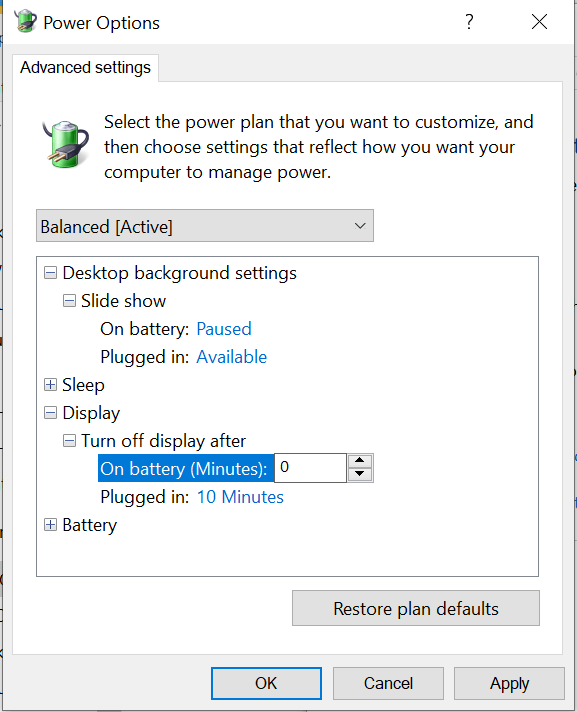
Step 3: Click on Apply and OK button to save the changed settings and restart your PC.
3Method 3: SFC Scanning
Step 1: Go to the search bar > type cmd > open the Command prompt and type "DISM.exe /Online /Cleanup-image /Restorehealth"
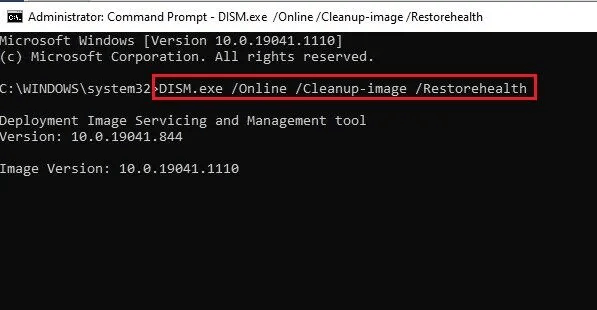
Step 2: Press the Enter key, and the scanning process will start to find out the corrupted file on your device.
Step 3: The scanning process will stop on its own after the identification of the corrupted file.
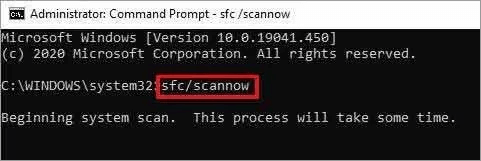
Step 4: Now, type "SFC/scannow" to start the next fixing process of the corrupted files. Reboot your device to see whether the issue is fixed or not.
4Method 4: Check Hard Drive Corruption
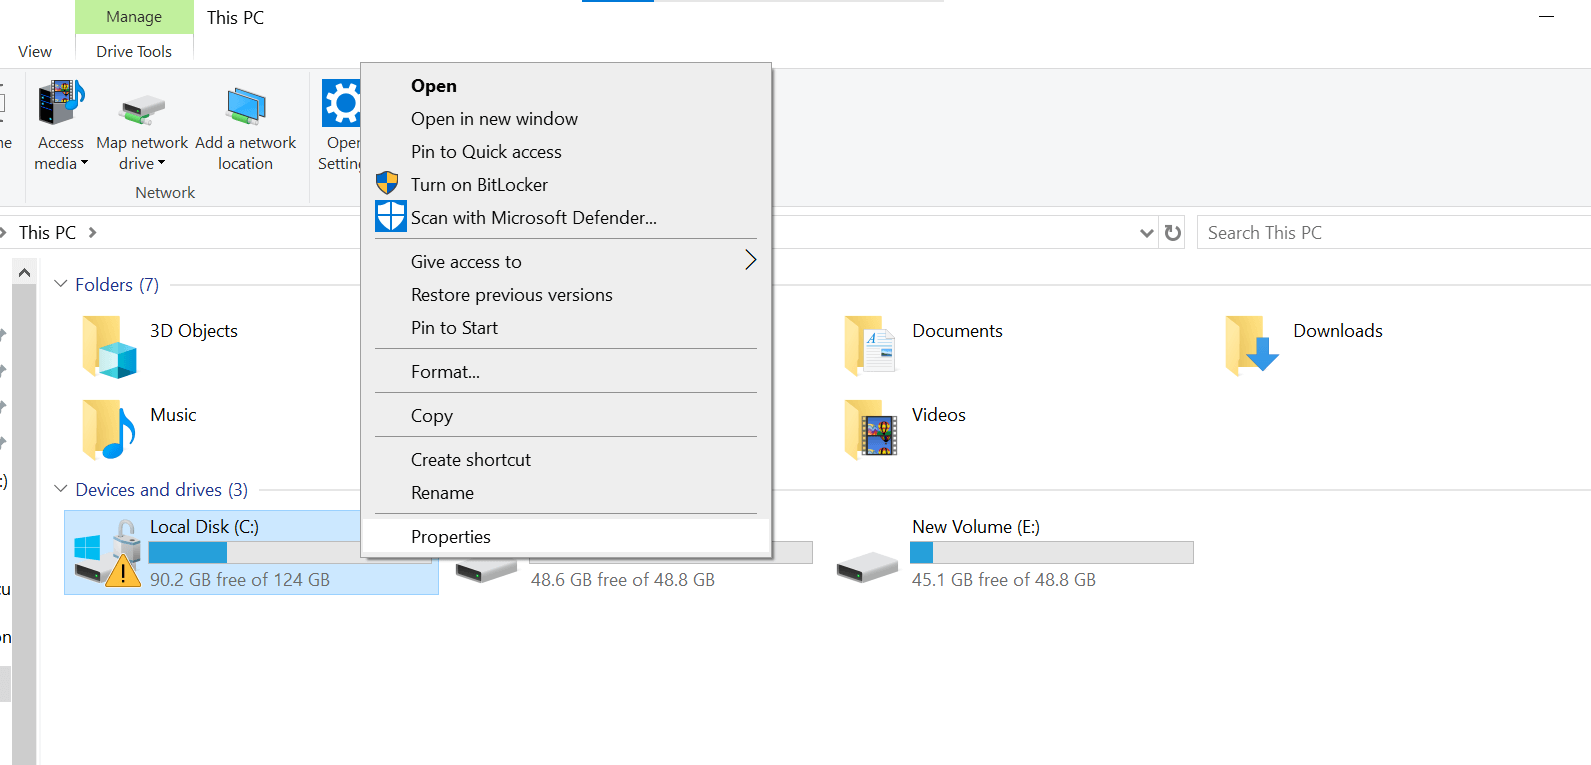
Step 1: Open File Explorer and go to This PC. Right-click on your system drive (Drive C) and select the Properties option from the drop-down menu.
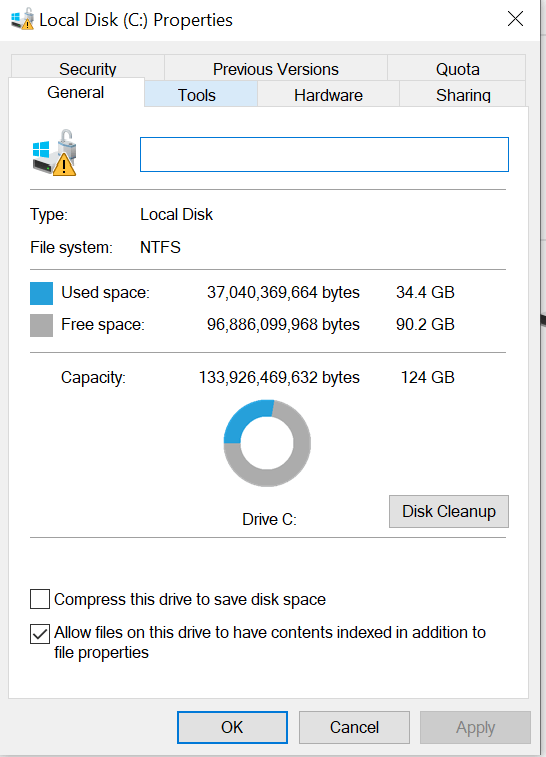
Step 2: This will open a small pop-up window on the screen. Select the Tools tab from the top head bar of the window and click on the Check option.
Step 3: A pop-up notification will appear on the screen. Click on the Scan Drive option and wait for the completion of this scanning process.
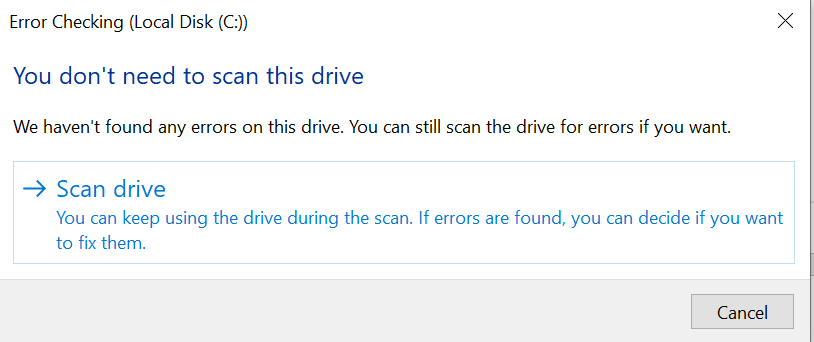
Step 4: After scanning, if you find anything wrong, follow the instructions provided by Windows to solve that issue.
5Method 5: Update Graphic Card Drivers
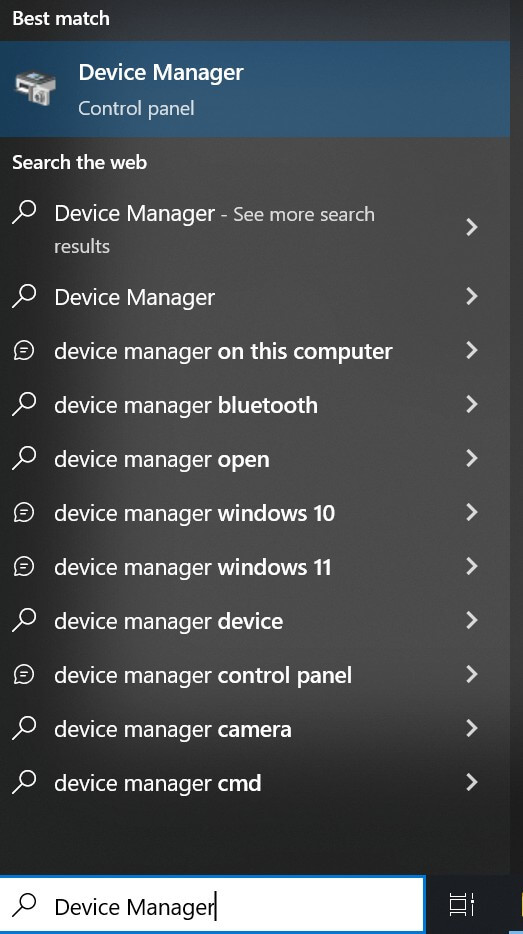
Step 1: Open Windows and go to the search bar. Type "Device Manager" and click on it.
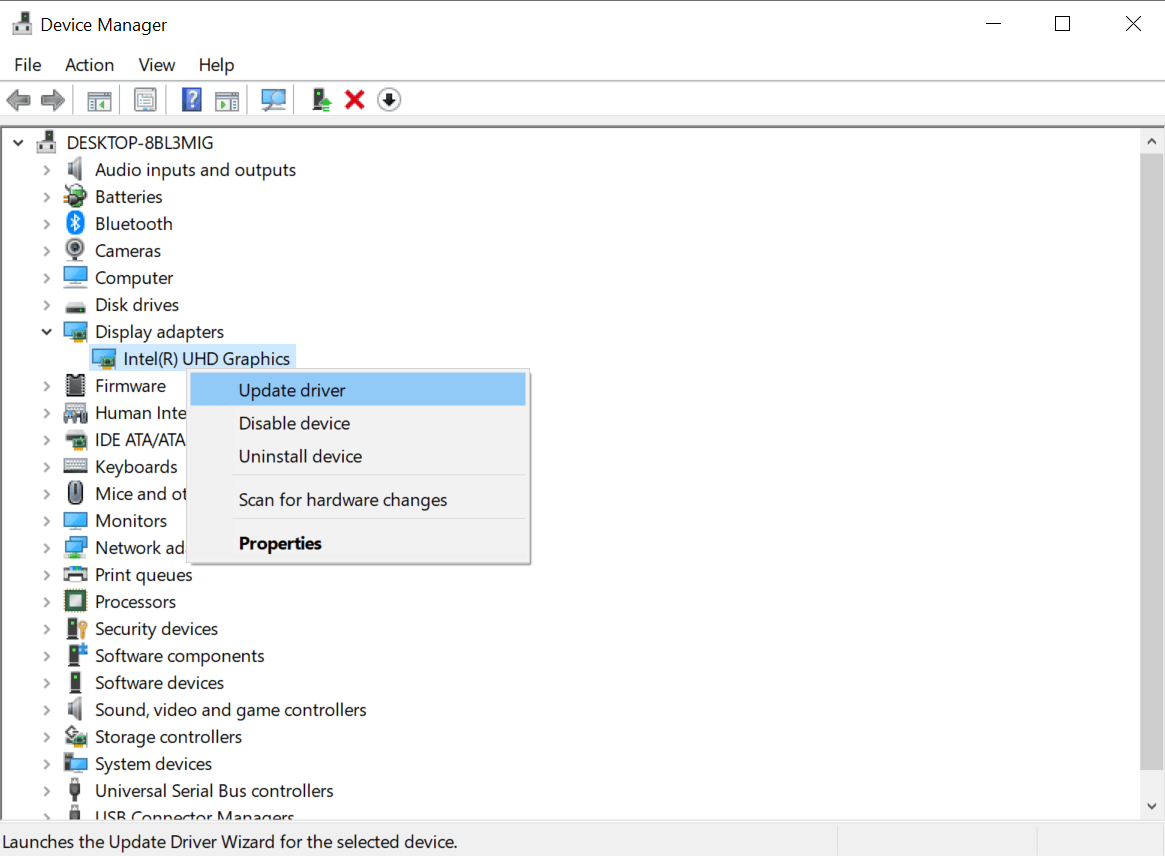
Step 2: A new window will open on the screen with many options. Click on the Display Adapters option, and the installed drivers will move down.
Step 3: Right-click on the installed graphic driver and click on the Update driver from the menu.
Step 4: Click on the Search Automatically for a Driver option to let the PC find and update the driver on its own. Finally, reboot your PC.
6Method 6: Uninstall Recently Installed Software
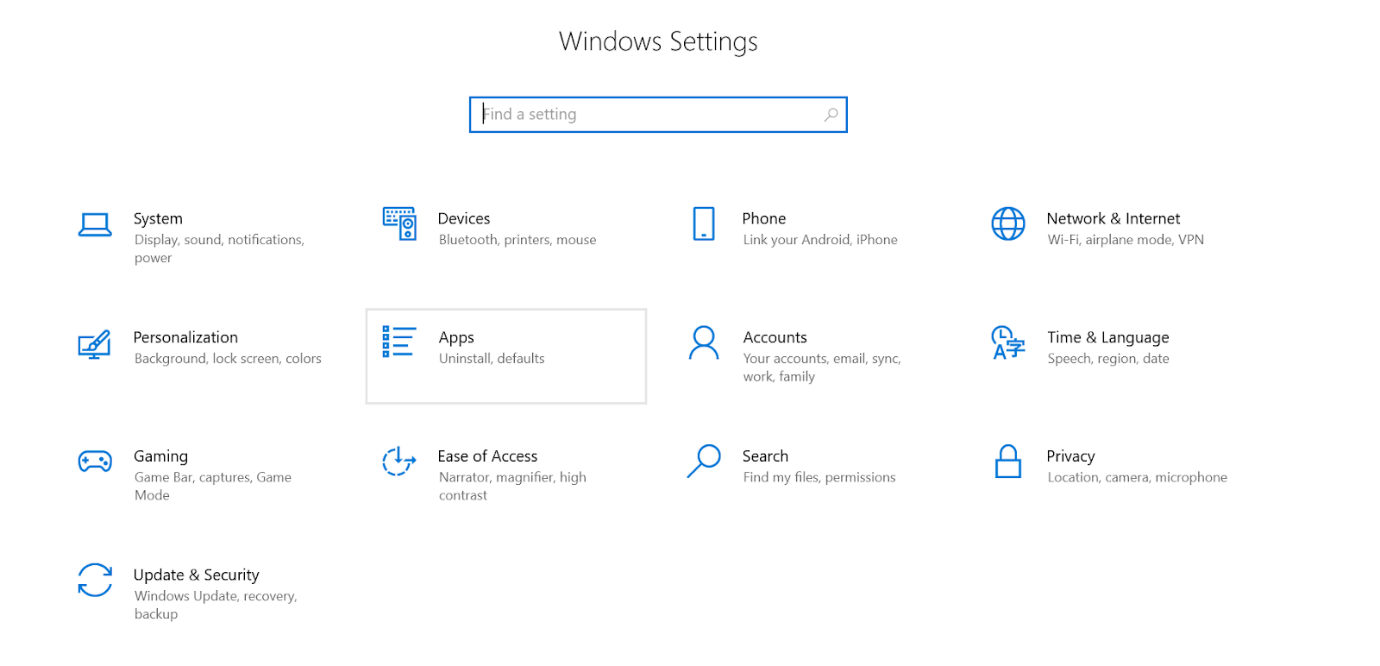
Step 1: Open your PC > go to Settings > click on the Apps option.
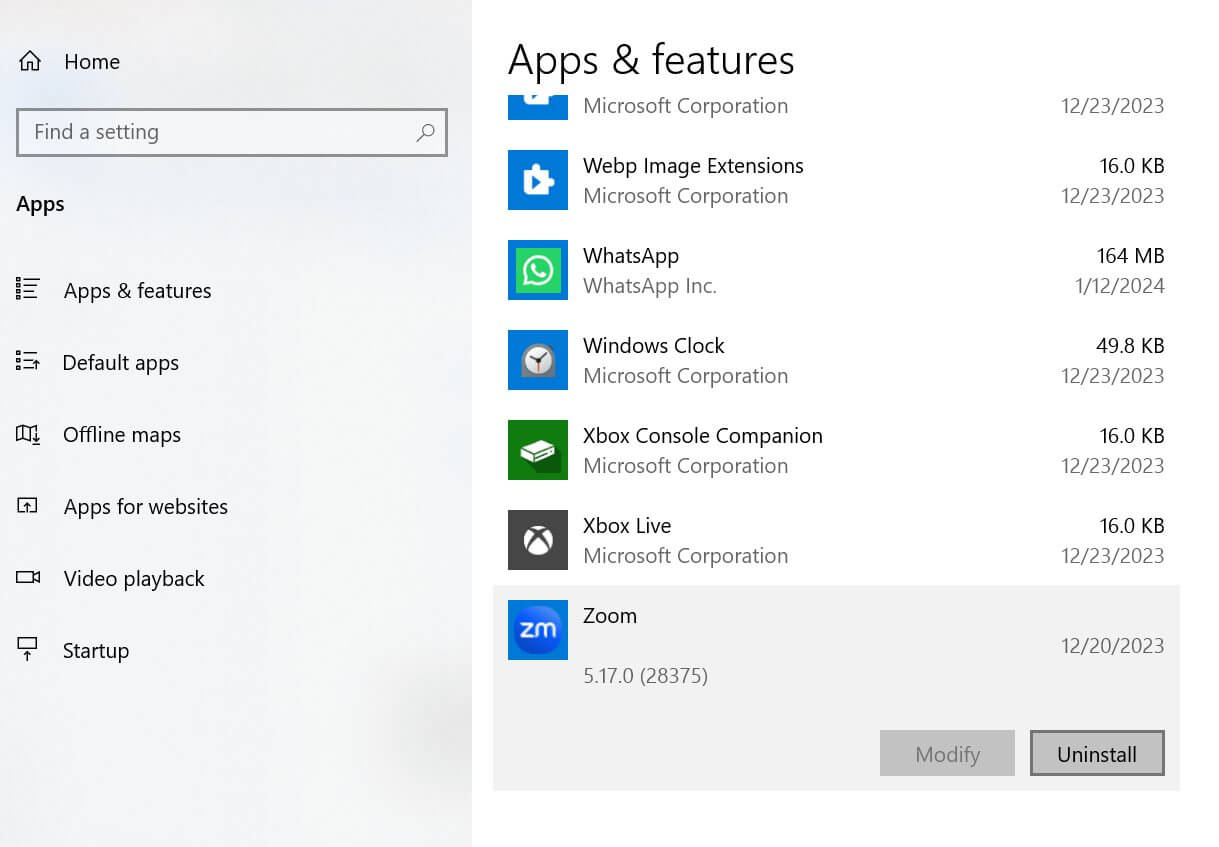
Step 2: This will show you the list of recently installed applications. Now, select the targeted recently installed app and click on it.
Step 3: You will see two options; hit the Uninstall button here. It will delete the application that was causing the internal power error.
7Method 7: Reset Your PC
Step 1: Go to Settings of your PC and type "Recovery" in the search bar.
Step 2: On the right side of the screen, you will see an option to Reset this PC.
Step 3: Click on the Get Started button. Here, Windows 10/11 will ask you to keep your files or not. Select the option according to your choice.
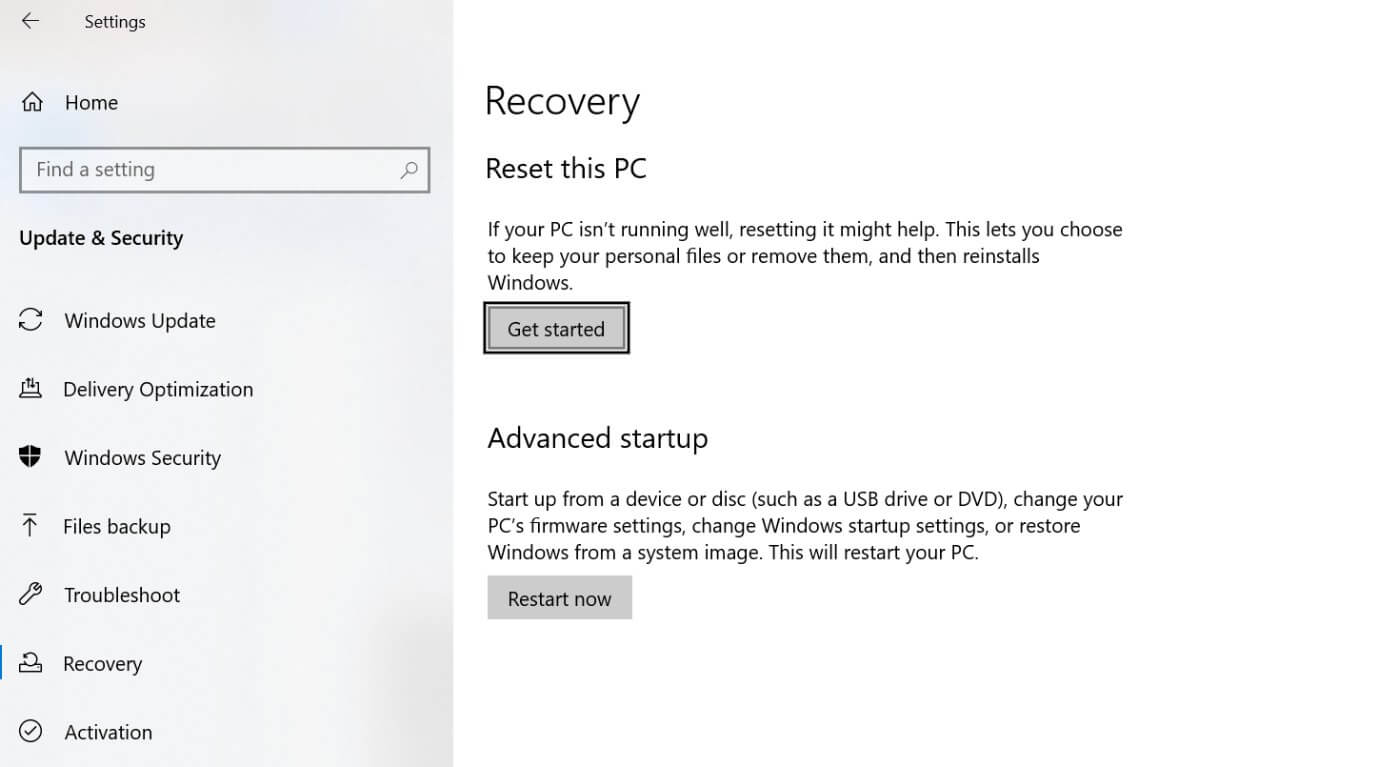
Step 4: Select the option, and your PC will be reset in a few minutes.
Part 3: Recover Lost Data From Blue Screen Internal Power Error
Internal Power Error occurs randomly and always puts the users at high risk of data loss. If you are also one of those who have lost their precious data due to an unexpected attack of Windows internal power error, then do not worry.
AnyRecover Key Features Include:
- AnyRecover is a robust software designed to recover lost/corrupted/deleted data after Deveice Corruption/Updating.
- The best for users encountering BSOD ERROR issues for various reasons, such as PFN_LIST_CORRUPT, or the Video Scheduler Internal Error, etc.
- This software is developed to recover all the data in its original form without overwriting it.
- It is 100% safe and easy to use.
We are here to share amazing software that can bring your lost data in a very easy, safe, and secure way. Anyrecover is a data recovery software that can do this job for you. Here is a short guide on how to recover lost data due to an internal power error in Windows 10/11.
Step 1: Download and install Anyrecover on your PC or Laptop. Open the software and click on the Hard Drive Recovery option.
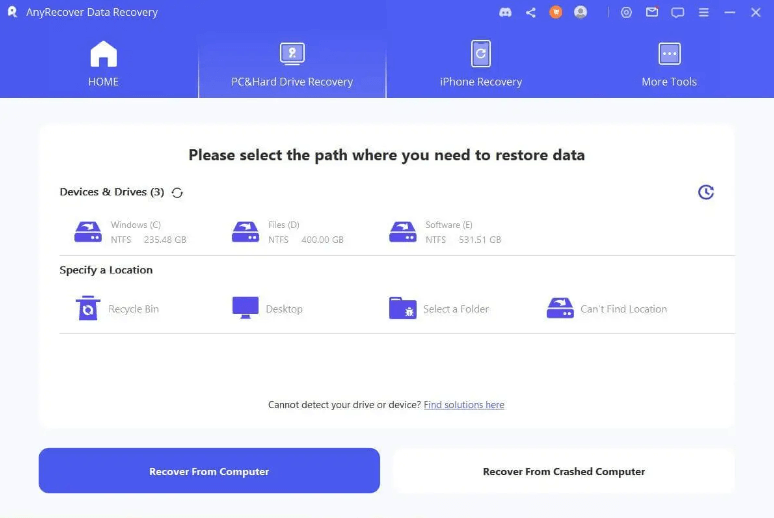
Step 2: Choose the location/drive where your data was present before disappearing. When you select the drive, an automatic scanning process will start.
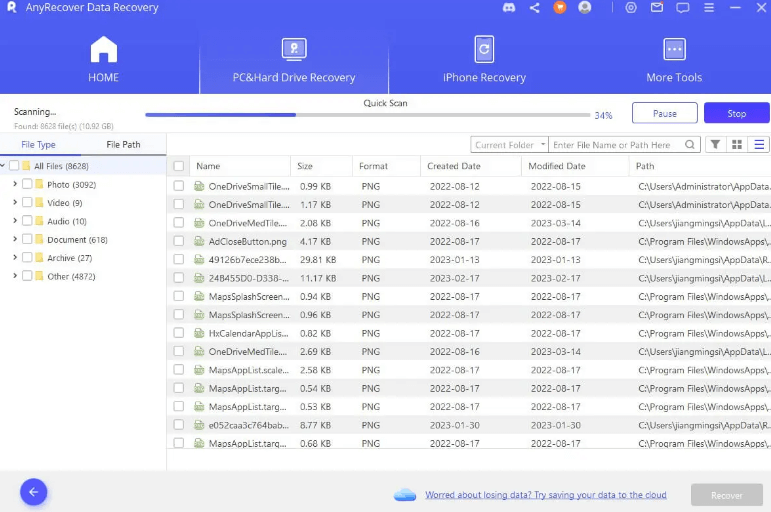
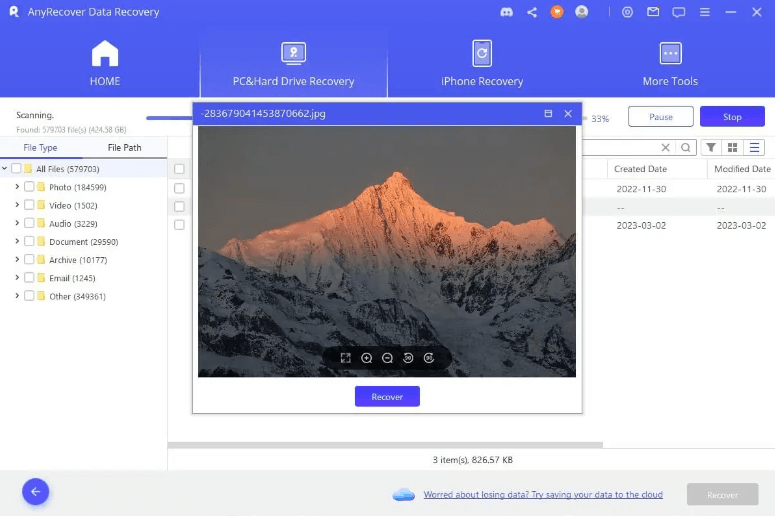
Step 3: Once the scanning process completes, all recoverable data files will appear on the screen. Select the data, preview it, and click on the Recover button. The selected data will be restored at the desired location on your device.
Conclusion:
The internal power error is irritating, but fixing this error will be a child's play for anyone if they know the right methods. In this article, we have listed the possible and effective ways to get rid of this error easily. Moreover, we have also listed some important points that can keep users away from the attack of such errors. This error causes data loss due to a sudden attack, but that lost data can also be recovered using AnyRecover data recovery software.
Data Recovery
Your Companion for Lost Files Recovery
Related Articles:
Time Limited Offer
for All Products
Not valid with other discount *

 Hard Drive Recovery
 Deleted Files Recovery


