7 Solutions: Memory Management Blue Screen On Windows 10/11 [2024]
Are you wondering why your PC screen suddenly turns blue every time you use it? Do you want to get rid of it? Here is the guide for you.
It happens due to the attack of memory management BSOD error. There can be multiple reasons behind it; however, the error can be fixed. We are going to share seven solutions to fix the memory management blue screen issue. We will share the step-by-step method so that you can follow along.

Part 1. Memory Management BSOD Overview
1What's Stop Code Memory Management?
Stop code memory management is an error that causes a blue screen of death and puts everything to an end without alarming the user.
It is related to PC memory management; hence, it disturbs the PC's memory storing and reading ability. Avoiding and fixing it is very important because it is enough to harm a computer's memory and stored data.
2Causes Of BSOD Memory Management
Knowing the cause of an issue is crucial for resolving that problem. Here are some of the most common causes that bring the memory management BSOD error on your PC.
- Faulty drivers
- Out-dated Windows operating system
- Corrupted files
- Unwanted changes in settings
- Hardware failure
- Virus infection
- Software updates
- Incompatible programs
Part 2. Fix Memory Management BSOD On Windows 10/11 [7 Methods]
Method 1. Windows Memory Diagnostics Tool
Method 4. Quick Scan For Your PC
1Method 1: Windows Memory Diagnostics Tool
As we deal with memory management blue screen errors, it is important to find the root cause. Windows offers a built-in memory diagnostics tool to identify and fix all memory-related issues on a PC.
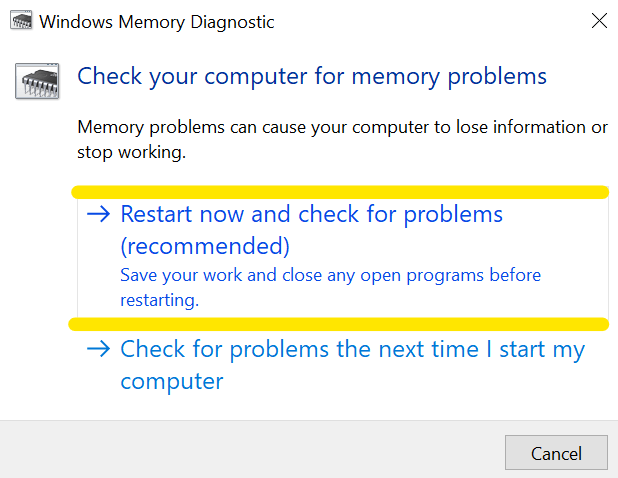
Step 1: Go to the search bar on your PC and type "Windows Memory Diagnostics" > open the tool.
Step 2: Click on Restart now and check for the problem (recommended) option. The PC will reboot to scan the memory bugs. Once restarted, open the application and click Event Viewer in the search bar.
Step 3: Click on the Event Viewer (local) > Windows Log options. Now, select the System option and click on the Find button on the right side of the screen.
Step 4: This will open a search box, type "Memory Diagnostic" in the search box, and hit the Find Next button.
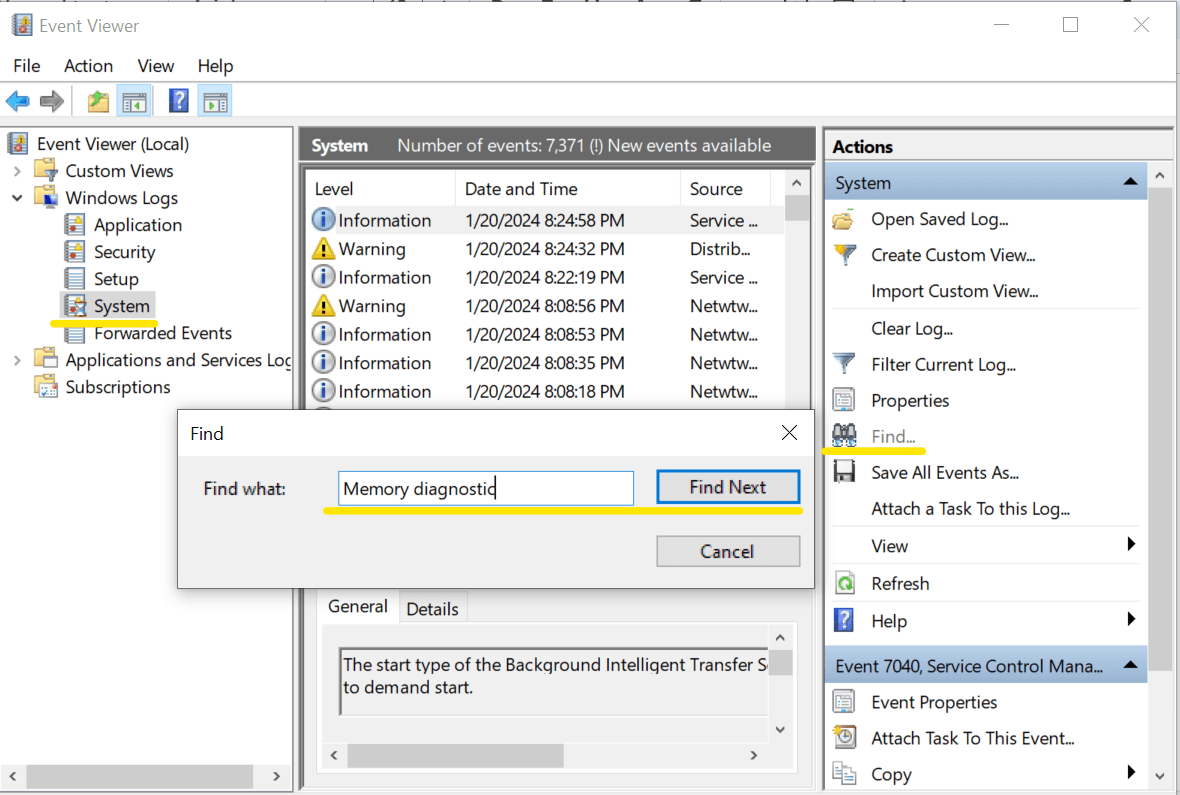
Step 5: All the diagnosed issues related to memory bugs will appear on the screen. Now, fix them by following the on-screen instructions.
2Method 2: Update Window 10/11
An updated operating system is extremely important for a problem-free device. If your Windows OS is not updated, you can face various snags, including BSOD memory management internal errors.
Step 1: Open the Control Panel and go to the Settings.
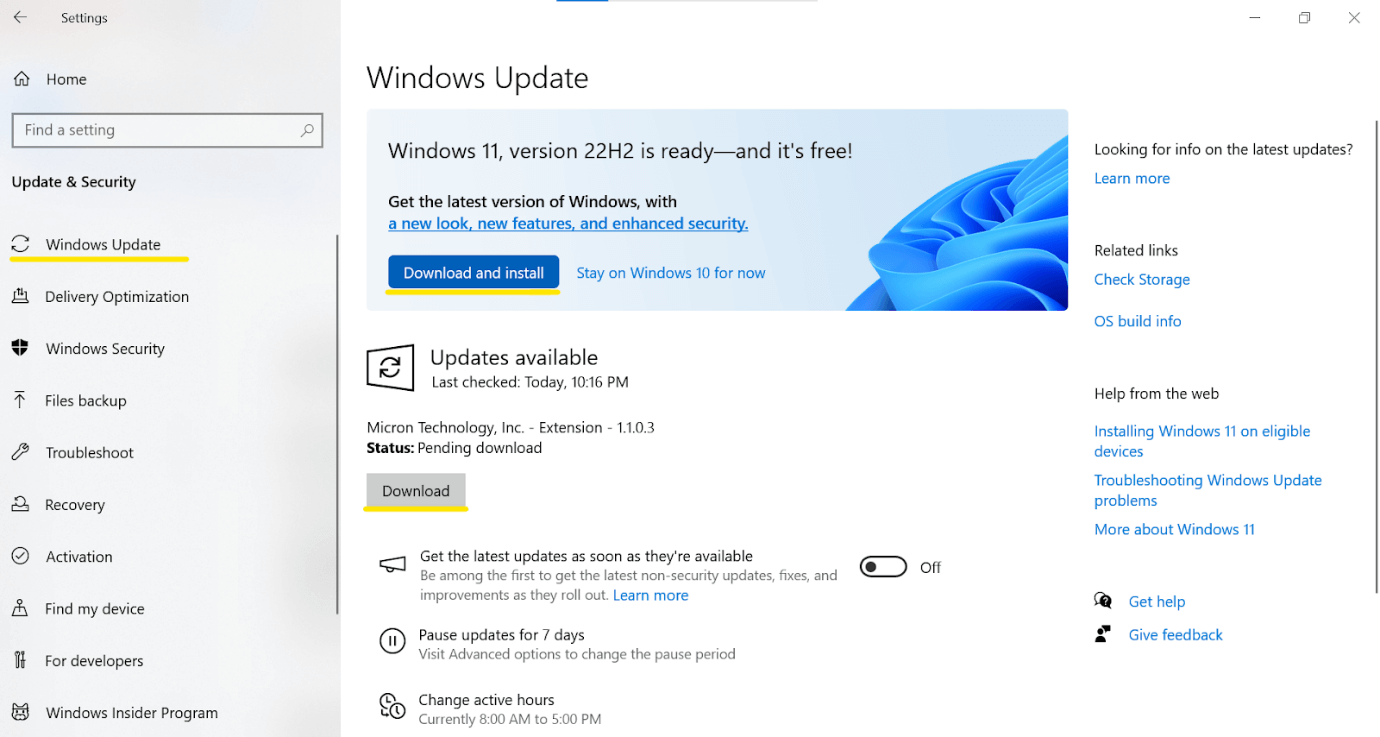
Step 2: Select the first option of Windows Update from the left panel of the screen.
Step 3: This will show you all available updates on the right panel of the screen, along with the Download, Install, or Update buttons. Use these options to update your Windows operating system.
3Method 3: Update Drivers
As the BSOD error affects the display and makes a functional screen blue, it is always a good idea to check and fix the issues related to the graphic drivers.
Step 1: Go to the Windows search bar and type "Device Manager" in the search box. Open the Device Manager app.
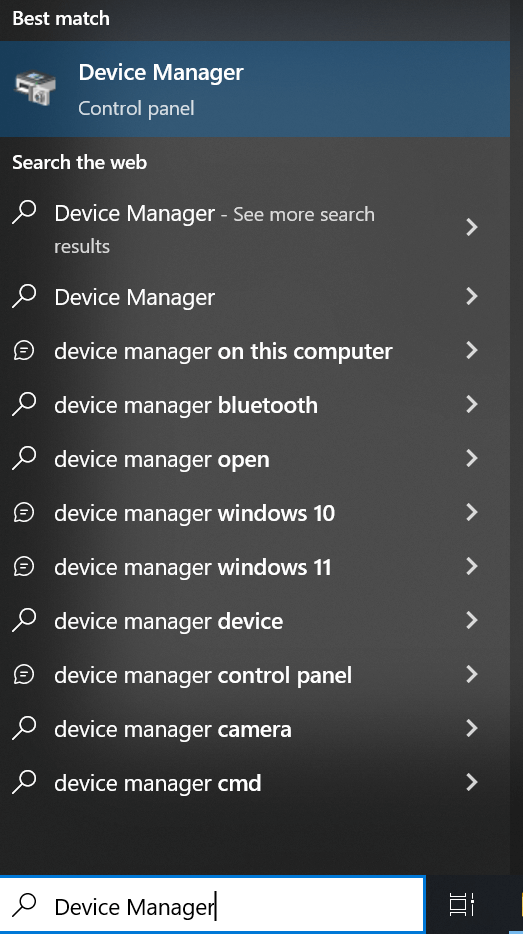
Step 2: A new window with multiple options will appear on the screen. Click on the Display Adaptor option to expand it. Once expanded, right-click on the installed graphic driver and select the Update Driver option.
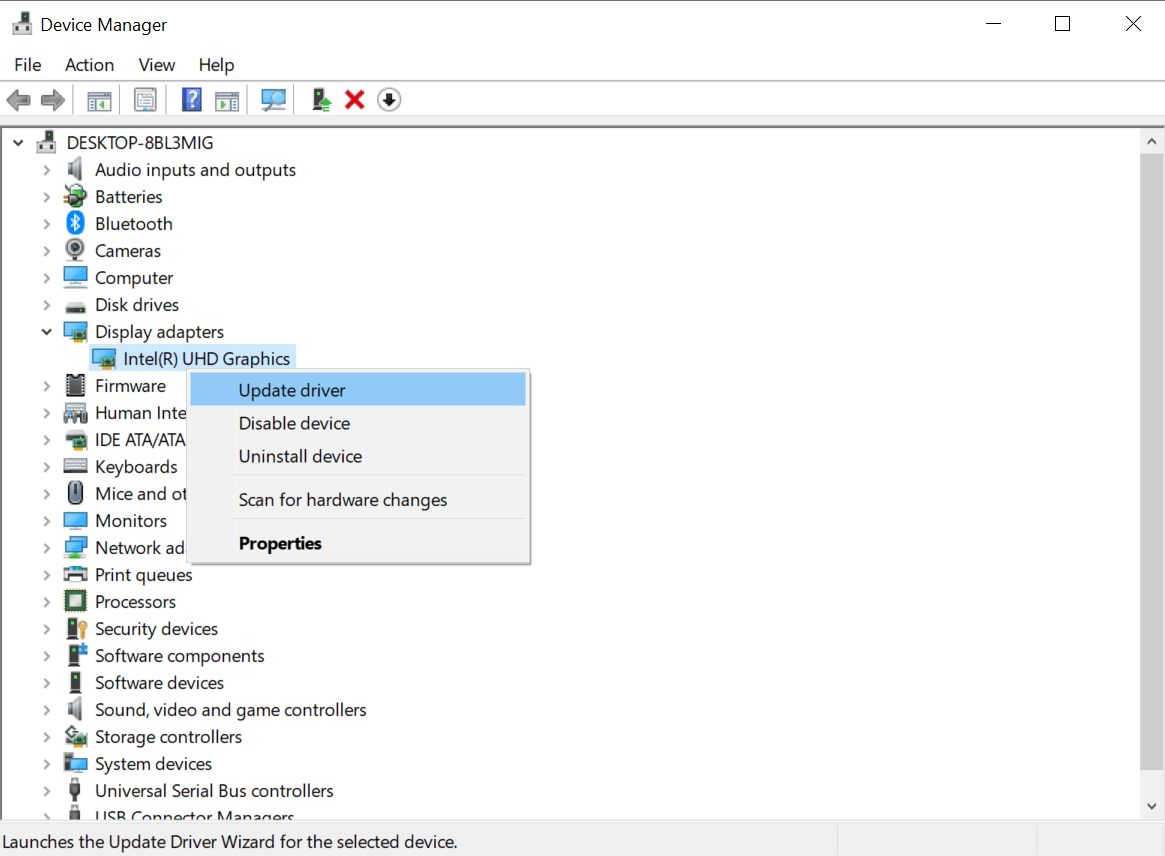
Step 3: Now, Windows will ask you to choose the driver search option. Select the Search automatically for drivers and the process will start.
4Method 4: Quick Scan For Your PC
It is possible that an unknown issue is causing a BSOD problem for you, and you cannot identify it. For such cases, you can run a quick scan for your PC. This automatic quick scan will identify and list the issues of your PC in a few simple steps.
Step 1: Click on the Start button, go to Settings, and hit the Update & Security option.
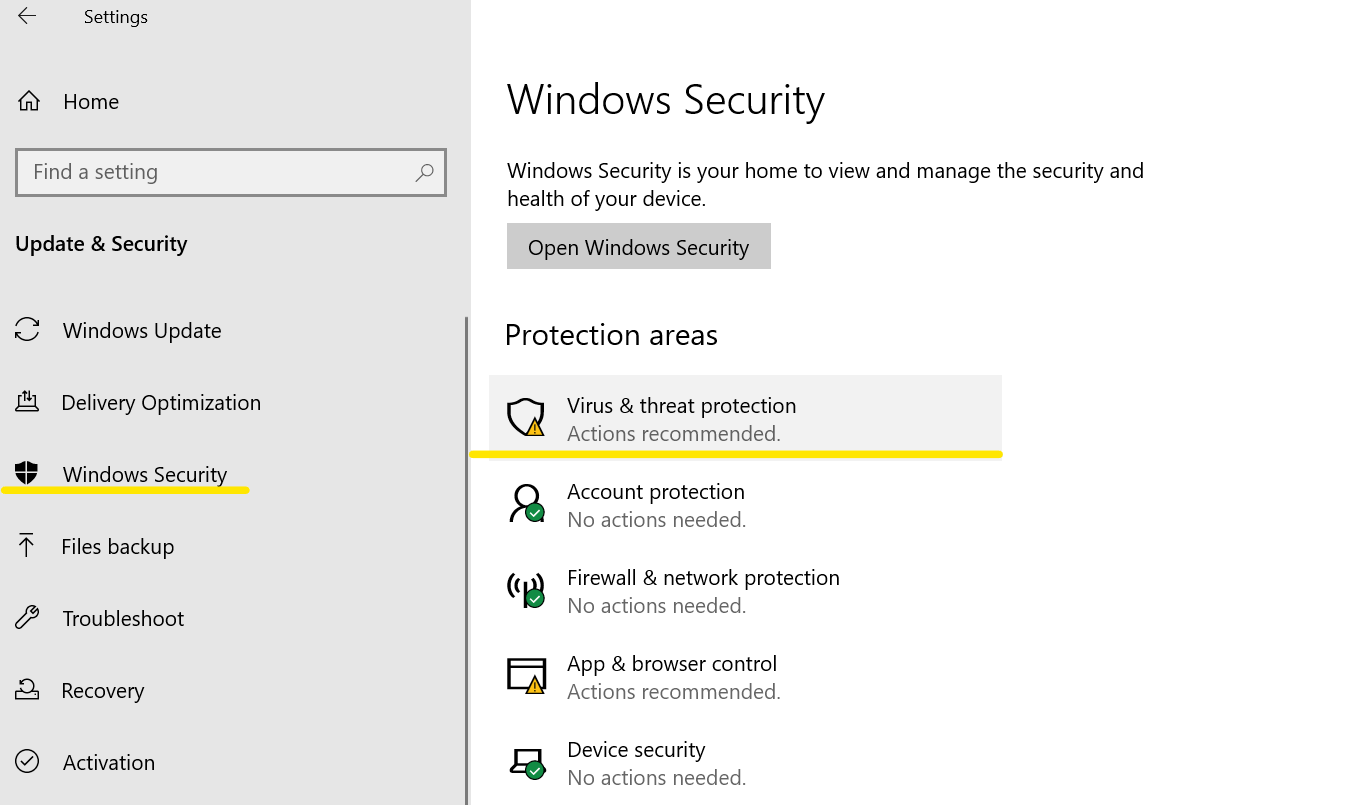
Step 2: Select Windows Security and click on the Virus & Threat Protection option from the screen's right panel.
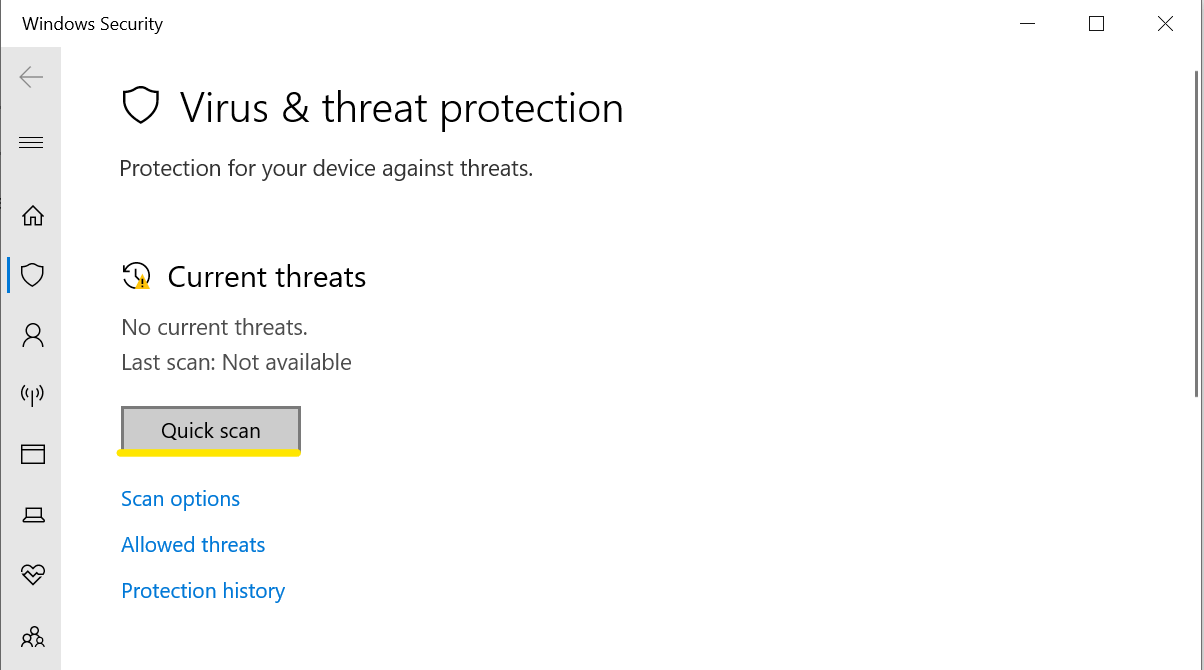
Step 3: A new window will open; click on the Scan button under Current Threats. This will show the current threats to your PC, which you can easily resolve through the on-screen instructions.
5Method 5: Update/Install CPU Driver
A correct and compatible CPU driver is very essential for normal functioning of a PC. Any type of issue or incompatibility in CPU drivers can bring the memory management BSOD error in seconds. That's why it is always recommended to keep your CPU drivers up-to-date and compatible with your PC.
CPU drivers can be updated using these steps.
Step 1: Go to the search bar of Windows and type "dxdiag". Open the DirectX Diagnostic Tool.
Step 2: Click on the Display tab from the top of the window, and all details of your CPU will appear on the screen.
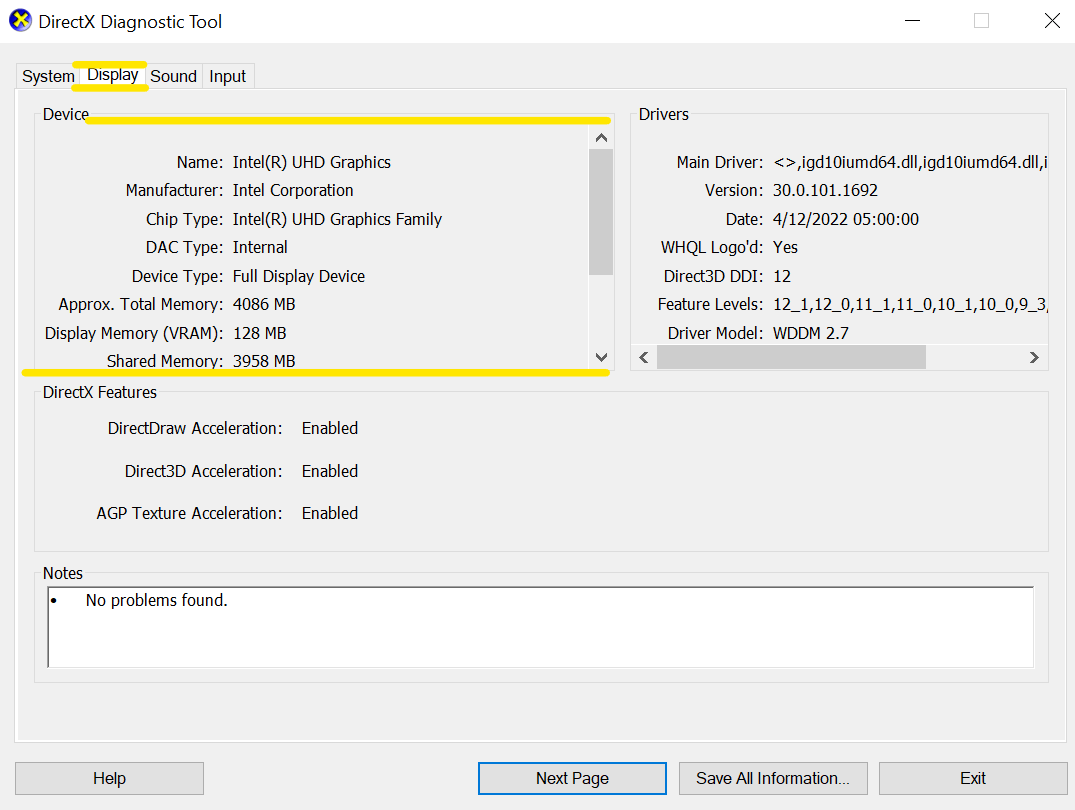
Step 3: Now, go to the manufacturer's website and figure out the matching drivers for your CPU. In the end, download the drivers and install them on your PC.
6Method 6: Reset Your PC
If you are unable to find the root cause of the issue, you can reset your PC. It will fix all the issues and reset it to the factory settings.
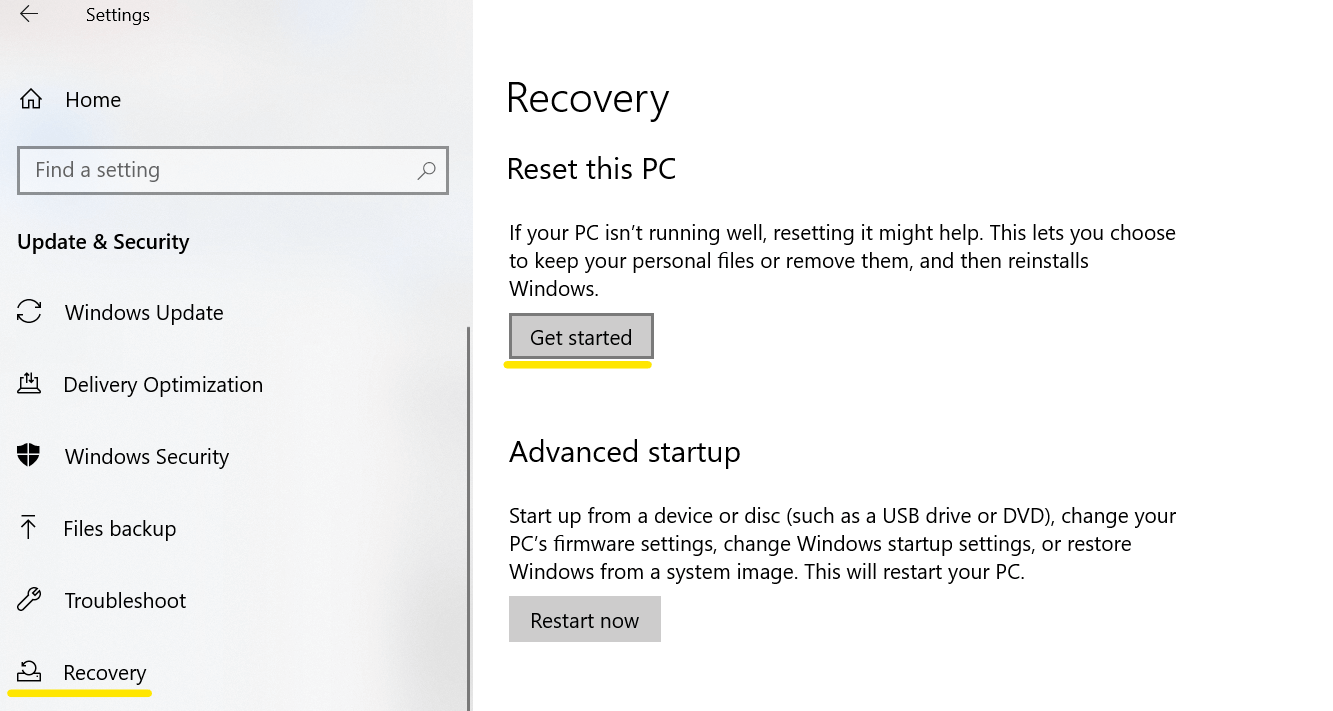
Step 1: Open Control Panel > Settings > Recovery.
Step 2: The Recovery window will open. Click on the Get Started button under Reset this PC.
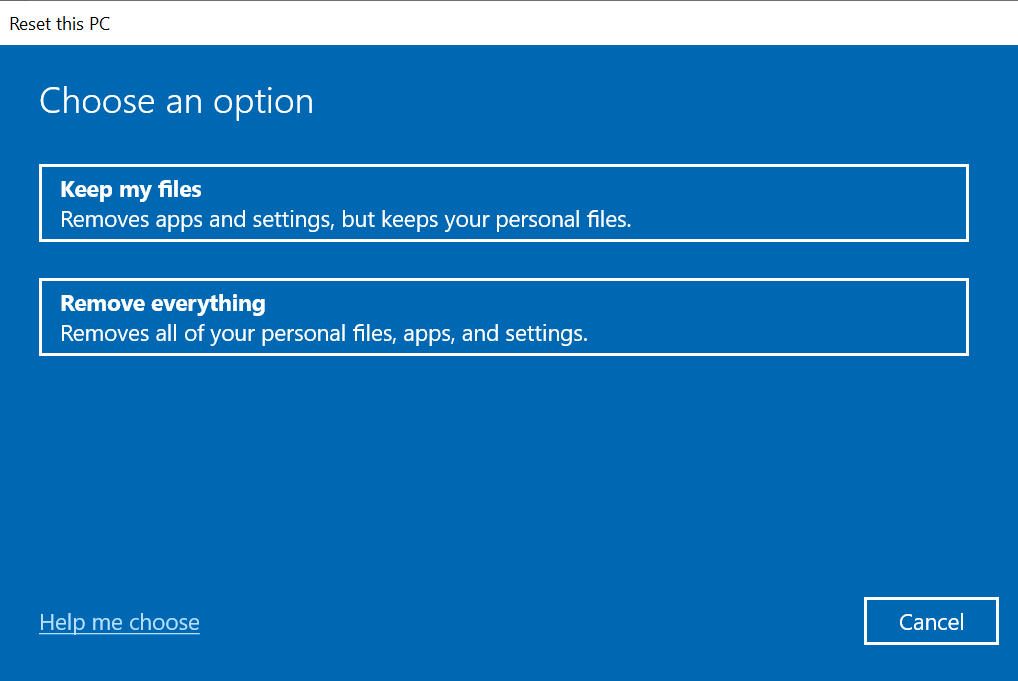
Step 3: Now, if you want to keep your personal files, select the Keep My Files option. Otherwise, simply click on Remove Everything. Your PC will take its time to reset all settings.
7Method 7: Run CHKDSK Command
Corrupted files in the PC can cause malfunctioning, including memory management blue screen issues. These files are difficult to identify without any assistance, but you can use the chkdsk command. It scans, identifies, and solves the problems related to the PC's corrupted files.
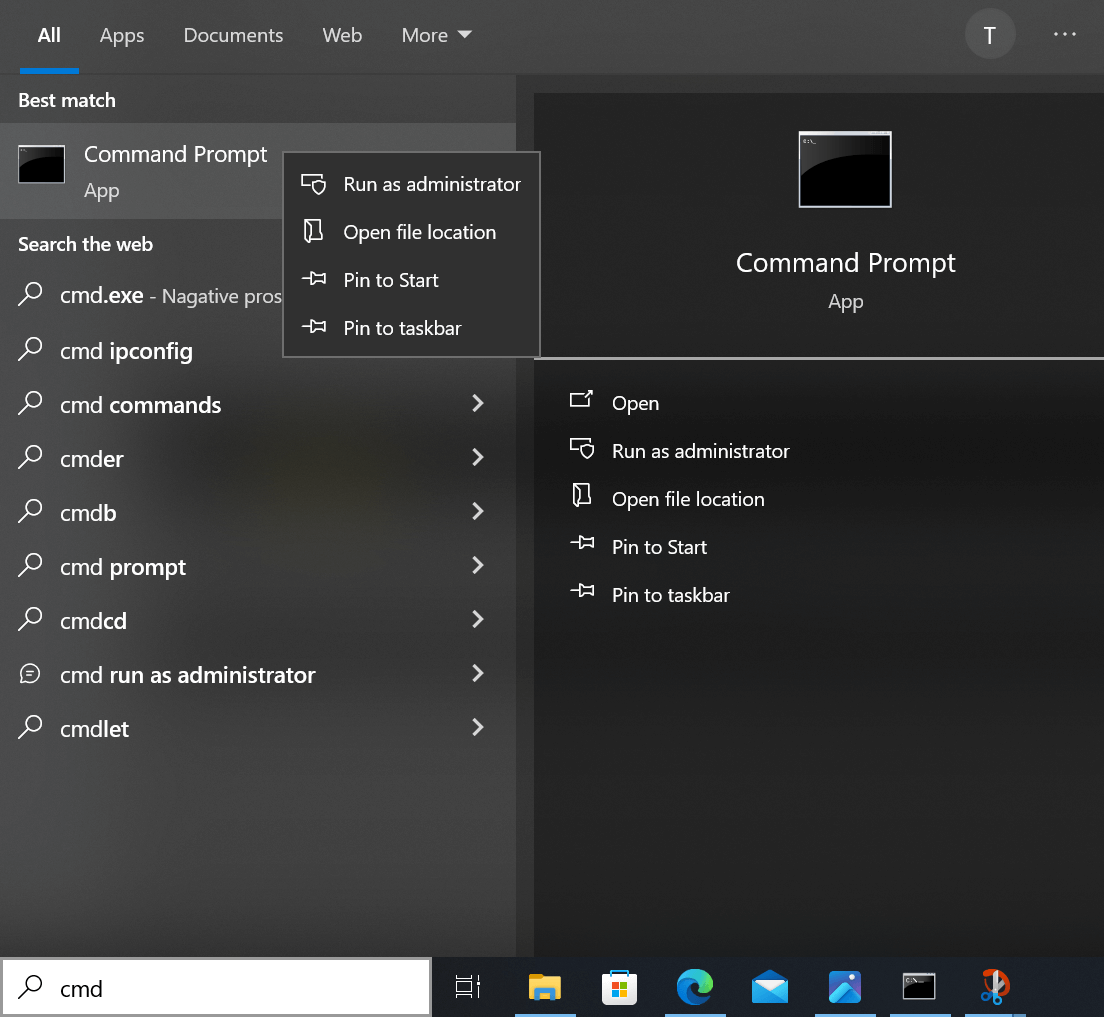
Step 1: Type "cmd" in the Windows search bar and open the Command Prompt by selecting Run as Administrator.
Step 2: Once the command prompt opens, type "chkdsk /r" and hit the Enter key.

Step 3: It will scan, find, and repair the corrupted file on your PC on its own.
Part 3. Repair Lost Files From Memory Management Blue Screen
Memory management BSOD error results in numerous complications and loss of data is one of them. This error attacks stored data in different locations on a PC.
If you have also lost your data due to memory management's blue screen of death, then do not worry. Anyrecover data recovery software will recover everything.
AnyRecover Key Features Include:
- AnyRecover is a robust software designed to recover lost/corrupted/deleted data after Deveice Corruption/Updating.
- The best for users encountering BSOD ERROR issues for various reasons, such as Internal Power Error, or the Video Scheduler Internal Error, etc.
- Recover data in its original form without overwriting it.
- It is easy to use with a user-friendly interface.
The software is available for Windows and Mac operating systems to restore audio, videos, documents, and other data files. If you want your data to be recovered using AnyRecover, follow the steps below.
Step 1 Download and install Anyrecover on your PC. Open the software and select the PC & Hard Drive Recovery.
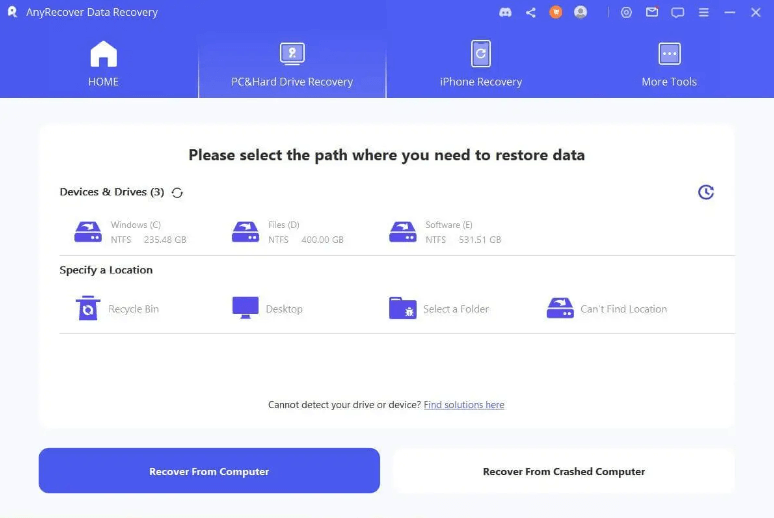
Step 2 On selecting the recovery mode, all your PC's drives/locations will appear on the screen. Now, select the drive where your lost data was located before. It will start an automatic scanning process of the selected drive.
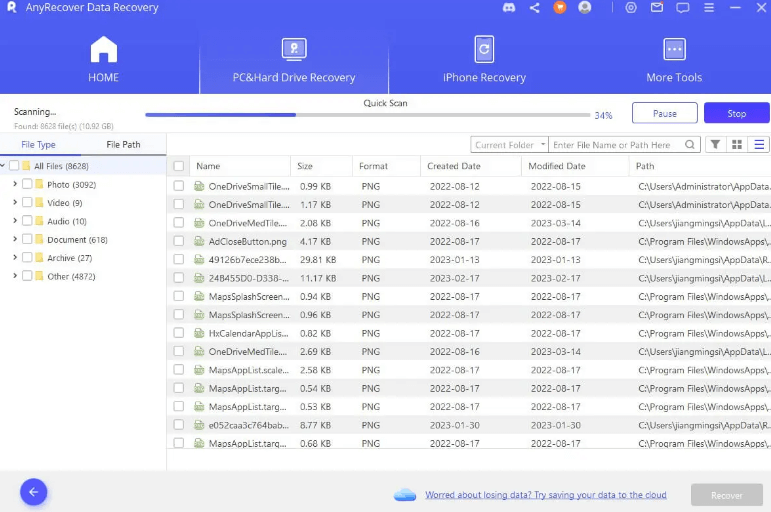
Step 3 After scanning, AnyRecover will show the recoverable data on the screen. Select the files you want to recover and click the Recover button.
Recover Data after BSOD
Your Companion for Lost Files Recovery
Conclusion
Memory management BSOD error attacks a PC for several reasons, which include hard drive failure, software bugs, software updates, driver issues, and many more. Considering these reasons will keep users away from this error. We have discussed seven solutions to fix their problem easily. You can try any of them according to your situation. If you have lost any file or data due to this error, you can use Anyrecover. It will scan your drive and bring all your data in a few minutes.
Related Articles:
Time Limited Offer
for All Products
Not valid with other discount *

 Hard Drive Recovery
 Deleted Files Recovery


