Office 365 Convert to Shared Mailbox [3 Ways]
When someone leaves your organization, you might want to keep their mailbox accessible to others. Usually, keeping a user's mailbox active requires Exchange Online license, but if you convert it to a shared mailbox in Microsoft 365, you won't need it. After this conversion, all your existing calendars and emails remain intact; the only change is that it becomes visible to multiple people. In this article we’ll discuss how to convert office 365 to shared mailbox, making it easier for your team to collaborate effectively.
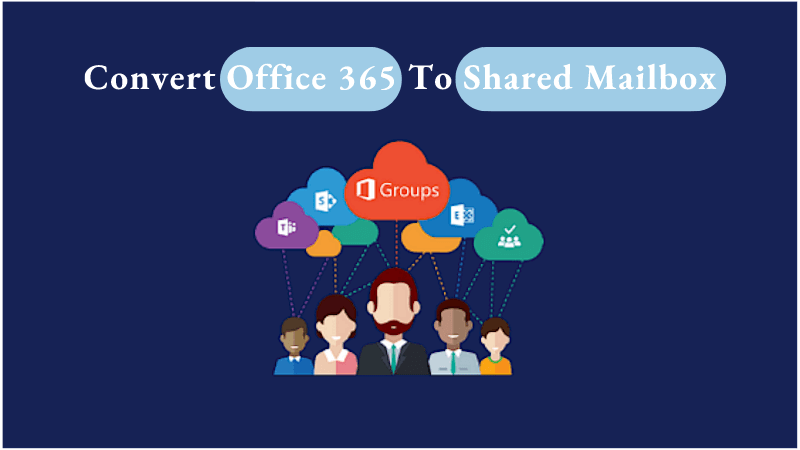
Part 1. Why Convert Office 365 to Shared Mailbox? What’s the Benefits?
It promotes teamwork and convenience. A shared mailbox allows one or more users to access it. This is particularly useful when someone leaves the organization, and others need to take over his/her tasks. Shared mailboxes can also be changed back to individual user mailboxes when necessary. Here are some advantages of converting office 365 to shared mailbox.
1.1 Convert Office 365 to Shared Mailbox Facilitates Collaboration
-
Shared mailboxes allow multiple users to access and manage emails, promoting collaboration within a team.
-
Teams or departments can have a shared inbox, ensuring that all members have access to the same emails.
1.2 Convert Office 365 to Shared Mailbox for Efficient Resource Management
-
Shared mailboxes are accessible to multiple users without requiring a separate login for each, simplifying access to shared resources.
-
Shared mailboxes are useful for temporary teams or collaborative efforts where a dedicated mailbox is not necessary.
-
Departments like customer support or sales that require shared access to specific emails, can benefit from shared mailboxes.
-
When someone leaves an organization, converting their mailbox to a shared mailbox allows continued access to their emails by colleagues.
Part 2. How to Convert Office 365 to Shared Mailbox?
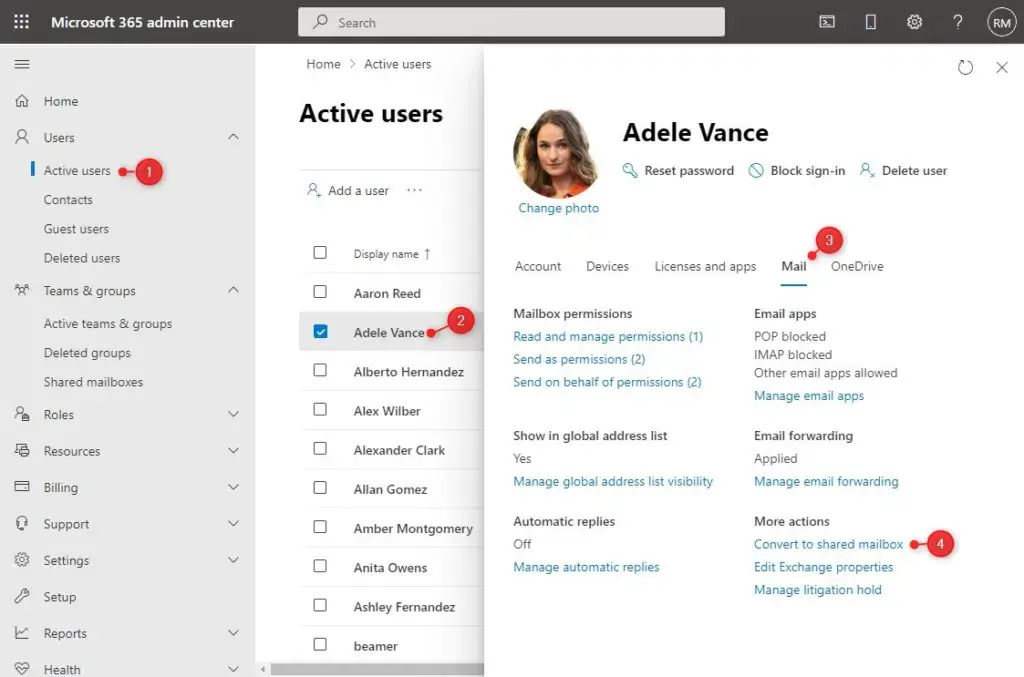
Using Office 365 Admin Center to Convert Office 365 Mailbox to Shared
Log in to the Office 365 Admin Center
Go to the Admin Centers and select Exchange
Select the Recipients option
Click on Mailboxes to view a list of user mailboxes
Choose the user mailbox that you would like to convert to a shared one
Click on the Convert to Shared Mailbox option.
Confirm the conversion. Note that the user will lose their license, but their mailbox data will be retained
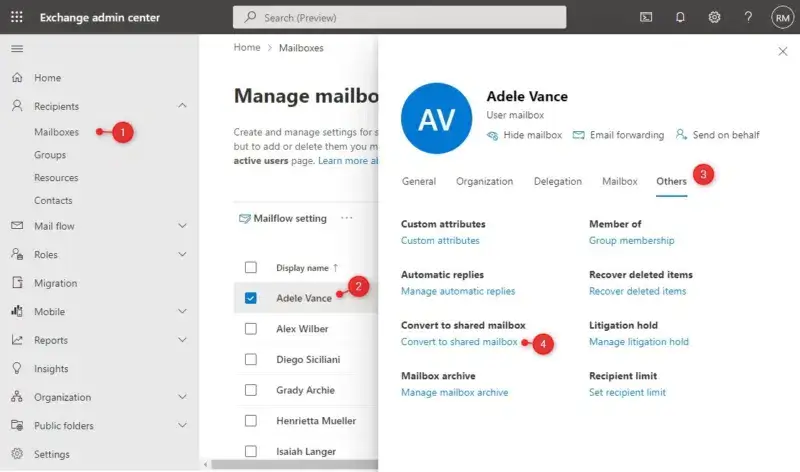
Using the Exchange Admin Center to Convert Office 365 to Shared Mailbox
Open up a web browser to admin.microsoft.com
Login with your credentials
Select the Exchange Admin Center
Click Mailboxes
Click Mailboxes
You can remove the license if the mailbox is smaller than 50 GB
Using PowerShell (for Advanced Users) to Convert Office 365 to Shared Mailbox
If you prefer using PowerShell, you can perform the conversion with the following steps:
Open the PowerShell console on your computer
Run the following command to connect to Office 365

Replace <admin@contoso.com> with your administrator account
Use the following command to convert a user mailbox to a shared mailbox

Replace <UserMailbox> with the actual user's mailbox you want to convert
You can verify the conversion by running:

It should show SharedMailbox.
Note that administrator rights are required to perform these actions. At the same time, don't forget to back up important data before making any changes.
Part 3. FAQs About Office 365 Convert Mailbox to Shared
3.1 What's the difference between office 365 mailbox and a shared mailbox?
An Office 365 mailbox is for individual users, requiring a personal license, while a shared mailbox is for teamwork, needing no extra license. Unlike private Office 365 mailboxes, shared ones encourage group access and transparency, great for collaborative tasks. Shared mailboxes stay accessible even if the creator leaves, ensuring shared info continuity. The differences in purpose, access, and storage capacity help organizations choose the right mailbox based on their collaboration needs.
3.2 What happens when you convert a mailbox to a shared mailbox?
When you convert a user's mailbox to a shared mailbox, all of the existing email and calendar is retained but can be accessible to any users with delegated access to the mailbox.
Part4. How to Recover Deleted Emails From Office 365 or Shared Mailbox?
If you accidentally delete important emails, we highly recommend you to use AnyRecover data recovery tool. Anyrecover is committed to helping users recover their data quickly. With AnyRecover in hand, your data will be safely back with you.
AnyRecover Key features include:
- AnyRecover is utterly developed to recover over 1000 different formats of photos, videos, documents and emails, etc.
- You could also preview your data before recovering it.
- This software is developed to recover all the data in its original form without overwriting it.
- It is 100% safe and easy to use.
After launching Anyrecover, you can directly select and enter the "PC & Hard Disk Data Recovery " on the main interface or the top navigation bar.
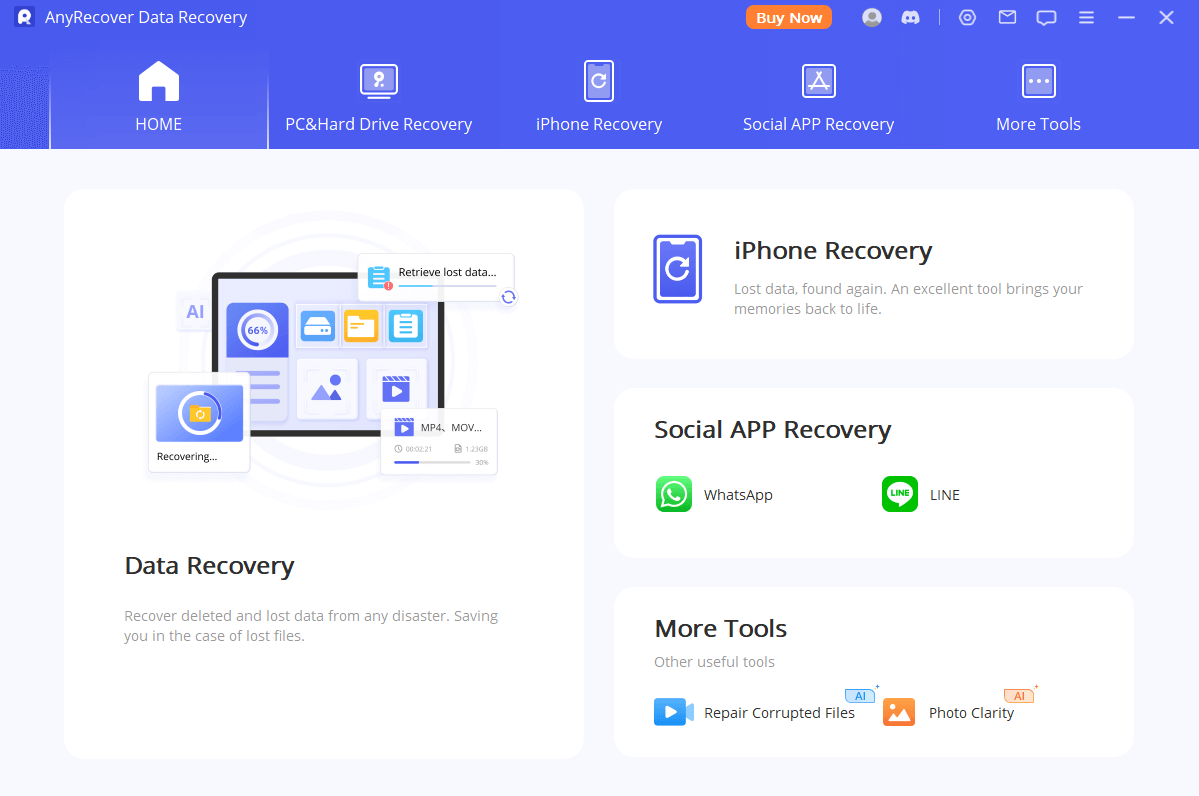
Step 1: Select a Location
After clicking the "PC and hard disk data recovery ", please select the path where you need to restore data and the program will start scanning the partition.
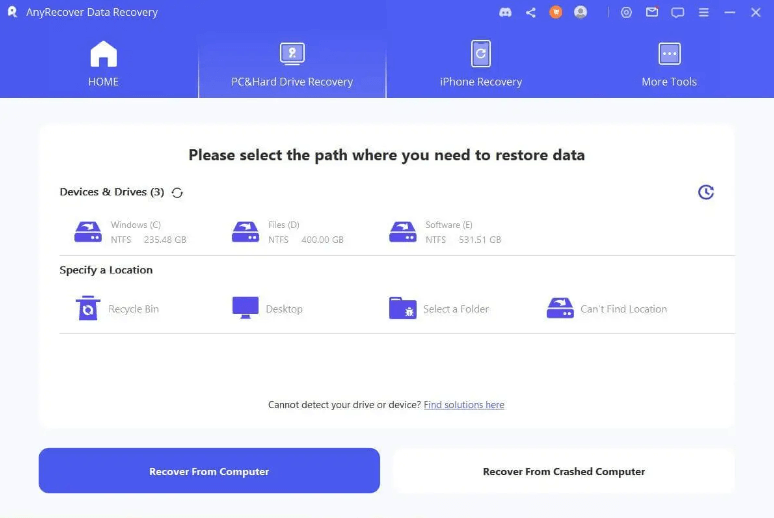
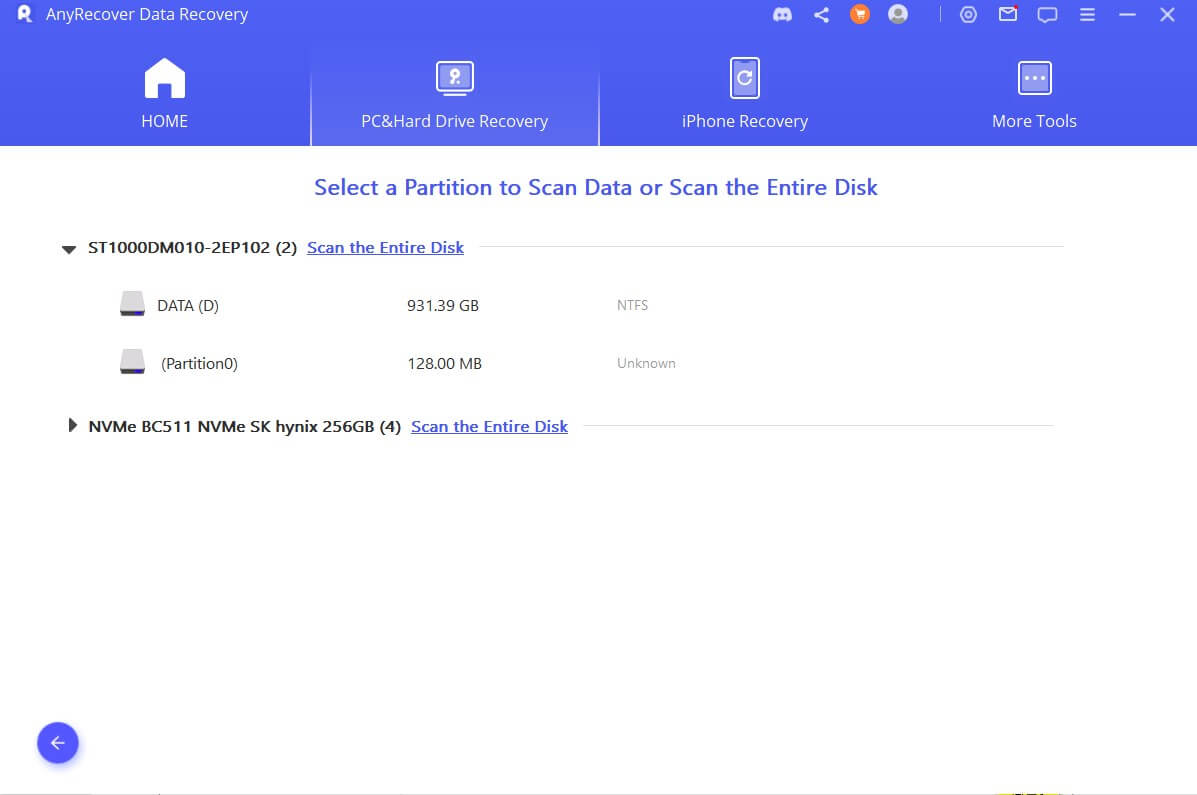
If you can't find the partition you want to recover data from the interface : you can try to scan it from Can't Find Location. All your hard disks and partitions will be displayed here, and you can also perform a full disk scan here.
Step 2: Scan the Selected Location
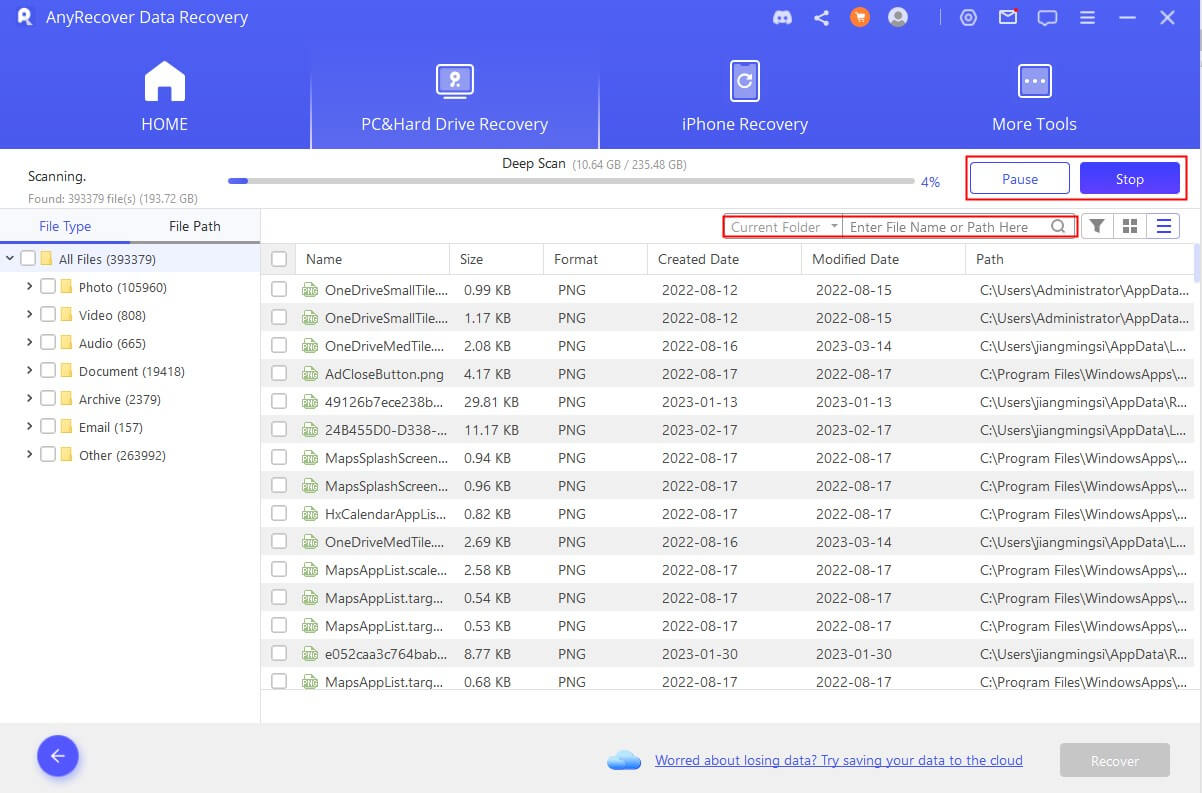
The scanning methods include quick scanning and deep scanning, and the two scanning methods are completed in sequence. The scan time depends on the size of your partition and the number of files.
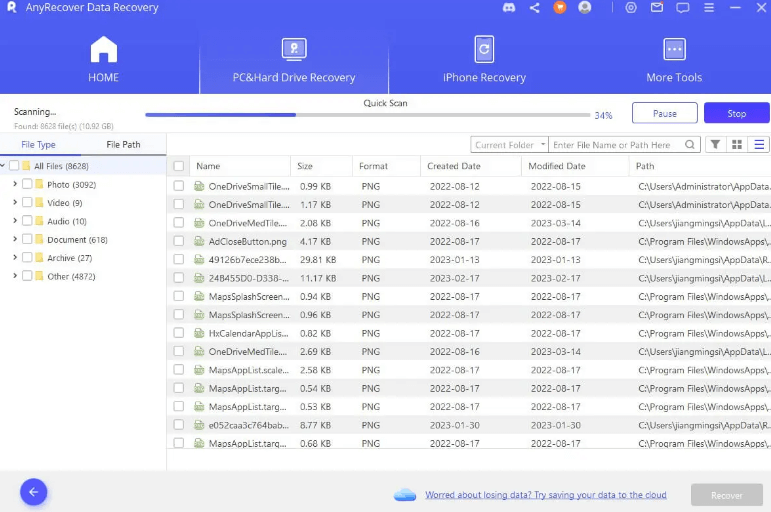
Also, you can use the search and filter functions to find the files you want to recover more quickly.
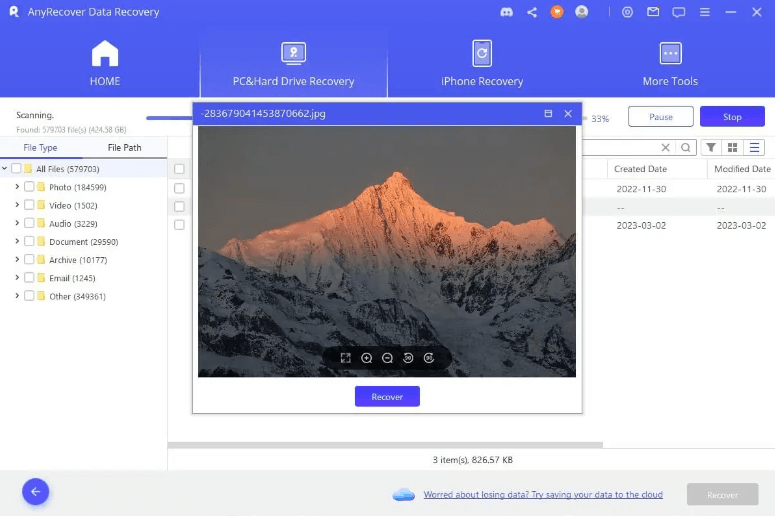
Step 3: Preview and Recover Lost Files
When the scanning is completed, all files will be neatly listed. AnyRecover allows you to preview the files and recover them selectively; the recovered files will retain their original quality.
Double-click on a file and a pop-up window will appear that lets you preview the content. AnyRecover supports the previewing of pictures and documents like PDF files, Word files, and Excel workbooks. If that's the file you need, click the "Recover" button.
Note:
DO NOT save the recovered files to the location where you lost the
data.
Conclusion
In conclusion, Office 365 and shared mailbox both have unique features and advantages. Compared to a private inbox, a shared mailbox is more suited to work teams. It allows all members of a team to send and receive emails from the same address. Apparently, it is a great choice for companies who wishes to promote teamwork, for It provides a flexible and efficient solution for people working together on various projects. Additionally, you can convert your shared mailbox back to private in the future when necessary. And remember, when you accidentally loss your mails, use Anyrecover to get them back!
Related Articles:
Time Limited Offer
for All Products
Not valid with other discount *
 Hard Drive Recovery
 Deleted Files Recovery


