How to Fix Not Enough Space to Update Windows 10/11 for Free
If you've been using your computer for many years or have large files stored on your hard drive, you may not have the space required to update to Windows 10 or Windows 11. When this happens, you will get an error message telling you that you lack the necessary room for your update.
This can be a major inconvenience of course. So, here in this post, we will talk about how you can fix this issue and get Windows 10 and 11 to update for you. You won't need any special software to do this, just follow our instructions carefully!
Part 1. How Much Space Do You Need for a Windows 10/11 Update?
So, how much space do you need for Windows 10 and 11? We'll talk about this briefly here.
Total Space Required for Windows 10 Update:
For Windows 10, you will need a minimum of 16 GB of data to install this update. This is if you want the 32-bit update. On the other hand, if you want the 64-bit update of Windows 10, you will need at least 20GB of space to do a proper update.
Total Space Required for Windows 11 Update:
For Windows 11, computer users will need a lot more space to do their updates. 64 GB is needed for any Windows 11 update. And there is only one version of the update.
Part 2. What If There Is Not Enough Storage Space for Windows 10/11 Update?
In this section, we'll talk about five ways you can easily fix this update problem. If there is not enough space for Windows 10/11 update, follow these simple and easy fixes that anyone can do.
1. Delete Unwanted Files and Apps
Our first recommendation is to delete any files and apps that you don't need on your computer. Especially if you have duplicate files or files that you won't ever open again, this is a great strategy for removal.
In addition, many apps and programs might be unused on your computer. So, if you delete them you can free up some space and get Windows 10/11 to update on your computer. This is one of the simplest ways to get rid of storage and free up space in your computer.
To do this follow these steps:
Step 1: Search and find files and apps that you are not using. You can look through your download file and document file.
Step 2: After you have found apps and files you don't need, all you have to do is select them and remove them.
2. Manage Storage Use on Your Device
If you don't want to individually delete files and search for apps to get rid of yourself, you can manage your storage use in your system settings:
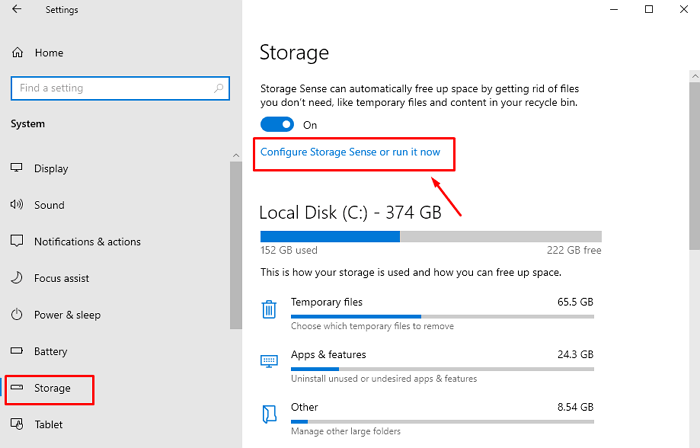
Step 1: Go to your System settings first, then click and scroll through the list of options. You want to click on Storage then proceed to the next step.
Step 2: Once you are in your Storage settings, turn on Storage Sense. Once this is on, your computer will get rid of files you don't need for you. This includes duplicate files and apps that you haven't used in the last 30 days.
Step 3: Finally, you can configure the settings to your liking on this page. Just click the Configure Storage Sense or run it now button.
3. Disk Cleanup Drive C
Disk cleanup is another option you can try out. Read to find out how to do this:
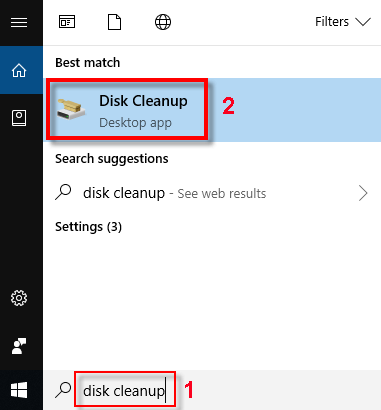
Step 1: To begin, go to your Start button and type in the words disk cleanup. This should bring you to the disk cleanup page. Search through the page and click on Drive C.
Step 2: Once you have selected Drive C then you can click the Clean up system files. You will be given some options to delete certain files.
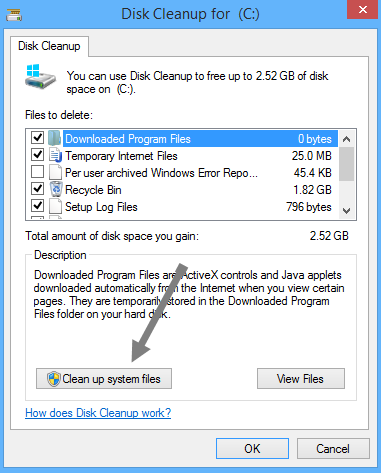
Step 3: Select what you want to delete, this includes recycling bin, internet files, and other files. Select the files then hit the OK button. This will finish the cleanup process.
4. Get More Space with External Drive
Space can be created with an external drive like a USB and SD card. Find out how to do this below:
Step 1: First, go to your Update page. You can do this by typing in Update and Security in the search bar.
Step 2: Once you're on the Update and Security page, click on Check for Updates. You will see your error message telling you that Windows needs more space.
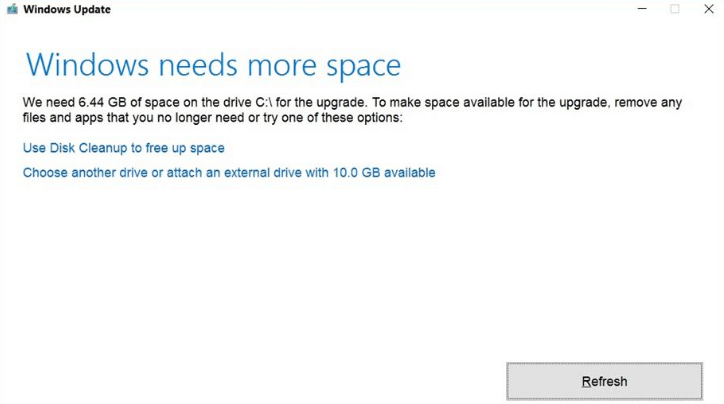
Step 3: From here, you can click on the Free up space button. You want to have an external drive with the correct amount of space beforehand. If you have bought one, plug it into your computer.
Step 4: Once your external drive is plugged in, click I want to use external storage instead button. This will bring you up to a page where the drive will be shown, select your drive and hit the Continue button. Then you can do your update.
The external storage device must have 10GB or more space and needs to be formatted ahead to avoid the Windows update failing. Moreover, an internet connection during the process is required, too.
5. Extend C Drive with Disk Management
Finally, you can extend your C Drive with the use of Disk Management that is already built into your system.
Step 1: Go to the Start button and then type in disk management. You will find Disk Management and then click on this option.
Step 2: After the Window opens, you'll be able to see all your various drives. Check if there is unallocated space on the Drive C.
Step 3: Right-click the Drive C and you will see an option to extend your drive. Click on Extend Volume then a window will pop up, click the Next button then allocate the unused data, this will show up as Drive 0.
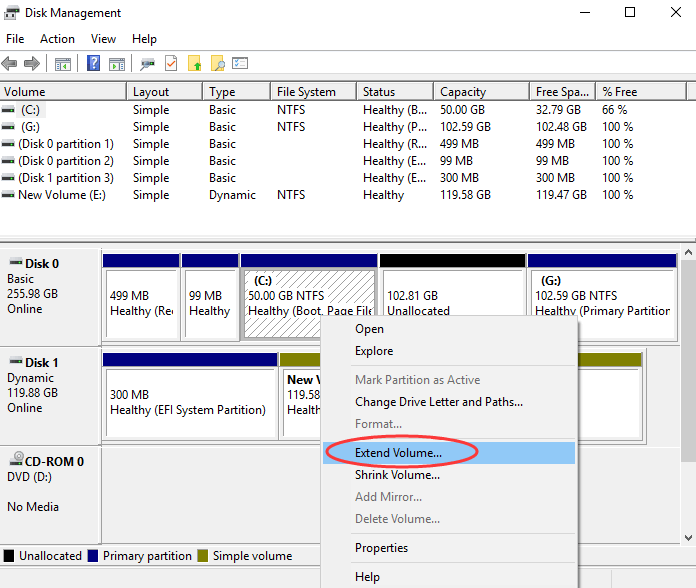
Step 4: Allocate the space you need for your update to C drive and hit the Finish button.
Conclusion
There are many ways you can free up space on your computer. We talked about what you can do when there's not enough space for Windows 10/11 update. Read through our fixes and try to see if you can fix this issue yourself. In most cases, this is a very simple process that requires no software.
Time Limited Offer
for All Products
Not valid with other discount *

 Hard Drive Recovery
 Deleted Files Recovery
