How to Convert PDF to JPG on Mac: 5 Easy Methods
When working with PDF documents on your Mac, you may often need to convert them into JPG format. Whether it's for image processing, sharing visual content, or simply wanting a more versatile image format, converting PDF to JPG on Mac is a useful skill to have.
In this guide, we'll show you how to convert PDF to JPG on Mac using 5 easy methods, from built-in tools to third-party software and online solutions. Whether you're looking for a quick solution or a more advanced one, we've got you covered. Let's dive in!
Method 1: Converting PDF to JPG on Mac Using Preview
Preview is a built-in macOS application that serves as the default viewer for PDFs and images, making it readily accessible without the need for third-party software. This tool offers an easy-to-use interface for converting PDF pages into high-quality image files, including JPG format. So, if you're looking for a simple and quick way to convert PDF to JPG on Mac, the Preview app is an excellent option.
Here's how to convert a PDF to JPG on Mac using Preview:
Step 1 - Open the PDF: Double-click your PDF file to open it in Preview.
Step 2 - Select the Page(s): If you want to convert a single page, go to the specific page in the PDF. If you need to convert multiple pages, make sure they are visible in the thumbnail sidebar.
Step 3 - Export as JPG: Go to the top menu and click on File > Export. In the export dialog, select JPEG as the format from the dropdown menu.
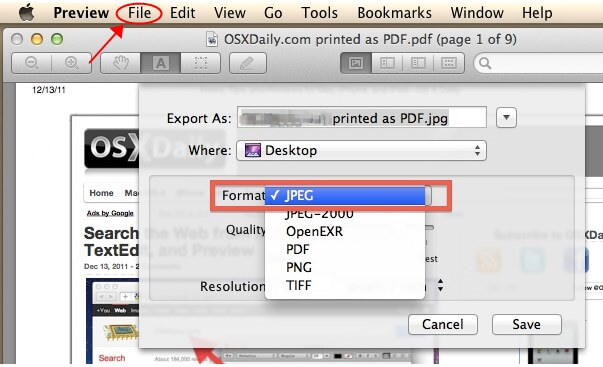
Step 4 - Adjust Settings: You can adjust the quality and resolution of the image. Higher resolution results in better quality but also a larger file size.
Step 5 - Save the File: Choose the destination folder and click Save.
This method is quick and free but works best for single-page PDFs or when converting one page at a time.
Method 2: Batch Convert PDF to JPG on Mac with Automator
If you need to convert multiple PDFs to JPG on Mac in one go, Automator, another built-in macOS tool, is a powerful solution. Automator allows you to create custom workflows that can process entire PDFs in batch, saving you time.
Steps to convert PDF to JPG with Automator Quick Action:
Step 1 - Open Automator: Open the Automator app from the Applications folder.
Step 2 - Create a New Workflow: Choose Application when prompted to select a type of document.
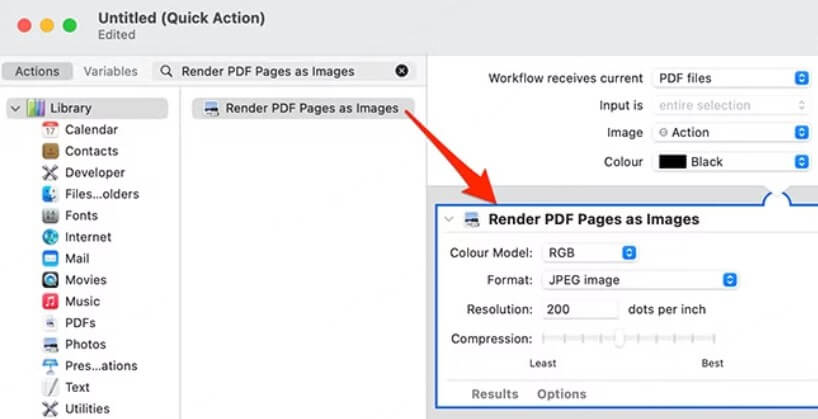
Step 3 - Add Actions: In the search bar, type "PDF" to find PDF-related actions. Drag "Render PDF Pages as Images" into the workflow. Set the format to JPEG and specify your desired resolution.
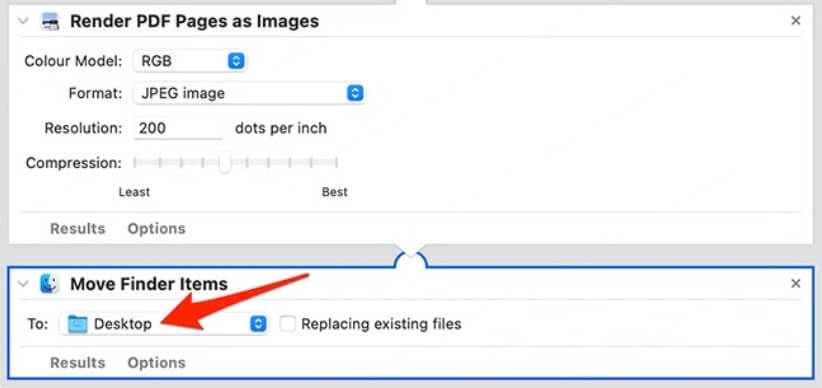
Step 4 - Select Destination: Add the "Move Finder Items" action to specify where the converted images will be saved.
Step 5 - Run the Workflow: Click Run at the top of the Automator window to convert all selected PDFs to JPG files.
This method is ideal for batch converting PDFs to JPG, but requires some familiarity with Automator. Once set up, however, you can use it repeatedly for large conversion tasks.
Method 3: Convert PDF to JPG with Professional Third-Party Tool
For those who need more advanced features or want a user-friendly way to convert PDF to JPG Mac, third-party PDF software like PDFull offers a professional solution. PDFull provides an intuitive, AI-powered PDF editor and converter that can easily handle PDF to JPG conversion with high quality and precision.
Need a More Advanced PDF to JPG Conversion? Try PDFull!
- Convert PDF to JPG and other image formats with just a few clicks.
- Batch convert multiple PDFs to JPGs at once for efficiency.
- Retain high quality and resolution with no formatting loss.
- Secure and user-friendly, perfect for all your PDF needs.
Here's how to change PDF to JPG on Mac using PDFull:
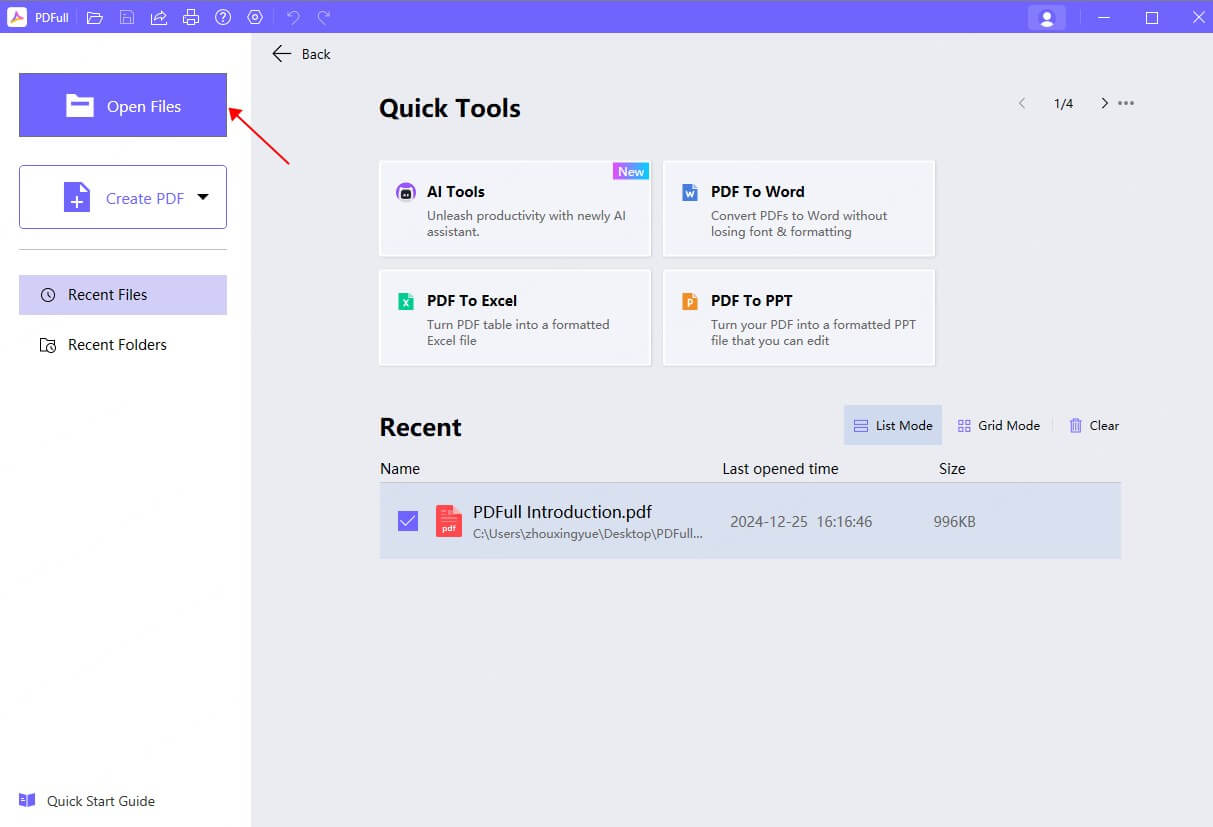
Step 1 - Open PDFull: First, download PDFull from the official website and install it on your Mac. Launch the application, and open the PDF file you want to convert.
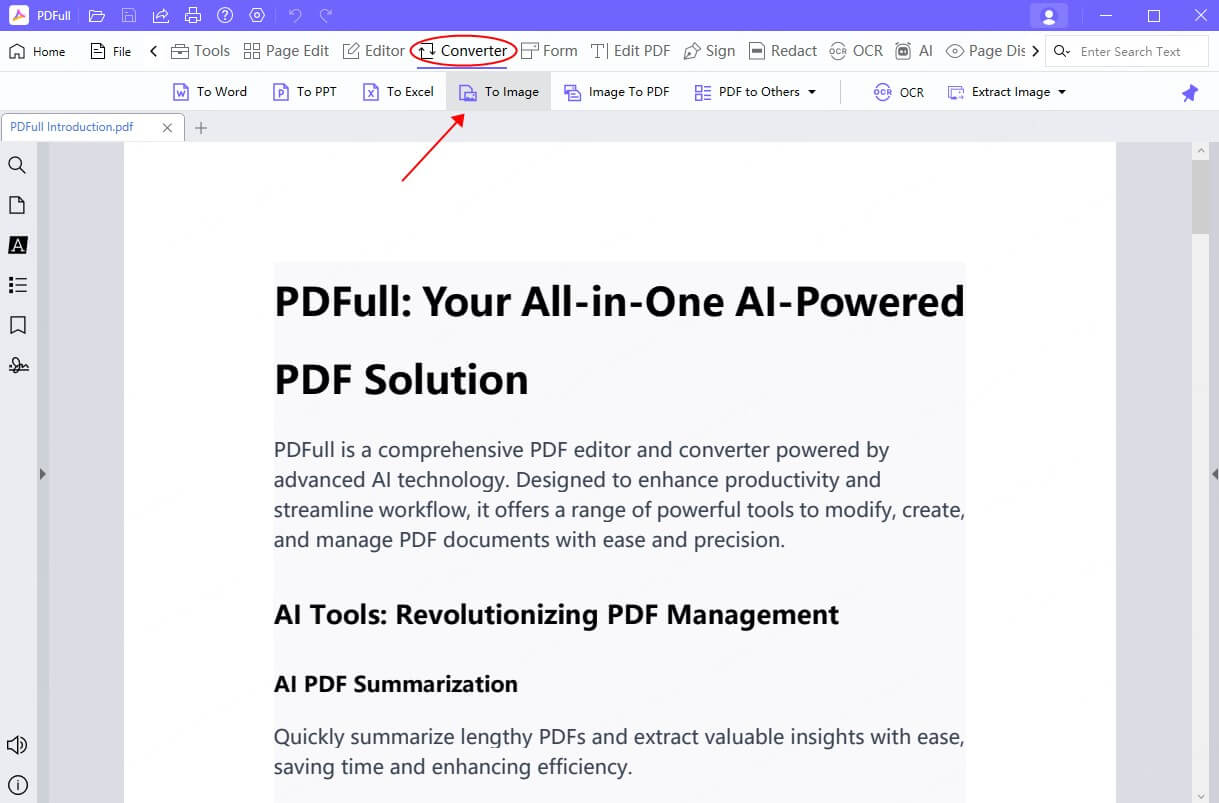
Step 2 - Select Conversion Option: From the toolbar, click on the Converter option and select PDF to Image.
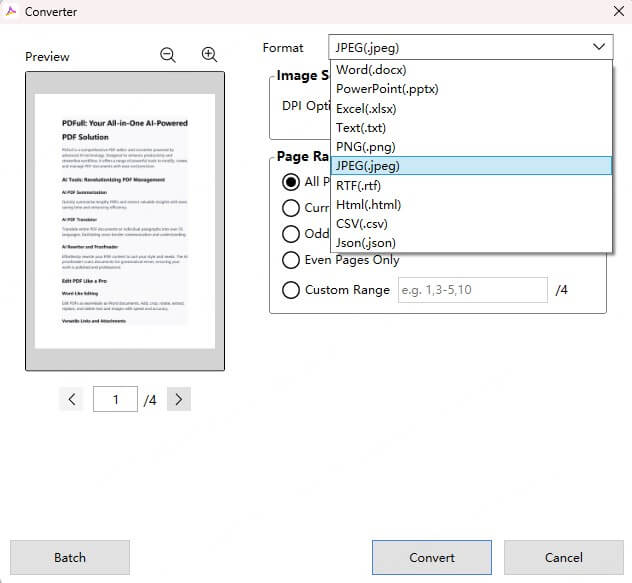
Step 3 - Choose JPG Format: In the conversion dialog, choose JPG/JPEG as the output format. You can also adjust settings like resolution, quality, and page range.
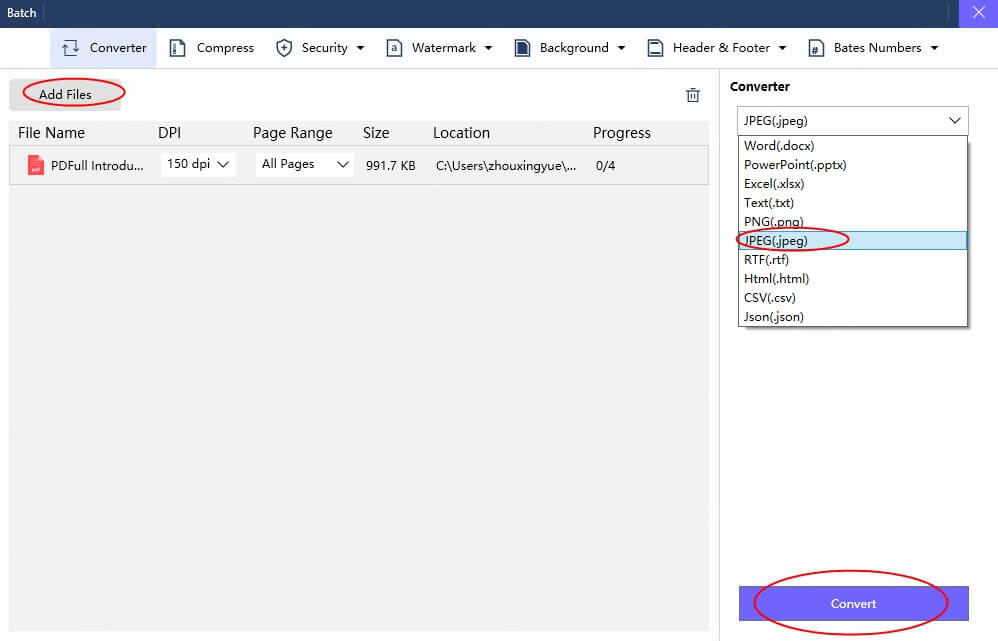
Step 4 - Convert and Save: Click Convert and select the destination folder to save your newly created JPG images.
Additionally, PDFull supports batch processing and allows you to convert multiple PDFs to JPGs at once, retaining the layout and quality of your original documents.
Method 4: Convert PDF to JPG Online for Free
If you prefer not to install software and need a quick online solution to convert PDF to JPG on Mac, PDFull offers a convenient online converter. This free tool allows you to upload a PDF and convert it to JPG without any complicated steps.
Steps to convert PDF to JPG online for free:
Step 1 - Upload Your PDF: Go to the PDFull website and navigate to the PDF to JPG converter page. Click the Upload PDF button and select the PDF file from your Mac.
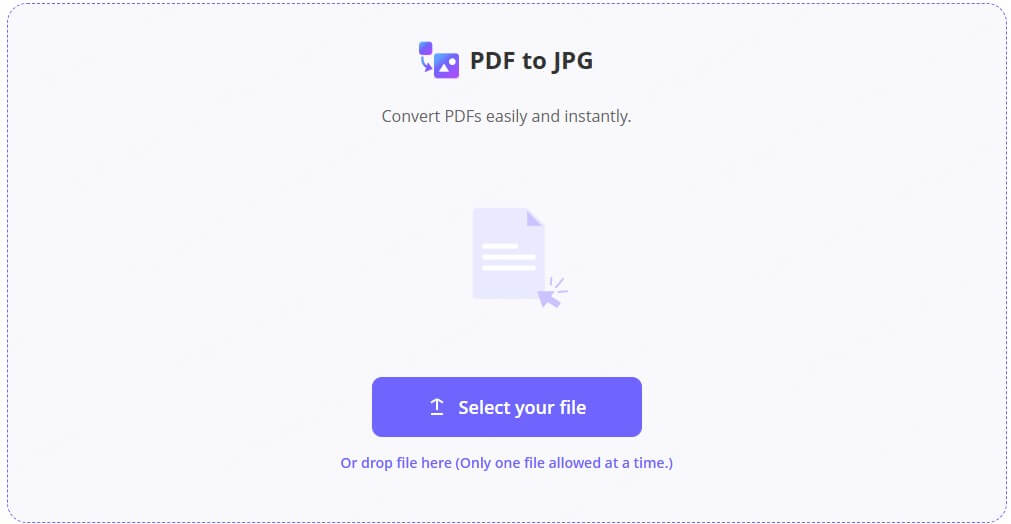
Step 2 - Convert and Download: After uploading, the tool will begin the conversion process with high quality for you. Once the conversion is complete, download the JPG images to your Mac.
This online method is simple and free, but it may not be suitable for large documents due to file size limitations. If the conversion failed, upgrade your PDF experience with PDFull for desktop version.
Method 5: Take a Screenshot to Convert PDF to JPG Mac
If you're looking for a quick, no-fuss way to convert PDF to JPG on Mac, taking a screenshot is a basic yet effective solution. While not the most precise or professional method, it works in a pinch.
Follow these steps:
Step 1 - Open the PDF: Open your PDF file in Preview or another PDF viewer on your Mac.
Step 2 - Take a Screenshot: Press Command + Shift + 4 to select a portion of the screen to capture. Alternatively, press Command + Shift + 3 to take a screenshot of the entire screen.
Step 3 - Save as JPG: The screenshot will automatically be saved to your desktop as a PNG. Open the screenshot in Preview, and then File > Export to save it as JPG.
This method is quick and easy for individual pages, but not ideal for high-quality conversions or batch processing.
Additional Tips for Quality PDF to JPG Conversion
- Resolution Matters: When converting PDF to JPG, higher resolution settings result in better quality images. If the conversion tool allows, select 300 dpi or higher (300 dpi and 600 dpi available in PDFull) for print-quality images.
- Consider File Size: JPGs can be compressed to reduce file size, but be mindful of the balance between image quality and size. Too much compression may result in blurry or pixelated images.
- Editing After Conversion: If you need to make further adjustments to your JPG images, consider using an image editor like Preview or Adobe Photoshop for editing brightness, contrast, and cropping.
Final Words
In conclusion, learning how to convert PDF to JPG on Mac opens up many possibilities for handling documents and images more efficiently. Whether you opt for Preview, Automator, PDFull's professional tools, or an online solution, each method has its strengths depending on your needs. If you're frequently working with PDFs and require a high-quality conversion, a professional PDF tool like PDFull is undoubtly your best option for precise, batch conversions.
Time Limited Offer
for All Products
Not valid with other discount *

 Hard Drive Recovery
 Deleted Files Recovery
