4 Best Ways to Recover Deleted iPhoto Library and Photos
“I accidentally deleted my iPhoto Library before I had the time machine on and then emptied the trash. Is there a way to recover the photos that I lost?”
– Elvis Sideburns, from Apple Support Forum
Elvis’s case is not unique, in fact, iPhoto Library and photos loss is a common problem among Mac owners. And the reasons behind such situation could be hardware failure, iPhoto App upgrade, accidental deletion, and so on. There's no need to panic if you have encountered the same problem. This post will show you how to recover iPhoto library through 4 verified methods. Let’s check.
How to Recover Deleted iPhoto Library and Photos on Mac
If you accidentally lose iPhoto Library files, here are 4 best methods to retrieve them.
1Restore Deleted iPhoto Library and Photos from Time Machine
Time Machine is a useful data recovery tool offered by Apple and will perform backup while it's running. So if you have a backup of deleted photos and iPhoto Library by Time Machine, you can easily restore them. Here’s how it works:
1. Locate the Time Machine drive and connect it to your MacBook.
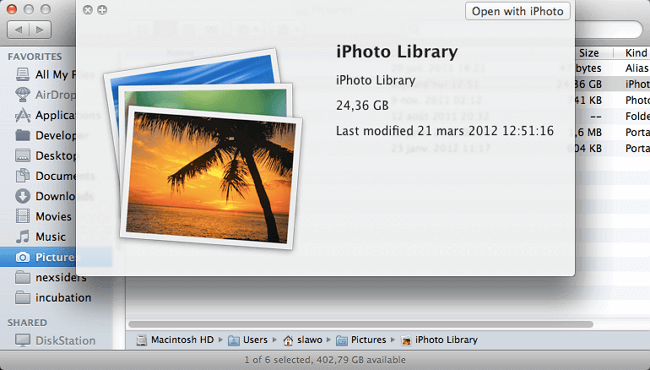
2. Launch Finder and locate the Pictures folder and navigate to the iPhoto library.
3. Enter Time Machine, either from the menu bar or in System Preferences. Use the timeline on the right side of your screen to navigate the folder's history.
4. Navigate to the backup of your desired iPhoto Library photos, select it.
5. After confirming, click Restore. If prompted for a system password, provide it. The iPhoto Library and photos will immediately be restored.
2Recover iPhoto Library with iPhoto Recovery Software
If you didn’t back up the data and have already emptied your Mac trash after deleting iPhoto Library and photos, it means they are permanently deleted. In such a case, the best way to recover them is by using iMyFone AnyRecover data recovery software.
AnyRecover for Mac is a sophisticated program used to recover lost data, including iPhoto library, iPhoto photos and videos. AnyRecover is easy to use and has been equipped with a state of the art deep scan algorithm that enables it to maintain a high recovery rate. The software is compatible with Mac OS X 10.9 to Mac OS X 10.15.

1,000,000 + Downloads
Key Features of iMyFone AnyRecover:
Supports photo file recovery in multiple formats, including JPG, JPEG, TIFF, PNG, BMP, CRW, and many more.
Recover data lost due to accidental deletion, virus attacks, system crash, hardware failure, formatting, etc.
Able to recover over 1000 types of data such as photos, documents, emails and videos.
Supports data recovery from damaged SD cards, SSD, HDD, USB drive, and other storage devices.
Provides swift recovery of lost files – taking only a few minutes depending on the size of data.
Step 1. Install and launch AnyRecover for Mac software, you can free download from its website.
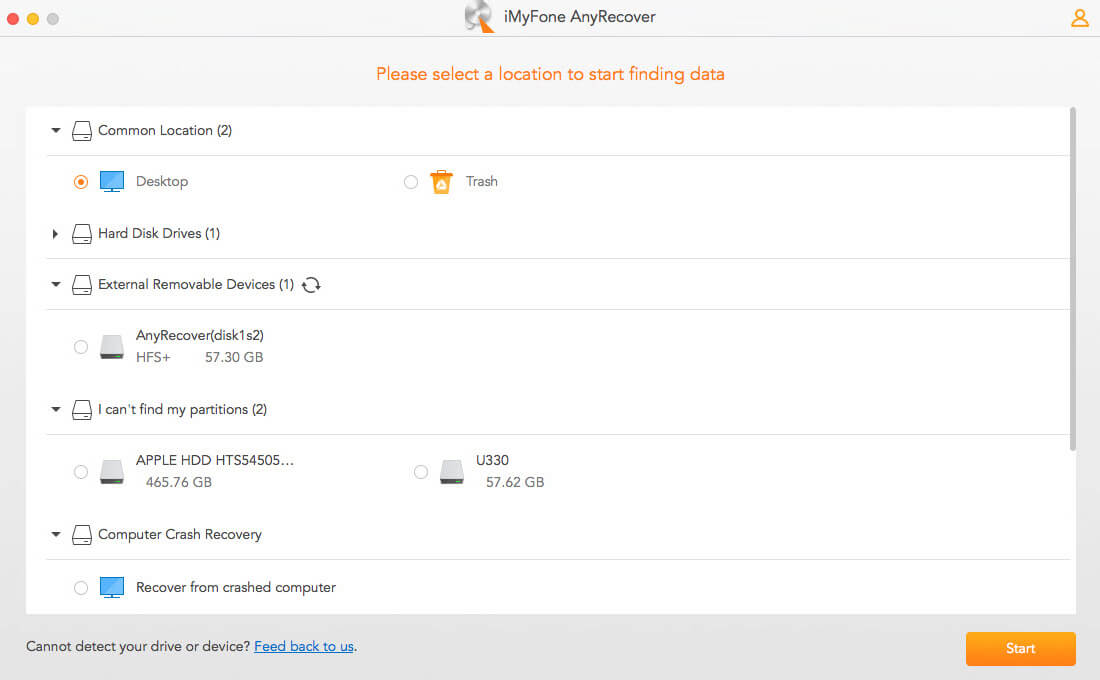
Step 2. From the app window, navigate to the location of your iPhoto library, for example, in Hard Disk Drive, then click on Start.
Step 3. The tool will perform a complete scan of the iPhoto library. You can pause or stop at any point in order to check out the lost files identified by the program so far.
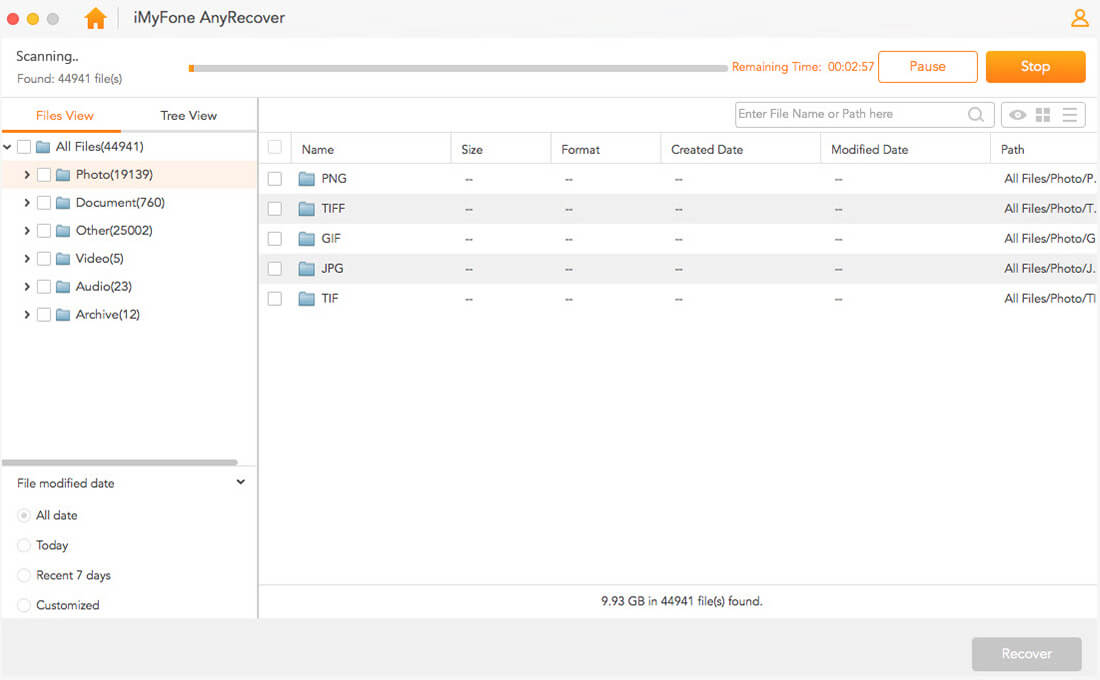
Step 4. The scan ends. You will see all the lost files and folders. Preview the files you want and then click Recover.

3Restore Missing Photos from iPhoto Library First Aid
In case there is an issue with your iPhoto library, you can also attempt to repair it by using the First Aid tool. Here’s a detailed guide.
1. First, make sure that the iPhoto app is closed.
2. Next, press the Command+Option keys and then double click on the photos icon in the Dock.
3. A repair dialogue window will launch. Click on Repair. If prompted to confirm the action, do it.
4. Wait for the repair process to complete before accessing the iPhoto library again.
4Rebuild iPhoto Library on Mac
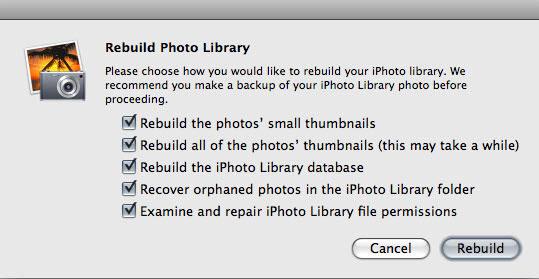
Apple iPhoto Library also comes with a feature that allows users to rebuild the library in the event that files become unreadable or mysteriously disappear. Depending on the nature of the issue, it may or may not work. However, here’s how you do it.
1. Press Command+Option and simultaneously click on the iPhoto icon.
2. A window will launch with several rebuild options. Check the necessary options you want.
3. Click on Rebuild and provide the necessary prompted confirmation if any.
Bonus: Extra Info about iPhoto Library
1How to Access iPhoto Library and Photos?
Technically speaking, the iPhoto library is more of a collection of folders and files (package) rather than a single folder. New Mac users often get confused when trying to access the iPhoto library package. Here’s how you can access it.
Navigate by following this path: Home > Pictures > iPhoto Library.
Right-click on the library icon, and in the drop-down, select Show Package Contents.
If you want to view original photos, click Masters or Originals (depending on the version of macOS).
If for one reason or another, you failed to back up your iPhoto Library to the Time Machine, you can use AnyRecover for Mac to restore lost photos.
2How Can You Backup iPhoto Library?
Besides just backing up photos in iCloud, there are other ways to do the backup locally. One way is through the Time Machine feature that we talked about earlier. In case you lose your photos, refer to "Method 1” on how to recover iPhoto Library using this feature.
Another method is by manually transferring photos to an external storage device such as an SD Card or external disk. This creates a copy of the photos in case you need them in the future, but you need to update them continuously.
The methods to recover deleted iPhoto library and photos discussed in this article should be sufficient enough for most, if not all, scenarios. They are simple and effective. In case you forget to backup photos – which makes the recovery features provided by Apple much harder – we recommend that you use AnyRecover for Mac data recovery software. It is an advanced program that’s well-received in the market and helps recover lost data quickly.
Time Limited Offer
for All Products
Not valid with other discount *

 Hard Drive Recovery
 Deleted Files Recovery
