How to Restore Mac to Previous Date With/Without Time Machine
Have you recently made changes or updates to your Mac that caused issues with your computer's performance? Restoring your Mac to previous date can help undo those changes and get your computer back to its former state. This process involves rolling back your Mac to an earlier date where it was functioning correctly and without issues. In this guide, we'll provide you with easy-to-follow approaches to restoring your Mac to a previous date.
Best Data recovery for Mac
To save time, you can restore mac to earlier date without time machine by using this powerful data recovery tool - AnyRecover
Part 1. Can I Restore Mac to Earlier Date Without Time Machine?
Yes. Apart from the Time Machine software that would enable you to keep an up-to-date backup of your Mac, you can make an entire copy of your storage drive on an external hard drive. The external hard drive keeps a copy of the macOS setting and all the files at the time when you copied them. So if your run into any problems with your computer along the line, you could restore your Mac to that previous date you copied the files with the external storage device.
You can also make use of a professional data recovery software that will mentioned in the next part of this article in the worst-case scenarios.
Part 2. How to Restore Mac to Previous Date Data Without Time Machine
Some people may not have the external storage device or the proper baukup. What's worse, people may fail to find the target files even after restoring Mac to a certain date. For this option, you will need to make use of a professional data recovery software known as AnyRecover. As an all-in-one data recovery software, it can help you recover lost data from Mac, Windows computer and iPhone device. With the AnyRecover software, you can recover lost and deleted files in 3 simple steps. And it promises a high success rate and requires no technical knowledge. So everyone can recover data with it quickly and easily. Let's check some of the features of this amazing software.
AnyRecover Key features include:
- Support more than 1000 file types, including images, PDF documents, videos, archives, office documents, emails, etc.
- Retrieve permanently deleted files from any device like computer hard drive, external drive, USB flash drive, SD card, SSD, camera, etc.
- Secure your original data without overwriting them.
- Compatible with Mac, Windows and iOS devices.
- It is 100% safe and easy to use.
To recover your files without time machine, the steps are:
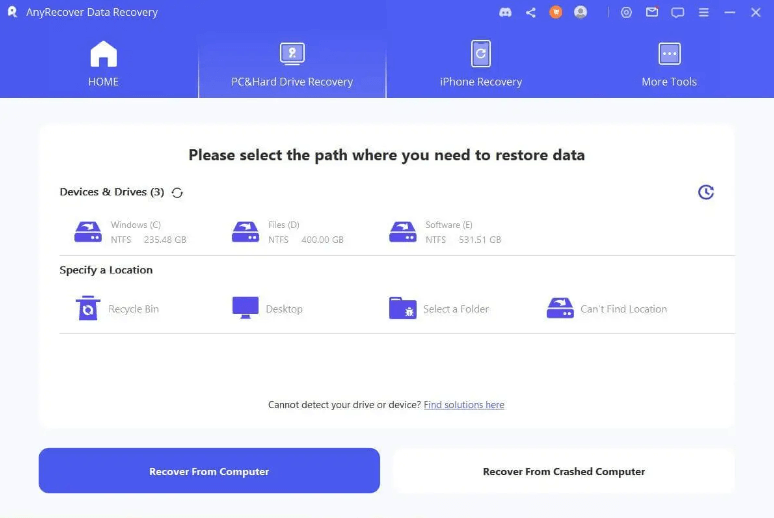
Step 1. After launching the AnyRecover software on your Mac, select “Data Recovery” and then choose a location you want to restore data from, then click Start.

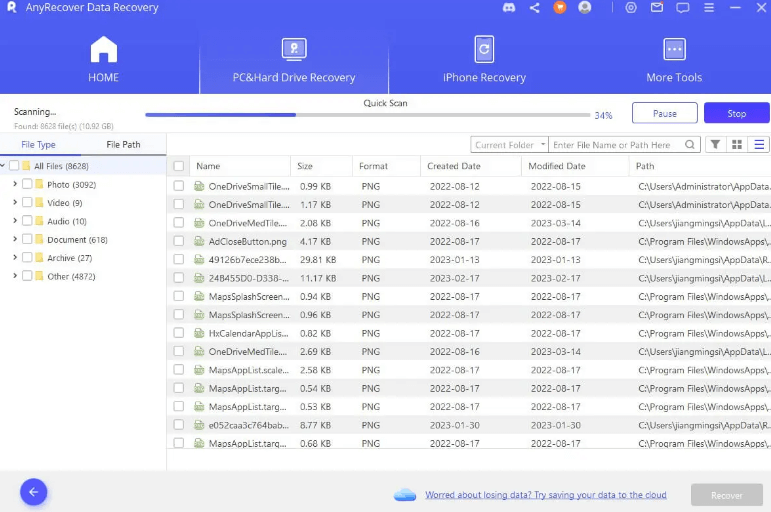
Step 2. AnyRecover software will give the selected location a deep scan, and the progress bar and real-time scanning results will be displayed on the interface for you to check the results easily. Besides, you can click on Pause or Stop on the top right corner to halt the scanning process.
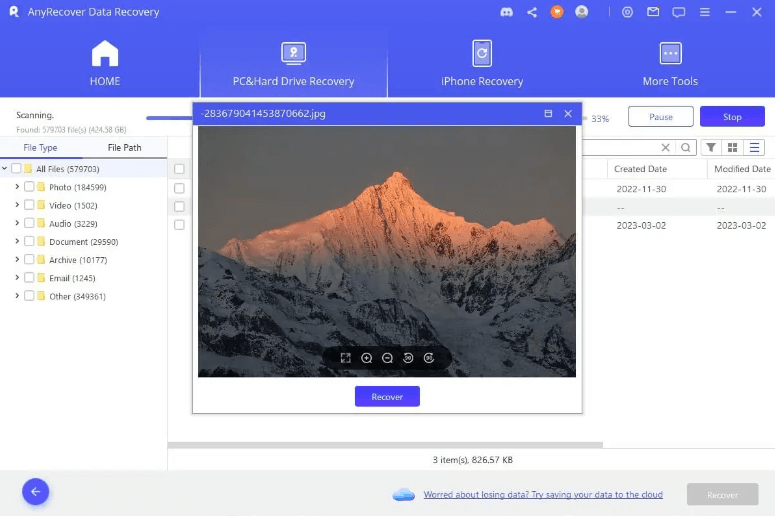
Step 3. Upon completing the scanning, double-clicking on the file you want to preview. Then you can click Recover if the file you previewed is the one you need.
Part 3. How to Restore All Your Data With Time Machine
We've mentioned Time Machine as the built-in tool in a Mac for backing up. It stores hourly backups of recent data, daily backups for the past month, and weekly backups for older data. An external hard drive is needed for frequent, detailed backups. Time Machine deletes older backups when storage is full. Restoring a Mac to a previous date with Time Machine is simple. Here are the steps:
Configure a Time Capsule
For you to restore your Mac to previous date, you will need to first configure a Time Capsule before doing anything else. Creating the Time Capsule means that your Mac will be restored to the state when you created the backup. The Time Capsule can be set up manually or automatically, and you will need an external hard drive with enough space to contain the data on your Mac.
-
Connect the external drive to your Mac via a USB cable. Once it is connected, you should get a confirmation window that says, “Do you want to use the drive to back up with the Time Machine?”
-
Select Use a Backup Disk to begin the process, and after a while, the Time Capsule would have been configured, and you can then restore your Mac.
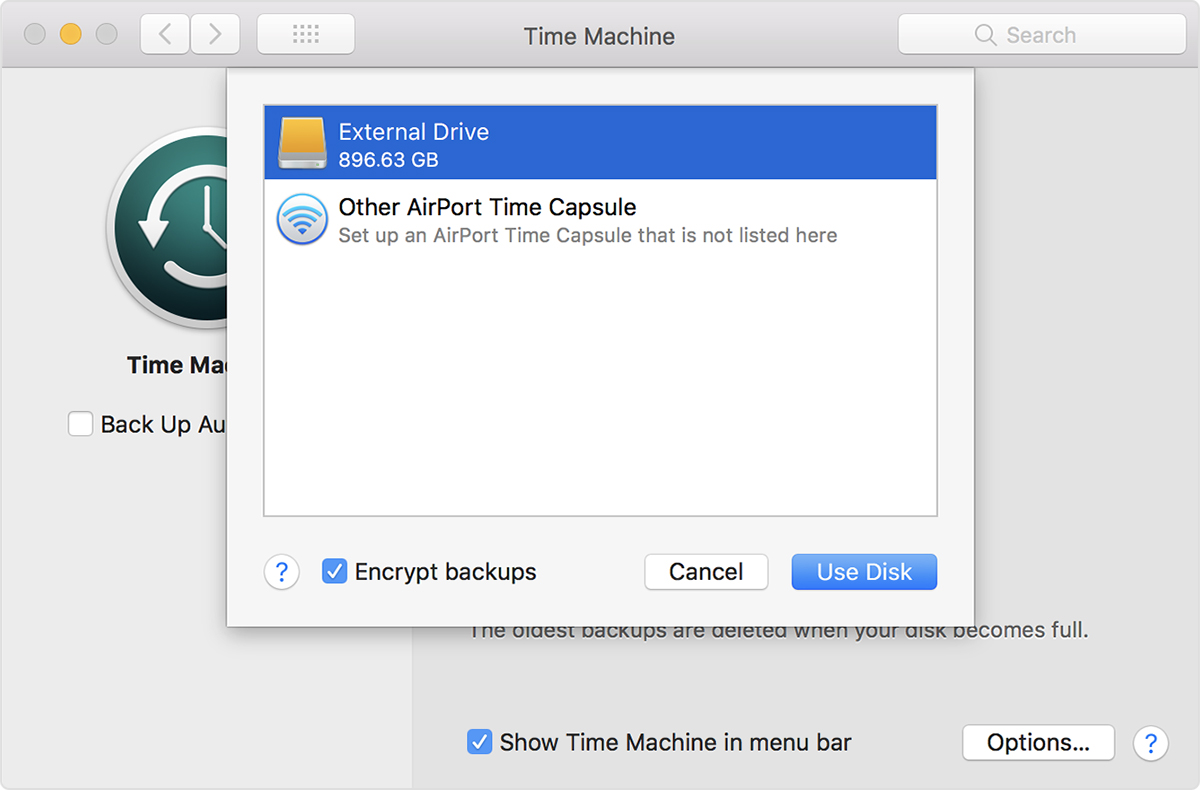
In some cases, the confirmation window does not come up, and you won’t automatically set up the Time Capsule. To manually set it up:
-
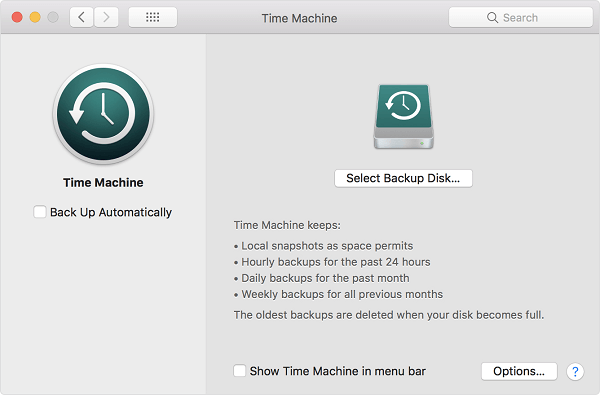
Open the Apple menu and then go to System preferences and select Time Machine.
-
Then click on the option which says Select Backup Disk.
-
Finally choose the external hard drive from the list of disks and then click on Use Disk.
Backup your Data with Time Machine
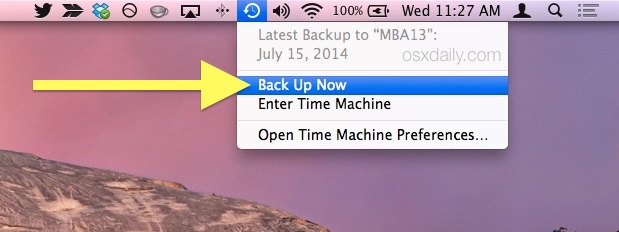
Once the Time Capsule has been set up, go to the Time Machine menu and from there choose Back Up Now. Then, choose the disk that you want to fully back your Mac up to continue the process.
Restore your Mac to Previous Date
Once you are done with enabling the Time Capsule and creating backups with Time Machine, you can restore your Mac to previous date now. The steps include:
-
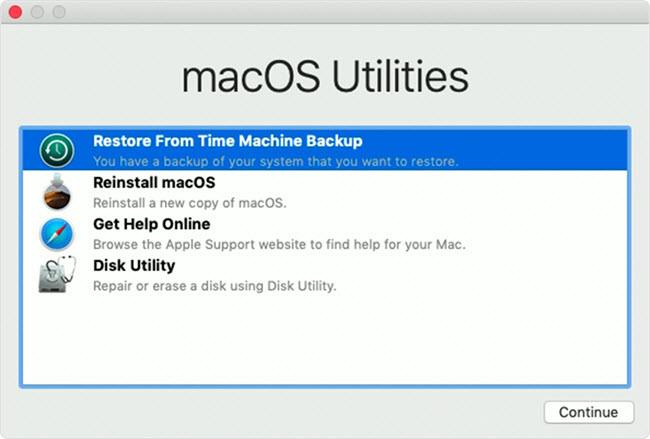
Restart Mac, and while it is restarting, hold down the Command + R keys simultaneously to launch the OS X Recovery Tool.
-
Select the option that says Restore from Time Machine Backup.
-
If the backups you have are more than one, choose the one created before your Mac ran into errors or got slow. Then just wait for the process to be completed.
If you do not have any valid Time Capsules or your Mac is experiencing some severe errors, and you can’t create backups, the only two options available would be either to repair the hard drive or reinstall the OS. However, bear in mind that these two options are likely to result in data loss.
Conclusion
You can now easily restore your Mac to previous date with or without Time Machine after going through this article if you just adhere to the steps that have been stated above. And if you have no Time Machine backup or want to recover files lost, AnyRecover is the best option for you. Why not download and give it a try?
Related Articles:
Time Limited Offer
for All Products
Not valid with other discount *

 Hard Drive Recovery
 Deleted Files Recovery


