6 Ways to Format USB to FAT32 on Windows 10/11 [Full Guide]
FAT32 is a file system used to organize storage on devices like USBs, SSDs, SD cards, and so on. At times, you want to format USB to FAT32 on Windows 10 to make it compatible with various devices and operating systems.
You might be surprised to know that the FAT32 file system has been around since Windows 95 but still plays an important role today. The reason behind the popularity of FAT32 is its greatest compatibility as compared to other file systems, and the USB sticks formatted in this way can easily be read across different platforms.Here, we will teach you how to format a USB drive in FAT32 on Windows 10/11 using several methods and also let you know about the best way to recover lost data after formatting a USB drive.
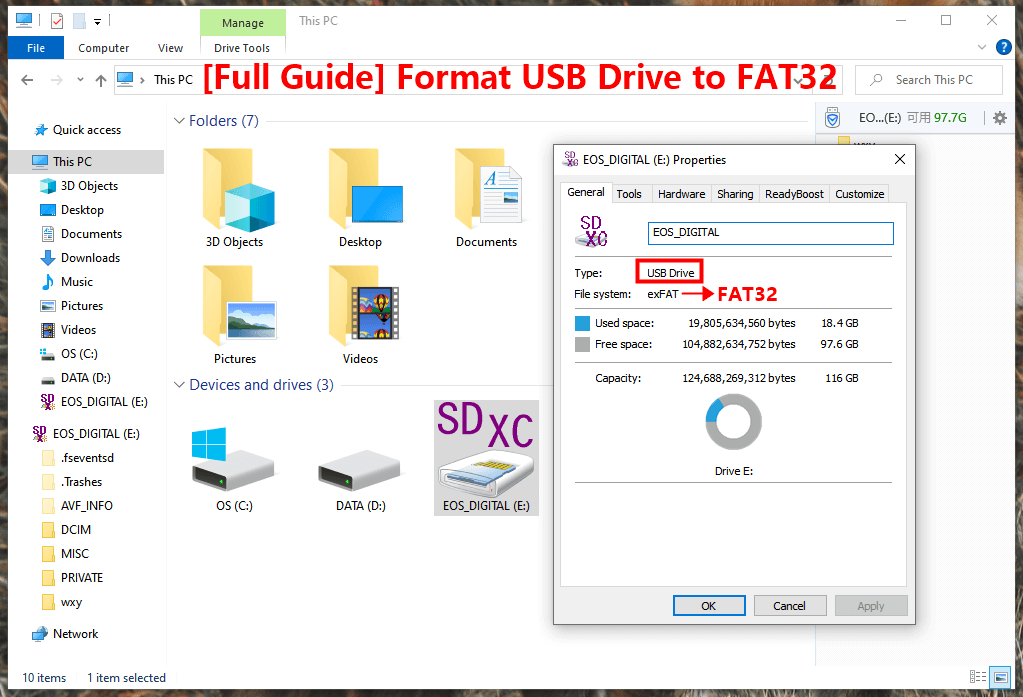
[Important] Reminders before Formatting FAT32 on USB
Before moving forward to the core point i.e. format USB to FAT32 Windows 10, let's have a look at some important points that you should keep in mind before formatting your USB to the FAT32.
Formatting the USB drive to FAT32 or any other file system will delete all the data on the device. So, make sure to have a backup of all the content on the drive before formatting to avoid any data loss.
FAT32 cannot work with hard drives larger than 16TB.
On USB drives formatted with FAT32, the maximum size allowed for an individual file is 4GB, which means it is suitable for lower-capacity storage.
FAT32 is slightly slower than its alternatives.
Despite all of these things, FAT32 still remains an ideal file system due to its cross-platform compatibility. If you frequently move your USB between Windows, Mac, Linux, and other operating systems, FAT32 is a perfect choice.
How to Format USB to FAT32 in Windows 10?
Now once you know almost everything about FAT32 format, the next step is to discuss how to format your USB flash drive to the FAT32 file system. Without any further ado, here are 6 different solutions so that you can use the one that best suits your use case.
Option 1: Use Windows File Explorer
Formatting USB to FAT32 with the help of File Explorer is probably the simplest method. Windows File Explorer on your PC isn't only designed to view and handle files, but you can also use it to do basic disc management tasks. If you don't want to get involved in the technical procedures, then you can format USB to FAT32 with File Explorer. However, it should be noted here that you can only format a drive smaller than 32GB in FAT32 format using this method.
The following are the steps to format USB under 32GB to FAT32 in Windows 10 Explorer:
Step 1: After connecting a USB drive to Windows 10 PC, click on the File Explorer icon from the taskbar and select the This PC option.
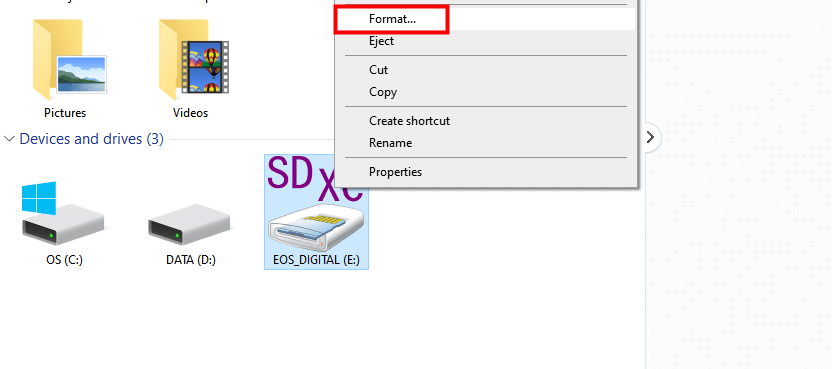
Step 2: Here, you will be able to see all the connected disks and external hard drives. Locate and right-click on the particular USB drive, and then, select the Format option.
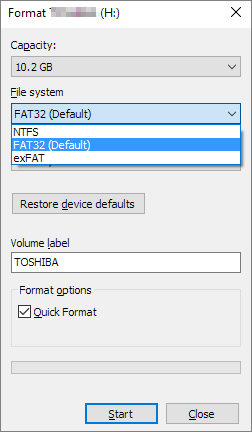
Step 3: Next, set FAT32 as the target file system, enable the Quick Format option, and click on the Start button. When the process gets finished, click OK to confirm and your USB drive in FAT32 should be prepared to use now.
Option 2: Use Disk Management
Another formatting option present on your device to format USB to FAT32 is Windows Disk Management. This free Windows built-in utility is easy to use and can help users to format a USB drive with 32GB capacity or smaller.
Here are the steps to follow that will format USB to FAT32 using Disk Management:
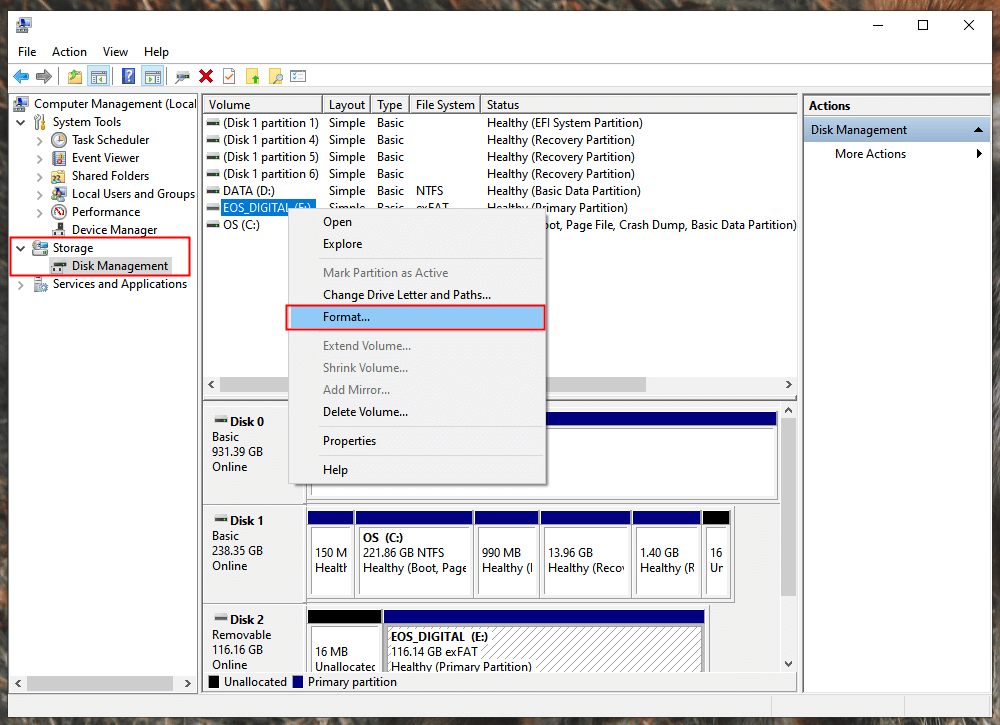
Step 1: On your Windows 10 computer, right-click on This PC and select the Manage option.
Step 2: Under the Storage tab, choose Disk Management.
Step 3: Locate your USB drive, right-click on it, and click Format.
Step 4: Click on the File system option, and from the drop-down list, select FAT32. Now, tick on Perform a quick format option and hit OK.
Option 3: Use Diskpart Command Translator
If you are good at computer skills and familiar with the command lines, then you can also try the Diskpart to format your USB drive to FAT32.
Here are the details of how to use Diskpart Command Translator to format USB to FAT32:
Step 1: Open the search bar on your Windows 10 PC, type diskpart, and press Enter.
Step 2: Now, once you are in the Diskpart window, type the below-given command lines to quickly format your USB drive and hit Enter each time.
list diskselect disk * (You can replace * with your USB disk number)
list volume
select volume ** (You can replace ** with the volume number of the USB drive)
format fs=fat32 quick
Step 3: Once Diskpart reports that it has successfully formatted the USB drive, type exit, and simply press the Enter key to close the window.
Option 4: Use Command Prompt (CMD)
Using the command prompt for proceeding to format USB to FAT32 Windows 10 is a useful and quick fix to go for formatting. Let's see how Command Prompt (CMD) can help in this reference.
Step 1: Open the search bar in Windows 10 and type command prompt. Or, you can also right-click on the Windows icon, choose the Search option, and type cmd in the given field.
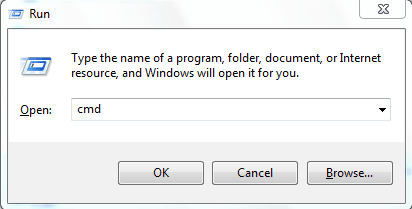
Step 2: In the next step, you will need to right-click on the Command Prompt and select Run as Administrator from the options.
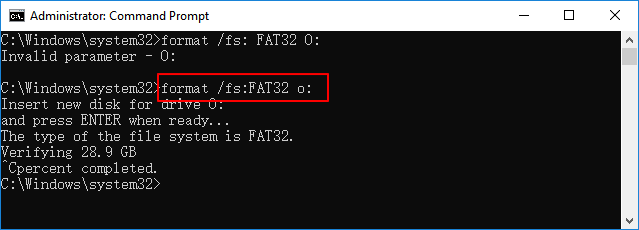
Step 3: Next, check the label of your USB and type format /fs:FAT32 o: into the command prompt. You can replace o: with the drive letter of your USB drive.
Option 5: Use PowerShell System Manager
PowerShell is often used to format external devices such as USD drives to FAT32. It is especially useful in actions like format 64GB USB to FAT32 without the need to download any third-party software.
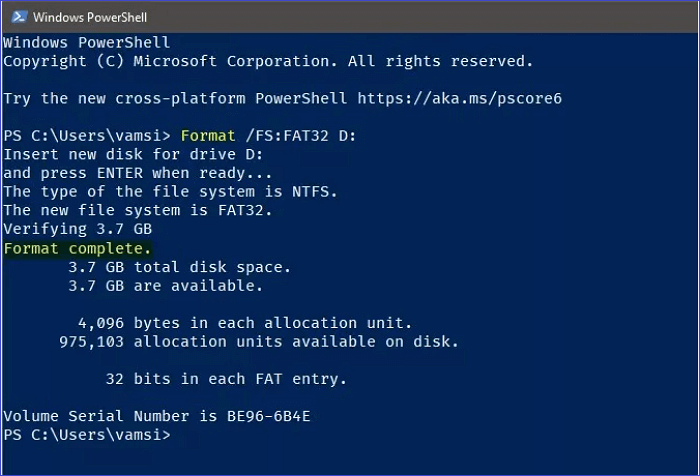
Below are the steps that you can follow to format USB to FAT32 using PowerShell System Manager.Step 1: First of all, click on the Windows search bar and type powershell. Then, click on the Run as administrator option to launch the program.
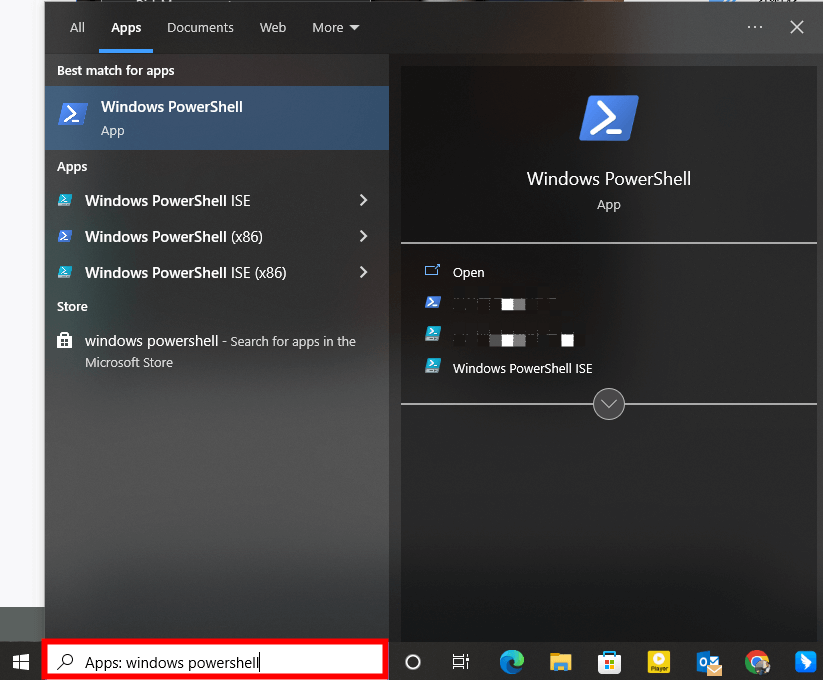
Step 2: In the PowerShell terminal, check the USB drive label and type the following command:
Format /FS:FAT32 o: (Replace o: with the drive letter of your USB drive)
Step 3: Hit Enter to start the formatting process, and once finished, type exit to close the program.
Option 6: Use FAT32 Formatting Tool Rufus
While PowerShell can work with larger drives but it is a very slow and time consuming process. Even formatting a 32GB drive can take up to an hour depending on your computer's performance. So, if your USB drive is larger than 32GB, then the only option left is to use a third-party formatting tool like Rufus. There are a lot of other programs also available to format USB drives, but we recommend Rufus because it is lightweight and great in portability.
Follow this step-by-step procedure to format 64GB USB to FAT32 with the help of Rufus.Step 1: Download the application on your computer, and then, click on the .exe file to launch Rufus.
Step 2: After selecting your USB drive from the interface of the Rufus program, head over to the Boot selection tab and select Non bootable from the drop-down menu.
Step 3: Now, click on the File system tab and select FAT32 from the provided options. You can also change the name of your USB drive from the Volume label tab.
Step 4: Finally, click on the Start button, which will begin the formatting process. Within a matter of a few seconds, your USB drive will be formatted to FAT32.
How to Rescue Files from a Formatted USB Drive?
It's always easy to retrieve files that are still present somewhere or backed up before formatting the USB. As you can see, you can lose important data after formatting the USB drive using the above-mentioned methods. The problem gets worse when the data is not backed up or you have no clue about the lost files on your flash drive. That's where the USB data recovery tool comes into play.
AnyRecover, as its name implies, is a dedicated tool that enables users to recover and repair lost or formatted files from any type of external device, including USB drives. With the help of its extremely user-friendly interface, you can effortlessly recover 1000+ types of data files, including videos, photos, emails, audio, documents, and much more with the highest recovery success rate in the industry.
In addition to restore lost files from formatted USB drives, AnyRecover is also able to recover data recycle bin/trash, internal hard drives, external storage media, and even a crashed computer.
![]()
2,061,704 Downloads
Features of AnyRecover
-
Efficient and reliable to recover accidentally deleted or lost data due to formatting, corruption, system crash, partition loss, or any other reason
-
Features sophisticated algorithms and cutting-edge data recovery technology that will help you get your formatted data back with lightning-fast speed
-
Allows to selectively restore data after previewing files from the formatted external device
-
Fully Compatible with all Windows and macOS. Completely safe, secure, and free from malware attacks
Steps to Recover Files from Formatted USB via AnyRecover
Install the software using the download button given above, and then, surf through the coming steps to know how to restore lost files from a formatted USB drive:
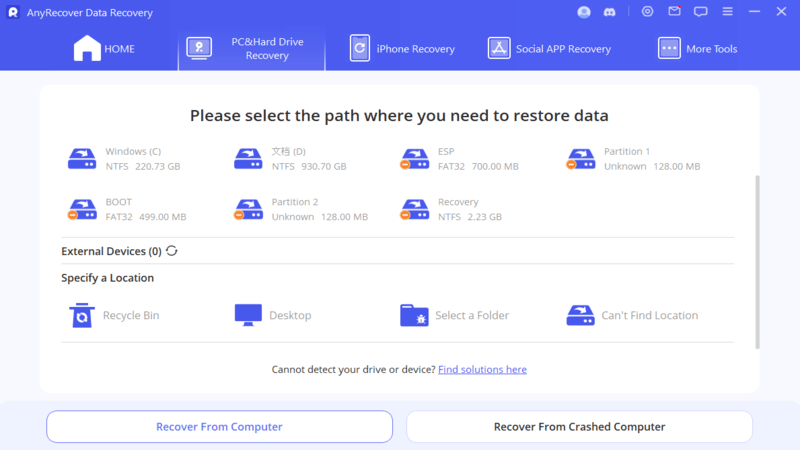
Step 1: First, you will need to connect your USB drive to the computer. Then, launch AnyRecover and select your USB drive from the main interface of the program.
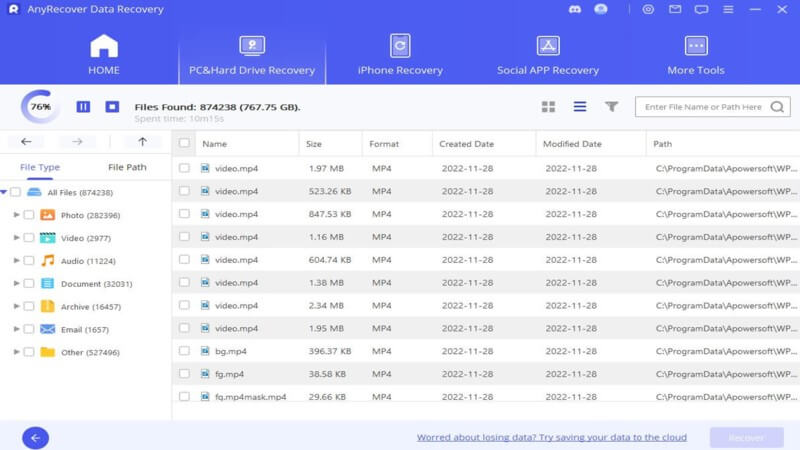
Step 2: The program will then start scanning lost files on the formatted USB drive. Here, you can choose to pause or stop the scanning process as per your requirements.
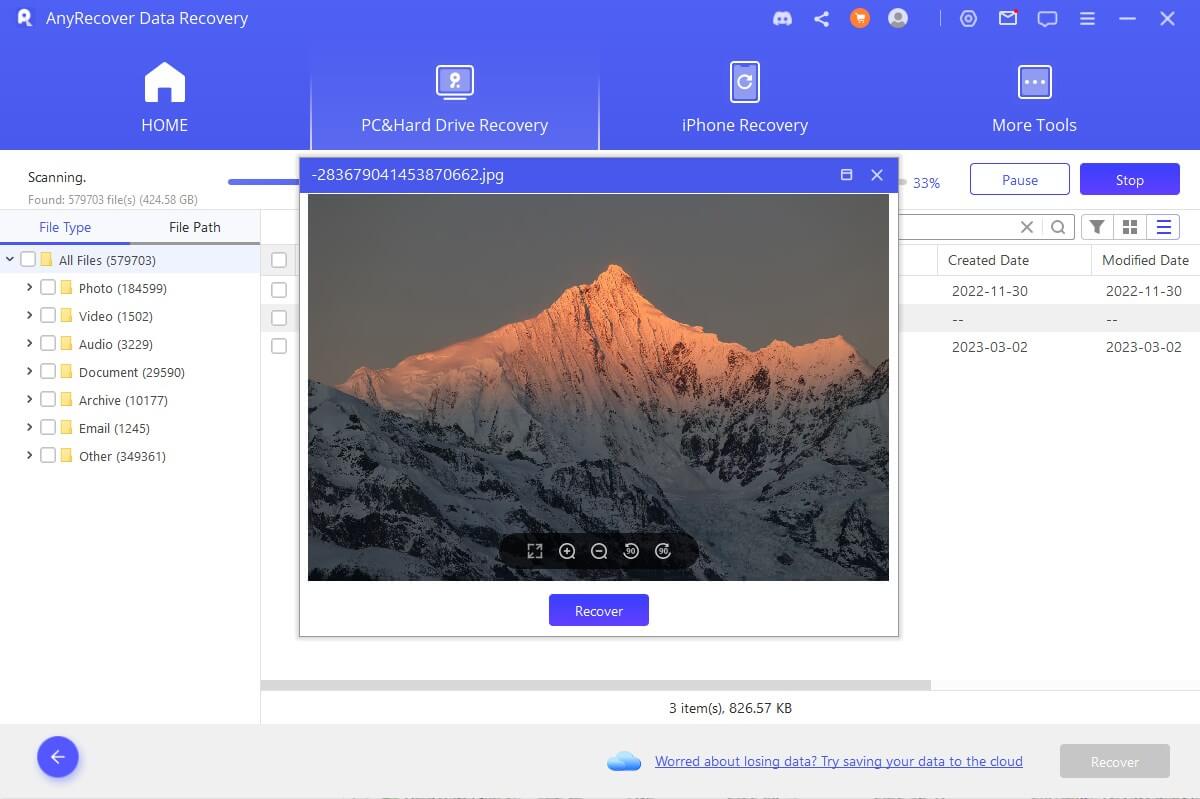
Step 3: After the scanning of data gets finished, you can preview the files and select the ones that you need to recover. Once you are done with the selection, click the Recover button and save the data to a secure location on your computer.
The Bottom Line
From this article, you should now be able to format a USB drive of any size to FAT32 on Windows 10 or 11. All of these solutions can be used to format your external drive, whereas, only the last 2 options will work to format 64GB USB to FAT32. Also, we have provided you with the finest method to recover all your valuable files from the formatted USB drives/ formatted SD Card drives.
So, install the free trial version of AnyRecover on your computer now, and get ready to recover your lost data as soon as possible!
Time Limited Offer
for All Products
Not valid with other discount *

 Hard Drive Recovery
 Deleted Files Recovery

