Best Ways to Format a SD Card on Camera
Formatting a SD card on your camera is of great importance before it is in use or becomes necessary when to fix some issues including a corrupted SD card and the card attacked by virus. In this article, we are gonna tell you how to safely format a SD card on your camera. Before heading to the smart rule, you may also want to know what would happen when you format a SD card.
Part 1: How to Format the SD Card on Camera
1. The General Method to Format a SD Card on Camera
The most effective and recommended way to format the SD card is to format it by inserting it into your digital camera. The camera's formatting method reduces the possibility of faults. Although, the procedures for formatting a camera SD card vary according to the camera brand, the formatting framework is nearly the same. Here, we have mentioned a general method of formatting SD cards on the camera.
Follow this guide step by step:
-
Turn the camera off and drop the SD card into the appropriate slot.
-
Turn on the camera. Choose Menu from the camera's menu.
-
Find the Setup menu in the camera's window and then click Format/Format Memory Card, or something similar.
-
Finally tap OK on the camera.
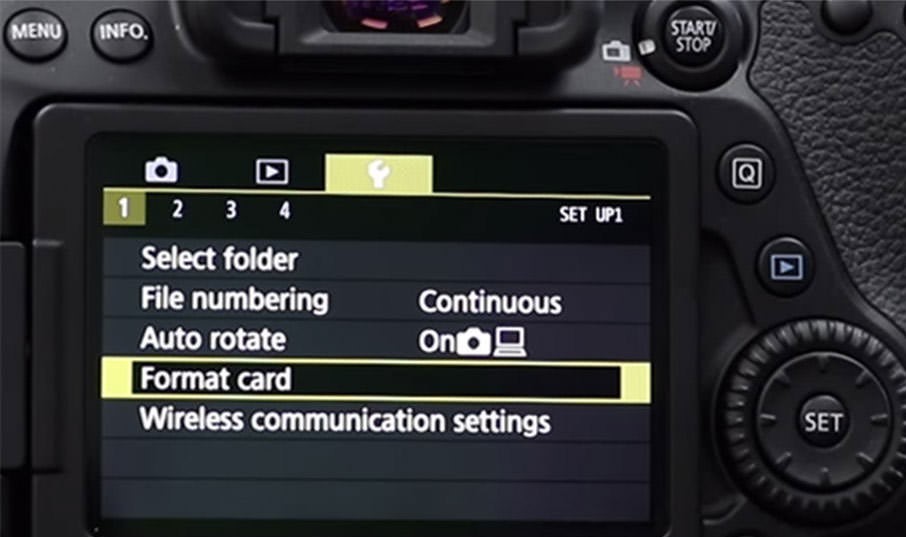
Wait for the camera to format the SD card. Formatting the card can take a few minutes. Switch off the camera until the SD card has been formatted.
Before formatting the SD card on your camera, you are suggested to back up the SD card files to your server or a cloud storage facility, and check that the camera's battery is fully charged.
2. Format a SD Card on the GoPro Camera
An SD card is a critical component of your GoPro. Formatting the SD card involves removing and renewing all current card records. Ensure that the data is downloaded and saved long before formatting. To format the SD card on GoPro, the efficiency is higher, and the card's functionality is not compromised. A step-by-step procedure is mentioned below.
-
Press the Power button several times before a trashcan icon appears on the front screen.
-
To select that option, press the Shutter button.
-
Hold down the Power button until the words "ALL/FORMAT" appear on the screen.
-
Select the ALL/Format function by pressing the Shutter button.
-
Hold down the Power button until the word "Yes" is illuminated.
-
To pick "Yes", press the Shutter button.
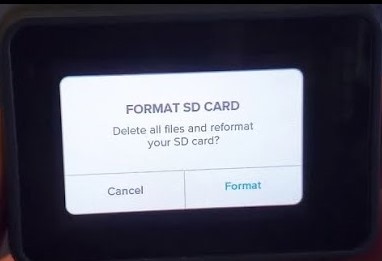
The camera then begins formatting, and both the camera's light and the trashcan icon on the screen start blinking to indicate that formatting is underway. When the process is over, the blinking will cease.
3. Format a SD Card on Your Canon (EOS 6D)
It is an art to format your cards even if you did not fill them after you have transferred pictures from your camera to your computer. This means that you will have a complete card to deal with and that you will not import redundant files to your computer. To format an SD card in your Canon camera:
-
Put the memory card into the camera.
-
Select the Menu option. (On the LCD monitor, the most recently used camera menu appears.)
To access the "Camera Settings" tab, press the Multi-controller.
-
To highlight Format, use the "Multi-controller" or the "Fast Control" dial.
-
Simply click the Set button. (The menu switches to reflect how much data is on the card and a note that all data will be destroyed).
-
Turn the "Fast Control" dial to the OK position and press Set.
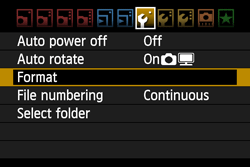
The card has been formatted. After formatting, you'll have a blank card ready to record pictures from your camera.
Additionally, there is a Low-Level format option that completely erases all data on the card and restores it to its default state. To allow a Low-Level format, click the "Erase" button, which resembles a garbage can, and then perform Step 6. It's a bright idea to do a Low-Level format on your cards now and then return them to near-new status.
4. Format a SD Card on the Trail Camera
We discovered that each manufacturer has a somewhat different method of formatting cards and deleting images, and the formatting technique is not standardized for all Trail camera types and brands. Therefore, we have mentioned a general method that you can follow easily by using your computer or a laptop.
-
Load the SD or Micro SD card into the Trail Cam Buddy and connect it to your PC's USB port.
Click the File Explorer icon at the bottom of your desktop screen.
The SD card should appear after clicking the Folder icon in the left side panel. It can be seen as SD, a removable disc, among other names. Just make sure you choose the right one.
When you've found the correct drive to format, right-click on it while hovering your mouse over it. This will open a dropdown box where you must pick the format from the list.
The format application will now launch. By default, everything should be fine; simply click the Format option.

Now that, the card will be formatted and you can use it again by inserting it into your camera.
Part 2: FAQs About Formatting SD Card on Camera
1. What's the Difference Between Erasing and Formatting a SD card on Camera?
Do you know the difference between erasing and formatting the SD card of the camera? It has always been a topic of discussion as to which method is preferable. There is a widespread misunderstanding that any of the options can fit. But actually, that's not the case, there is a significant difference between erasing and formatting the card, and depending on the circumstances, you can select one or the other.
|
Erasing the SD Card
|
Formatting the SD Card
|
|---|---|
|
Erasing the memory card saves the directory of the images and also reserves the filename settings.
|
While Formatting a card, changes all the settings and deletes dictionaries too.
|
|
If you just want to remove a certain thing, erasing the card is suitable.
|
But if you wish to renew the card and like to delete all your stuff, formatting is recommended.
|
|
The process of erasing the memory card leaves some residual data. As a result, it does not delete the files directly; it merely deletes the address to the file's position.
|
Formatting is comparable to using a new memory card. It absolutely deletes all data stored on it. However, you can restore your multimedia files using photo recovery tools.
|
|
When you erase the card, you don't need to give it a name.
|
But when you format the card, you need to give a name, every single time when you attempt to remove it.
|
|
Though erasing the memory card deletes the multimedia files on it, and they can be restored using photo recovery software.
|
Formatting cleans up the directory dataset on the memory card and eliminates fragmentation, but once the directory is overwritten with new data, it becomes very difficult to recover the previous data.
|
|
When there are just a few files to delete, erasing is preferable.
|
Where there are too many files, formatting is a better alternative.
|
2. Do You Have to Format a New SD Card for Camera?
The folder containing the images is usually called DCIM, which stands for Digital Camera Images, and it can contain subfolders that are generated when a folder reaches its numerical limit. As a result, the camera begins to degrade in performance and efficiency, increasing the time between image capture and viewing, or requiring excessive loading to execute such features. Therefore, formatting a memory card can be a wise move.
Let's take a deep dive into the advantages of card formatting and when it should be performed.
-
Formatting a memory card improves the efficiency of your digital camera by increasing the camera's processing speed.
-
If you have the Canon camera and you're having slow write speeds and unusually long delays between images, you can format the card to boost results.
-
Some Canon cameras offer a low-level formatting feature that erases all recordable sectors when formatting the card. If you have poor write results, this will take longer but will have the best performance boosted.
-
When using a new card for your camera, this technique is often advised.
However, no matter you erase or format the SD card on your camera, make a backup of your valuable pictures or videos.
3. Why Can't I Format My SD Card on My Camera?
SD card format problem on camera happens from time to time. This process could be resulted from by the following possible situations:
-
The SD card was damaged or corrupted.
-
The SD card was applied in different devices including various brands of camera and computers.
-
Some SD card Access Denied, etc errors causing the issue.
-
Wrong SD card brands was used in your camera. So you should check the type of the card inserted.
Bonus: How to Format SD Card for Camera on PC
Using Windows
-
Connect the SD card to your PC with a card reader and launch Windows Explorer.
Click the options of This PC and right click your SD Card.
Hit on the Format option.
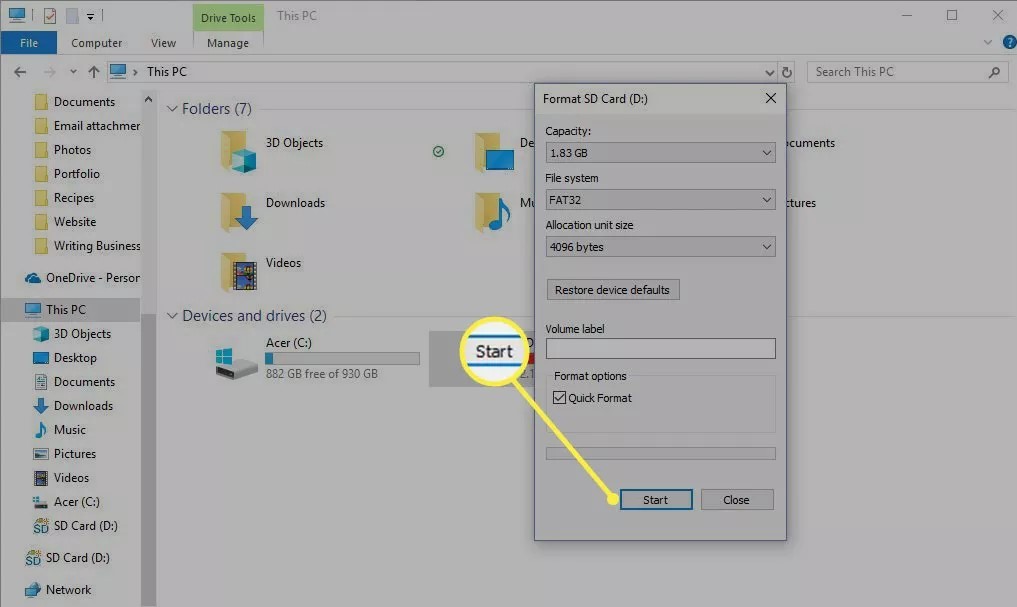
Pick FAT32 from the File System dropdown arrow in the Format SD Card dialogue box.
If you've previously formatted the SD card, click the Quick Format checkbox; otherwise, clear the Quick Format checkbox to format the SD card for the first time.
Click the Start button and OK in the Warning dialogue box.
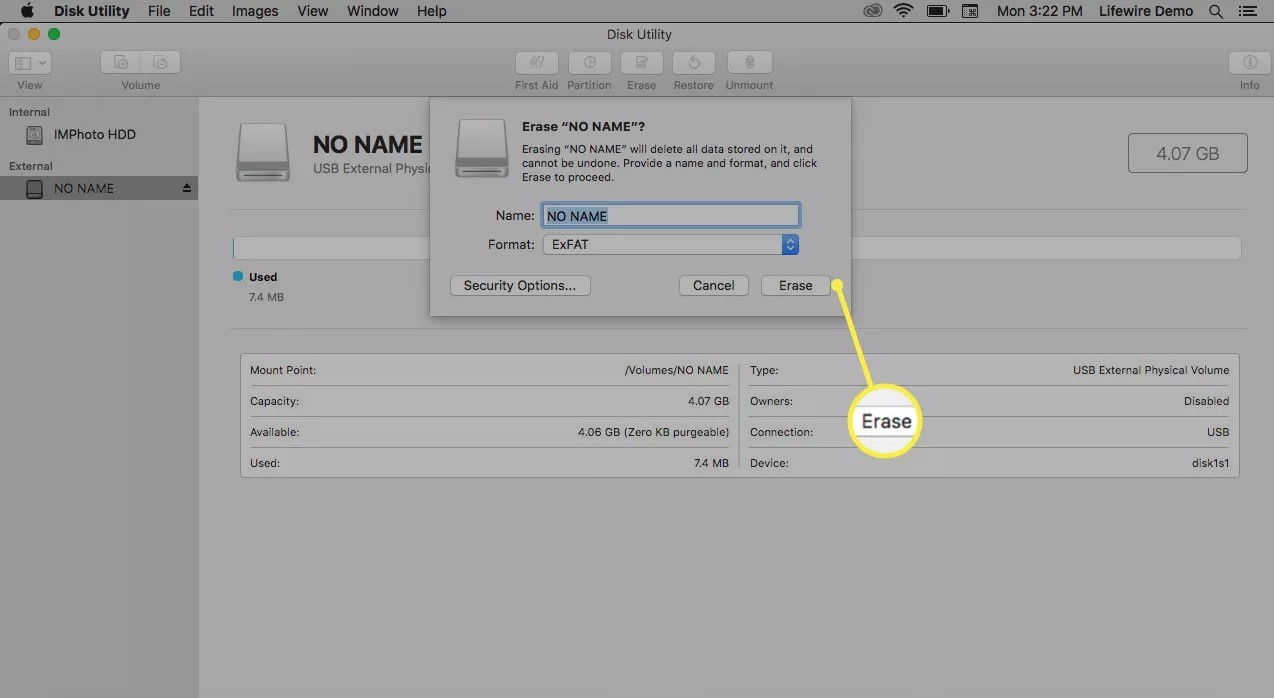
Using MAC
-
Insert the SD card in a card reader and connect it to your Mac computer.
Launch Finder. Click Go and then choose Utilities.
Select the Disk Utility. Now Choose your SD card. Click the Erase button.
To format the SD Card for use on Mac, click the Format dropdown arrow and choose exFAT.
Click Erase in the Erase dialogue window.
Conclusion
You can format memory cards with either your camera or a computer/laptop. It’s just a matter of personal opinion. Although each camera operates differently but majorly, all cameras of the same categories adopt a similar general structure. Insert the card into the camera, power it on, and choose playback mode. Navigate to the alternative that helps you to format the card by opening the menu.
After you formatting the SD card on your camera, if you want to recover photos from your formatted camera, you could rely on AnyRecover to do it with ease.
Time Limited Offer
for All Products
Not valid with other discount *

 Hard Drive Recovery
 Deleted Files Recovery
