6 Fixes for "Operating System Loader Has No Signature" Issue [100% Working]
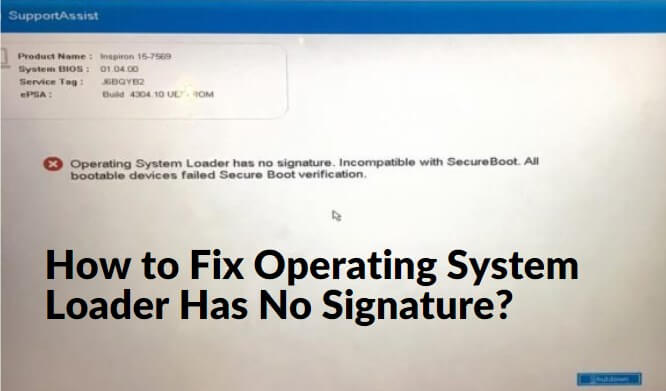
Do you come across such a frustrating problem that an operating system loader has no signature and a pop-up occurs in your PC? You are not alone; this is a quite wide-ranging problem that leads you to scratch your head and think about how to fix it.
Help is at hand, so there's really no need to worry. This article will address this nasty little problem head-on and provide you with six simple fixes to get your system up and running smooth in no time.
So let's get going.
What Causes "Operating System Loader Has No Signature" Issue?
Before getting straight to fix the operating system loader failed signature verification, it's essential to first understand its causes.
Well, the problem concerning the operating system loader has no signature normally comes about through a conflict in the digital signature of the operating system loader. Simply in other words, the process of booting the computer is having trouble because it cannot provide an apt verification of the files of the operating system that it is currently attempting to load.
There can be a number of reasons for the same. One common reason could be that there might have been a recent update or installation that hasn't been successfully finished, leaving behind files that may be corrupt or missing. Another probable reason could be the fact that the Secure Boot feature in your system might be enabled, flagging on the premise that a valid signature is missing.
Besides, such signature verification may be falsified in case critical system files are tampered by malware or viruses during boot. Whatever might be the cause, the first requirement to get at the root of the problem is right.
Now, let's discuss the operating system loader signature found in secureboot fixes to get your system back on track.
How to Fix Operating System Loader Has No Signature?
Method 1: Repair Boot Configuration Data (BCD)
Use the Windows Recovery Environment to repair the Boot Configuration Data (BCD) and prevent operating system loader has no signature error. This involves running commands such as bootrec.exe to rebuild the BCD store and fix any issues with the boot configuration.
Step 1. Restart your computer and wait for the manufacturer's logo to appear.
Step 2. Press and hold the necessary key (often F8 or F12) to enter the boot menu.
Step 3. Select "Repair Your Computer" or "Troubleshoot" from the menu options.
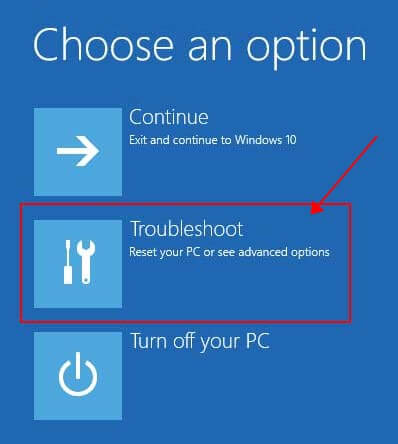
Step 4. After that, go to Advanced options > Command Prompt.
Step 5. When Command Prompt opens, ensure it's running with administrative privileges. If not, right-click on it and select "Run as administrator."
Step 6. In the Command Prompt window, type the following commands one by one, pressing Enter after each:
Once you have completed running the commands and received confirmation, type exit to close Command Prompt.
Method 2: Disable Secure Boot
If your system has Secure Boot enabled. It might be causing the operating system loader failed signature verification error.
In this situation, try disabling Secure Boot in the BIOS or UEFI settings. This can sometimes resolve the problem by allowing the system to boot without strict signature verification.
Step 1. Start your computer and wait for the manufacturer's logo to appear.
Step 2. Press the necessary key to enter the BIOS or UEFI settings. This key varies depending on your computer's manufacturer, but it's commonly Del, F2, F10, or Esc.
Step 3. Once in the BIOS or UEFI settings, use the arrow keys to navigate to the "Security" or "Boot" section.
Step 4. Look for an option labeled "Secure Boot" or "UEFI Secure Boot." It might be under a sub-menu like "Boot Options" or "Security Options."
Step 5. Select the option for Secure Boot and press Enter. After that, choose the option to disable Secure Boot.
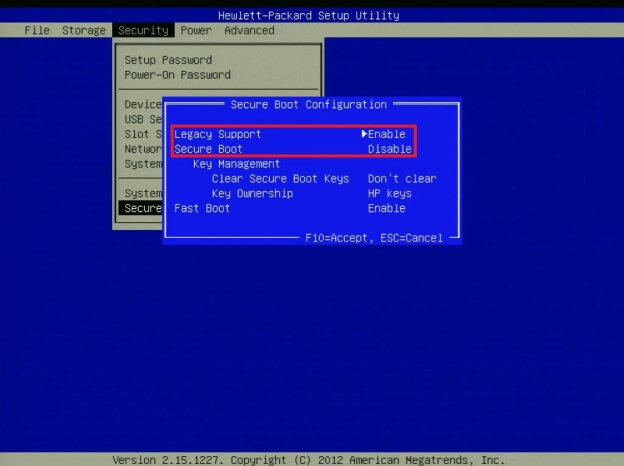
Step 6. Once you have disabled Secure Boot, navigate to the "Exit" or "Save & Exit" menu. After that, you will have to select the option to save your changes and exit the BIOS or UEFI settings.
After saving the changes, restart your computer and there will be no error.
Method 3: Use System Restore
If the issue started after a recent software installation or update, try using System Restore to revert your system to a previous state where it was functioning correctly. This can help undo any changes that might have caused the signature verification problem.
Step 1. Press the Windows key on your keyboard and type "System Restore" into the search bar and select "Create a restore point" from the search results.
Step 2. In the System Protection window that appears, click on the "System Restore" button. This will launch the System Restore wizard and you will have to click on "Next" to proceed.

Step 3. You will see a list of available restore points. Select a restore point that predates the onset of the "Operating System Loader Has No Signature" issue and hit the Next button.
Step 4. System Restore will begin reverting your system to the selected restore point. This process may take several minutes to complete.
Method 4: Check for Disk Errors
Use the built-in Windows utility, CHKDSK (Check Disk), to scan for and repair any errors on your hard drive or SSD. Disk errors can sometimes interfere with the boot process and cause operating system loader has no signature failures.
Step 1. Open Command Prompt as administrator.
Step 2. Type: chkdsk C: /f /r (Replace "C:" with the appropriate drive letter where you have installed your Windows).
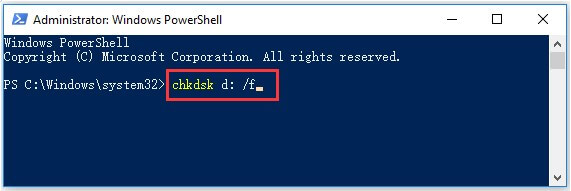
Step 3. Press Enter and confirm scheduling CHKDSK to run on the next restart.
Step 4. Restart your computer.
Step 5. Wait for CHKDSK to complete the scan and repair process.
Once the process is completed, you computer will be turned On and hopefully the error will be resolved.
Method 5: Update or Rollback Drivers
Ensure that all device drivers, especially those related to disk storage and system booting, are up to date. Sometimes outdated or incompatible drivers can cause issues with the boot process and trigger operating system loader has no signature error.
If recent driver updates have been installed, consider rolling back to a previous version to see if that resolves the problem.
Step 1. Right click on the Windows icon and go to Device Manager.
Step 2. Now here, you will have to identify the problematic drivers, especially those related to disk storage and system booting. The problematic drivers will have a yellow mark.
Step 3. Update drivers by right-clicking on the device and selecting "Update driver," then choose to search automatically for updated driver software.
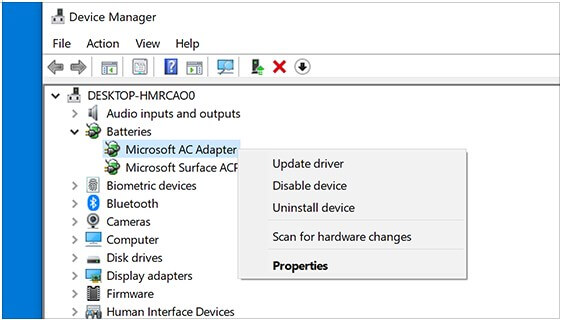
This will update your drivers, potentially resolving the error you are facing.
But if you are facing this error right after a driver update, you can rollback those problematic drivers by following these steps:
Step 1. Rollback drivers by right-clicking on the device, selecting "Properties," navigating to the "Driver" tab, and clicking on "Roll Back Driver."
Step 2. Restart your computer to apply the changes.
Step 3. Check if the "Operating System Loader Has No Signature" issue has been resolved.
Method 6: Perform a Clean Install of Windows
If all else fails and you are still facing operating system loader signature found in secureboot error, consider performing a clean install of Windows. This will erase all data on your system drive, so be sure to back up any important files beforehand.
A clean install will give you a fresh start with a properly configured operating system, hopefully resolving any signature verification issues.
Step 1. Backup your important files.
Step 2. Create installation media using the Windows installation media creation tool.
Step 3. Boot from the installation media by changing the boot order in BIOS or UEFI settings.
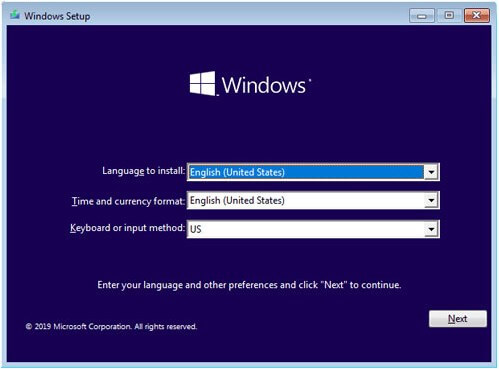
Step 4. Start the Windows installation process by following the on screen instructions.
How to Recover Data from The System When the Error Occurs?
When encountering the operating system loader signature found in secureboot error, recovering your valuable data becomes paramount. AnyRecover is a versatile data recovery tool that excels in retrieving lost or deleted files under various scenarios.
![]()
19,061,704 Downloads
Features of AnyRecover
-
Supports the recovery of data from various storage devices, including internal/external hard drives, USB drives, SD cards, and more.
-
Recover all 1000 files whether it's documents, photos, videos, audio files, emails, or other file type.
-
It works on different versions of Windows, including Windows 11/10/8/7, XP, etc.
-
Quick Scan scans recently deleted files, while Deep Scan scans files that are more difficult to recover.
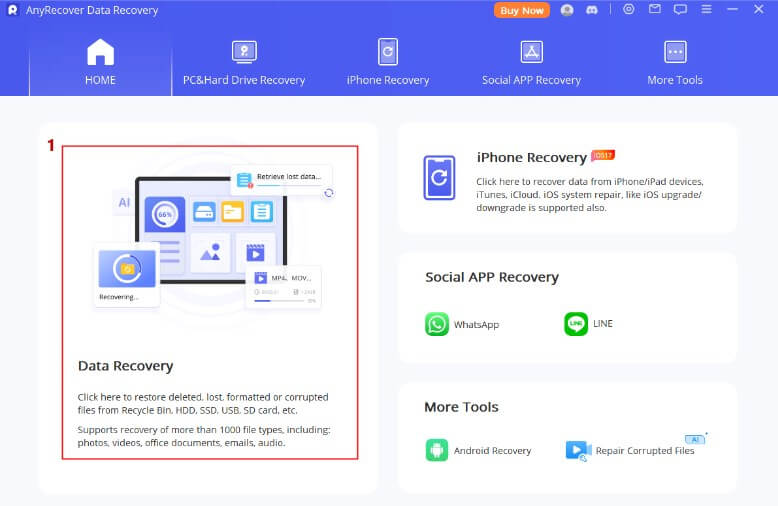
Step 1 Download and install AnyRecover. Select the "Data Recovery" option and choose the disk where your files were lost.
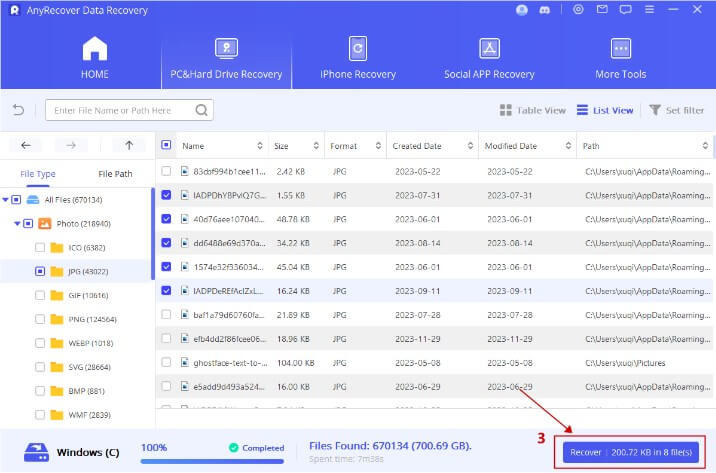
Step 2 AnyRecover will begin scanning the selected drive for lost and deleted files. After that, you can preview and choose the file that you want to restore.
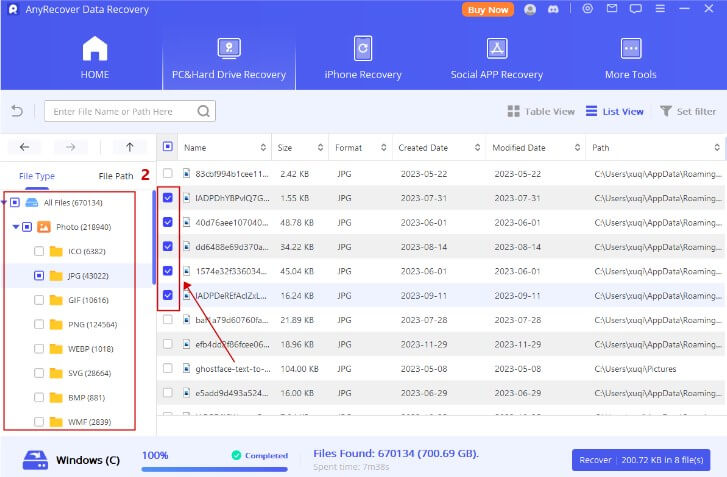
Step 3 Once all desired files are found, pause the scanning process and click the "Recover" button.
FAQs about Operating System Loader Has No Signature
How can I resolve the "Operating System Loader Failed Signature Verification" issue?
To resolve the "Operating System Loader Failed Signature Verification" issue, try repairing the Boot Configuration Data (BCD), disabling Secure Boot, or performing a clean install of Windows. These methods can help bypass signature verification errors during the boot process.
What are the common causes of loader signature verification failures?
Common causes of loader signature verification failures include corrupted system files, incomplete updates or installations, malware infections, and issues with Secure Boot configurations. These factors can disrupt the integrity checks performed during the boot process, leading to signature verification errors.
Can I still boot my system if the loader signature is found in Secure Boot?
Yes, you can still boot your system even if the loader signature is found in Secure Boot. However, Secure Boot may prevent the system from booting if it detects a signature mismatch or absence. Disabling Secure Boot in the BIOS or UEFI settings can bypass this restriction and allow the system to boot without strict signature verification.
Conclusion
In conclusion, dealing with the operating system loader has no signature issue can be a frustrating experience, but with the right tools and knowledge, it's manageable. By following the steps outlined in this article, you can effectively troubleshoot and resolve this pesky problem.
Besides, if you have lost your important files while dealing with operating system loader has no signature error, you can use AnyRecover tool to get back everything.
Related Articles:
Time Limited Offer
for All Products
Not valid with other discount *
 Hard Drive Recovery
 Deleted Files Recovery


