3 Simple Ways to Downgrade from Windows 11 to Windows 10
Microsoft released the most anticipated Windows 11 upgrade some weeks ago, and it has been a mixture of excitement and disappointment. The new Operating System (OS) beta update is available to any Windows 10 user who signs up for the Windows Insider Program to download. While some of us are eager for a new user experience, others are quite reluctant because of this new Operating System's changes. Change is difficult to accept.
Although Windows 11 is an upgrade to Windows 10 computers, it is still an unfinished build. Beta users have recorded various bugs and issues in the latest Windows update. If you are not satisfied with Windows 11 experience, we have come up with three simple ways to downgrade Windows 11 to Windows 10.
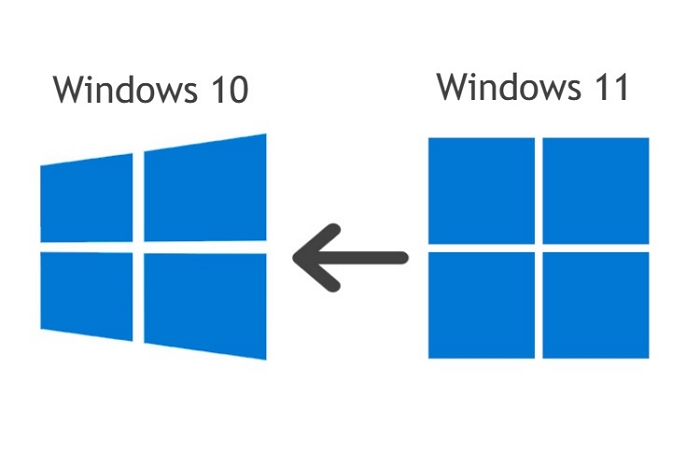
Part 1. Can You Downgrade Windows 11 to Windows 10?
Of course, you can downgrade from Windows 11 to Windows 10! Once you upgraded to Windows 11, you have a 10-day space to return to the previous Windows OS. Although you can still downgrade after ten days, the process becomes more difficult after the specified period. But this article should make the process easier.
We advise that you backup your data before downgrading to Windows 10 in case of any errors during the process. Supposed that you are in the worst case, you could still recover data on your Windows computer with professional AnyRecover Data Recovery software.
Part 2. 3 Ways to Downgrade Windows 11 to Windows 10
Way 1: Downgrade Windows 11 in Settings
Microsoft users upgraded to Windows 11 via the update manager can quickly go back to the previous version of Windows provided you have not deleted the old Windows file. Microsoft creates a backup file when upgrading to Windows 11 to recover your data if there is a disruption in the process. Let's see how we can use this backup file to downgrade from Windows 11 to Windows 10:
Launch Settings.
-
Click on Windows Update.
-
Select Advanced Options from the options on the list.
-
Once the Advanced Options window comes up, click on Recovery.
-
Select Go back from the list of recovery options.
-
The process begins once the computer displays Getting Things Ready.
A window pops up asking you why you wish to downgrade to the previous version. Select your reason(s) from the itemized options before you proceed.
Select No when the computer asks you to check for updates.
At this point, the computer begins to downgrade Windows 11 to Windows 10.
The process starts immediately after your computer restarts.
Wait patiently until the downgrade is completed. This may take between 30 to 60 minutes, depending on your storage drive speed and other factors.
The downgrade is complete once you see the Windows 10 lock screen.
Sign in and continue your Windows 10 experience.
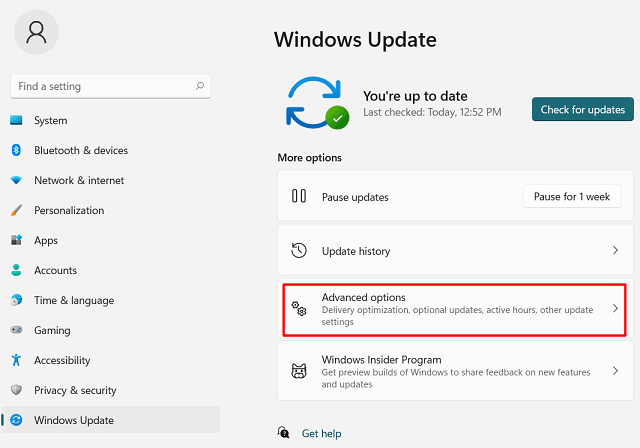
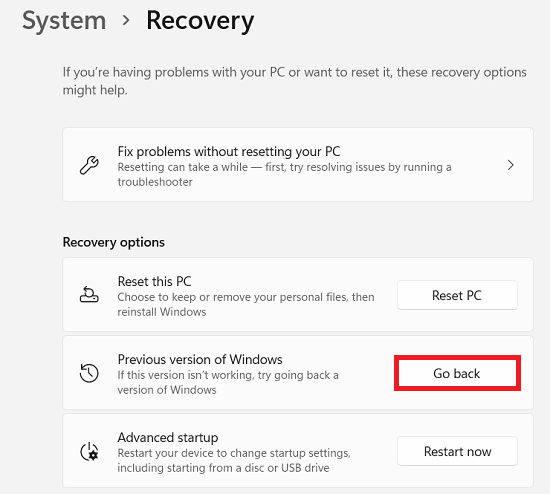
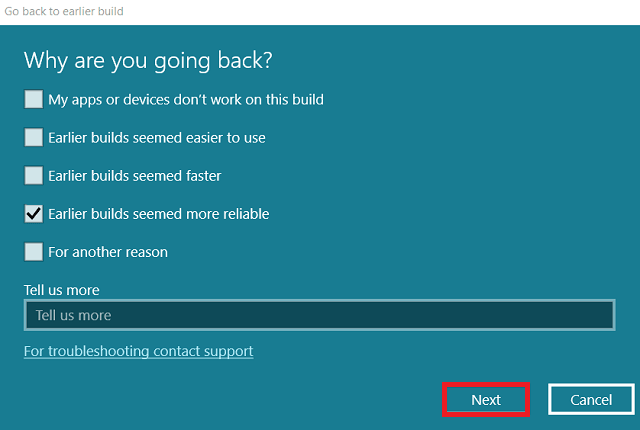
Be aware that this method is effective within ten days after initiating the Windows 11 update only if you do not delete the Windows 10 installation files. If this method doesn't fix the issue, then check out the next one.
Way 2: Manually Install Windows 10
You can downgrade Windows 11 to Windows 10 by manually installing the previous OS version on your PC. If you did a clean Windows 11 upgrade or it's been more than ten days since you installed the update, you can rely on this method to downgrade to the previous Windows version. Even if you or Windows automatically deleted the Windows 10 backup file to create space and improve performance, follow the steps below to downgrade Windows 11 to Windows 10 without much ado:
Download the Windows 10 ISO file using Windows 10 Media Creation tool.
Create a Windows 10 installation media or bootable drive once the download is complete.
Restart your PC after creating the bootable drive.
Once the computer restarts, use any F8, F10, or F12 keys to enter the boot menu to install the Windows 10 software.
Choose the system version of Windows 10 you would like to install.
You can select Clean Install or Custom the installation settings to suit your preference. However, we recommend that you perform a clean installation.
Select a partition to install Windows on (You risk losing the data on the selected drive).
Provide any information required during the installation process; system name, signing in to a Microsoft account, etc.
Wait until the installation finihses.
The Windows 10 desktop appears once the installation is complete.
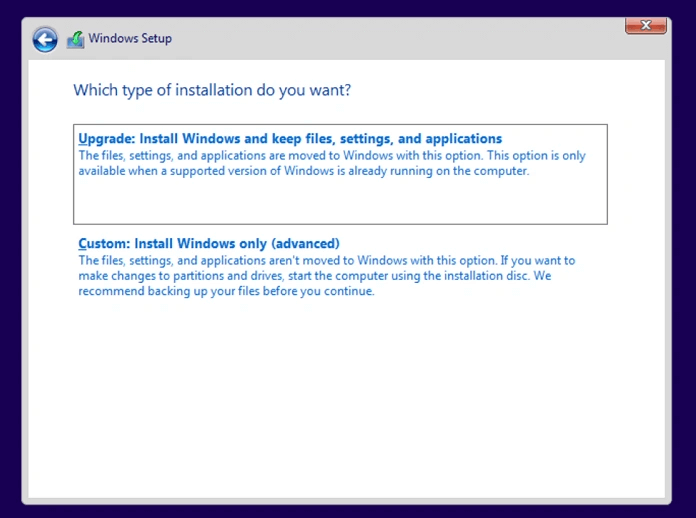
Besides using this method to downgrade from Windows 11 to Windows 10 OS, you can also use it to install any Windows version on your personal computer. Just follow the steps listed above.
Way 3: Use Command Prompt
In events where Windows automatically deletes the Windows.old folder, and you cannot downgrade easily, you can use Command prompt to downgrade Windows 11. You can also extend the uninstallation period before the 10-days period ends:
Launch Command Prompt.
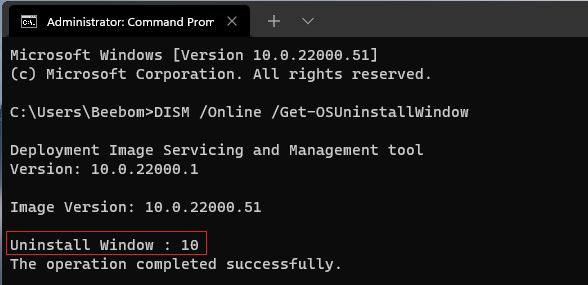
Input the command DISM /Online /Get-OSUninstallWindow to check the current uninstallation window. Then you will see the number of days left. A no element found error means you can no longer downgrade from Windows 11 to Windows 10.
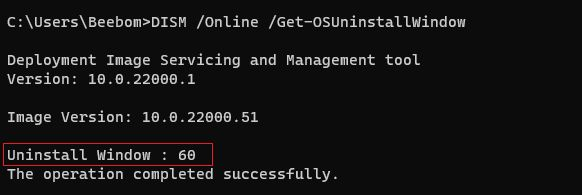
Input the command DISM /Online /Set-OSUninstallWindow /Value:60 to set extend the window to 60 days. Be aware that you can adjust the uninstallation window without exceeding 60 days.
Once this is done, you can use the above methods to downgrade from Windows 11 to Windows 10 anytime within the uninstallation window.
Conclusion
So, these are the three ways you can downgrade from Windows 11 to the Windows 10 version. I hope you find this helpful article. Kindly share this with friends and drop a comment if you have any inquiries.
Time Limited Offer
for All Products
Not valid with other discount *

 Hard Drive Recovery
 Deleted Files Recovery
